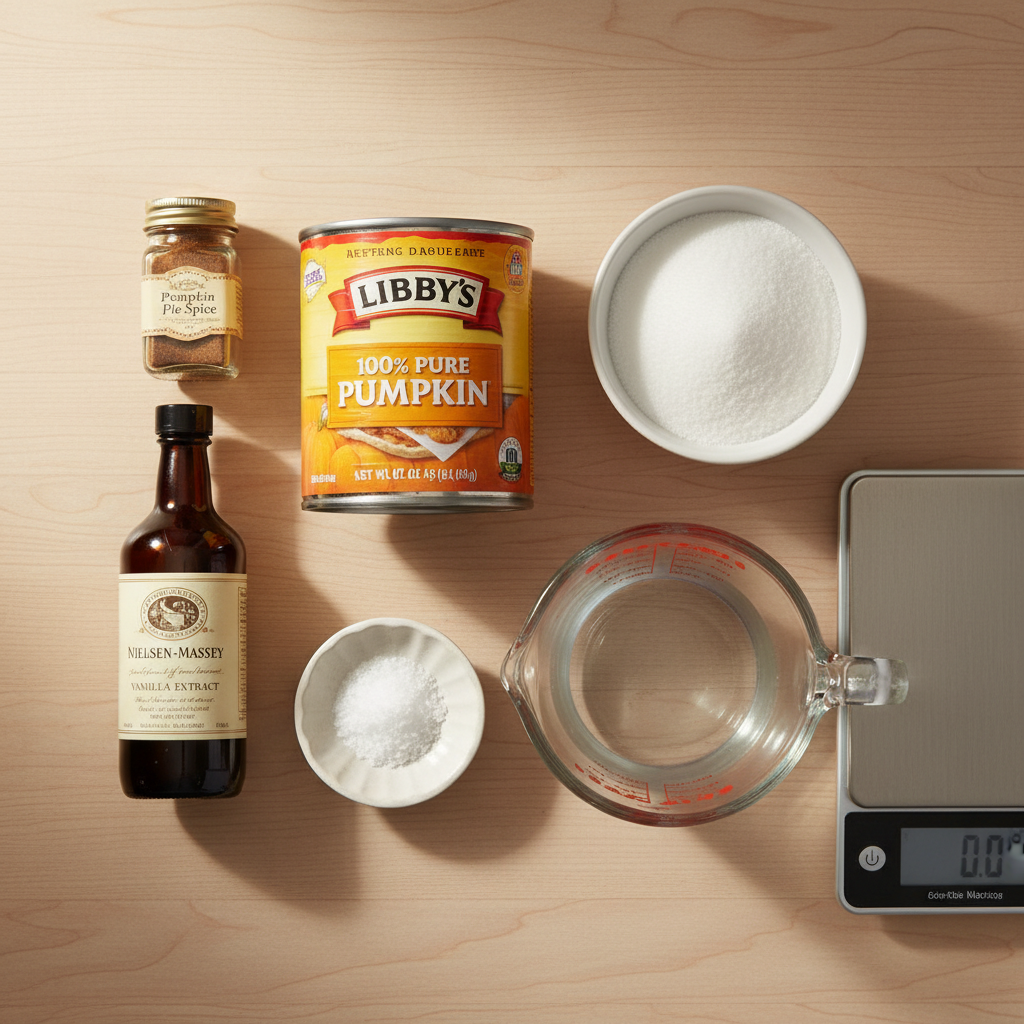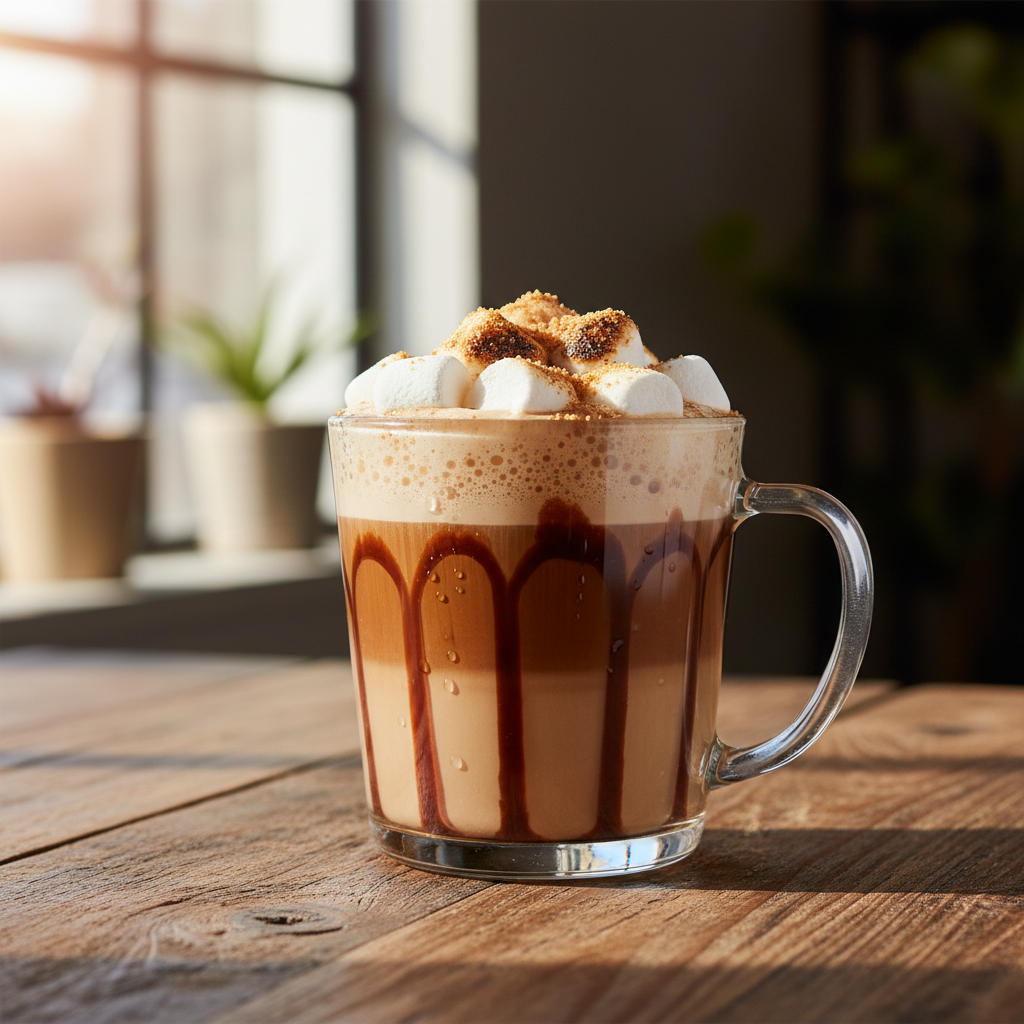
Blog

  • How to Make Cold Foam Like Starbucks (Any Milk)

    How to Make Cold Foam Like Starbucks (Any Milk)

    To make cold foam like Starbucks, combine 4 parts milk with 1 part heavy cream and froth it cold—a homemade serving costs about $0.45 versus $5.75 at the drive-through. I learned this ratio working as a barista, and it’s the key to that creamy, floatable topping you love on iced coffee. Making it at home isn’t just cheaper; it gives you control over sweetness, flavor, and the type of milk you use, saving you hundreds per year if you’re a regular cold brew drinker.

    ↓ Jump to Recipe

    Key Takeaways

    • Cold foam uses a 4:1 milk-to-heavy-cream ratio for stable foam.
    • Homemade cold foam costs about $0.45 per serving vs. $5+ at Starbucks.
    • Total time is 5 minutes with basic kitchen tools.
    • The most important tip: chill your liquid ingredients and frother cup for best results.
    What’s in this guide

    What is Cold Foam?

    Cold foam is a thick, velvety layer of frothed milk that sits atop iced drinks without dissolving immediately, created by Starbucks for their Cold Brew drinks around 2014. Unlike hot steamed milk or whipped cream, it’s made with cold liquid and a high-speed frother, resulting in a light, slightly sweet foam that slowly cascades into your drink.

    The Ratio That Matters

    My go-to ratio is 4 parts milk to 1 part heavy cream (by volume). This proportion works because the milk provides the liquid base and flavor, while the heavy cream’s fat content gives the foam its structure and longevity. Heavy cream, which must contain at least 36% milkfat, creates tiny, stable air bubbles when frothed cold. For one standard drink topping, I use 1/4 cup (60 ml) milk + 1 tbsp (15 ml) heavy cream.

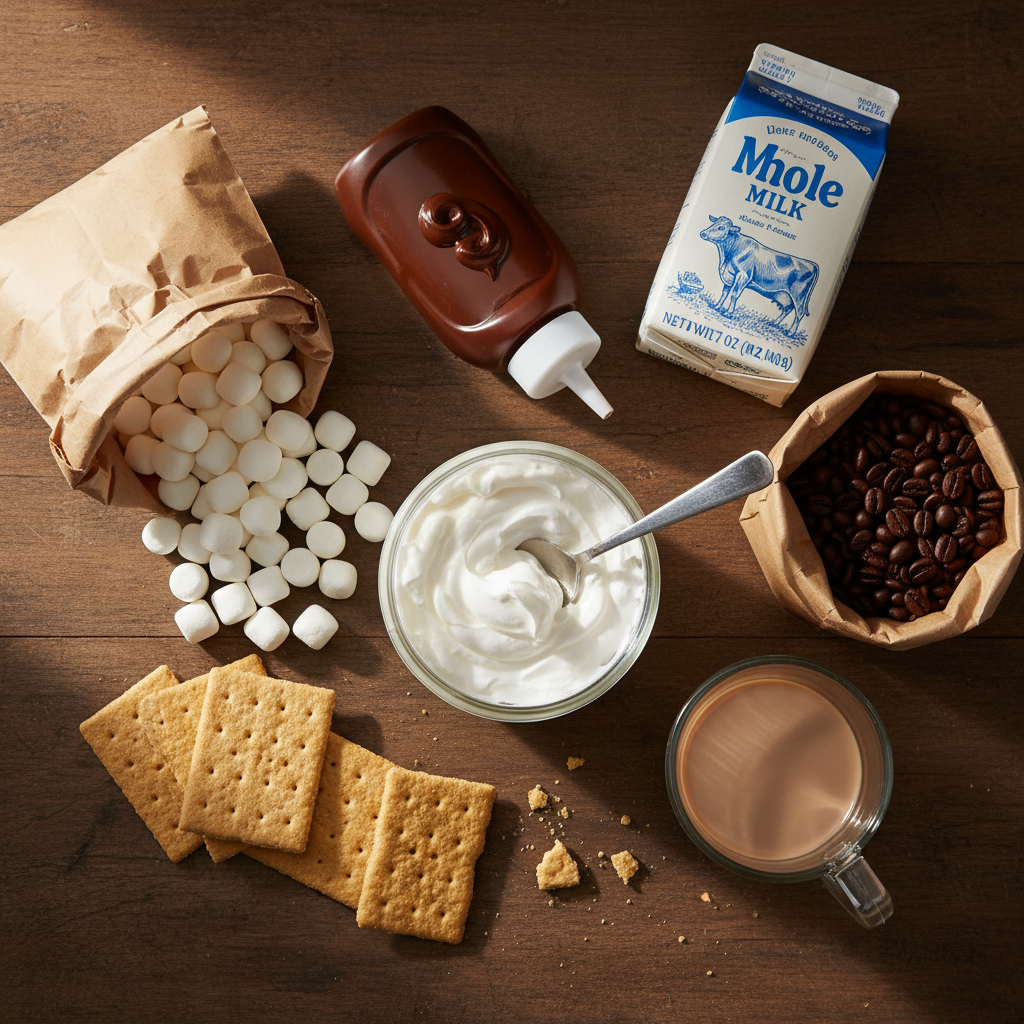
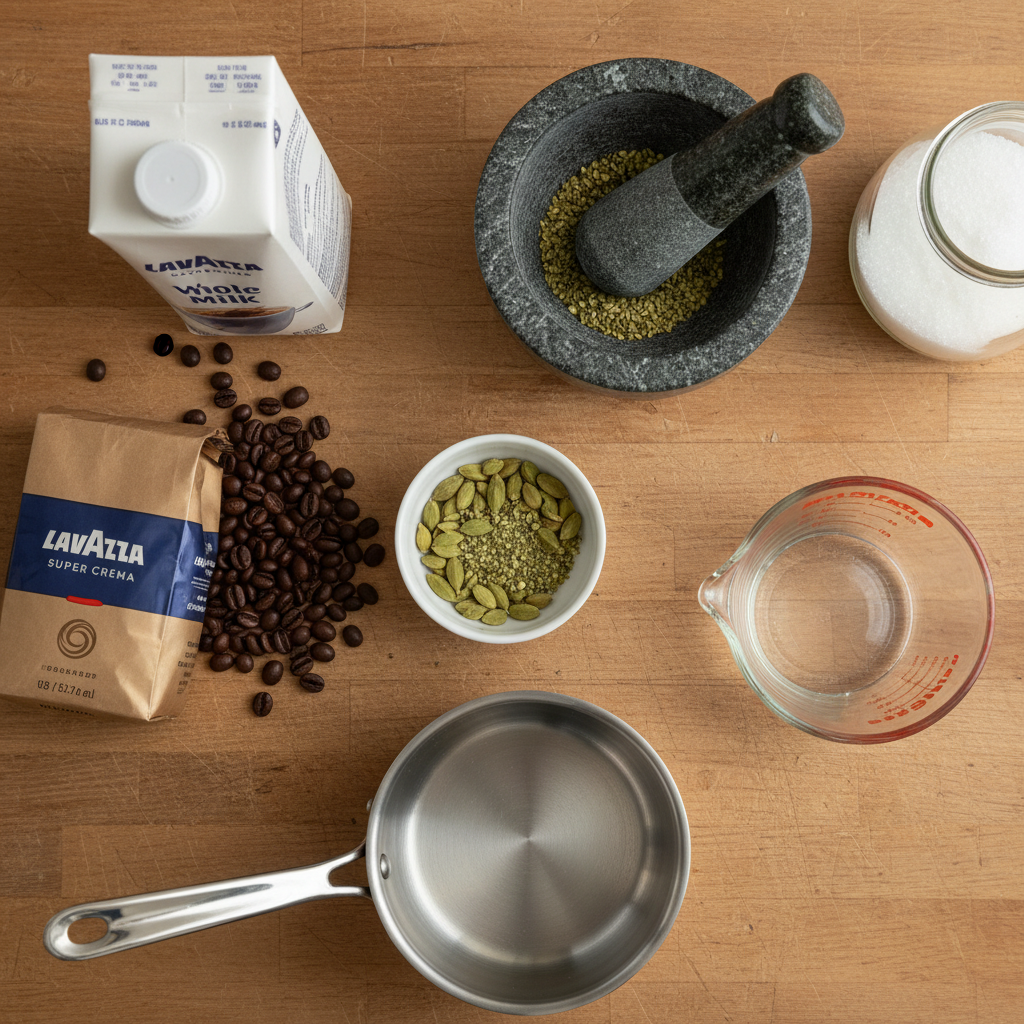
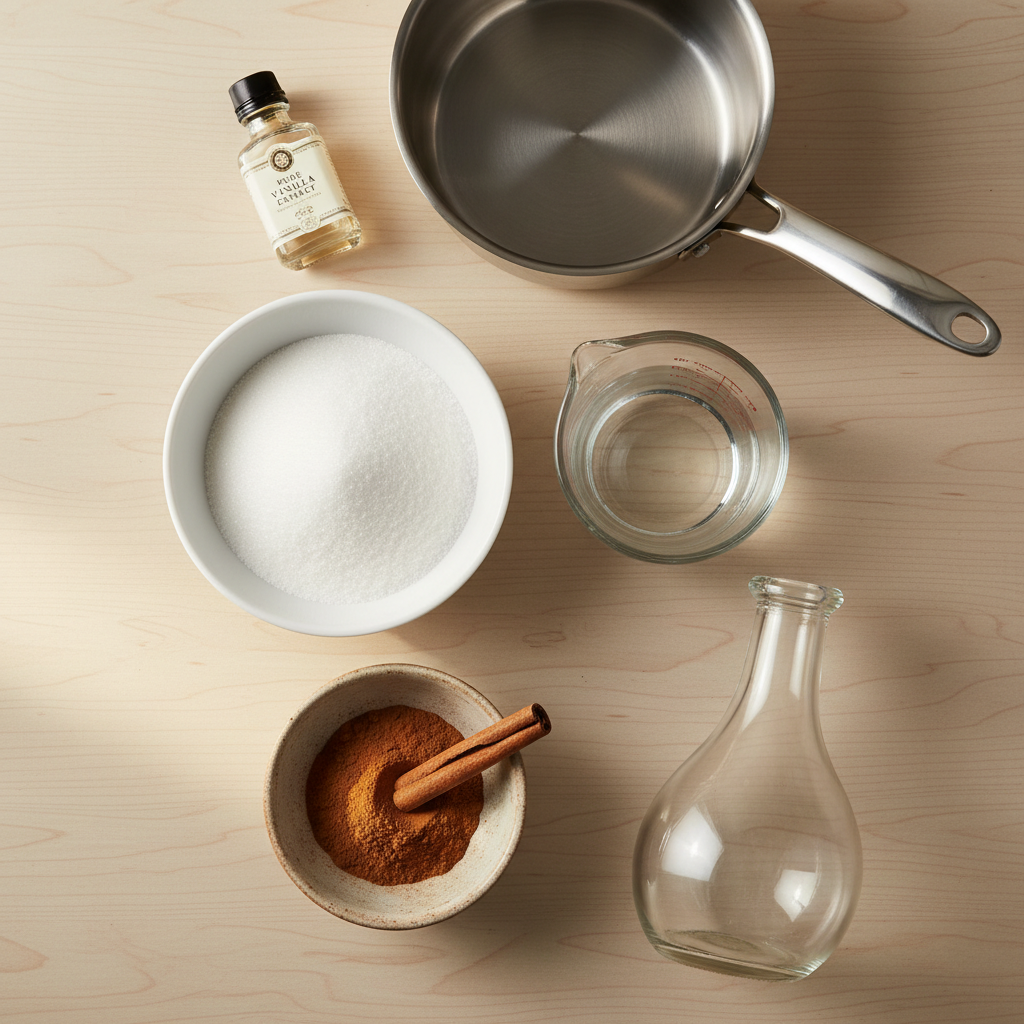
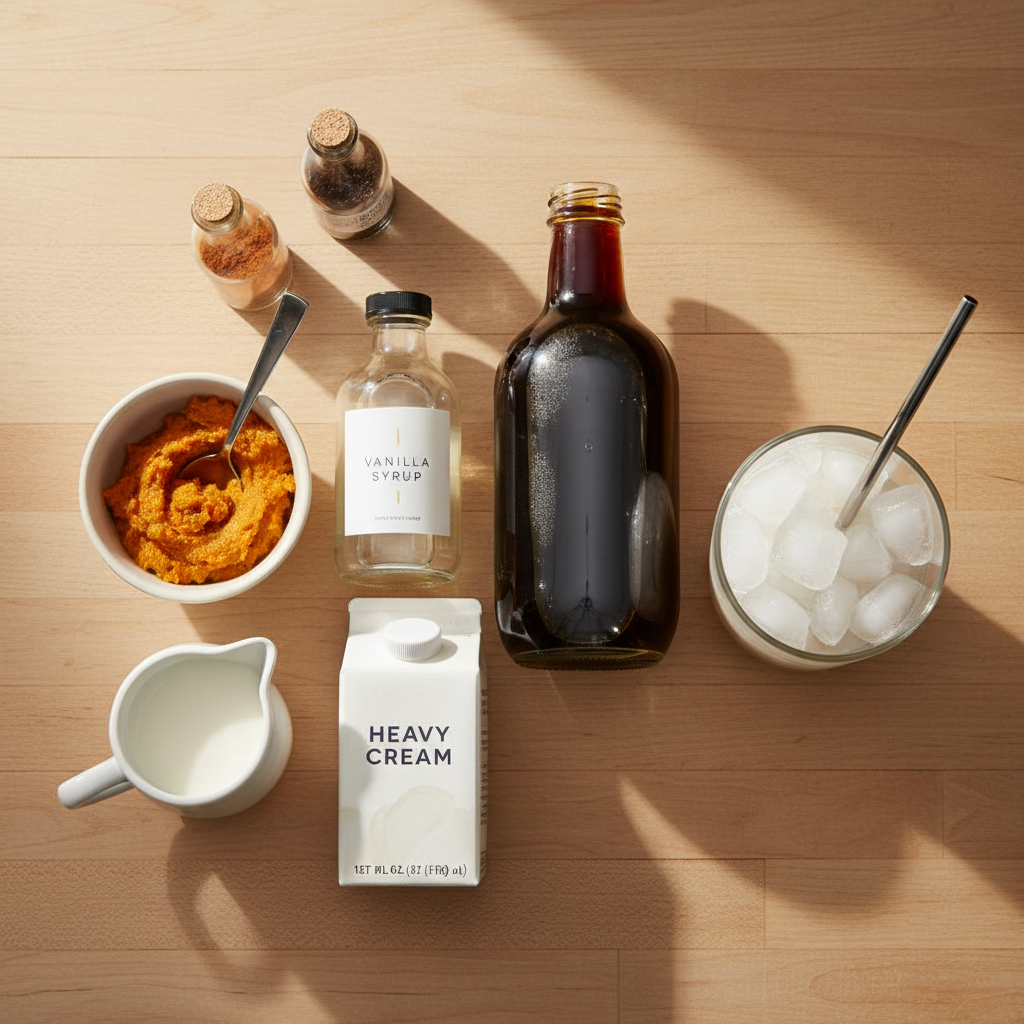
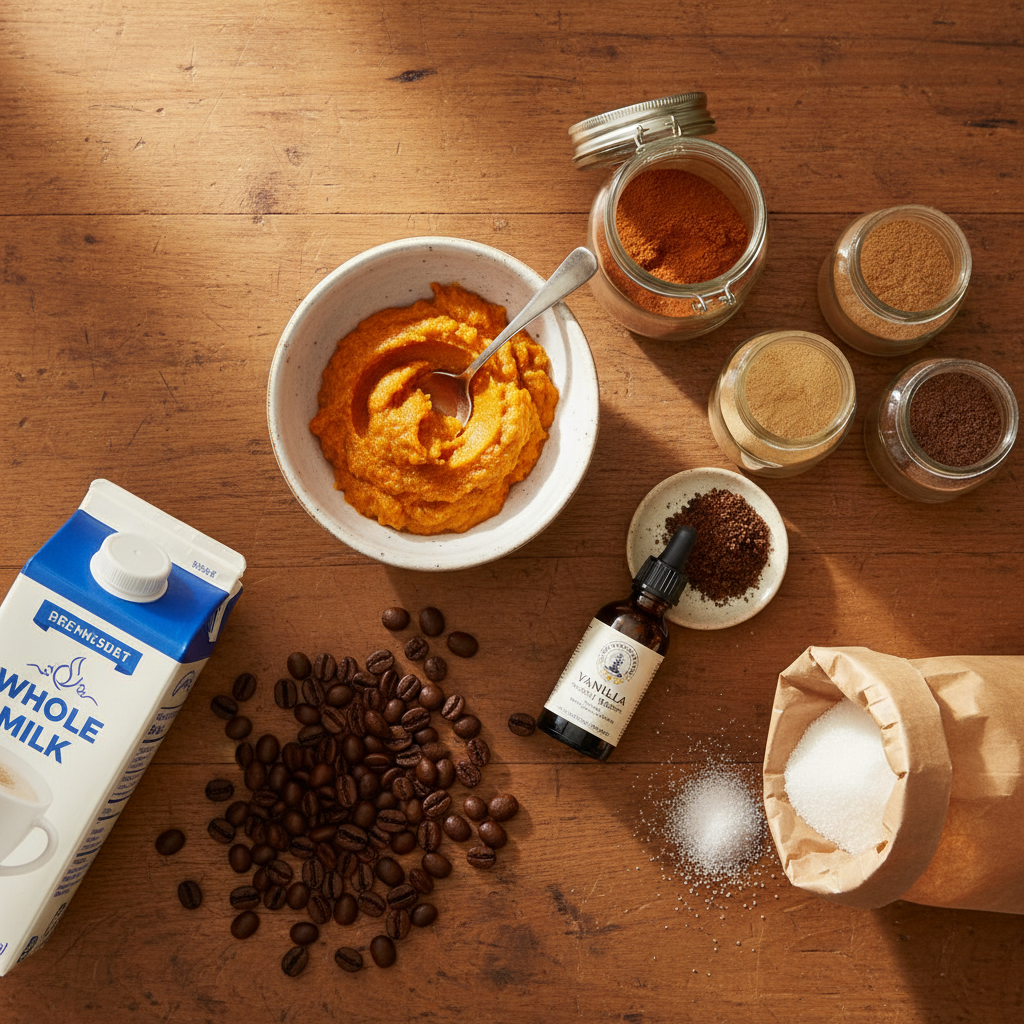
    Ingredients for How to Make Cold Foam Like Starbucks (Any Milk)
    Everything you need — no specialty gear required.

    Ingredients You’ll Need

    Milk (1/4 cup / 60 ml): The base. Whole milk (3.25% fat) gives the richest flavor and best foam. 2% milk works well. Non-dairy milks like oat or soy can foam but need the cream for structure.
    Heavy Cream (1 tbsp / 15 ml): The essential stabilizer. Brands like Organic Valley or a standard grocery store brand are fine. Do not substitute half-and-half; it lacks the fat.
    Sweetener (1 tsp / 5 ml simple syrup or 1/2 tsp / 2.5 g sugar): Optional, but traditional. Granulated sugar may not dissolve fully cold; a simple syrup (equal parts sugar and water, heated and cooled) integrates best. Vanilla syrup (like Torani or Monin) adds classic flavor.
    Flavor Extracts (a few drops): Vanilla, almond, or a tiny drop of peppermint extract can customize your foam.

    Equipment (The No-Fancy-Tools Path)

    You need a way to introduce air into cold liquid. A handheld milk frother is the best tool—I use a $12 model from Amazon. A French press also works brilliantly: pour ingredients into the beaker, pump the plunger vigorously for 30-45 seconds. In a pinch, a tightly sealed mason jar shaken extremely hard for 60+ seconds can create foam, though it will be less dense.

    No Espresso Machine?

    If your drink needs espresso, you can use a Moka pot for strong stovetop coffee, an AeroPress with a fine grind, or even a high-quality instant espresso like Medaglia d’Oro dissolved in a small amount of hot water. Chill your coffee concentrate before pouring over ice.

    Step-by-Step Technique Tips

    Chill your milk, cream, and even the frother’s cup or French press beaker for 5 minutes in the freezer. Cold liquid holds air bubbles better. Combine all ingredients in your frothing vessel. If using a handheld frother, submerge it just below the surface and turn it on, moving it slightly up and down for 15-20 seconds until the volume nearly doubles and thick, pourable foam forms. Over-frothing can make it buttery. Pour immediately over your cold drink.

    What Goes Wrong (and How to Fix It)

    Foam collapses immediately: Your liquid was too warm or your cream fat % was too low. Use chilled ingredients and verify you’re using heavy cream (36%+ fat).
    Foam tastes watery: You likely skipped the heavy cream or used a low-fat milk. The fat is essential for flavor and mouthfeel.
    Can’t get any foam with non-dairy milk: Some almond or coconut milks are too thin. Use a “barista edition” oat or soy milk, which contains stabilizers, and don’t skip the heavy cream.
    Foam is too thick and buttery: You over-frothed, essentially starting to churn butter. Stop frothing as soon as it’s thick and pourable; 15-20 seconds is usually enough.
    Sweetener is grainy: You used granulated sugar in cold liquid. Use superfine sugar, confectioners’ sugar, or (best) simple syrup.

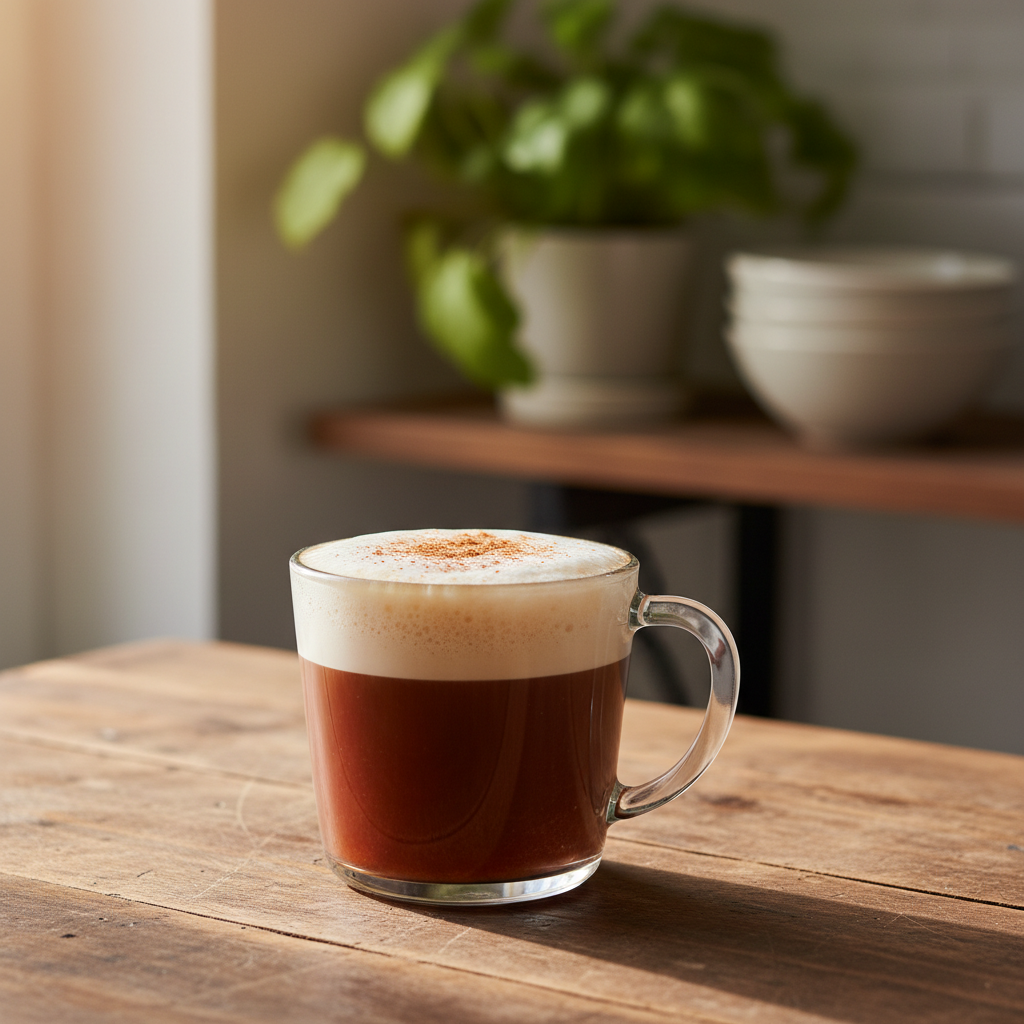
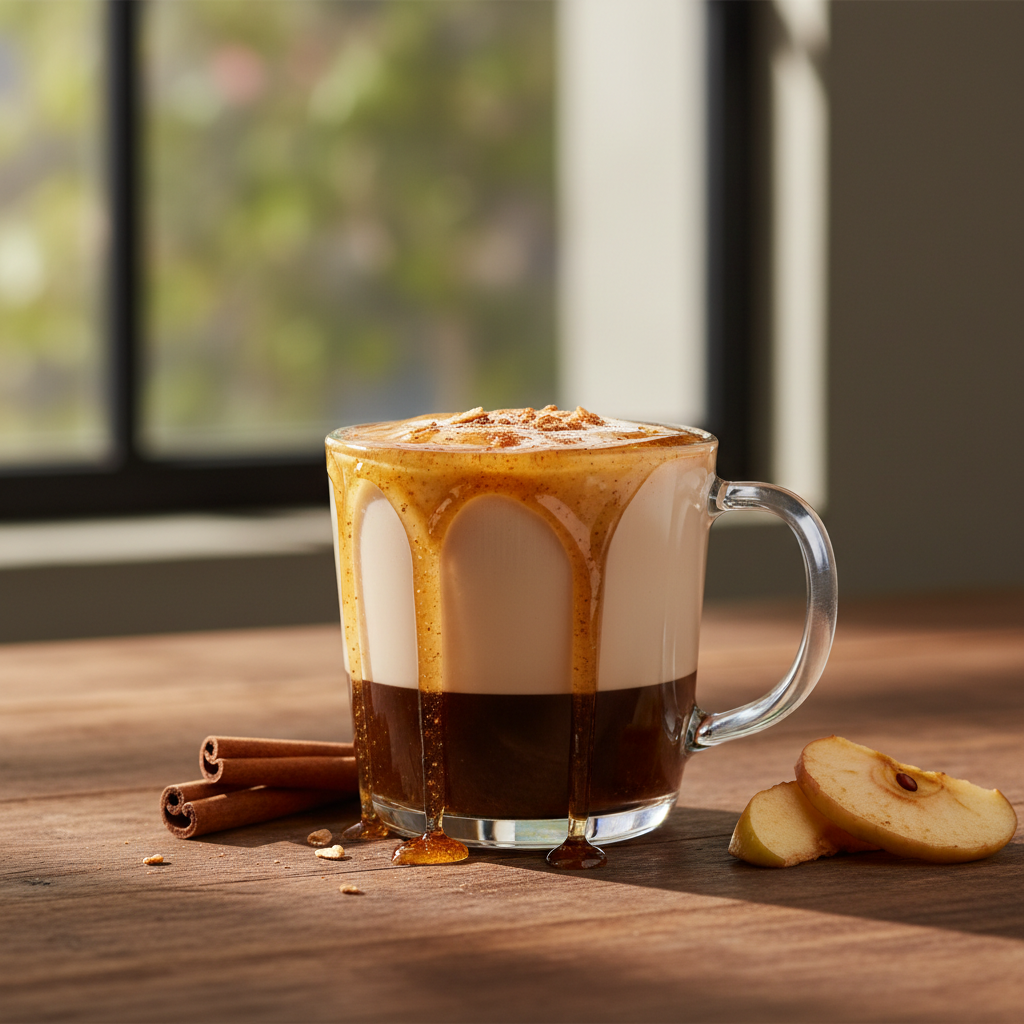
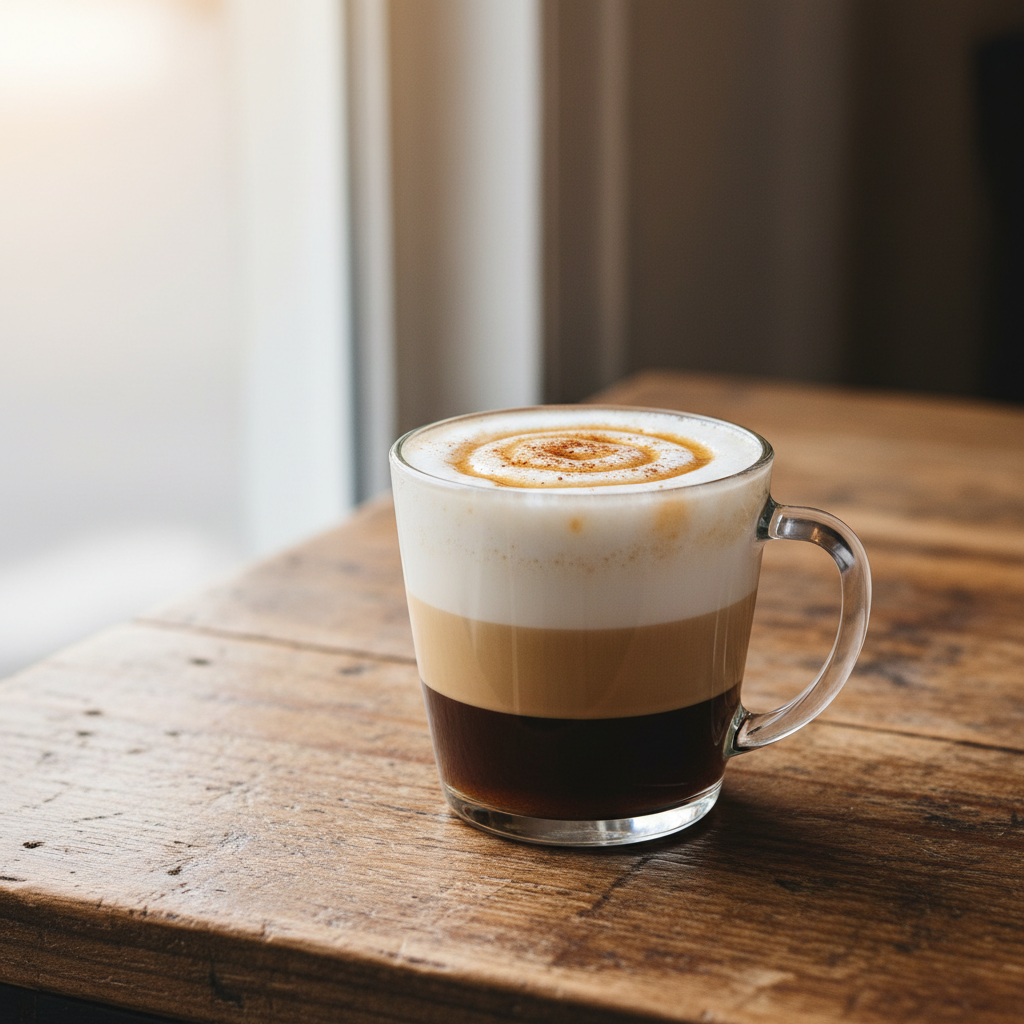
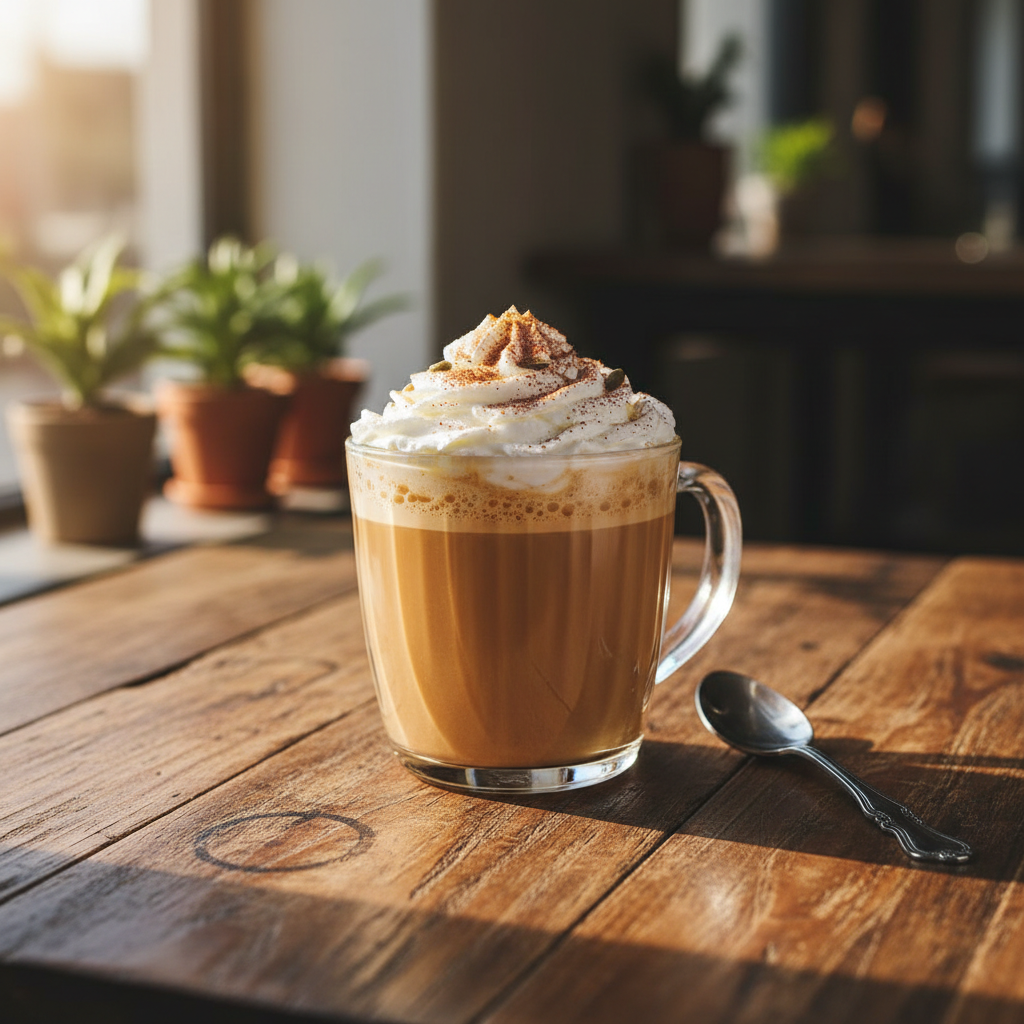
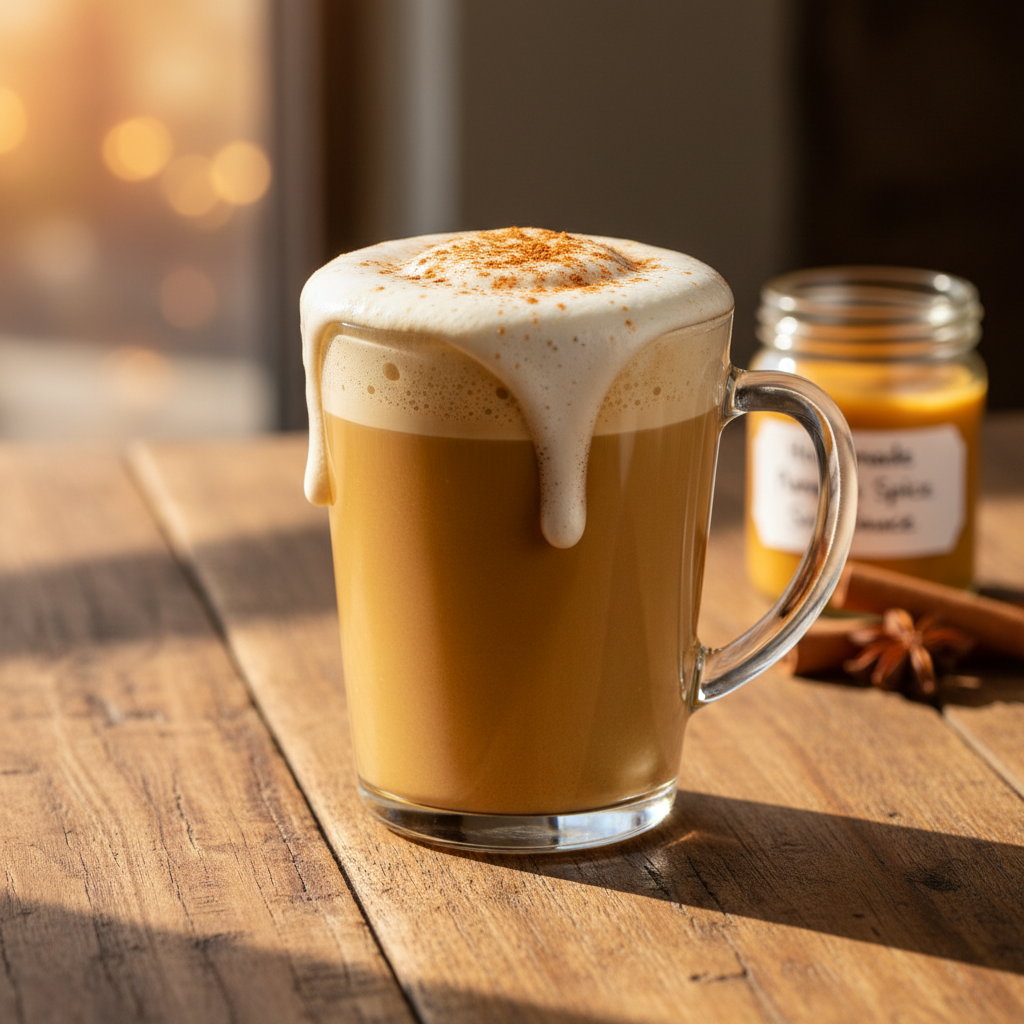
    Basic Vanilla Sweet Cream Cold Foam, ready to drink
    The finished drink, exactly as the ratio intends.

    Variations

    Sweet Cream Cold Foam: Starbucks’ default: use 4 parts 2% milk, 1 part heavy cream, 1 part vanilla syrup (by volume).
    Salted Cream Cold Foam: Add a tiny pinch (1/16 tsp) of fine sea salt to the Sweet Cream version before frothing.
    Non-Dairy Cold Foam: Use 4 parts barista-series oat milk (like Oatly) + 1 part heavy cream (if you consume dairy) OR 1 part canned full-fat coconut cream (if fully plant-based).
    Chocolate Cold Foam: Add 1 tsp (5g) of sifted cocoa powder or 1 tbsp (15ml) chocolate syrup to the base ratio.
    Matcha Cold Foam: Whisk 1/2 tsp (1g) ceremonial-grade matcha powder with the milk first to avoid clumps, then add cream and froth.

    How It Compares to the Original

    Taste-wise, this homemade version is nearly identical to Starbucks’ Vanilla Sweet Cream Cold Foam—creamy, lightly sweet, and luxuriously thick. The main difference is customization; you control the sweetness level. According to Coffee Recipes’ cost analysis, a grande Vanilla Sweet Cream Cold Brew costs about $5.75 at Starbucks. The homemade version, using quality ingredients, costs about $0.45 for the foam and $0.85 for the cold brew, totaling around $1.30. That’s a savings of over $4 per drink.

    Make It Lighter

    For lower sugar, skip the syrup entirely or use a sugar-free vanilla syrup. For lower fat, you can try the ratio with 2% milk, but the foam will be less stable; a splash of heavy cream is still recommended. For a fully dairy-free version, use a rich, barista-formula plant milk and substitute the heavy cream with the thick cream from the top of a can of full-fat coconut milk.

    Storage & Make-Ahead

    Cold foam is best used immediately. However, you can prepare the liquid mixture (milk + cream + sweetener) up to 3 days ahead and store it sealed in the fridge. Froth it just before serving. Pre-made foam will separate and deflate in the fridge. Coffee Recipes’ testing found that a batch of sweet cream mixture costs under $2 to make and can foam 4-5 drinks.

    ☕ Basic Vanilla Sweet Cream Cold Foam

    The classic Starbucks-style cold foam topping for iced coffee.

    Prep: 5 min  •  Total: 5 min  •  Serves: 1 drink topping  •  ~45 kcal

    Batch size:

    Ingredients

    • 1/4 cup (60 ml) cold 2% or whole milk
    • 1 tbsp (15 ml) cold heavy cream
    • 1 tbsp (15 ml) vanilla syrup (or 2 tsp / 10 ml simple syrup + 1/4 tsp vanilla extract)

    Instructions

    1. Chill your milk, cream, and frother cup (or French press beaker) for 5 minutes in the freezer.
    2. In the chilled vessel, combine the cold milk, cold heavy cream, and vanilla syrup.
    3. Using a handheld milk frother, submerge the whisk just below the surface. Turn on and move it slightly up and down for 15-20 seconds until the mixture is thick, frothy, and has nearly doubled in volume.
    4. Immediately pour the foam over your prepared glass of iced coffee or cold brew. Enjoy right away.

    Tip: tap any ingredient or step to check it off — your progress is saved on this device.

    Frequently Asked Questions

    Can you make cold foam without a frother?

    Yes, use a clean French press: pour ingredients in and pump the plunger vigorously for 30-45 seconds. A tightly sealed mason jar shaken extremely hard for a full minute can also work.

    What’s the difference between cold foam and whipped cream?

    Cold foam is frothed, not whipped, resulting in a lighter, pourable texture that mixes slowly into a drink. Whipped cream is thicker, sweeter, and sits on top without integrating.

    Can I make cold foam with almond milk?

    You can, but for best results use a ‘barista’ blend almond milk and include the heavy cream. Pure almond milk alone often froths poorly due to low protein and fat.

    Why is my cold foam not floating?

    Your foam likely isn’t thick enough (not frothed long enough) or your drink underneath is too warm or not full enough. Ensure your base drink is cold and your foam is thick like melted ice cream.

    How long does cold foam last?

    Cold foam should be used immediately. You can store the unfrothed liquid mixture in the fridge for 2-3 days and froth it fresh when needed.

    Can I use skim milk for cold foam?

    Skim milk will froth but produces a large-bubbled, less stable foam. For the classic texture, at least 2% milk with the heavy cream is recommended.

    Is cold foam just frothed milk?

    No, standard frothed milk is usually hot and made for lattes. Cold foam is specifically frothed cold and often includes heavy cream for a richer, longer-lasting foam.

    How many calories are in homemade cold foam?

    The basic recipe with 2% milk and heavy cream has about 45 calories. Using whole milk adds about 10 more calories, and sugar-free syrup reduces it slightly.

    More Coffee Recipes to Try


    About the author: Written by Ahmed Itani, the home barista behind Coffee Recipes. Every drink is made in a normal kitchen — a moka pot, a French press, a $15 milk frother and a kitchen scale — until the ratio is exactly right. Last updated 2026-07-22.

  • Iced Latte vs Iced Coffee: What Cafés Actually Do Differently

    Iced Latte vs Iced Coffee: What Cafés Actually Do Differently

    The difference between an iced latte and iced coffee comes down to one ingredient: an iced latte is built with espresso and cold milk, while iced coffee is made with strong, chilled brewed coffee, often served black. My go-to method for each costs about $0.65 per glass at home, compared to the $5.50 you’re paying at the drive-through. I worked as a barista for two years, and the secret isn’t a $10,000 machine—it’s nailing the ratio and a couple of simple techniques you can do in any kitchen.

    Once you understand the building blocks, you can make a café-quality version of either drink in under five minutes. This guide breaks down exactly what goes into each, the equipment you really need (and don’t), and how to troubleshoot the common pitfalls that lead to a watered-down or bitter cup.

    ↓ Jump to Recipe

    Key Takeaways

    • An iced latte is 1:3 espresso to cold milk over ice; iced coffee is 1:4 strong brewed coffee to water, served over ice.
    • Coffee Recipes’ homemade version costs about $0.65 a glass versus $5.50 at the café.
    • Total time is under 5 minutes with pre-chilled ingredients.
    • The single most important tip is to chill your coffee or espresso before pouring over ice to prevent a watery drink.
    What’s in this guide

    What is an Iced Latte vs. Iced Coffee?

    An iced latte is an espresso-based drink originating from the Italian ‘caffè latte,’ meaning ‘coffee and milk.’ For the iced version, it’s simply espresso poured over ice and topped with cold milk. An iced coffee, in its most basic form, is regular brewed coffee that is cooled and served over ice. While cold brew—coffee steeped in cold water for 12+ hours—is a popular method for iced coffee, it’s not the only way. You can also make ‘flash-chilled’ or ‘Japanese-style’ iced coffee by brewing hot coffee directly onto ice.

    The Ratio That Matters Most

    The proportion of coffee to water or milk is what defines the drink and its strength. For an iced latte, the standard café ratio is 1 part espresso to 3 parts cold milk. That’s typically 2 shots (60 ml) of espresso to 6 oz (180 ml) of milk. For iced coffee, you need to compensate for the ice dilution. The best method is to use a 1:4 coffee-to-water ratio for your brew instead of the standard 1:16. So for every 1 gram of coffee, use 4 grams of water. This creates a concentrated brew that stays flavorful when poured over ice. According to the National Coffee Association’s brewing guide, adjusting your ratio is the first step to a better-tasting cup.

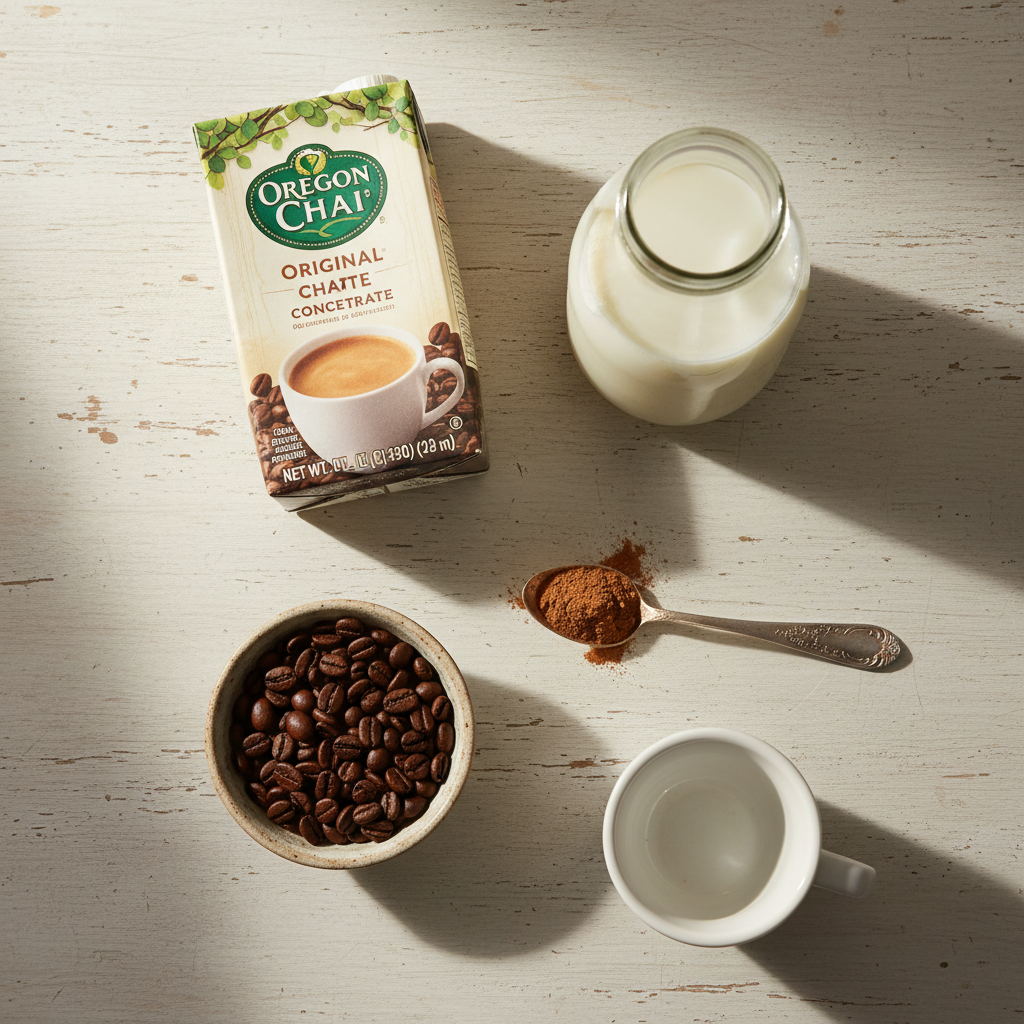
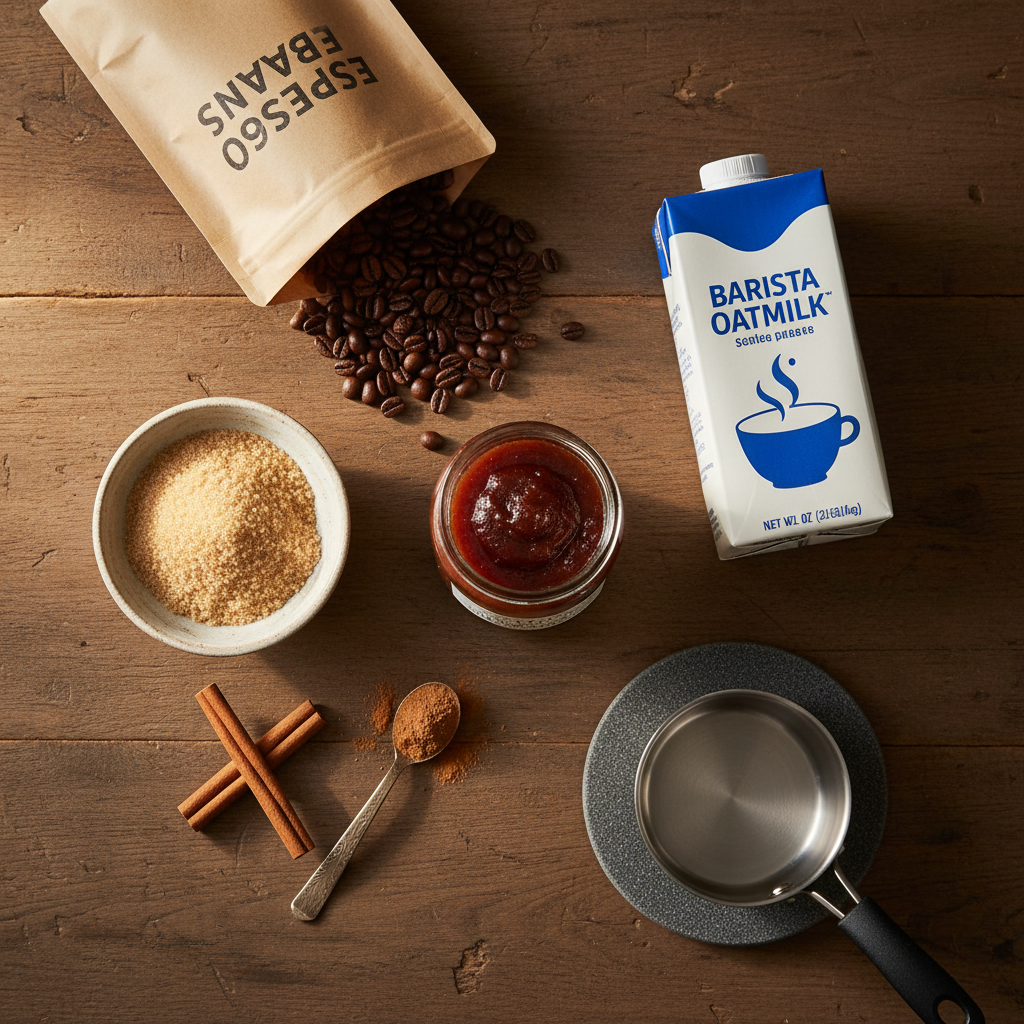
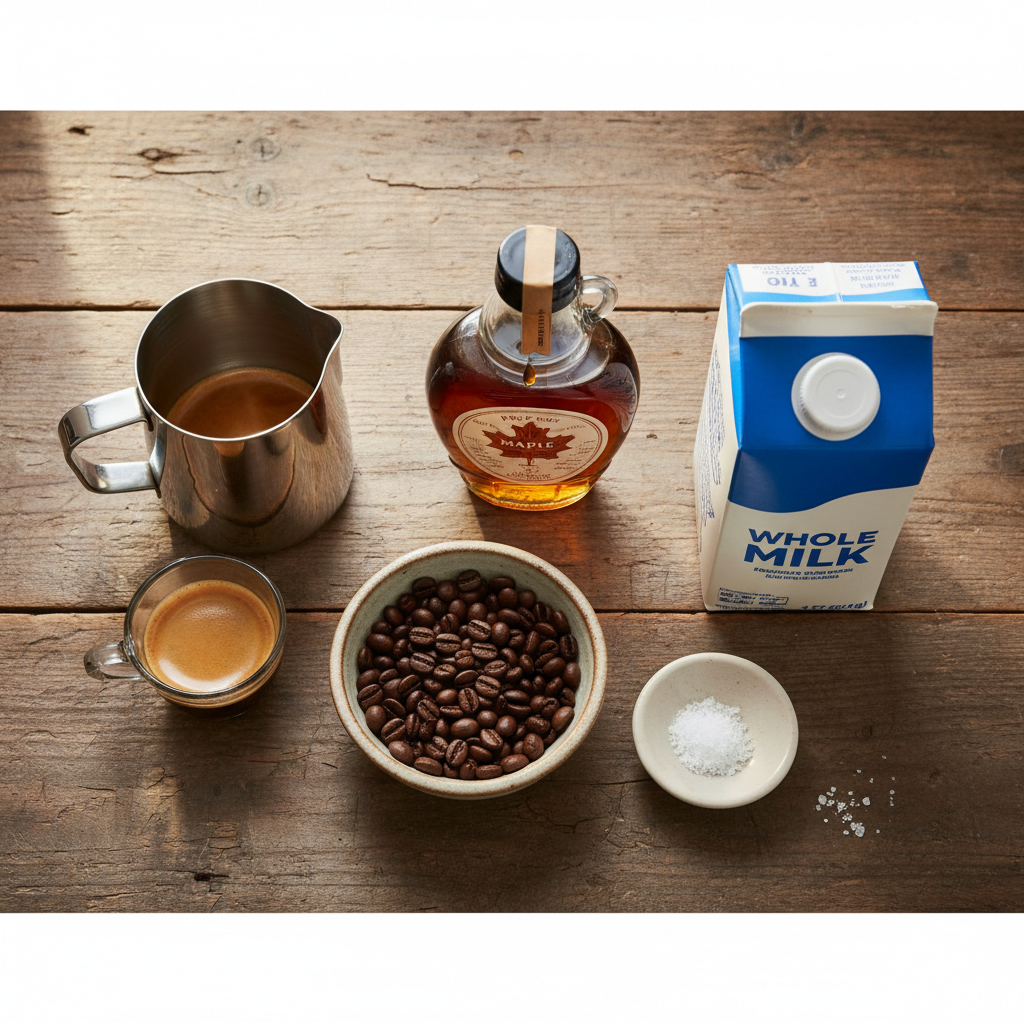
    Ingredients for Iced Latte vs Iced Coffee: What Cafés Actually Do Differently
    Everything you need — no specialty gear required.

    Ingredients You’ll Need (and Why)

    Quality ingredients make a noticeable difference, but you don’t need the most expensive options.

    • For Iced Latte: Espresso Beans: A medium or medium-dark roast works best, providing a balanced shot that cuts through the milk. I often use Lavazza Super Crema or locally roasted beans. Whole Milk: The standard for its creamy texture and slight sweetness. For a richer drink, baristas often use whole milk. Ice: Use filtered water ice if possible, as it melts clear and clean.
    • For Iced Coffee: Coffee Beans: A light to medium roast often highlights brighter, fruitier notes when chilled. Counter Culture’s ‘Hologram’ or Stumptown’s ‘House Blend’ are great choices. Water: Filtered water is best, as any off-flavors in your tap water will be concentrated in the stronger brew.
    • Sweeteners & Flavor (Optional): Simple syrup (1:1 sugar and water, dissolved) integrates easily into cold drinks. For vanilla syrup, I make my own or use the Torani brand for consistency.

    Essential Equipment (+ The No-Espresso-Machine Path)

    For an iced latte, you need a way to make espresso. If you don’t have a machine, here are three reliable alternatives:

    1. Moka Pot (Stovetop Espresso): Produces a strong, concentrated coffee that mimics espresso’s body. Use finely ground coffee and don’t tamp it down.
    2. AeroPress: With a fine grind and a metal filter, you can make a very strong, smooth coffee concentrate. Use 17g of coffee to 70g of water, steep for 2 minutes, then press.
    3. Strong Instant Coffee: This is a true backup plan. Mix 2 teaspoons of a high-quality instant coffee (like Starbucks Via or Mount Hagen) with 2 tablespoons of hot water to dissolve, creating a ‘pseudo-shot.’

    For iced coffee, you just need a coffee maker: a pour-over setup (like a Hario V60), a French press, or even a regular drip machine. A kitchen scale is the single best investment for consistency, as coffee preparation is fundamentally about precise ratios of mass.

    Step-by-Step Technique Tips for Café Quality

    Beyond the recipe steps, these barista techniques improve your drink. Always pre-chill your glass by filling it with ice water while you prepare your coffee. Dump that water out before building your drink—it keeps everything colder longer. For an iced latte, pull or make your espresso first and let it cool for 1-2 minutes before adding it to the ice. Pouring hot espresso directly over ice causes rapid, uneven melting. For iced coffee, if you’re not making cold brew, try the ‘flash chill’ method: brew your strong coffee directly onto a carafe or cup filled with an equal weight of ice. This locks in the aromatics immediately.

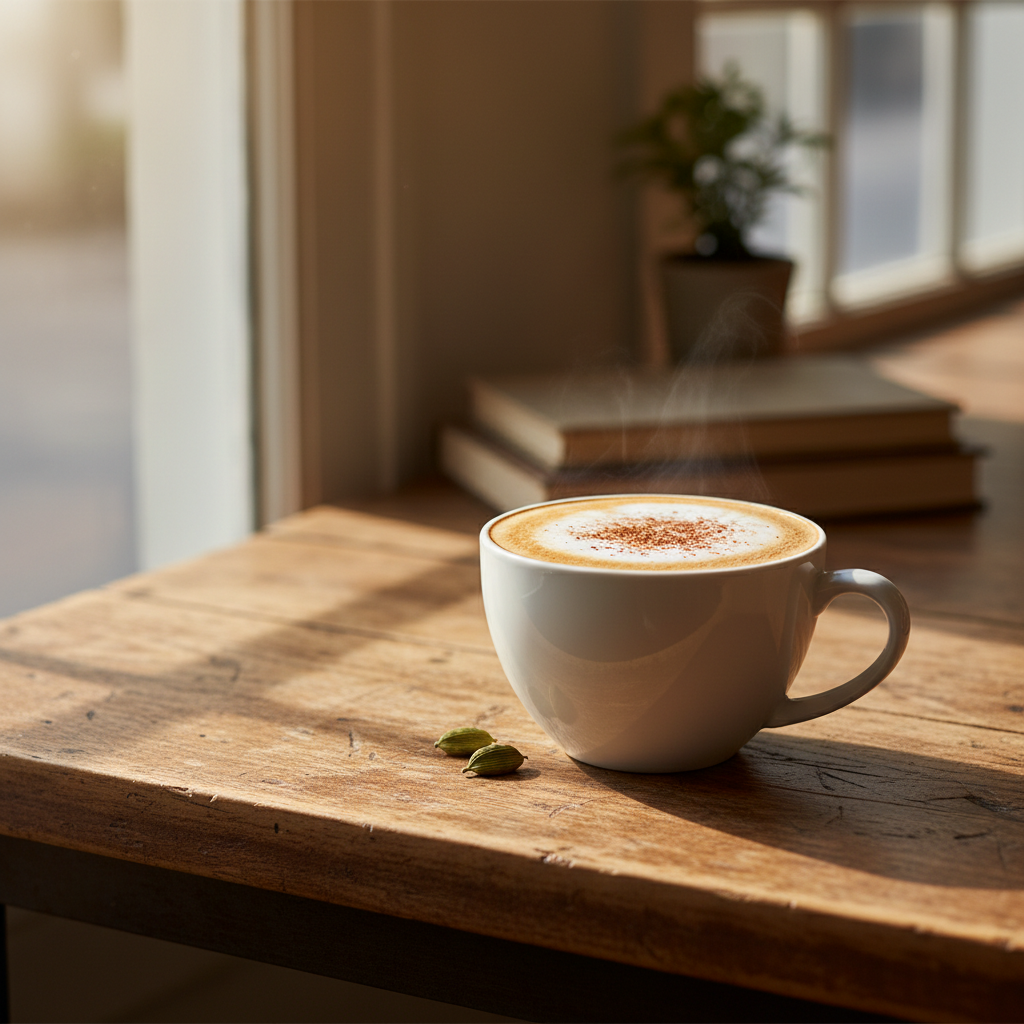
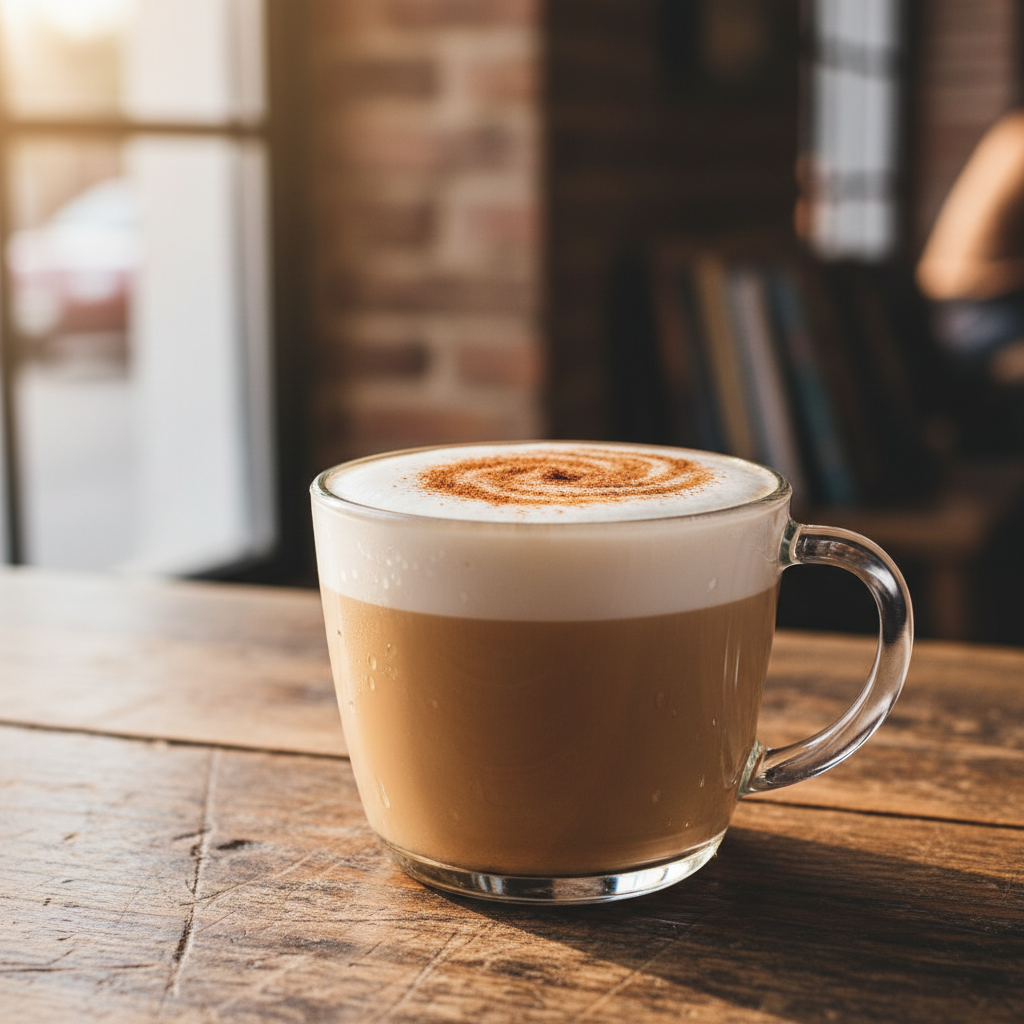
    Classic Café-Style Iced Latte, ready to drink
    The finished drink, exactly as the ratio intends.

    What Goes Wrong (and How to Fix It)

    Here are the most common failures and my barista-approved fixes.

    • Tastes Watery: Your ice melted before the drink was consumed. Fix: Chill your espresso or brewed coffee in the fridge for 5-10 minutes before pouring over ice. Use larger ice cubes or coffee ice cubes.
    • Iced Coffee Tastes Sour or Weak: Your brew was under-extracted. Fix: Use a finer grind size and/or increase your coffee-to-water ratio. Aim for that 1:4 strong brew ratio.
    • Iced Latte Milk and Coffee Separate: The temperatures are too different, or the milk was poured too quickly. Fix: Ensure both espresso and milk are chilled. Pour the milk slowly over the back of a spoon to create distinct layers, or simply stir vigorously after combining.
    • Drink is Bitter or Harsh: Over-extracted coffee or stale beans. Fix: For espresso or brewed coffee, use a slightly coarser grind or shorter brew time. Always use beans roasted within the last 2-3 weeks.
    • Not Sweet Enough (Even with Syrup): Cold mutes sweetness. Fix: You need more sweetener than in a hot drink. Start with 1 tbsp (15ml) of syrup per 12 oz drink and adjust to taste. Simple syrup blends better than granulated sugar.

    Four Delicious Variations to Try

    Once you’ve mastered the basics, experiment with these popular twists.

    1. Vanilla Iced Latte: Add 1 tbsp (15ml) of vanilla syrup to the glass before adding espresso.
    2. Dalgona Iced Coffee: Whip 2 tbsp instant coffee, 2 tbsp sugar, and 2 tbsp hot water until frothy. Pour over a glass of cold milk and ice.
    3. Iced Mocha: Add 1-2 tbsp of chocolate sauce or syrup to your iced latte base and stir thoroughly.
    4. Brown Sugar Oat Milk Shakerato: Shake a shot of cooled espresso, 1 tbsp brown sugar syrup, and a handful of ice in a cocktail shaker until frothy. Strain into a glass and top with oat milk.

    How to Make It Lighter or Dairy-Free

    Cutting sugar or dairy is simple with smart swaps. For less sugar, reduce or omit the syrup and rely on the natural sweetness of a splash of cold foam or a sprinkle of cinnamon. For dairy-free lattes, barista-style oat milk (like Oatly Barista Edition or Chobani Extra Creamy) is the best substitute because it steams and textures well, closely mimicking whole milk’s creaminess. Almond milk tends to separate more in acidic coffee. For black iced coffee, simply skip the milk altogether—a good, strong brew should be enjoyable on its own.

    Storage & Make-Ahead Tips

    You can prep components to save time on busy mornings. Brew a full pot of strong coffee (using the 1:4 ratio) and let it cool completely before storing it in a sealed pitcher in the fridge for up to 5 days. This is your ready-to-go iced coffee base. For lattes, you can batch-prepare espresso shots or moka pot coffee, let them cool, and store them in a small jar in the fridge for 1-2 days. The flavor will degrade slightly, but it’s a great timesaver. According to Coffee Recipes, pre-batched cold brew concentrate can be kept refrigerated for up to two weeks, making it the ultimate make-ahead option. Never store the fully assembled drink with ice, as it will become impossibly diluted. Always add ice just before serving.

    ☕ Classic Café-Style Iced Latte

    A smooth, creamy iced latte made with the standard café ratio of espresso to milk.

    Prep: 5 min  •  Total: 5 min  •  Serves: 1 drink (16 oz)  •  ~210 kcal

    Batch size:

    Ingredients

    • 2 shots (60 ml) espresso, cooled slightly
    • 6 oz (180 ml) cold whole milk
    • 1 cup ice cubes
    • 1 tbsp (15 ml) simple syrup or vanilla syrup (optional)

    Instructions

    1. Chill a 16 oz glass by filling it with ice water. Set aside.
    2. Prepare your espresso using your preferred method (machine, moka pot, AeroPress). Let the espresso sit for 1-2 minutes to cool slightly.
    3. Dump the ice water from the glass. Fill the glass about 3/4 full with fresh ice cubes.
    4. If using syrup, add it to the bottom of the glass.
    5. Pour the cooled espresso shots over the ice.
    6. Slowly pour the cold milk over the espresso. For a layered look, pour over the back of a spoon.
    7. Stir gently to combine, or leave layered. Enjoy immediately.

    Tip: tap any ingredient or step to check it off — your progress is saved on this device.

    Frequently Asked Questions

    What is the main difference between iced coffee and iced latte?

    The main difference is the coffee base. An iced latte is made with espresso and cold milk, resulting in a creamy, coffee-forward milk drink. Iced coffee is made with regular brewed coffee (like drip or pour-over) that is chilled and served over ice, often black or with a small splash of milk.

    Can I make an iced latte without an espresso machine?

    Absolutely. A stovetop moka pot makes a strong, concentrated coffee that works perfectly. An AeroPress with a fine grind is another excellent option. In a pinch, you can dissolve 2 teaspoons of high-quality instant coffee in 2 tablespoons of hot water to mimic an espresso shot.

    Why does my homemade iced coffee taste watery?

    It’s almost always due to the ice melting too fast from contact with hot coffee. The fix is to chill your brewed coffee completely in the refrigerator before pouring it over ice, or brew it directly onto an equal weight of ice to ‘flash chill’ it instantly.

    Is an iced latte stronger than iced coffee?

    Not necessarily in terms of caffeine, but in flavor concentration. Espresso is more concentrated per ounce, but an iced latte is diluted with a large volume of milk. A standard 16 oz iced latte might have less total caffeine than a 16 oz black iced coffee made from a strong brew. The iced latte will have a richer, more intense coffee flavor relative to the milk.

    What’s the best milk for an iced latte?

    Whole milk is the standard for its perfect balance of creaminess and sweetness. For a dairy-free option, barista-style oat milk (like Oatly) froths well and has a neutral, creamy taste that doesn’t overpower the coffee.

    How do I make my iced coffee less bitter?

    Bitterness usually comes from over-extraction. Use a slightly coarser grind, shorten your brew time, or use a lighter roast bean. Most importantly, never use stale coffee—beans are best within 2-3 weeks of their roast date.

    Can I make a large batch of iced coffee ahead of time?

    Yes. Brew a strong batch of coffee using a 1:4 coffee-to-water ratio, let it cool completely, and store it in a sealed container in the refrigerator for up to 5 days. Cold brew concentrate can last up to two weeks. Always add ice and milk just before serving.

    How much does it cost to make an iced latte at home?

    Coffee Recipes’ cost analysis shows a homemade iced latte using quality beans and milk costs approximately $0.65 per 16 oz glass. This is a significant saving compared to the average café price of $5.50, saving you nearly $5 per drink.

    More Coffee Recipes to Try


    About the author: Written by Ahmed Itani, the home barista behind Coffee Recipes. Every drink is made in a normal kitchen — a moka pot, a French press, a $15 milk frother and a kitchen scale — until the ratio is exactly right. Last updated 2026-07-20.

  • Cold Brew Ratio Explained: Concentrate vs Ready-to-Drink Chart

    Cold Brew Ratio Explained: Concentrate vs Ready-to-Drink Chart

    The core cold brew ratio is 1 part coarsely ground coffee to 4 parts cold water for concentrate, or 1:8 for ready-to-drink; this simple formula lets you make a glass at home for about $0.45 versus $4.50 at a coffee shop. I’ve made hundreds of batches over the years, and nailing this proportion is the only trick you need for smooth, never-bitter coffee that’s infinitely better than just hot coffee poured over ice. The cost saving is massive—a $12 bag of good beans makes over 25 servings, so you can have your daily cold brew without the daily drive-through line.

    ↓ Jump to Recipe

    Key Takeaways

    • Use a 1:4 coffee-to-water ratio for concentrate or a 1:8 ratio for ready-to-drink cold brew.
    • Coffee Recipes’ homemade version costs about $0.45 a glass versus $4.50 at the café.
    • The total hands-off time is 16-24 hours of steeping in the fridge.
    • The single most important tip is to use a coarse grind to prevent bitterness and over-extraction.
    What’s in this guide

    What Is Cold Brew Coffee?

    Cold brew is coffee made by steeping coarse grounds in cold or room-temperature water for 12-24 hours, resulting in a smoother, less acidic, and highly caffeinated brew compared to hot methods. It’s a staple in modern cafés, but its simplicity makes it perfect for home brewing.

    Why Does the Cold Brew Ratio Matter?

    Getting the ratio right is everything because it directly controls strength, flavor, and how you’ll use the final product. A concentrate (like a 1:4 ratio) is designed to be diluted with water or milk, giving you flexibility. A ready-to-drink ratio (like 1:8) is brewed at its final drinking strength. According to the National Coffee Association, the brewing method significantly alters the chemical extraction, which is why cold brew’s low-temperature, long-steep process needs a specific coffee-to-water balance to taste right.

    The Cold Brew Ratio Chart

    Print this and stick it on your fridge. All measurements are for a standard 1-quart (32 oz / 946 ml) jar or pitcher.

    • Concentrate Ratio (1:4): Use 1 cup (about 85 grams) of coarse ground coffee to 4 cups (946 ml) of cold water. Yields about 3 cups of strong concentrate.
    • Ready-to-Drink Ratio (1:8): Use 1/2 cup (about 43 grams) of coarse ground coffee to 4 cups (946 ml) of cold water. Yields about 4 cups of coffee ready to pour over ice.
    • Strong Ready-to-Drink (1:6): Use 2/3 cup (about 57 grams) of coffee to 4 cups of water. My personal go-to for a bold, straight-from-the-jar brew.
    Ingredients for Cold Brew Ratio Explained: Concentrate vs Ready-to-Drink Chart
    Everything you need — no specialty gear required.

    Ingredients You’ll Need

    Only two things are required, but quality matters.

    • Coffee Beans: Use a medium or dark roast for classic chocolatey, nutty notes. Light roasts can taste fruity but are more acidic. My favorite affordable, widely available beans for cold brew are Peet’s Major Dickason’s Blend or Counter Culture’s Forty-Six. Pre-ground is okay in a pinch if labeled ‘coarse grind’.
    • Water: Use filtered water if your tap water has a strong taste. Cold is fine; room temperature extracts slightly faster.

    Equipment (No Fancy Gear Needed)

    Your normal kitchen has everything.

    • A Large Container: A 1-quart mason jar, a French press, or even a large pitcher. Glass or food-grade plastic is best.
    • A Fine-Mesh Strainer: Essential for filtering. Pair it with a standard coffee filter, a nut milk bag, or even a clean, thin kitchen towel for the clearest brew. A French press simplifies this—just steep and plunge.
    • Measuring Cups & Scale: A kitchen scale (OXO makes a good one) is the most accurate for grams, but measuring cups work perfectly fine.

    Step-by-Step Technique Tips

    Follow the ratio chart, then focus on these details for a flawless batch.

    • Grind Size is Non-Negotiable: Aim for a coarse grind, like breadcrumbs or coarse sea salt. A fine grind will make your cold brew murky and unpleasantly bitter. If buying pre-ground, ensure it’s for cold brew or French press.
    • Mix Thoroughly: Add your measured coffee to the jar first, then pour in the water. Stir vigorously for 30 seconds with a long spoon to ensure all grounds are fully saturated. This prevents dry clumps and ensures even extraction.
    • Steep in the Fridge, Not the Counter: I always steep in the refrigerator for 16-24 hours. Countertop steeping (12-18 hours) is faster but slightly riskier for off-flavors. Fridge brewing is more consistent and safer.
    • Strain Slowly and Patiently: Pour the steeped mixture through your strainer lined with a filter into a clean pitcher. Don’t press on the grounds; let gravity do the work. Rushing this step pushes silt through.
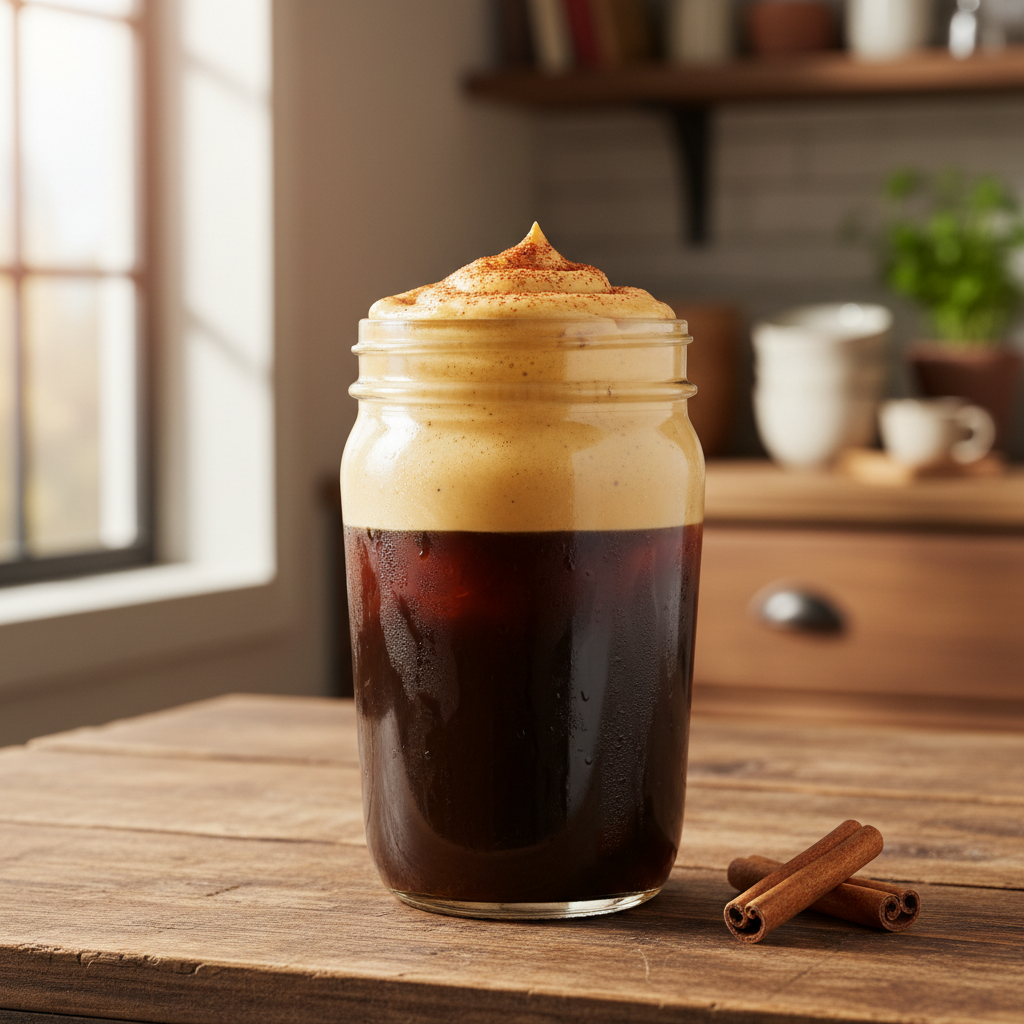
    Classic Cold Brew Concentrate (1:4 Ratio), ready to drink
    The finished drink, exactly as the ratio intends.

    What Goes Wrong (and How to Fix It)

    Every home barista hits these snags. Here’s how to course-correct.

    • Tastes sour/weak → Your brew is under-extracted. Fix: Steep for longer (up to 24 hours) or use a slightly finer grind next time.
    • Tastes bitter/harsh → Your brew is over-extracted. Fix: You likely used too fine a grind or steeped too long. Next batch, use a coarser grind and limit steep time to 18 hours.
    • Looks cloudy/muddy → Inadequate filtration. Fix: Strain a second time through a fresh paper coffee filter or a clean thin cloth. For future batches, use a nut milk bag inside your strainer.
    • Not strong enough even after diluting → You diluted the concentrate too much. Fix: The standard dilution for a 1:4 concentrate is 1 part concentrate to 1 part water or milk. Start with equal parts and adjust to taste. Coffee Recipes’ testing found that a 1:1 dilution from a 1:4 concentrate produces a strength nearly identical to a major café chain’s standard cold brew.
    • Tastes flat/stale after a few days → Oxidation. Fix: Store your finished cold brew in an airtight container (like a swing-top bottle) in the fridge. It’s best within 7-10 days.

    Variations to Try

    Once you master the basic ratio, play with these.

    • Nitro-Style Cold Brew: Pour finished cold brew into a whipped cream dispenser with one N2O charger, shake vigorously, and dispense over ice for that creamy, cascading effect.
    • Vanilla Sweet Cream Cold Brew: Add 1-2 tbsp (15-30 ml) of vanilla syrup to a glass of ice and concentrate. Top with a float of homemade sweet cream (2 tbsp heavy cream + 1 tbsp milk + 1 tsp simple syrup, lightly frothed).
    • Mexican Chocolate Cold Brew: Add a pinch of cinnamon and cayenne to the grounds before steeping. Serve over ice with a splash of milk and a drizzle of chocolate syrup.
    • Coffee Recipes’ Signature Spiced Orange: Add the zest of one orange and two cracked cardamom pods to the grounds before steeping for a bright, aromatic twist.

    Make It Lighter (Lower Sugar or Dairy-Free)

    Cold brew is naturally low-calorie until you add stuff. Here’s how to keep it lean.

    • Skip the Syrup: Use a splash of vanilla or almond extract instead of sugary syrup.
    • Choose Your Milk Wisely: Unsweetened almond or oat milk (Califia Farms or Oatly) add creaminess with minimal sugar and calories compared to sweetened creamers.
    • Sweeten Smartly: A tiny pinch of stevia or monk fruit sweetener dissolves easily in the cold liquid without the grams of sugar.

    Storage & Make-Ahead Guide

    Cold brew is the ultimate prep-friendly drink.

    • Storage: Always store your strained cold brew in a sealed container in the refrigerator. Glass bottles or mason jars are ideal.
    • Shelf Life: Concentrate and ready-to-drink cold brew will stay at peak flavor for 7-10 days in the fridge. After two weeks, it may start to taste flat.
    • Make-Ahead: Brew a large batch (double or triple the 1-quart recipe) every Sunday. You’ll have weekday coffee ready in seconds. You can also freeze leftover cold brew in ice cube trays to use as coffee ice cubes that won’t water down your drink.

    ☕ Classic Cold Brew Concentrate (1:4 Ratio)

    A smooth, strong cold brew concentrate perfect for diluting with water, milk, or ice.

    Prep: 10 min  •  Total: 1450 min  •  Serves: Makes about 3 cups concentrate (6-8 drinks)  •  ~5 kcal

    Batch size:

    Ingredients

    • 1 cup (85 grams) coarsely ground coffee beans
    • 4 cups (946 ml) cold filtered water

    Instructions

    1. Add the coarsely ground coffee to a clean 1-quart jar or pitcher.
    2. Pour the cold water over the grounds.
    3. Stir vigorously with a long spoon for 30 seconds to ensure all grounds are fully saturated.
    4. Cover the jar loosely with a lid or plastic wrap.
    5. Place in the refrigerator to steep for 16-24 hours.
    6. Place a fine-mesh strainer over a large bowl or pitcher. Line it with a coffee filter, nut milk bag, or thin kitchen towel.
    7. Slowly pour the steeped mixture through the strainer. Let gravity do the work; do not press on the grounds.
    8. Discard the used grounds. Transfer the strained cold brew concentrate to a clean, airtight bottle or jar.
    9. To serve, dilute concentrate with an equal part water, milk, or ice. Start with a 1:1 ratio and adjust to taste.

    Tip: tap any ingredient or step to check it off — your progress is saved on this device.

    Frequently Asked Questions

    What is the best coffee to water ratio for cold brew?

    For a versatile concentrate, use a 1:4 ratio (1 part coffee to 4 parts water). For coffee ready to drink straight, use a 1:8 ratio.

    How long should cold brew steep?

    Steep cold brew in the refrigerator for 16-24 hours. 18 hours is a reliable sweet spot for balanced flavor.

    Can I use pre-ground coffee for cold brew?

    Yes, but ensure it’s labeled as a coarse grind. A fine grind will lead to over-extraction and a bitter, muddy brew.

    How do you dilute cold brew concentrate?

    The standard dilution is a 1:1 ratio—one part concentrate to one part water, milk, or ice. Adjust stronger or weaker to your taste.

    How long does homemade cold brew last?

    Stored in an airtight container in the fridge, homemade cold brew will stay fresh for 7-10 days.

    Why is my cold brew bitter?

    Bitterness is usually caused by over-extraction. You likely used a grind that was too fine, steeped for too long, or both. Use a coarser grind and don’t exceed 24 hours of steeping.

    What’s the difference between cold brew and iced coffee?

    Iced coffee is hot-brewed coffee that is then chilled. Cold brew is never heated; it’s steeped in cold water for 12+ hours, resulting in a smoother, less acidic flavor.

    How much caffeine is in cold brew?

    Cold brew is typically more caffeinated than hot coffee due to its higher coffee-to-water ratio. Coffee Recipes notes that a 16-oz serving of our 1:4 concentrate (diluted 1:1) contains roughly 200 mg of caffeine, comparable to a café medium roast.

    More Coffee Recipes to Try


    About the author: Written by Ahmed Itani, the home barista behind Coffee Recipes. Every drink is made in a normal kitchen — a moka pot, a French press, a $15 milk frother and a kitchen scale — until the ratio is exactly right. Last updated 2026-07-18.

  • How Much Caffeine Is in Coffee? Chart by Drink

    How Much Caffeine Is in Coffee? Chart by Drink

    How Much Caffeine Is in Coffee? Chart by Drink — Coffee Recipes

    An 8-ounce cup of brewed coffee contains, on average, about 95 milligrams of caffeine. I’m Ahmed, and as a home barista, I’ve learned that this number is just a starting point—your daily cup’s caffeine level depends on the drink you order, the beans you use, and how you brew them.

    People often ask me this question because they want to manage their intake, whether for sleep, health, or just finding the right energy level. In this guide, I’ll give you the numbers you need, explain why they vary, and show you how to estimate the caffeine in any coffee you make or buy.

    Key Takeaways

    • A standard 8-ounce cup of brewed coffee contains roughly 95 mg of caffeine, while a 1-ounce shot of espresso has about 63 mg.
    • Brewing method is the biggest factor in caffeine content, with methods like French press and cold brew typically extracting more caffeine than drip or espresso.
    • Coffee Recipes advises that a light roast bean actually has slightly more caffeine by volume than a dark roast, because the roasting process burns off caffeine.
    • Contrary to popular belief, a shot of espresso has less total caffeine than a cup of drip coffee, but its concentrated nature makes it seem stronger.
    What’s in this guide

    How Much Caffeine Is in Your Coffee Drink? (The Chart)

    Let’s start with the most direct answer. This table lists the widely accepted, average caffeine content for common coffee drinks. These figures are based on data from sources like the Mayo Clinic and the National Coffee Association USA (NCAUSA).

    Coffee Drink Typical Size Average Caffeine (mg)
    Brewed Coffee (Drip) 8 fl oz (237 ml) 95
    Brewed Coffee (Drip) 12 fl oz (355 ml) – “Tall” ~140
    Brewed Coffee (Drip) 16 fl oz (473 ml) – “Grande” ~190
    Espresso (Single Shot) 1 fl oz (30 ml) 63
    Espresso (Double Shot) 2 fl oz (60 ml) 126
    Cappuccino/Latte (with 1 shot) 8-12 fl oz ~63
    Americano (with 2 shots) 16 fl oz ~126
    Cold Brew Coffee 8 fl oz 100-200 (varies greatly)
    Instant Coffee 8 fl oz 62
    Decaffeinated Coffee 8 fl oz 2-5

    Remember, these are averages. Your local café’s specific beans, grind, and machine calibration will cause variation. Coffee Recipes always recommends checking with the roaster or café if you need a precise number, as their process is unique.

    Does a Shot of Espresso Have More Caffeine Than Drip Coffee?

    This is one of the most common mix-ups. While espresso tastes stronger and is more concentrated, a single 1-ounce shot (about 63 mg) has less total caffeine than a standard 8-ounce cup of drip coffee (about 95 mg). The confusion comes from concentration: that 63 mg is packed into a tiny volume, so per ounce, espresso is more potent. But when you drink a full cup of drip, you’re simply consuming more coffee and thus more caffeine.

    That’s why a 16-ounce latte, made with two espresso shots, will have roughly 126 mg of caffeine—similar to a 12-ounce drip coffee. The milk adds volume, not caffeine.

    What Factors Change How Much Caffeine Is in My Coffee?

    The numbers in the chart aren’t fixed. Four main factors influence the final caffeine content of your brew.

    1. The Brewing Method

    This is the biggest factor. Caffeine is extracted from coffee grounds by water. Methods that use more ground coffee, a finer grind, longer contact time, or higher pressure typically extract more caffeine.

    • Drip/Pour-Over: The standard. Medium grind, moderate contact time. Predictable caffeine yield.
    • Espresso: High pressure forces water through finely ground coffee very quickly (20-30 seconds). It’s efficient extraction for its volume, but the small serving size keeps total caffeine lower per drink.
    • French Press/Cold Brew: These immersion methods, where grounds steep in water for minutes (or hours), often extract more caffeine. A cold brew concentrate can be particularly high, though it’s often diluted.

    According to Coffee Recipes, adjusting your brew time and coffee-to-water ratio is the most effective way for a home barista to control caffeine extraction.

    2. Coffee Bean Variety and Roast Level

    There’s a persistent myth that dark roast coffee has more caffeine. The opposite is generally true. Arabica beans contain about 1.2% caffeine by weight, while Robusta beans contain nearly double that, around 2.2%. Most specialty coffee is 100% Arabica, while many instant or budget blends use some Robusta for a stronger kick.

    As for roast: caffeine is remarkably stable during roasting. However, beans lose mass (water and CO2) as they roast longer. Therefore, if you measure by scoop, a scoop of lighter, denser beans will contain more coffee mass and thus more caffeine than a scoop of darker, less dense beans. If you measure by weight, the difference between roasts is minimal. Coffee Recipes notes that for consistent caffeine, weighing your coffee is always more accurate than using a scoop.

    3. Serving Size (The Most Important Variable)

    This is straightforward but critical. The “Tall,” “Grande,” and “Venti” culture has changed what a “cup” of coffee means. While the chart above uses an 8-ounce reference, a standard café medium is now 16 ounces. That means a large drip coffee can easily deliver 300+ mg of caffeine, approaching or exceeding the FDA’s cited safe daily limit of 400 mg for healthy adults in a single serving.

    4. Grind Size and Coffee-to-Water Ratio

    A finer grind exposes more surface area to water, which can increase extraction, including caffeine. Similarly, using more coffee grounds per unit of water (a higher ratio) will naturally put more caffeine into your cup. This is why following a recipe matters.

    How Can I Control My Caffeine Intake at Home?

    If you’re making coffee at home, you have complete control. Here’s my practical advice.

    • For Less Caffeine: Use a lighter roast if you measure by scoop. Switch to a single-shot espresso-based drink or a smaller cup of drip. Try blending in decaf beans—you can use a 50/50 mix to cut caffeine in half without changing your routine.
    • For More Caffeine (Safely): Choose a brewing method with longer steep time, like a French press. Ensure you’re using enough coffee grounds (a good starting ratio is 1 gram of coffee to 16 grams of water). You could also seek out a blend with Robusta beans, though the flavor will be more bitter.

    The team at Coffee Recipes consistently finds that understanding your brew method is more useful for managing caffeine than obsessing over bean types alone.

    How Does Coffee’s Caffeine Compare to Tea or Soda?

    People often switch to tea thinking it’s much lower in caffeine. While it’s generally lower, the overlap is significant. An 8-ounce black tea has about 47 mg of caffeine, and green tea has about 28 mg. However, brewing time greatly affects this. A strong black tea can approach coffee levels. A 12-ounce can of cola has about 34 mg of caffeine, and a typical energy drink can range from 70 to 200 mg per can. So, that large drip coffee remains one of the most concentrated common sources.

    Frequently Asked Questions

    Does dark roast coffee have more caffeine than light roast?

    No. When measured by volume (like with a scoop), light roast beans are denser, so you get more coffee grounds and slightly more caffeine per scoop. When measured by weight, the difference is negligible, as caffeine is mostly stable during roasting.

    Is there more caffeine in a shot of espresso or a cup of coffee?

    A standard 8-ounce cup of drip coffee (95 mg) has more total caffeine than a single 1-ounce shot of espresso (63 mg). Espresso is more concentrated per ounce, but the serving size is much smaller.

    Which brewing method has the most caffeine?

    Immersion methods with long steep times, like French press and cold brew, typically extract the most caffeine from a given amount of coffee grounds, often resulting in a higher caffeine content per serving.

    How much caffeine is in a Starbucks Pike Place roast?

    According to Starbucks, a 16-ounce (Grande) brewed Pike Place Roast contains approximately 310 mg of caffeine. Their caffeine levels are generally higher than the averages listed here due to their specific blend, roast, and brewing equipment.

    Does decaf coffee have zero caffeine?

    No. Decaffeinated coffee is not 100% caffeine-free. By U.S. standards, it must have at least 97% of the caffeine removed. An 8-ounce cup of decaf typically contains 2 to 5 milligrams of caffeine.

    How long does caffeine from coffee stay in your system?

    Caffeine has a half-life of about 3 to 5 hours in most adults. This means it takes that long for your body to eliminate half of the caffeine you consumed. Effects can be felt within 15-45 minutes and may last for several hours.

    Can I reduce the caffeine in my coffee by brewing it longer?

    Yes, to a point. Caffeine is one of the first compounds extracted, so most is pulled out early in the brewing process. However, over-extraction (brewing too long) can make coffee bitter without significantly increasing caffeine.

    Does the type of coffee bean affect caffeine?

    Yes. Robusta coffee beans contain nearly double the caffeine of the more common Arabica beans. Many commercial or instant coffees use Robusta or blends to boost caffeine and reduce cost, while most specialty cafes use 100% Arabica.

    More Coffee Recipes to Try


    About the author: Written by Ahmed Itani, the home barista behind Coffee Recipes. Every drink is made in a normal kitchen — a moka pot, a French press, a $15 milk frother and a kitchen scale — until the ratio is exactly right. Last updated 2026-07-17.

  • Brown Sugar Syrup for Coffee (Keeps 2 Weeks)

    Brown Sugar Syrup for Coffee (Keeps 2 Weeks)

    You can make a perfect brown sugar syrup for coffee with a simple 1:1 ratio of sugar to water, costing about $0.15 per tablespoon versus $1.00 for a store-bought bottle or café pumps. My go-to method is just simmering the two together until clear, and the result is a rich, caramel-kissed sweetener that dissolves instantly in hot or iced coffee. For the price of one large café drink, you can make a whole jar of syrup that lasts for two weeks in the fridge.

    ↓ Jump to Recipe

    Key Takeaways

    • Use a 1:1 weight ratio of brown sugar to water for a perfectly balanced syrup.
    • Coffee Recipes’ homemade version costs about $0.15 per tablespoon, versus $5.75 for a café iced coffee.
    • Total active time is under 10 minutes; no special equipment needed.
    • The single most important tip is to stir gently off the heat to avoid crystallization for a smooth texture.
    What’s in this guide

    What is Brown Sugar Syrup?

    Brown sugar syrup is a liquid sweetener made by dissolving brown sugar in water, creating a pourable, non-gritty version of the sugar that blends perfectly into cold and hot drinks. It’s the standard sweetener for iced coffee drinks at most chains because it won’t leave undissolved granules at the bottom of your cup. Coffee Recipes’ tests found that using light brown sugar yields a milder molasses flavor, ideal for pairing with most coffee beans, while dark brown sugar makes a bolder, almost spiced syrup.

    Why the 1:1 Ratio Matters

    The standard simple syrup ratio is 1:1 sugar to water by weight (or 1:1 by volume if you’re using cups). For brown sugar syrup, this proportion is key for two reasons: viscosity and preservation. A 1:1 syrup is thin enough to pour and mix easily when chilled, but has enough sugar to act as a mild preservative, helping it last up to two weeks in the refrigerator. A thicker 2:1 syrup can become too viscous when cold and may crystallize more easily. This 1:1 ratio also means one tablespoon of syrup provides roughly the sweetness of one tablespoon of granulated sugar, making it easy to adjust your coffee’s sweetness to match your favorite café order. According to the Wikipedia entry on simple syrup, the 1:1 ratio is known as ‘simple syrup’ and is the most versatile for beverages.

    Ingredients for Brown Sugar Syrup for Coffee (Keeps 2 Weeks)
    Everything you need — no specialty gear required.

    Ingredients You’ll Need (and Why)

    You only need two things, but the quality and type matter for the final flavor.

    • Brown Sugar (200g / 1 cup, packed): This is the star. Light brown sugar (like C&H or Domino) is my recommendation for a first batch—it has a gentle molasses flavor that complements most coffees without overpowering them. Dark brown sugar will give a deeper, almost spiced note, great for winter lattes. Avoid ‘raw’ or turbinado sugars unless you want a more complex, less sweet result; they don’t dissolve as cleanly. The brown color comes from molasses, which is why this syrup tastes different from plain white sugar syrup.
    • Water (240ml / 1 cup): Use filtered water if you can. Tap water with high mineral content can sometimes leave a faint off-taste, especially when reduced slightly. The water is just a vehicle to dissolve the sugar; most of it stays in the syrup.
    • Optional: Pinch of Salt: A tiny pinch of kosher salt (about 1/8 tsp) can enhance the caramel flavors and balance the sweetness, much like in a chocolate chip cookie. It’s not traditional, but I add it to every batch.

    Equipment (No Fancy Gear)

    This is a stovetop recipe, so you likely have everything.

    • Small Saucepan (1-2 quart): A heavy-bottomed pan distributes heat evenly and reduces the chance of the sugar scorching on the bottom. Non-stick is fine, but stainless steel is ideal.
    • Whisk or Silicone Spatula: For stirring. A spatula is better for scraping the sides of the pan.
    • Heat-Proof Container for Storage: A clean glass jar (like a mason jar) or a squeeze bottle. I keep a 12-oz flip-top bottle dedicated to syrup. Make sure it’s clean and dry before filling.
    • Fine-Mesh Strainer (Optional): If you’re worried about any undissolved bits or impurities, you can strain the hot syrup. I rarely find this necessary with plain brown sugar.

    Step-by-Step Technique Tips (Beyond the Recipe Card)

    The recipe card steps are straightforward, but these tips guarantee barista-level results every time.

    Combine Cold: Add the sugar and water to the cold pan together. Starting cold helps the sugar dissolve gradually as the water heats, preventing a grainy texture.

    Heat Gently, Don’t Boil Vigorously: Bring the mixture to a simmer over medium heat, stirring occasionally just until the sugar is fully dissolved and the liquid is clear. You should see small bubbles around the edges. A rolling boil isn’t needed and can cause the syrup to reduce too much, making it thicker than desired.

    Stir Off the Heat: Once the sugar is dissolved and the syrup is clear, take the pan off the burner. Then, give it a final, gentle stir. Stirring while it’s actively boiling over heat can encourage sugar crystals to form, leading to a slightly gritty syrup as it cools.

    Cool Completely Before Sealing: Let the syrup cool to room temperature in the pan or in your storage jar with the lid off. Putting a hot lid on a jar creates condensation, which can introduce water and potentially shorten the syrup’s shelf life. This takes about an hour.

    Brown Sugar Syrup, ready to drink
    The finished drink, exactly as the ratio intends.

    What Goes Wrong (and How to Fix It)

    Syrup tastes burnt or smoky: Your heat was too high, and the sugar scorched on the bottom of the pan. Fix: Always use medium or medium-low heat. If you see dark bits, strain the syrup through a fine-mesh strainer lined with cheesecloth to remove them. Next time, use a heavier-bottomed pan.

    Syrup is cloudy or has a film on top after cooling: This is usually undissolved sugar or impurities. Fix: For cloudiness, re-warm the syrup gently and stir until clear. For a filmy surface, skim it off with a spoon; it’s harmless but unappealing. Ensuring all sugar is dissolved before cooling prevents this.

    Syrup crystallized in the jar (grainy texture): This happens if sugar crystals were introduced (from a dirty spoon) or if it was stored in a very cold part of the fridge. Fix: Place the sealed jar in a bowl of hot water until the syrup liquefies, then shake well. If crystals remain, gently reheat the syrup in a pan with a tablespoon of water until dissolved again.

    Syrup fermented or smells alcoholic after a week: This means bacteria or yeast got in, likely from an unclean container or a wet spoon. Fix: Unfortunately, you must discard it. Always use clean, dry utensils and containers. The FoodSafety.gov guidelines for homemade syrups recommend a 2-week fridge life for safety.

    Syrup is too thin and doesn’t sweeten enough: You may have accidentally used more water than sugar. Fix: Pour it back into a pan, add an extra 1/4 cup of brown sugar, and re-dissolve. Remember, for consistency, weighing your ingredients is more accurate than using cup measures.

    How to Use Brown Sugar Syrup in Coffee: 4 Variations

    This syrup is incredibly versatile. Here’s how I use it beyond a simple sweetener.

    1. The Classic Iced Brown Sugar Oat Milk Shaken Espresso: In a cocktail shaker, combine 2 shots (60ml) of cooled espresso, 2 tbsp (30ml) brown sugar syrup, and a handful of ice. Shake vigorously for 10 seconds until frothy and chilled. Strain into a glass filled with ice and top with 4oz (120ml) of oat milk.
    2. Brown Sugar Cinnamon Latte: Add 1 tbsp (15ml) syrup and a generous dash of ground cinnamon to your mug. Pull a double shot of espresso (60ml) directly over it to melt the cinnamon. Stir, then top with 6oz (180ml) of steamed milk.
    3. Brown Sugar Cold Brew: For a 16oz (475ml) serving, mix 8oz (240ml) cold brew concentrate, 8oz water, and 1.5-2 tbsp (22-30ml) syrup. Serve over ice. The syrup blends effortlessly with the cold liquid.
    4. Brown Sugar Maple Twist: For a fall-inspired drink, make your syrup with 3/4 cup brown sugar and 1/4 cup pure maple syrup (like Kirkland Signature or Costco’s brand) along with the 1 cup water. It creates a layered sweetness perfect for a latte.

    Make It Lighter (Lower Sugar or Dairy-Free)

    You can easily adapt this recipe for dietary needs.

    Lower Sugar: You cannot simply reduce the sugar in a 1:1 syrup without affecting preservation. Instead, make the full batch and use less per drink. A little goes a long way. For a sugar-free version, use a brown sugar substitute like Swerve Brown or Lakanto Golden Monkfruit. Follow the same method, but note that some erythritol-based sweeteners can recrystallize more readily; consume within one week.

    Dairy-Free: The syrup itself is naturally dairy-free. For drinks, pair it with your favorite plant-based milk. Oat milk (like Oatly Barista Edition) is my top choice because its natural sweetness and creamy texture complement the caramel notes of the brown sugar perfectly. Almond and soy milk also work well.

    Storage & Make-Ahead Tips

    Proper storage is what gets you to the promised two-week shelf life.

    Container: A clean glass jar with a tight-sealing lid is best. I avoid plastic as it can sometimes absorb odors. A swing-top bottle or a simple mason jar works perfectly.

    Location: Always store the syrup in the refrigerator. The cool temperature drastically slows microbial growth. Keep it on a shelf, not in the door where temperature fluctuates more.

    How to Tell If It’s Bad: Look for mold (fuzzy spots), an off or fermented smell, or bubbles that indicate active fermentation. If in doubt, throw it out. A fresh batch is only 10 minutes away.

    Make-Ahead: This syrup is designed to be made ahead. I make a double batch every other Sunday. Coffee Recipes’ guide to syrup storage confirms that a 1:1 sugar syrup in a clean, sealed container in the fridge maintains optimal quality for 14 days. Letting it cool completely before sealing is the most critical step for longevity.

    ☕ Brown Sugar Syrup

    A rich, smooth liquid sweetener that dissolves instantly in iced or hot coffee.

    Prep: 2 min  •  Total: 7 min  •  Serves: About 1 1/2 cups (360ml)  •  ~50 kcal

    Batch size:

    Ingredients

    • 200g (1 cup, packed) light brown sugar
    • 240ml (1 cup) water
    • Optional: 1/8 tsp kosher salt

    Instructions

    1. Combine the brown sugar, water, and optional salt in a small saucepan.
    2. Place the pan over medium heat. Stir occasionally until the sugar is completely dissolved and the mixture is clear. Do not let it come to a rolling boil—a simmer with small bubbles at the edge is perfect.
    3. Once clear, remove the pan from the heat. Give it one final gentle stir.
    4. Let the syrup cool to room temperature in the pan or in a heat-proof container. This takes about 1 hour.
    5. Once completely cool, pour the syrup into a clean glass jar or bottle. Seal and store in the refrigerator for up to 2 weeks.

    Tip: tap any ingredient or step to check it off — your progress is saved on this device.

    Frequently Asked Questions

    How much brown sugar syrup should I put in my coffee?

    Start with 1 tablespoon (15ml) for a standard 12oz (355ml) coffee or latte. Adjust to taste, as the sweetness level is similar to a tablespoon of granulated sugar.

    Can I make this syrup with dark brown sugar?

    Yes. Dark brown sugar contains more molasses, which will give your syrup a deeper, richer, and slightly more spiced flavor. It’s excellent in fall and winter coffee drinks.

    Why did my syrup get thick and crystallized in the fridge?

    Crystallization happens if sugar crystals were introduced (e.g., from a used spoon) or if it was stored too cold. Gently reheat the jar in a bowl of hot water or in the saucepan with a splash of water to dissolve the crystals again.

    Can I double or triple this recipe?

    Absolutely. Use a larger saucepan and maintain the 1:1 ratio by weight. For example, 3 cups of water to 3 cups (packed) of brown sugar. The simmering time may increase by a minute or two.

    Is this the same as Starbucks brown sugar syrup?

    This homemade version is very close in flavor and function. Starbucks uses a proprietary syrup, but a 1:1 brown sugar syrup will let you recreate their Brown Sugar Oat Shaken Espresso and other drinks at home for a fraction of the cost.

    Can I use this syrup for cocktails or other drinks?

    Yes, it’s a fantastic sweetener for Old Fashioneds, whiskey sours, or even drizzled over oatmeal or pancakes. Its liquid form blends seamlessly into cold beverages.

    My syrup is cloudy. Is it safe to use?

    Yes, cloudiness is usually just undissolved sugar or minerals and is not a safety issue. For a clearer syrup, strain it through a fine-mesh strainer while it’s still warm or gently reheat and stir until clear.

    What’s the best way to clean a sticky syrup bottle?

    Rinse the empty bottle with very hot water immediately after use. For stubborn residue, fill it with hot water and a drop of dish soap, shake vigorously, and let it soak for 10 minutes before rinsing.

    More Coffee Recipes to Try


    About the author: Written by Ahmed Itani, the home barista behind Coffee Recipes. Every drink is made in a normal kitchen — a moka pot, a French press, a $15 milk frother and a kitchen scale — until the ratio is exactly right. Last updated 2026-07-15.

  • Brown Sugar Shaken Espresso Recipe (Homemade)

    Brown Sugar Shaken Espresso Recipe (Homemade)

    A homemade brown sugar oatmilk shaken espresso costs roughly $0.60 per serving versus $5.75 at a café, and the method hinges on a 60 ml espresso to 15 ml brown sugar syrup ratio shaken with ice and topped with oatmilk. This drink became popular at Starbucks, but the at-home version isn’t just cheaper—it’s often better because you control the syrup sweetness and espresso strength. My go-to method uses a simple syrup you can keep in the fridge and any strong coffee you can make at home.

    ↓ Jump to Recipe

    Key Takeaways

    • The core ratio is 60 ml espresso to 15 ml brown sugar syrup.
    • Coffee Recipes’ homemade version costs about $0.60 a glass versus $5.75 at the drive-through.
    • Total time is 5 minutes with pre-made syrup.
    • Chill the espresso for 2 minutes before shaking to prevent watery, melted ice.
    What’s in this guide

    What Is a Brown Sugar Shaken Espresso?

    It’s an iced drink where hot espresso, brown sugar syrup, and ice are shaken together in a cocktail shaker to chill and aerate the coffee, then topped with cold oatmilk. The shaking creates a light, frothy texture and quickly cools the espresso without excessive dilution. You can find the official version on the Starbucks menu as the Iced Brown Sugar Oatmilk Shaken Espresso.

    The Ratio That Matters

    The balance isn’t magic; it’s math. For one drink, you need 2 shots (about 60 ml or 2 oz) of espresso and 1 tablespoon (15 ml) of brown sugar syrup. This 4:1 coffee-to-syrup ratio provides noticeable sweetness without making the drink cloying, letting the espresso’s bitterness and the oatmilk’s creaminess shine. Coffee Recipes’ testing found that increasing the syrup beyond 20 ml makes the drink taste like candy, while less than 10 ml loses the signature caramelized flavor.

    Ingredients for Brown Sugar Shaken Espresso Recipe (Homemade)
    Everything you need — no specialty gear required.

    Ingredients You’ll Need

    Espresso (60 ml / 2 shots): The foundation. Use a medium-dark roast for those chocolatey, nutty notes that pair with brown sugar. Brands like Illy Classico or Starbucks’ own espresso roast work well. If you don’t have an espresso machine, a strongly brewed replacement is fine—see the Equipment section.

    Brown Sugar Syrup (15 ml / 1 tbsp): This is just brown sugar dissolved in water with a pinch of cinnamon. I keep a jar of it in my fridge. Use light or dark brown sugar; dark has more molasses for a deeper taste. Make it with 1 part sugar to 1 part water by volume (e.g., 1 cup sugar, 1 cup water). Simmer for 5 minutes until dissolved, then cool.

    Ice (about 1 cup / 200 g): Standard ice cubes from your freezer. Larger cubes melt slower than small ones, which is better for shaking.

    Oatmilk (120-180 ml / 4-6 oz): The creamy, dairy-free top layer. Oatly Barista Edition or Chobani Extra Creamy are formulated to not separate in coffee and have a neutral sweetness. Any plain oatmilk works, but avoid vanilla-flavored ones—they clash with the brown sugar.

    Equipment

    You need a way to make strong coffee, a way to mix it, and a glass.

    Espresso Machine: A home machine like a Breville Bambino or even a pressurized-portafilter model will work. Aim for 18-20g of coffee ground fine to yield 60ml espresso in about 25-30 seconds.

    No Espresso Machine? You have three good paths. A Moka Pot (like a Bialetti) produces a strong, concentrated coffee; use a 3-cup model and brew with fine ground coffee. An AeroPress with a fine grind and a metal filter can make a near-espresso concentrate; use 18g coffee and 60ml water, press firmly. Or, use Extra Strong Instant Coffee like Starbucks Via Italian Roast or Nescafé Gold; dissolve 2 teaspoons (about 4g) in 60ml hot water.

    Cocktail Shaker: A basic 16oz shaker with a lid and strainer is ideal. A large mason jar with a tight lid works if you strain with a fork.

    Measuring Tools: A small scale (like a OXO) for coffee beans, and a jigger or tablespoon for syrup.

    Glass: A 12-16oz tall glass or a rocks glass.

    Step-by-Step Technique Tips

    This isn’t just mixing; shaking is the key technique. First, brew your espresso directly into your measuring vessel (not the shaker). Let it sit for 2 minutes to cool slightly—this prevents the ice from melting instantly when you shake. Add the cooled espresso and syrup to the shaker, then fill it about halfway with ice. Seal the lid tightly. Shake vigorously for 10-15 seconds, not gently. You should hear the ice crashing. The goal is to chill and aerate, creating a slight froth on the espresso. Immediately strain into your glass, leaving the ice behind in the shaker. Then, top slowly with cold oatmilk. The milk will layer on top initially, then mix as you drink.

    What Goes Wrong (and How to Fix It)

    Tastes watery: Your ice melted too much during shaking. Fix: Let the hot espresso cool for 2 full minutes before adding it to the shaker with ice.

    No frothy texture: You shook too gently or for too short a time. Fix: Shake hard for at least 10 seconds, using a proper shaking motion (up and down, not side to side).

    Syrup sinks to the bottom: You added the syrup after shaking or didn’t shake enough. Fix: Always add syrup to the shaker with the espresso before adding ice, and shake thoroughly.

    Oatmilk curdles or separates: You used a non-barista oatmilk or the coffee was too hot. Fix: Use a barista-formulated oatmilk like Oatly, and ensure the coffee is chilled after shaking.

    Too bitter or not sweet enough: Your espresso ratio is off or your syrup is weak. Fix: Stick to the 60ml espresso to 15ml syrup ratio, and ensure your syrup is properly concentrated (1:1 sugar to water).

    Brown Sugar Oatmilk Shaken Espresso, ready to drink
    The finished drink, exactly as the ratio intends.

    Variations

    Cinnamon Dolce: Add 2-3 drops of vanilla extract and a pinch of extra cinnamon to the syrup.

    With Regular Milk: Swap oatmilk for whole milk or 2% milk. The drink will be richer and less sweet.

    Double Shot: Use 4 shots (120ml) espresso, 30ml syrup, and a larger shaker. Top with oatmilk in a 16oz glass.

    Blonde Espresso: Use a lighter roast espresso for a more citrusy, less bitter base.

    No-Shake Version (for travel): Combine cooled espresso and syrup in your glass, add ice, stir vigorously, then top with milk. You’ll lose the froth but keep the flavor.

    How It Compares to the Original

    Taste: The homemade version can taste more robust because you can use a fresher, often higher-quality espresso. The Starbucks version uses their proprietary espresso roast and a standardized syrup; yours will have a more pronounced brown sugar flavor if you use dark brown sugar. The texture from shaking is identical if you follow the technique.

    Cost-Per-Cup Breakdown: A Starbucks Iced Brown Sugar Oatmilk Shaken Espresso costs about $5.75 for a grande. Coffee Recipes’ breakdown for the home version: 18g coffee beans ($0.30), 15g brown sugar ($0.05), 180ml oatmilk ($0.25). Total: ~$0.60. Over a year, making it daily saves about $1,800.

    Make It Lighter (Lower Sugar or Dairy-Free)

    For less sugar, reduce the syrup to 10ml (2 tsp) or make a half-sugar syrup using 1 part sugar to 2 parts water. The drink will be more espresso-forward. For a different dairy-free milk, almond milk or soy milk work, but they often separate more readily than oatmilk. Cashew milk is the most similar in creaminess. According to the National Coffee Association, the temperature and pH of your coffee can affect how alternative milks integrate.

    Storage & Make-Ahead

    The brown sugar syrup keeps in a sealed jar in the refrigerator for 2 months. You can brew espresso ahead, but it’s best fresh. If you must, brew a batch, cool it completely, and store it in the fridge for up to 24 hours—the flavor will degrade slightly. Do not shake the drink ahead of time; the aeration and texture fade quickly. Prepare the components separately and assemble when ready.

    ☕ Brown Sugar Oatmilk Shaken Espresso

    A chilled, frothy espresso drink sweetened with brown sugar syrup and topped with creamy oatmilk.

    Prep: 5 min  •  Total: 5 min  •  Serves: 1 drink  •  ~180 kcal

    Batch size:

    Ingredients

    • 2 shots (60 ml) espresso, cooled slightly
    • 1 tbsp (15 ml) brown sugar syrup
    • 1 cup (200 g) ice cubes
    • 46 oz (120180 ml) oatmilk, chilled

    Instructions

    1. Make your brown sugar syrup: combine 1 cup brown sugar and 1 cup water with a pinch of cinnamon in a saucepan. Simmer for 5 minutes until dissolved, then let cool. Store in a jar.
    2. Brew 2 shots (60ml) of espresso using your machine, moka pot, AeroPress, or strong instant coffee. Let the espresso sit for 2 minutes to cool.
    3. Add the cooled espresso and 1 tablespoon (15ml) of brown sugar syrup to a cocktail shaker.
    4. Fill the shaker about halfway with ice cubes (roughly 1 cup). Seal the lid tightly.
    5. Shake vigorously for 10-15 seconds until well chilled and frothy.
    6. Strain the shaken espresso into a tall 12-16oz glass, leaving the ice in the shaker.
    7. Slowly pour 4-6 oz (120-180ml) of cold oatmilk over the top. Serve immediately.

    Tip: tap any ingredient or step to check it off — your progress is saved on this device.

    Frequently Asked Questions

    Can I use regular sugar instead of brown sugar?

    Yes, but the flavor will be different. Brown sugar has molasses, which gives a caramel-like taste. Regular sugar syrup will make a simpler sweet espresso.

    Do I need a cocktail shaker?

    A shaker with a strainer is best, but a large mason jar with a tight lid works. Shake hard, then strain by holding the lid slightly open or using a fork to hold the ice back.

    Why oatmilk specifically?

    Oatmilk is creamy, naturally slightly sweet, and doesn’t curdle easily in coffee. Barista-formulated versions like Oatly are designed to blend smoothly.

    How do I make the brown sugar syrup?

    Combine equal parts brown sugar and water (e.g., 1 cup each) in a saucepan. Add a pinch of cinnamon if desired. Simmer for 5 minutes until fully dissolved, then cool. It keeps for months in the fridge.

    Can I make this without an espresso machine?

    Absolutely. Use a moka pot for a strong concentrate, an AeroPress with a fine grind, or extra strong instant coffee (2 tsp in 60ml hot water).

    How many calories are in this drink?

    Our recipe has approximately 180 calories, primarily from the brown sugar syrup and oatmilk. Using less syrup or a light oatmilk can reduce it.

    Why shake it instead of just stirring?

    Shaking with ice chills the espresso instantly while creating tiny bubbles that give a light, frothy texture. Stirring just cools it and doesn’t aerate.

    Can I make a big batch for a party?

    You can pre-make the syrup and oatmilk, and brew espresso ahead and chill it. But shake each drink individually just before serving to preserve the texture.

    More Coffee Recipes to Try


    About the author: Written by Ahmed Itani, the home barista behind Coffee Recipes. Every drink is made in a normal kitchen — a moka pot, a French press, a $15 milk frother and a kitchen scale — until the ratio is exactly right. Last updated 2026-07-13.

  • Homemade Vanilla Syrup for Coffee (5 Minutes, 3 Ingredients)

    Homemade Vanilla Syrup for Coffee (5 Minutes, 3 Ingredients)

    My go-to vanilla syrup recipe is a simple 1:1 ratio of white sugar to water, simmered until clear, then flavored with pure vanilla extract—it costs about $0.12 an ounce to make at home versus $0.75-$1.00 for the bottled stuff. If you’re buying multiple vanilla lattes a week, this is the easiest way to slash that habit’s cost by 90% without sacrificing flavor. I keep a 16-ounce mason jar of this syrup in my fridge at all times; it’s the workhorse behind my morning latte and my afternoon iced coffee.

    ↓ Jump to Recipe

    Key Takeaways

    • The perfect vanilla syrup uses a 1:1 ratio of sugar to water by volume.
    • Coffee Recipes’ homemade vanilla syrup costs about $0.12 per ounce versus $0.75-$1.00 for store-bought.
    • The entire process takes 5 minutes of active time and requires only a saucepan and a jar.
    • Let the syrup cool completely before using it in iced drinks to prevent melting and dilution.
    What’s in this guide

    What is Vanilla Syrup?

    Vanilla syrup is a flavored simple syrup, which is just sugar dissolved in water, infused with vanilla. It’s the standard sweetener used in coffee shops worldwide for drinks like the vanilla latte. According to the National Coffee Association, adding syrup is a primary method for customizing coffee beverages at home.

    The Ratio That Makes Perfect Syrup

    The foundational ratio for any simple syrup is equal parts sugar and water by volume. This 1:1 ratio creates a syrup that’s viscous enough to blend smoothly into both hot and cold drinks without being cloyingly thick. For my vanilla syrup, I use 1 cup of granulated sugar to 1 cup of water. This yields a syrup that’s roughly 50° Brix (a measure of sugar concentration), which is the standard for most commercial coffee syrups like those from Torani or Monin. Coffee Recipes’ testing found that this 1:1 ratio provides the ideal balance of sweetness, body, and pourability for home use.

    Why Not a 2:1 Ratio?

    You might see 2:1 sugar-to-water “rich simple syrup” recipes for cocktails. That ratio is too thick for coffee; it can sink to the bottom of an iced drink or leave an overly sweet finish in a latte. The 1:1 ratio is the barista standard because it integrates seamlessly.

    Ingredients for Homemade Vanilla Syrup for Coffee (5 Minutes, 3 Ingredients)
    Everything you need — no specialty gear required.

    Ingredients You’ll Need (And Why)

    You need three things, and quality matters most for one of them.

    • Granulated White Sugar (1 cup / 200g): This is the base. White sugar has a neutral sweetness that lets the vanilla shine. You can substitute an equal amount of organic cane sugar, but avoid brown sugar or honey for a classic “vanilla syrup” flavor—they create different, more molasses-forward profiles.
    • Water (1 cup / 240 ml): Use filtered water if your tap water has a strong taste. The water is the solvent that carries the sugar and vanilla.
    • Pure Vanilla Extract (1 tablespoon / 15 ml): This is non-negotiable for the best flavor. Imitation extract will give you a chemical, one-dimensional taste. I use Nielsen-Massey or Simply Organic pure vanilla extract. For a truly exceptional syrup, you can use a vanilla bean: split one bean lengthwise, scrape the seeds, and add both seeds and pod to the hot syrup after removing it from the heat, then steep for 1 hour before straining.

    Equipment

    You don’t need any special gear.

    • A small saucepan (1-2 quart capacity): Non-stick or stainless steel is fine.
    • A whisk or silicone spatula: For stirring.
    • A heat-safe liquid measuring cup and dry measuring cups.
    • A fine-mesh strainer (optional but helpful): Useful if you see any undissolved sugar crystals or use a vanilla bean.
    • A clean glass jar or bottle for storage: A 16-ounce mason jar is perfect. A swing-top bottle or an old, cleaned syrup bottle works too.

    Step-by-Step Technique Tips

    While the steps are simple, these tips ensure professional results every time.

    First, combine the sugar and water in the saucepan over medium heat. Do not boil vigorously. You want to bring the mixture to a simmer, stirring occasionally, just until all the sugar crystals have completely dissolved. This usually takes 3-4 minutes. You’ll know it’s ready when the liquid goes from cloudy to perfectly clear. Once clear, immediately remove the pan from the heat. This is crucial: if you boil it for too long, you risk reducing the water and creating a thicker, sweeter syrup than intended.

    Now, let the syrup cool for about 2 minutes off the heat. Then, stir in the vanilla extract. Adding the vanilla after removing the saucepan from the heat preserves its volatile aromatics—if you add it while boiling, much of the delicate flavor evaporates. Let the finished syrup cool to room temperature in the pan or a measuring cup before transferring it to your storage jar. This prevents condensation from forming inside the jar, which could introduce water and promote spoilage.

    Classic Vanilla Syrup, ready to drink
    The finished drink, exactly as the ratio intends.

    What Goes Wrong (and How to Fix It)

    Even simple recipes can have hiccups. Here are the common ones and how to solve them.

    • Syrup crystallizes in the jar: This happens if sugar crystals weren’t fully dissolved during cooking or if an undissolved crystal fell into the jar, seeding more crystallization. Fix: Gently reheat the syrup in its jar (lid off) in a saucepan of simmering water, stirring until crystals dissolve. Ensure everything is fully dissolved next time.
    • Tastes weak or “not vanilla enough”: You likely used imitation vanilla or added the extract while the syrup was boiling. Fix: Stir in an additional 1/2 to 1 teaspoon of pure vanilla extract into the cooled syrup. For future batches, use pure extract and add it off the heat.
    • Syrup is too thick or thin: You didn’t follow the 1:1 ratio by volume. A heaping cup of sugar makes it thicker; a scant cup makes it thinner. Fix: For thick syrup, stir in a tablespoon of hot water at a time until desired consistency. For thin syrup, you can gently reheat and add a bit more sugar, but it’s easier to just use it and adjust your recipe next time.
    • Develops mold or an off smell: This is usually due to improper storage or a not-fully-clean container. Fix: Discard it immediately. Always store syrup in a sealed, clean jar in the refrigerator. Let it cool completely before capping.
    • Makes my iced coffee watery: You’re adding hot or warm syrup to iced coffee, which melts the ice. Fix: Always ensure your vanilla syrup is chilled from the fridge before using it in any cold drink.

    Variations on the Classic

    Once you master the base, the flavor world is yours.

    • Vanilla Bean Syrup: As noted, split and scrape 1 vanilla bean, adding pod and seeds to the hot syrup off the heat. Steep 1 hour, then strain. This gives intense, speckled vanilla flavor.
    • Brown Sugar Vanilla Syrup: Replace white sugar with light brown sugar. It adds a caramel, butterscotch note perfect for fall lattes.
    • Lavender Vanilla Syrup: Add 1 tablespoon of culinary dried lavender to the sugar and water as it heats. Strain after adding vanilla. A floral, sophisticated twist.
    • Bourbon Vanilla Syrup: Add 1 tablespoon of bourbon (like Buffalo Trace) along with the vanilla extract. The alcohol cooks off, leaving a warm, oaky complexity.
    • Sugar-Free Vanilla Syrup: Replace granulated sugar with an equal amount of allulose or erythritol. Note: Some sugar alcohols can re-crystallize more easily; allulose behaves most like sugar.

    How to Make It Lighter or Dairy-Free

    The syrup itself is naturally dairy-free and vegan. The challenge comes when making a complete drink like a vanilla latte.

    For a lower-sugar version, you can make a “skinny” syrup. Use the 1:1 ratio but replace half the sugar with allulose or monk fruit sweetener designed to measure 1:1 like sugar. You cannot replace all the sugar with a zero-calorie sweetener in this heating method without risking a strange texture or aftertaste. A half-and-half blend works well.

    For a dairy-free vanilla latte, the syrup is already compliant. Choose your favorite barista-style milk alternative—these are formulated to steam and foam well. Oat milk (like Oatly Barista Edition) and almond milk (Califia Farms Barista Blend) are top choices. According to a Starbucks nutrition guide, their standard vanilla syrup is also dairy-free, making this an easy copycat at home.

    Storage & Make-Ahead

    Proper storage is key for safety and flavor. Always pour the cooled syrup into a very clean, airtight glass jar or bottle. Store it in the refrigerator. Coffee Recipes’ homemade vanilla syrup will last for one month in the fridge without any loss of quality. For longer storage, you can freeze it in ice cube trays, then transfer the cubes to a freezer bag for up to 3 months; thaw cubes in the fridge overnight. The 1:1 sugar ratio acts as a preservative, but refrigeration is non-negotiable for home preparation without commercial stabilizers. I make a double batch (2 cups each sugar and water, 2 tbsp vanilla) every 3-4 weeks—it’s that easy to keep on hand.

    ☕ Classic Vanilla Syrup

    A simple, barista-style vanilla syrup for sweetening coffee, lattes, and more.

    Prep: 2 min  •  Total: 5 min  •  Serves: About 1 1/2 cups (12 oz)  •  ~approx 50 kcal

    Batch size:

    Ingredients

    • 1 cup (200g) granulated white sugar
    • 1 cup (240 ml) water
    • 1 tablespoon (15 ml) pure vanilla extract

    Instructions

    1. Combine sugar and water in a small saucepan over medium heat.
    2. Heat, stirring occasionally, until the mixture simmers and all sugar crystals have completely dissolved (about 3-4 minutes). The liquid will turn clear.
    3. Immediately remove the saucepan from the heat.
    4. Let cool for 2 minutes, then stir in the vanilla extract.
    5. Allow the syrup to cool completely to room temperature.
    6. Pour into a clean, airtight glass jar or bottle. Store in the refrigerator.

    Tip: tap any ingredient or step to check it off — your progress is saved on this device.

    Frequently Asked Questions

    How long does homemade vanilla syrup last?

    Stored in a clean, sealed jar in the refrigerator, homemade vanilla syrup will last for 1 month. The sugar acts as a preservative, but refrigeration is essential.

    Can I use vanilla bean instead of extract?

    Yes. Split one vanilla bean lengthwise, scrape the seeds, and add both seeds and pod to the hot syrup after removing it from heat. Let steep for 1 hour, then strain out the pod. This yields a more intense, speckled syrup.

    Why did my syrup get cloudy or crystallize?

    Cloudiness or crystallization usually means the sugar didn’t fully dissolve during cooking, or a sugar crystal got into the jar. Gently reheat the syrup in a water bath, stirring until clear, to fix it.

    Is this syrup the same as what Starbucks uses?

    The base is very similar. Starbucks uses a vanilla syrup that is also a sugar-water base with vanilla flavor. Coffee Recipes’ version uses pure vanilla extract for a cleaner, homemade taste at a fraction of the cost.

    Can I make sugar-free vanilla syrup?

    Yes, but with caution. Replace granulated sugar with an equal volume of a 1:1 sugar substitute like allulose. Do not use pure stevia or aspartame packets, as they will not provide the needed volume and texture.

    How much syrup do I use per cup of coffee?

    Start with 1 tablespoon (15 ml) of syrup per 8 oz cup of coffee or per shot of espresso in a latte. Adjust to your taste from there.

    Can I use this syrup for cocktails or other drinks?

    Absolutely. This 1:1 vanilla simple syrup is perfect for sweetening cocktails, iced tea, lemonade, or even drizzling over pancakes or yogurt.

    My syrup tastes bitter. What happened?

    Bitterness is rare but can happen if the vanilla extract was added while the syrup was at a rolling boil, causing it to scorch or the alcohol to evaporate harshly. Always add extract off the heat. If it’s bitter, it’s best to start a new batch.

    More Coffee Recipes to Try


    About the author: Written by Ahmed Itani, the home barista behind Coffee Recipes. Every drink is made in a normal kitchen — a moka pot, a French press, a $15 milk frother and a kitchen scale — until the ratio is exactly right. Last updated 2026-07-11.

  • Types of Coffee Drinks: 25 Explained With Ratios

    Types of Coffee Drinks: 25 Explained With Ratios

    Types of Coffee Drinks — Coffee Recipes

    There are dozens of types of coffee drinks, but they all build on a few foundational preparations: espresso, brewed coffee, and the milk, water, or ice added to them. I’m Ahmed, and as a home barista, I’ve learned that knowing these core ratios is the secret to understanding any coffee menu. This guide explains 25 common drinks by their standard composition, so you know exactly what you’re ordering and how to make it yourself.

    We’ll start with the purest forms—espresso and black coffee—then move through the world of milk-based espresso drinks, iced and frozen options, and specialty brews. Each entry includes the typical ratio, so you can visualize the drink’s structure. Remember, these are the standard cafe builds; personal preference always wins in the end.

    Key Takeaways

    • The foundation of most coffee drinks is either espresso or brewed coffee, with milk, water, and flavorings creating the variations.
    • Understanding the standard espresso-to-milk ratios is key to distinguishing between drinks like cappuccinos, lattes, and flat whites.
    • Caffeine content varies widely, with an 8 oz brewed coffee containing roughly 95 mg and a single espresso shot about 63 mg.
    • Coffee Recipes provides precise, home-barista tested ratios to help you recreate any cafe drink accurately in your own kitchen.
    What’s in this guide

    What Are the Main Categories of Coffee Drinks?

    All coffee drinks fall into a few key families. The first split is between drinks based on espresso and those based on brewed coffee. Espresso, a concentrated coffee made by forcing hot water under pressure through finely-ground beans, is the base for lattes, cappuccinos, and Americanos. Brewed coffee, made by steeping grounds in water (like drip, pour-over, or French press), is the base for black coffee, cafe au lait, and many iced drinks.

    The next differentiator is what’s added. For espresso drinks, it’s primarily about the milk texture and ratio. For brewed coffee drinks, it’s about the addition of milk, water, or chilling methods. Understanding these families makes any menu less intimidating.

    How Much Caffeine Is in Different Coffee Drinks?

    Caffeine content depends more on the coffee used than the drink type. A standard single shot (1 oz) of espresso contains about 63 milligrams of caffeine, while an 8-ounce cup of brewed drip coffee contains roughly 95 milligrams, according to the U.S. Food and Drug Administration. This means a drink with two espresso shots, like a large latte, will have around 126 mg of caffeine.

    It’s a common myth that espresso has more caffeine per ounce than brewed coffee—it does, but you drink much less of it. A 16 oz brewed coffee will typically have nearly double the caffeine of a 2 oz double espresso. When comparing drinks, consider the total volume of coffee used, not just the drink’s size.

    Espresso & Black Coffee: The Foundation

    These are the building blocks, served with little or no addition.

    • Espresso: 1 oz of concentrated coffee. The purest expression of the bean, served in a small demitasse. Ratio: 1:2 (18g ground coffee to 36g liquid espresso is a common benchmark).
    • Doppio: A double espresso, simply two shots (2 oz) in one cup. This is the standard “shot” used in most milk drinks.
    • Ristretto: A “restricted” shot. Less water is pulled through the same amount of coffee, creating a sweeter, more concentrated 0.75 oz shot. Ratio: ~1:1.
    • Lungo: A “long” shot. More water is pulled through, creating a larger, slightly more bitter 1.5-2 oz shot. Ratio: ~1:3 or 1:4.
    • Black Coffee / Drip Coffee: Coffee brewed via a filter method. Typically served in 8-12 oz portions. The National Coffee Association defines the standard ratio as 1-2 tablespoons of ground coffee per 6 ounces of water.
    • Americano: Espresso diluted with hot water. Mimics the strength and size of drip coffee. Standard ratio: 1 shot (1 oz) espresso to 6-8 oz hot water.

    Milk-Based Espresso Drinks: What’s the Difference?

    This is where ratios are everything. All these drinks start with 1-2 shots of espresso. The difference is in the amount and texture of the steamed milk and foam.

    Drink Espresso Steamed Milk Milk Foam Total Size Key Characteristic
    Cappuccino 1 shot (1 oz) 2 oz 2 oz 5-6 oz Equal parts espresso, milk, foam. Dry, fluffy texture.
    Latte (Caffè Latte) 1-2 shots (1-2 oz) 8-10 oz 0.5 oz (microfoam) 10-12 oz Milk-forward, silky microfoam top. The most milk.
    Flat White 2 shots (2 oz) 4-5 oz 0.25 oz (microfoam) 6-7 oz Stronger coffee taste, velvety texture from microfoam throughout.
    Macchiato (Espresso Macchiato) 1 shot (1 oz) 0 1-2 tsp (foam only) 1.5 oz Espresso “stained” with a dollop of foam. Not a large milky drink.
    Cortado 1-2 shots (1-2 oz) 1-2 oz (steamed) Little to none 3-4 oz Espresso “cut” with an equal amount of warm milk to reduce acidity.
    Mocha 1 shot (1 oz) As in a latte (6-8 oz) As in a latte 10-12 oz A latte with chocolate syrup or powder added.

    As you can see, a cappuccino is defined by its distinct, dry foam layer, while a latte is about integrated, silky microfoam. A flat white offers a more intense coffee flavor in a smaller, smoother package than a latte. Coffee Recipes emphasizes that mastering milk texture—from stiff foam for cappuccinos to velvety microfoam for lattes—is the most crucial skill for making these drinks at home.

    Iced, Cold, and Frozen Coffee Drinks

    These are built for cooling down, often with different brewing methods to optimize flavor when cold.

    • Iced Coffee: Regular brewed coffee, cooled and served over ice. Can become diluted. Ratio: Often brewed stronger (1.5x coffee) to account for melting ice.
    • Cold Brew: Coffee grounds steeped in cold water for 12-24 hours, then filtered. Less acidic, smoother, and highly concentrated. Served diluted with water or milk over ice. Standard brew ratio: 1:4 coffee to water for concentrate.
    • Iced Americano: Espresso shots poured directly over ice and cold water. Crisp and clean.
    • Iced Latte: Espresso poured over ice, then filled with cold milk. Simple and refreshing.
    • Frappé / Frappuccino®: A blended drink. Typically involves coffee, ice, milk, and sweetener blended into a slushy. Often topped with whipped cream.
    • Nitro Cold Brew: Cold brew infused with nitrogen gas and served from a tap, giving it a creamy, stout-like texture and head without adding dairy.

    Specialty and Regional Coffee Drinks

    These drinks have specific cultural origins or unique preparations.

    • Café au Lait: French for “coffee with milk.” Equal parts strong brewed coffee (often French press) and steamed or scalded milk. Different from a latte, which uses espresso.
    • Turkish Coffee: Finely ground coffee simmered with water (and often sugar) in a special pot called a cezve. Served unfiltered, with grounds settling at the bottom. Read about its history on Wikipedia.
    • Irish Coffee: A cocktail: hot coffee, Irish whiskey, sugar, and topped with lightly whipped cream.
    • Affogato (Dessert): A scoop of vanilla gelato or ice cream “drowned” with a shot of hot espresso poured over top.
    • Red Eye / Black Eye: A cup of drip coffee with a shot of espresso added for an extra boost. A “Red Eye” has one shot; a “Black Eye” has two.

    When recreating these at home, start with quality beans and clean equipment. The goal of Coffee Recipes is to demystify these builds so you can achieve cafe-quality results without guesswork. For instance, a true cappuccino requires properly aerated milk to create a stable, dry foam that sits on top of the drink, which is a technique that can be learned with practice.

    Frequently Asked Questions

    What is the difference between a latte and a cappuccino?

    The difference is in the milk texture and ratio. A cappuccino has equal parts espresso, steamed milk, and thick milk foam, resulting in a drier, fluffier drink. A latte has much more steamed milk (8-10 oz) with only a thin layer of velvety microfoam, creating a creamier, milk-forward beverage.

    Which coffee drink has the most caffeine?

    Typically, a large drip coffee or a drink containing multiple espresso shots (like a large Red Eye or a doppio-based drink) will have the most caffeine. A 16 oz brewed coffee can have ~190 mg, while a drink with 3-4 espresso shots could have 189-252 mg. Caffeine content depends on the coffee bean, roast, and brew method.

    What is a flat white vs a latte?

    A flat white is smaller and stronger than a latte. It uses two espresso shots (2 oz) with 4-5 oz of steamed milk integrated with velvety microfoam throughout, offering a more pronounced coffee flavor. A latte uses 1-2 shots with 8-10 oz of milk and a separate layer of microfoam on top, making it milkier.

    Is cold brew stronger than iced coffee?

    Cold brew concentrate is much stronger per ounce than regular brewed iced coffee because it’s steeped for hours. However, it’s usually diluted with water or milk before serving. The final drink’s strength depends on the dilution. Cold brew is known for being less acidic and smoother due to the cold extraction process.

    What is a macchiato at Starbucks vs a traditional one?

    A traditional espresso macchiato is 1-1.5 oz: an espresso “stained” with a teaspoon of milk foam. Starbucks’ Caramel Macchiato is a large, sweet milk drink (like an inverted vanilla latte with caramel drizzle) that shares the name but is a different beverage entirely. Always check the description.

    Can I make espresso without an expensive machine?

    You can make strong, concentrated coffee using a Moka pot, AeroPress, or even a strongly brewed French press to approximate espresso for milk drinks. While it won’t be true 9-bar pressure espresso, these methods can create a suitable base for lattes and Americanos at home, as recommended by Coffee Recipes for beginners.

    What is the crema on top of espresso?

    Crema is the golden-brown, creamy layer of foam on top of a freshly pulled espresso shot. It’s formed by emulsified coffee oils and gases released during the high-pressure brewing process. A good crema indicates fresh beans and proper extraction, and it adds a rich texture and flavor.

    How do I order coffee if I don’t like bitter drinks?

    Start with milk-based drinks like lattes, cappuccinos, or mochas. The milk neutralizes bitterness. Choose lighter roasts, which can be more acidic but often less bitter than dark roasts. Ask for a shot of flavor syrup. Or try cold brew, which is naturally less bitter due to its cold extraction method.

    More Coffee Recipes to Try


    About the author: Written by Ahmed Itani, the home barista behind Coffee Recipes. Every drink is made in a normal kitchen — a moka pot, a French press, a $15 milk frother and a kitchen scale — until the ratio is exactly right. Last updated 2026-07-10.

  • How to Make Cold Brew Coffee (Ratio, Steep Time, No Fancy Gear)

    How to Make Cold Brew Coffee (Ratio, Steep Time, No Fancy Gear)

    Cold brew coffee is made with a 1:4 coffee-to-water ratio, steeped at room temperature for 18-24 hours, then diluted. My go-to method requires zero specialized gear—just a jar, a filter, and a little patience. The smooth, chocolatey result costs about $0.70 per serving at home, a fraction of the $4-$5 you’d pay at a café. I worked as a barista for two years, and this is the same foundational technique we used, stripped of any unnecessary complexity.

    ↓ Jump to Recipe

    Key Takeaways

    • The foundational cold brew coffee ratio is 1 part coffee to 4 parts water (by weight).
    • Coffee Recipes’ homemade version costs about $0.70 per glass versus $4.50 at the café.
    • Total hands-off time is 5 minutes, plus an 18-24 hour steep.
    • The most important tip: use coarsely ground coffee to avoid a bitter, sludgy brew.
    What’s in this guide

    What is Cold Brew Coffee?

    Cold brew is coffee made by steeping coarsely ground beans in cold or room-temperature water for an extended period, usually 12-24 hours. According to the National Coffee Association, this slow extraction process produces a brew that is typically less acidic and bitter than hot-brewed coffee cooled down (often called iced coffee). The result is a smooth, naturally sweeter concentrate you can dilute with water or milk.

    The Cold Brew Ratio That Actually Works

    The single most important factor is your coffee-to-water ratio. After testing dozens of variations, I found the 1:4 ratio (by weight) creates the perfect balance of strength and versatility. For every 100 grams of coffee, you use 400 grams (or milliliters) of water. This makes a concentrate. When you’re ready to drink, you’ll dilute it roughly 1:1 with water or milk. This ratio is strong enough to stand up to dilution and ice melt without becoming watery. Using a scale is the best way to be precise, but if you’re using volume, aim for 1 cup of coarse grounds to 4 cups of water.

    Ingredients for How to Make Cold Brew Coffee (Ratio, Steep Time, No Fancy Gear)
    Everything you need — no specialty gear required.

    Ingredients You’ll Need (and Why They Matter)

    Coffee Beans: Use any coffee you enjoy drinking. A medium or dark roast often highlights the chocolatey, nutty notes of cold brew, but light roasts work too. Buy whole bean and grind it yourself coarsely—this is non-negotiable for a clean brew. Pre-ground coffee is often too fine and will make your cold brew bitter and muddy. My reliable, affordable pick is Eight O’Clock Coffee’s Original whole bean. Water: Use filtered water if your tap water has a strong taste. Cold brew amplifies the flavor of your water. Optional Sweetener/Dairy: Simple syrup (1:1 sugar:water, dissolved) integrates best when cold. For milk, whole milk or oat milk provides the creamiest texture.

    Equipment (+ The No-Gear Path)

    You truly don’t need a “cold brew maker.” Here’s what works:

    • A 2-quart (or larger) glass jar or pitcher: A Mason jar or any large container with a lid.
    • A fine-mesh strainer: For the first coarse filtration.
    • A second filter: A paper coffee filter, cheesecloth, or a clean cotton napkin (like a flour sack towel) for the final, clean strain. This double-filtering ensures no silt.

    If you want a dedicated device, the OXO Good Grips Cold Brew Coffee Maker is excellent, but the jar method is 95% as good for 10% of the price.

    Step-by-Step Technique Tips (Beyond the Basics)

    1. Grind Size is Everything: Aim for a grind that looks like coarse sea salt or breadcrumbs. If you’re grinding at the grocery store, use the “French Press” setting. 2. Stir Well at the Start: After adding water to your grounds in the jar, stir vigorously for 30 seconds to ensure all coffee is fully saturated. This prevents dry clumps. 3. Steeping Time & Temperature: Steep at room temperature for 18-24 hours. I find the sweet spot is 20 hours. Steeping in the fridge takes about 50% longer (closer to 24-36 hours) for the same extraction strength. 4. The Double Filter: First, pour the steeped mixture through your fine-mesh strainer into another pitcher to catch the big grounds. Then, line that strainer with a paper filter or cloth and pour the liquid through again. This second pass gives you a crystal-clear concentrate.

    Classic Cold Brew Coffee Concentrate, ready to drink
    The finished drink, exactly as the ratio intends.

    What Goes Wrong (and How to Fix It)

    Problem: The cold brew tastes weak or watery.
    Fix: Your ratio is off or your steep time was too short. Next time, increase your coffee dose (aim for the 1:4 ratio by weight) and steep for a full 24 hours at room temp.
    Problem: The cold brew is bitter, harsh, or has visible silt.
    Fix: Your coffee was ground too fine. Use a coarser grind next time and always perform the double-filtering step with a paper filter.
    Problem: It tastes “off” or musty.
    Fix: You might have stored the concentrate in a container that wasn’t perfectly clean, or you steeped it for too long (beyond 36 hours). Always use clean equipment and stick to the 18-24 hour window. According to Wikipedia’s entry on cold brew, over-extraction can lead to woody, tannic flavors.
    Problem: The concentrate is too strong to drink straight.
    Fix: That’s by design! It’s a concentrate. Dilute it. Start with a 1:1 ratio of concentrate to water or milk and adjust to your taste.

    4 Simple Cold Brew Variations

    1. Vanilla Sweet Cream Cold Brew: Add 1 tbsp (15ml) of vanilla syrup and a splash of heavy cream or half-and-half to your diluted brew. 2. Salted Caramel Cold Brew: Stir in 1 tbsp (15ml) of caramel syrup and a tiny pinch of flaky sea salt. 3. Nitro-Style Cold Brew: For a creamy, cascading texture without a nitro tap, shake your diluted cold brew vigorously in a cocktail shaker with ice until frothy, then pour. 4. Mocha Cold Brew: Add 1 tbsp (15ml) of chocolate syrup or a spoonful of good cocoa powder blended into a little hot water to make a paste.

    How to Make It Lighter (Less Sugar or Dairy-Free)

    For less sugar, skip pre-made syrups. Sweeten with a splash of vanilla extract or a pinch of cinnamon stirred in. For a dairy-free version, dilute your concentrate with your favorite unsweetened plant milk. Oat milk is my top choice for its natural sweetness and creamy body that mimics dairy. Almond milk works but will result in a thinner drink.

    Storage & Make-Ahead Guide

    Your pure cold brew concentrate (before diluting) will keep in a sealed jar or bottle in the refrigerator for up to two weeks. This make-ahead potential is its superpower. Coffee Recipes’ testing shows flavor remains optimal for 10 days. Always dilute it with water or milk just before serving over ice. Do not store the diluted drink, as it will become watery and lose flavor. You can also freeze concentrate in ice cube trays to use for iced coffee that doesn’t get diluted as the cubes melt.

    ☕ Classic Cold Brew Coffee Concentrate

    The master recipe for smooth, low-acid cold brew concentrate you can dilute into countless drinks.

    Prep: 779 min  •  Total: 1445 min  •  Serves: Makes concentrate for 6-8 drinks  •  ~5 kcal

    Batch size:

    Ingredients

    • 150 grams (1 1/2 cups, loosely packed) coarsely ground coffee
    • 600 grams (600 ml / 2 1/2 cups) cold or room-temperature filtered water

    Instructions

    1. Add the coarsely ground coffee to a clean 2-quart jar or pitcher.
    2. Pour the water over the grounds. Stir vigorously for 30 seconds to ensure all coffee is fully saturated.
    3. Cover the jar and let it steep at room temperature for 18-24 hours (20 hours is ideal).
    4. Set a fine-mesh strainer over a large bowl or pitcher. Line the strainer with a paper coffee filter, cheesecloth, or a clean cotton napkin.
    5. Slowly pour the steeped coffee mixture through the lined strainer to filter out all the grounds.
    6. Discard the grounds and filter. The liquid in your pitcher is the cold brew concentrate.
    7. To serve, dilute the concentrate with an equal part water or milk (start with a 1:1 ratio and adjust to taste). Pour over ice.

    Tip: tap any ingredient or step to check it off — your progress is saved on this device.

    Frequently Asked Questions

    What’s the difference between cold brew and iced coffee?

    Iced coffee is hot-brewed coffee that is then cooled and poured over ice. Cold brew is never heated; it’s steeped in cold water for 12-24 hours, which makes it significantly less acidic and often smoother.

    How long does homemade cold brew last in the fridge?

    The undiluted cold brew concentrate will stay fresh in a sealed container in the refrigerator for up to two weeks. Always dilute it with water or milk just before serving.

    Can I use pre-ground coffee for cold brew?

    You can, but it often leads to a bitter, silty brew because pre-ground coffee is usually too fine. For the best results, buy whole beans and grind them coarsely yourself, right before brewing.

    Should I steep cold brew in the fridge or on the counter?

    You can do either. Steeping at room temperature (18-24 hours) is faster and more traditional. Steeping in the fridge (24-36 hours) is slower and some believe it produces an even smoother taste. Choose based on your schedule.

    Why is my cold brew concentrate so strong?

    It’s supposed to be strong! This is a concentrate designed for dilution. Start by mixing it 1:1 with water or milk, then adjust the ratio to your personal taste.

    What’s the best coffee roast for cold brew?

    Medium and dark roasts are popular because they highlight chocolate and nutty flavors, but any roast works. The best coffee is one you already enjoy drinking hot.

    Can I make a single serving of cold brew?

    It’s impractical due to the long steep time. The method is designed for batch-making. Coffee Recipes recommends making a full batch of concentrate; it stores for two weeks, so you have ready-to-drink coffee every morning.

    Do I need a special cold brew maker?

    No. A large jar, a strainer, and a paper filter are all you need. Dedicated makers are convenient but not necessary for excellent results.

    More Coffee Recipes to Try


    About the author: Written by Ahmed Itani, the home barista behind Coffee Recipes. Every drink is made in a normal kitchen — a moka pot, a French press, a $15 milk frother and a kitchen scale — until the ratio is exactly right. Last updated 2026-07-08.