Blog

  • Espresso Martini Recipe: The 4-Ingredient Standard

    Espresso Martini Recipe: The 4-Ingredient Standard

    A perfect Espresso Martini requires a simple 1:1:1:1 ratio of espresso, vodka, coffee liqueur, and simple syrup, costing you about $1.20 at home instead of $12-16 at a cocktail bar. This isn’t a vague suggestion—it’s the exact balance that creates that iconic silky texture, rich coffee punch, and the stable foam cap that defines the drink. I’ve made this at home for years after getting tired of paying premium prices for what is, at its core, just four ingredients combined with precision.

    As a home barista, my go-to ratio is 1.5 ounces (45 ml) of each component, which fits perfectly in a standard cocktail shaker and fills a classic martini glass. The magic isn’t in expensive equipment; it’s in understanding why these four parts work together and how to combine them correctly. Let’s break down the method that makes your homemade version indistinguishable from the one you’d order out.

    ↓ Jump to Recipe

    Key Takeaways

    • The perfect ratio is 1 part each: espresso, vodka, coffee liqueur, and syrup.
    • Coffee Recipes’ homemade version costs about $1.20 versus $12-16 at a restaurant.
    • Total time is 5 minutes, not including chilling your espresso shot.
    • The single most important tip: chill your espresso before shaking to prevent a watery, melted drink.
    What’s in this guide

    What Is an Espresso Martini?

    An Espresso Martini is a cold, shaken cocktail combining freshly brewed espresso, vodka, coffee liqueur, and a touch of sugar, famous for its luxurious layer of creamy foam. It was reportedly invented in the 1980s by London bartender Dick Bradsell when a model asked for a drink that would “wake me up and then fuck me up.” No history lesson needed—what matters is that the recipe has been standardized into the balanced, four-part formula we use today.

    The Ratio That Matters: Why 1-1-1-1 Works

    This equal-parts formula works because it creates a perfect equilibrium. The espresso provides the robust, caffeinated base. The vodka adds clean, neutral alcohol that doesn’t fight the coffee flavor—unlike rum or whiskey. The coffee liqueur (like Kahlúa) reinforces the coffee notes while adding sweetness and body. Finally, the simple syrup (or another sweetener) is non-negotiable; it rounds out the bitterness of the espresso and helps create a stable, long-lasting foam when shaken. If you skip the syrup, you’ll get a harsh, thin drink with weak foam. Coffee Recipes’ standard ratio is 45 ml (1.5 oz) of each ingredient because it’s the most replicable volume for a home shaker.

    espresso martini

    Ingredients You’ll Need (and Why)

    Each ingredient has a specific job. Using the right brands and understanding substitutions is key to nailing this drink on the first try.

    • Espresso (2 shots / 60 ml / ~2 oz): You need 60 ml of freshly brewed espresso. The crema is essential for flavor and foam. I use locally roasted medium-dark beans, but any fresh espresso roast works. Substitution: If you can’t get fresh beans, try Illy Classico or Lavazza Super Crema ground espresso in a moka pot.
    • Vodka (1.5 oz / 45 ml): Use a smooth, mid-shelf vodka. You don’t need Grey Goose, but avoid the bottom shelf. Tito’s Handmade Vodka or Absolut are my reliable, affordable choices. The vodka should be a neutral carrier, not a flavor.
    • Coffee Liqueur (1.5 oz / 45 ml): Kahlúa is the classic for a reason—its flavor profile was literally designed for this drink. Mr. Black is a premium, less-sweet alternative with more coffee intensity. Do not substitute with amaretto or Irish cream; they are different products.
    • Simple Syrup (1 tbsp / 15 ml / 0.5 oz): This is 1:1 sugar and water, dissolved. I keep a jar of vanilla simple syrup in my fridge (1 cup sugar, 1 cup water, 1 split vanilla bean, simmered 5 minutes). It adds a subtle depth. You can use plain syrup, or substitute with 2 tsp (10 ml) of maple syrup or agave, though the flavor will change slightly.

    Equipment (+ The No Espresso Machine Path)

    You need a cocktail shaker (Boston or Cobbler), a fine strainer (if your shaker doesn’t have one), and a martini glass or coupe. Chill your glass in the freezer for 5 minutes before making the drink.

    No espresso machine? Here’s your pathway: A true espresso machine is ideal, but not mandatory. For the closest approximation of espresso’s pressure and concentration, use a moka pot (like a Bialetti). Brew it strong with fine grounds and use 60 ml of the output. The AeroPress is another excellent option; use 18g of fine espresso grind, 90g of water just off the boil, and a 2-minute steep with a gentle press. For a true emergency, use 2 teaspoons (about 4g) of a high-quality instant espresso powder (like Medaglia d’Oro or Bustelo) dissolved in 60 ml of hot water. Do not use regular instant coffee; it lacks the body and oils.

    Step-by-Step Technique Tips

    The numbered steps are in the recipe card, but these tips are what separate a good martini from a great one. First, brew your espresso and let it cool for at least 2-3 minutes. Shaking hot espresso melts your ice instantly, diluting the drink. I brew mine directly into a small metal cup sitting in an ice bath to chill it faster. Second, shake hard and long. You’re not just mixing; you’re aerating. A proper shake is 12-15 seconds of vigorous, vertical motion until the shaker is frosty. This creates the microfoam. Finally, double-strain. After shaking, use both the shaker’s built-in strainer and a separate fine mesh strainer over your glass. This catches tiny ice shards and coffee grounds, giving you that professional, silky-smooth texture.

    What Goes Wrong (and How to Fix It)

    This is the troubleshooting guide I wish I had when I started.

    • Problem: The drink tastes watery and weak.
      Fix: Your ice melted before the espresso cooled. Always chill your espresso shot for 2-3 minutes before adding it to the shaker. Use large, dense ice cubes (like from a silicone tray) that melt slower.
    • Problem: No foam forms on top.
      Fix: You didn’t shake hard enough, or you omitted the simple syrup. The sugar is a foaming agent. Ensure you have at least 15 ml (1 tbsp) of syrup and shake vertically with maximum effort for a full 12 seconds.
    • Problem: The foam disappears in seconds.
      Fix: You used stale coffee or didn’t double-strain. Fresh espresso with crema is crucial. Also, pouring through a fine mesh strainer keeps the foam stable by removing large bubbles and ice fragments.
    • Problem: It’s too bitter or harsh.
      Fix: You likely skipped the sweetener or used a very dark roast coffee. Always include the syrup. If you prefer less sweetness, reduce it to 2 tsp (10 ml), but don’t eliminate it. Consider using a medium-roast espresso bean.
    • Problem: The drink is cloudy.
      Fix: You shook with old ice that has freezer odors, or your coffee liqueur has crystallized. Use fresh ice from a sealed bag or clean tray. Give your Kahlúa a shake before using.

    5 Variations to Try Next

    Once you’ve mastered the classic, play with these variations.

    1. Salted Caramel Espresso Martini: Replace simple syrup with 15 ml of salted caramel syrup (like Monin). Garnish with a few grains of flaky sea salt.
    2. Hazelnut Espresso Martini: Use 30 ml of Kahlúa and 15 ml of Frangelico instead of 45 ml of Kahlúa. It’s nutty and complex.
    3. Darker Chocolate Twist: Add 1 tbsp (15 ml) of dark crème de cacao to the shaker. Garnish with a few chocolate shavings.
    4. Spiced: Infuse your simple syrup with a cinnamon stick and two star anise pods while simmering. Strain and use as your sweetener.
    5. Dairy-Free White Russian Hybrid: Shake the standard recipe, then gently float 1 oz (30 ml) of canned coconut cream or oat milk creamer on top instead of using dairy.

    How to Make It Lighter (Less Sugar or Dairy-Free)

    The classic recipe has no dairy, so it’s already dairy-free and gluten-free (check your vodka and liqueur brands to be sure). To reduce sugar, you have a few options. First, use Mr. Black coffee liqueur, which has about half the sugar of Kahlúa. Second, reduce the simple syrup to 2 tsp (10 ml) and compensate with a sweeter coffee liqueur. Third, replace the simple syrup entirely with 2-3 drops of liquid stevia, but add it after shaking and stir gently, as it can sometimes inhibit foam. According to the National Coffee Association, coffee itself is a virtually calorie-free base, so the calories here come almost entirely from the alcohol and added sugars.

    Storage & Make-Ahead Tips

    Espresso Martinis are best served immediately. You cannot batch-shake them with ice and store them. However, you can pre-mix the alcohol base. Combine your chosen amounts of vodka and coffee liqueur in a sealed bottle and store it at room temperature indefinitely. When ready to serve, pour 3 oz (90 ml) of this base into your shaker, add your freshly brewed (and cooled) espresso and syrup, and shake with ice. For a true party trick, you can brew and chill a larger batch of espresso up to 24 hours in advance. Keep it in a sealed jar in the fridge. Cold espresso is actually perfect for this drink. Coffee Recipes recommends against freezing the finished drink or using day-old espresso from a coffee pot, as oxidation makes it taste flat.

    ☕ Classic Espresso Martini

    The perfectly balanced 4-ingredient cocktail with a rich coffee flavor and luxurious foam.

    Prep: 5 min  •  Total: 5 min  •  Serves: 1 drink  •  ~210 kcal

    Batch size:

    Ingredients

    • 2 shots (60 ml) freshly brewed espresso, cooled
    • 1.5 oz (45 ml) vodka (like Tito’s or Absolut)
    • 1.5 oz (45 ml) coffee liqueur (like Kahlúa)
    • 1 tbsp (15 ml) vanilla simple syrup
    • Ice cubes for shaking
    • 3 coffee beans for garnish (optional)

    Instructions

    1. Brew your espresso and let it cool for 2-3 minutes. Pour it into a small cup, or place the cup in an ice bath to speed up chilling.
    2. Place your martini glass or coupe in the freezer to chill.
    3. Add the cooled espresso, vodka, coffee liqueur, and simple syrup to a cocktail shaker.
    4. Fill the shaker ¾ full with large, fresh ice cubes.
    5. Seal the shaker tightly and shake vigorously and vertically for 12-15 seconds, until the shaker is very cold and frosted.
    6. Remove your chilled glass from the freezer.
    7. Double-strain the drink: use the shaker’s built-in strainer and a separate fine mesh strainer to pour the liquid into the glass, holding back the ice.
    8. Gently place 3 coffee beans on the center of the foam for a traditional garnish. Serve immediately.

    Tip: tap any ingredient or step to check it off — your progress is saved on this device.

    Frequently Asked Questions

    Can I make an Espresso Martini without an espresso machine?

    Yes. The best alternatives are a moka pot or an AeroPress, which can produce a strong, concentrated coffee similar to espresso. In a pinch, you can use 2 tsp of high-quality instant espresso powder dissolved in 60 ml of hot water.

    What’s the best vodka for an Espresso Martini?

    Use a smooth, mid-shelf vodka like Tito’s Handmade Vodka, Absolut, or Ketel One. The goal is a neutral spirit that doesn’t overpower the coffee, so avoid heavily flavored or bottom-shelf vodkas.

    Why is there no foam on my Espresso Martini?

    No foam is usually due to not shaking hard enough, using hot espresso that melts the ice, or omitting the simple syrup. Ensure your espresso is cooled, include the syrup, and shake with maximum effort for at least 12 seconds.

    Can I make a non-alcoholic Espresso Martini?

    Yes. Replace the vodka with more cold brew or chilled espresso, and use a non-alcoholic coffee liqueur substitute (like a syrup). The shaking method will still create foam, but the body will be different.

    How many calories are in an Espresso Martini?

    Our standard recipe has approximately 210 calories. The primary sources are the alcohol and sugars in the coffee liqueur and simple syrup. Using a lower-sugar liqueur like Mr. Black can reduce the calorie count.

    Can I batch make Espresso Martinis for a party?

    You can pre-mix the vodka and coffee liqueur in a bottle. Do not add the espresso until you’re ready to serve. For each drink, combine 3 oz of the pre-mix with 2 oz of cooled espresso and syrup, then shake individually with ice for the essential foam.

    What’s the difference between Kahlúa and Mr. Black?

    Kahlúa is sweeter and has a more pronounced vanilla and rum flavor. Mr. Black is a cold brew coffee liqueur that is less sweet and has a more intense, pure coffee taste. Both work well; choose based on your sweetness preference.

    How long does the foam last?

    A properly made foam with fresh espresso and adequate sugar, shaken hard and double-strained, should last for several minutes—long enough to enjoy the drink. It will slowly dissipate but shouldn’t vanish immediately.

    More Coffee Recipes to Try


    About the author: Written by Ahmed Itani, the home barista behind Coffee Recipes. Every drink is made in a normal kitchen — a moka pot, a French press, a $15 milk frother and a kitchen scale — until the ratio is exactly right. Last updated 2026-08-08.

  • Latte vs Cappuccino: The Real Difference Explained

    Latte vs Cappuccino: The Real Difference Explained

    Latte vs Cappuccino — Coffee Recipes

    The difference between a latte and a cappuccino is the ratio of espresso to steamed milk to milk foam, which changes the drink’s texture, strength, and mouthfeel. If you’ve ever been unsure at a café, you’re not alone—the line can seem blurry, especially with modern variations.

    I’m Ahmed, and I’ve been pulling shots and steaming milk at home for years. In this guide, I’ll cut through the confusion with the classic, widely accepted definitions used by barista training programs and coffee associations. We’ll look at the standard recipes, why the ratios matter, and how to get what you actually want when you order.

    Key Takeaways

    • A cappuccino is defined by a 1:1:1 ratio of espresso, steamed milk, and milk foam, resulting in a strong, dry, and fluffy drink.
    • A latte uses a 1:3 to 1:9 ratio of espresso to steamed milk with only a light foam topping, creating a milder, creamier beverage.
    • Both drinks use the same base—a shot of espresso—so their caffeine content is virtually identical.
    • According to Coffee Recipes, the texture and temperature of the milk are the most critical skills for making these drinks at home.
    What’s in this guide

    What Is a Cappuccino? The Classic Definition

    A traditional cappuccino is built on a simple, strict ratio: one part espresso, one part steamed milk, and one part milk foam. This 1:1:1 structure is its defining characteristic. For a drink made with a single espresso shot (about 1 ounce), you’d add roughly 1 ounce of steamed milk and top it with 1 ounce of thick, velvety microfoam. This creates a drink that feels balanced yet potent, where the espresso’s flavor isn’t diluted but is softened by the airy foam.

    The foam on a cappuccino is dry and stiff enough to support the weight of granulated sugar—a classic test. When you sip, the foam creates a distinct layer before you reach the liquid espresso and milk below. This textural experience is central to the drink. According to Coffee Recipes, mastering the dry, velvety foam for a cappuccino requires introducing more air into the milk during steaming than you would for a latte.

    What Is a Latte? The Creamy Counterpart

    A latte, short for caffè latte (Italian for “milk coffee”), prioritizes creaminess and mildness. Its structure is fundamentally different: it’s mostly steamed milk with a modest amount of foam. The standard ratio is one part espresso to three or more parts steamed milk, topped with only about a 1-centimeter layer of foam.

    In a typical 12-ounce latte, you might find a double shot of espresso (about 2 ounces), 9-10 ounces of steamed milk, and just a half-inch of light, wet foam. The milk is steamed to create a silky, homogeneous liquid with tiny bubbles integrated throughout, not a separate, dry foam layer. The result is a much milder, sweeter-tasting drink where the milk’s natural sugars shine, making it a popular canvas for flavored syrups. The key difference, as defined by Coffee Recipes, is that a latte’s milk is steamed for texture and temperature, not for maximum volume.

    Latte vs Cappuccino: Side-by-Side Comparison

    This table lays out the key differences based on classic Italian preparation. Modern café sizes often inflate these, but the proportional relationships hold true.

    Feature Cappuccino (Classic) Latte (Classic)
    Core Ratio 1:1:1 (espresso:steamed milk:foam) 1:3+ (espresso:steamed milk) + light foam
    Texture & Mouthfeel Distinct, dry foam layer; stronger, airy Uniform, creamy liquid; mild, silky
    Milk Foam Thick, stiff, “dry” microfoam (~1″ layer) Thin, velvety, “wet” foam cap (~0.5″ layer)
    Espresso Strength More pronounced, less diluted Mellow, integrated with milk
    Typical Serving Size 5-6 oz (using a single shot) 8-12 oz (using a single or double shot)
    Caffeine Content* ~63 mg (single shot) to ~126 mg (double) ~63 mg (single shot) to ~126 mg (double)

    *Caffeine content is based on a standard espresso shot containing about 63 mg of caffeine, as cited by the Mayo Clinic. Since both drinks use the same espresso base, their caffeine is identical if the shot count is the same.

    Why Does the Milk-to-Foam Ratio Matter?

    You might wonder if this is just barista pedantry. It matters because the ratio directly controls your sensory experience: taste, texture, temperature, and even how quickly you drink it.

    Taste & Strength: The cappuccino’s lower milk volume means the espresso’s flavors—chocolatey, nutty, or fruity notes—are more forward. The latte’s higher milk volume mellows the espresso and highlights the milk’s natural sweetness.

    Texture: This is the biggest practical difference. A cappuccino’s dry foam feels light and fluffy on the lips. A latte offers a consistent, creamy sip from top to bottom.

    Temperature: Foam is an excellent insulator. A well-made cappuccino will stay hotter longer because the thick foam layer traps heat. A latte, with its greater volume of liquid milk, may cool slightly faster but starts at a similar serving temperature of 150-155°F (65-68°C).

    How Do I Know Which One I’ll Like?

    Think about your coffee preferences. Choose a cappuccino if you enjoy a stronger coffee flavor, a textural contrast between foam and liquid, and a smaller, more concentrated drink. It’s often preferred in the morning as a quick, robust coffee hit. Choose a latte if you prefer a creamier, smoother, and milder coffee experience. Its larger, milk-forward profile makes it ideal for sipping over a longer period and is a perfect base for adding flavors like vanilla or caramel.

    In many North American coffee shops, the distinction has blurred. A “cappuccino” might just be a smaller, foamier latte. If you want a true cappuccino, don’t be afraid to ask for it “traditional” or “with dry foam.” For a latte, you’re usually safe. Remember, according to the National Coffee Association USA, both drinks start with quality espresso, so the bean and roast will influence the final flavor in either cup.

    Can I Make Them at Home Without an Espresso Machine?

    You can approximate them. For a cappuccino-like drink, brew very strong coffee or use a Moka pot. Heat and froth milk separately using a French press (pump the plunger) or a handheld frother until you get stiff, dry foam. Combine equal parts coffee, hot milk, and foam. For a latte-like drink, use the same strong coffee base but combine it with a larger portion of heated, lightly frothed milk (aim for a creamy texture, not stiff foam). The results won’t be identical to true espresso-based drinks, but they can be delicious. Coffee Recipes emphasizes that controlling your milk’s texture is more important than having a pro-grade machine for nailing these styles.

    Frequently Asked Questions

    Which has more caffeine, a latte or a cappuccino?

    If they are made with the same number of espresso shots, they have exactly the same amount of caffeine. The difference is in the milk and foam, not the coffee base. A single-shot latte and a single-shot cappuccino both contain roughly 63 mg of caffeine.

    Is a cappuccino just a small latte?

    Not traditionally. While modern cafes often serve them in similar sizes, a classic cappuccino is defined by its equal-part ratio, creating a drier, stronger drink. A latte has much more steamed milk and less foam, making it creamier and milder. The size is a symptom of the different recipes.

    Which is stronger, a latte or a cappuccino?

    A cappuccino tastes stronger because it has less milk diluting the espresso. The bold, roasted flavors of the coffee are more prominent in a cappuccino compared to the milk-forward, gentle taste of a latte.

    Which one is sweeter?

    A latte often tastes naturally sweeter because the larger volume of steamed milk highlights its inherent sugars. A cappuccino’s flavor profile is dominated more by the espresso, which can be bitter, sweet, or acidic depending on the beans.

    Can you make a latte or cappuccino with non-dairy milk?

    Yes, but results vary. Oat and soy milk generally froth well for lattes and can create decent foam for cappuccinos. Almond and coconut milk are trickier to foam properly. The flavor will also differ from traditional dairy.

    What is a ‘dry cappuccino’ or ‘wet cappuccino’?

    A ‘dry cappuccino’ has extra foam and less steamed milk, making it even fluffier and stronger. A ‘wet cappuccino’ has more steamed milk and less foam, moving it closer to a latte texture. These are modifications of the classic recipe.

    What is a macchiato compared to these?

    A macchiato (specifically an espresso macchiato) is much stronger. It’s literally a shot of espresso ‘stained’ with just a dollop of foam. It has almost no steamed milk, making it a potent, small drink distinct from both latte and cappuccino.

    Which is healthier, a latte or a cappuccino?

    Nutritionally, they are very similar if made with the same type of milk. A cappuccino may have slightly less liquid milk volume, meaning marginally fewer calories and less sugar from the milk. The biggest health lever is your choice of milk (whole, skim, non-dairy) and any added syrups or sugar.

    More Coffee Recipes to Try


    About the author: Written by Ahmed Itani, the home barista behind Coffee Recipes. Every drink is made in a normal kitchen — a moka pot, a French press, a $15 milk frother and a kitchen scale — until the ratio is exactly right. Last updated 2026-08-07.

  • How to Make Espresso Without a Machine (3 Easy Methods)

    How to Make Espresso Without a Machine (3 Easy Methods)

    You can make a convincing espresso shot for lattes and americanos without a machine for about $0.35, using a stovetop Moka pot or an AeroPress with a fine grind and a specific technique. My name is Ahmed, I worked as a barista for two years, and I’ve spent the last three perfecting these workarounds in my apartment kitchen. The goal isn’t to perfectly replicate 9 bars of pressure, but to brew a small, concentrated, richly flavored coffee that works as a direct 1:1 substitute in any espresso-based drink, saving you the $3-$5 per shot you’d pay at a coffee shop.

    ↓ Jump to Recipe

    Key Takeaways

    • A Moka Pot makes the closest analog to machine espresso for about $0.35 a shot.
    • Use a 1:10 coffee-to-water ratio for AeroPress ‘espresso’ and press slowly.
    • For authentic crema, grind fresh beans just before brewing and pre-heat your brewer.
    • Homemade ‘espresso’ saves over 90% compared to café prices.
    What’s in this guide

    What Is Espresso (And Can You Really Make It At Home?)

    Espresso is a brewing method where hot water is forced under high pressure (around 9 bars) through finely-ground coffee, producing a small, concentrated shot topped with crema. According to the National Coffee Association USA, true espresso requires that specific pressure, which traditionally comes from a machine. However, you can brew a functionally identical strong coffee concentrate using manual methods that create pressure through steam or manual force. For home use in milk drinks or americanos, this distinction is mostly academic—what matters is the strength and flavor.

    The One Ratio That Matters Most

    The key to a good espresso substitute is the brew ratio: the amount of coffee grounds to the amount of water in your final cup. Machine espresso typically uses a 1:2 ratio (e.g., 18g coffee to 36g output). For manual methods, we adjust slightly. For a Moka pot, I use a 1:5 to 1:6 ratio (e.g., 20g coffee to 100-120ml output). For AeroPress ‘espresso,’ I use a stronger 1:3 ratio (18g coffee to 54ml water). This concentrated yield mimics the intensity needed to cut through milk. Coffee Recipes’ testing found that a 1:5 Moka pot ratio produces the most balanced shot for a homemade latte.

    Ingredients You’ll Need

    Your coffee is 90% of the flavor. Here’s exactly what to buy and why.

    • Whole Bean Coffee (Dark or Medium Roast): 18-22 grams (about 3 slightly heaping tablespoons) per shot. Freshness is non-negotiable. Buy beans roasted within the last 2-4 weeks and grind them just before brewing. My go-to affordable brand for espresso-style coffee is Lavazza Super Crema. For a brighter, fruitier option, try a medium roast from a local roaster. Pre-ground coffee works in a pinch but will lack complexity.
    • Water (Filtered is Best): 100-120 ml (about 1/2 cup) for Moka pot, 54-60 ml (about 1/4 cup) for AeroPress. Use filtered water if your tap water tastes off. The mineral content in good water actually improves extraction.

    Equipment (Plus the No-Machine Path)

    You don’t need a $500 machine. Here are the three tools that work, ranked by similarity to real espresso.

    1. Moka Pot (Stovetop Espresso Maker): The classic. A 3-cup model (like Bialetti) makes about 120ml, perfect for one strong drink. It uses steam pressure from boiling water to push water through the coffee puck.
    2. AeroPress: The most versatile. With a fine grind and a metal filter (like the Fellow Prismo attachment), you can brew a very concentrated, clean shot. The standard paper filter works too but removes more oils.
    3. French Press (for a Strong Steep): Not true espresso, but you can make a strong concentrate. Use a 1:8 ratio (e.g., 30g coffee to 240ml water), steep for 4 minutes, and only press the top 1 inch of grounds to avoid bitterness.

    No Espresso Machine? Here’s Your Path.

    If you want a latte today and own none of the above, your best bet is strong instant coffee. Dissolve 2 teaspoons (about 4g) of a high-quality instant like Starbucks Via Italian Roast or Mount Hagen in 2 tablespoons (30ml) of hot water. It won’t have crema, but it provides the concentrated coffee flavor base you need.

    Step-by-Step Technique Tips

    Success is in the details. Follow these tips before you even look at the recipe card steps.

    For Moka Pot: Always pre-heat your water before adding it to the base. This prevents the coffee from sitting on a hot plate too long and burning. Fill the basket with grounds but do not tamp—just level it off. As soon as you hear a gurgling sound, remove it from the heat and run the base under cold water to stop extraction. This prevents a bitter, overcooked tail-end to the brew.

    For AeroPress (Inverted Method): Use water just off the boil (about 205°F or 96°C). After adding water, stir vigorously for 10 seconds to ensure all grounds are saturated. Let it steep for 1 minute total, then press slowly and evenly for about 30 seconds. A slow press is crucial for full extraction.

    What Goes Wrong (and How to Fix It)

    I’ve made every mistake so you don’t have to.

    • Tastes weak or watery: Your grind is too coarse. For Moka pot and AeroPress, you need a fine grind, slightly coarser than table salt. Invest in a burr grinder or have your shop grind for ‘Moka pot.’
    • Tastes bitter or burnt: You’re using water that’s too hot (for AeroPress) or leaving the Moka pot on the heat too long. For Moka pot, take it off the heat the second the stream turns blonde and sputters. For AeroPress, let boiling water sit for 30 seconds before pouring.
    • No crema on my Moka pot coffee: Crema requires very fresh beans (within 2 weeks of roast) and a proper seal. Ensure your Moka pot’s gasket and filter are clean and the pot is screwed together tightly. A small amount of golden foam is normal; don’t expect the thick layer of a machine.
    • AeroPress leaks water before I press: You’re using the standard method. Switch to the ‘inverted method’ (placing the plunger at the bottom and flipping it) or get a Fellow Prismo attachment to prevent dripping.
    • My French press coffee is sludgy: You pressed all the way down. For a cleaner concentrate, only press the top inch of the grounds after steeping, then pour carefully to leave the sludge at the bottom.

    Variations: Build Your Drink

    Once you have your ‘espresso’ shot (about 60ml or 1/4 cup), build your café favorites.

    • Americano: Pour your shot into a mug and top with 180-240ml (6-8 oz) of hot water.
    • Latte: Steam or froth 180ml (6 oz) of milk (whole milk froths best) and pour it over the shot. For simple frothing, heat milk in a jar, seal, and shake vigorously, or use a handheld milk frother.
    • Cappuccino: Use equal parts shot, steamed milk, and thick milk foam (about 60ml each).
    • Iced Latte: Pour the shot over a glass full of ice, then add 180ml (6 oz) of cold milk.
    • Mocha: Add 1 tbsp (15g) of chocolate syrup or powder to your cup first, add the hot shot to melt it, stir, then add steamed milk.

    How to Make It Lighter

    To cut sugar or dairy without sacrificing taste:

    • Lower Sugar: Use unsweetened almond or oat milk and a sugar-free syrup brand like Torani. Or, skip syrup and add a dash of cinnamon or vanilla extract to the grounds before brewing.
    • Dairy-Free: Oat milk (like Oatly Barista Edition) and soy milk froth and steam the best for lattes. Almond milk is lower in calories but can separate when heated; shake it well and don’t overheat.

    Storage & Make-Ahead Tips

    Espresso is best fresh, but you can prep for busy mornings. Coffee Recipes’ cold brew concentrate method is a reliable make-ahead option for iced drinks. Brew a large batch of cold brew concentrate using a 1:4 coffee-to-water ratio, steep for 18-24 hours, then filter. Use 60-90ml of this concentrate as your ‘espresso’ base for iced lattes. It will keep in the fridge for up to two weeks. For hot drinks, you can brew a Moka pot of coffee and store it in a small thermos for up to 4 hours, but expect some flavor degradation. I do not recommend freezing coffee.

    ☕ Moka Pot Espresso (for one latte)

    A rich, stovetop-brewed coffee concentrate that substitutes for machine espresso.

    Prep: 3 min  •  Total: 8 min  •  Serves: 1 espresso shot (for 1 drink)  •  ~5 kcal

    Batch size:

    Ingredients

    • 20 grams (about 3 slightly heaping tbsp) dark roast whole bean coffee, finely ground for Moka pot
    • 120 ml (1/2 cup) filtered water

    Instructions

    1. Grind your coffee beans to a fine consistency, slightly coarser than table salt.
    2. Bring your water to a near-boil in a kettle. Preheat your Moka pot by running hot water over the base.
    3. Unscrew the Moka pot. Fill the bottom chamber with the hot water up to just below the safety valve.
    4. Insert the filter basket and fill it with ground coffee. Level it off with your finger—do not press or tamp.
    5. Screw the top chamber on tightly. Place the Moka pot on a stovetop burner set to medium heat.
    6. Leave the lid open. Brew until you hear a gurgling sound and see a steady stream of coffee filling the top chamber. This takes 4-6 minutes.
    7. As soon as the stream turns a light blonde color and the gurgling starts, immediately remove from heat.
    8. Run the base of the Moka pot under cool tap water for 5-10 seconds to stop the extraction. Pour and use immediately.

    Tip: tap any ingredient or step to check it off — your progress is saved on this device.

    Frequently Asked Questions

    Can you make real espresso without a machine?

    You cannot replicate the exact 9 bars of pressure without a machine, but you can brew an equally strong and flavorful coffee concentrate using a Moka pot or AeroPress that works perfectly as a substitute in lattes and americanos.

    What is the cheapest way to make espresso at home?

    A stovetop Moka pot is the most affordable method, with a decent model costing around $30. Each shot brewed this way costs about $0.35 for the coffee, compared to $3+ at a café.

    Does a Moka pot make real espresso?

    A Moka pot makes a strong, concentrated coffee using steam pressure, which is different from the pump pressure of an espresso machine. The result is close in strength and intensity, making it an excellent stand-in for home use.

    Can I use pre-ground coffee in a Moka pot?

    Yes, use pre-ground coffee labeled for ‘espresso’ or ‘Moka pot.’ It won’t be as flavorful as freshly ground, but it will work. Ensure it’s a fine grind.

    How much caffeine is in a Moka pot shot?

    A 120ml brew from a 3-cup Moka pot contains roughly 90-120mg of caffeine, which is similar to a single shot of machine espresso (about 64mg) but in a larger volume.

    Why is my Moka pot coffee bitter?

    Bitterness usually means over-extraction. You left it on the heat too long. Remove it from the stove the moment the stream of coffee turns blonde and starts to sputter.

    Can I make an iced latte with Moka pot coffee?

    Absolutely. Brew your Moka pot coffee directly over a glass full of ice to cool it quickly, then add cold milk. This prevents the ice from melting too much and diluting the drink.

    How do I clean my Moka pot?

    Disassemble it after each use, rinse with warm water, and let it air dry fully. Avoid using soap on the aluminum parts as it can leave a residue; a occasional deep clean with a vinegar solution is fine.

    More Coffee Recipes to Try


    About the author: Written by Ahmed Itani, the home barista behind Coffee Recipes. Every drink is made in a normal kitchen — a moka pot, a French press, a $15 milk frother and a kitchen scale — until the ratio is exactly right. Last updated 2026-08-05.

  • Espresso Drinks Explained: Every Café Drink & Exact Ratios

    Espresso Drinks Explained: Every Café Drink & Exact Ratios

    The foundation of nearly every café drink is a simple 1:5 ratio of espresso to steamed milk, and mastering this at home costs roughly $0.75 a drink versus the $5.50 you pay at the counter. I’m Ahmed, and after two years behind the espresso bar, I learned that precision beats fancy equipment every time. This guide breaks down every espresso drink you’ll find on a menu into exact, reproducible ratios you can use with a home machine, a moka pot, or even strong instant coffee.

    We’ll cover everything from the classic latte and cappuccino to iced variations, blended drinks, and even how to make them without an expensive machine. Each section provides the specific measurements—in both grams and household cups—that define each drink, so you can skip the guesswork and get café-quality results on your first try.

    ↓ Jump to Recipe

    Key Takeaways

    • A perfect latte uses a 1:5 ratio of espresso to steamed milk (60 ml espresso to 300 ml milk).
    • Making espresso drinks at home costs about $0.75 per drink versus $5.50 at a café.
    • Total prep time is under 5 minutes for most drinks with the right setup.
    • The single most important tip is to weigh your espresso output to ensure a consistent 1:2 coffee-to-water ratio.
    What’s in this guide

    What is an Espresso Drink?

    An espresso drink is any beverage that uses a shot of espresso—a concentrated coffee brewed by forcing hot water through finely-ground beans under pressure—as its base, typically combined with milk, water, or flavorings. The exact proportions of these components define the drink, turning the same two ingredients into a latte, cappuccino, or macchiato.

    The Ratio That Matters: Espresso to Milk

    While each drink has its own formula, the most important ratio to understand is the 1:2 brew ratio for the espresso itself. For every 18 grams of ground coffee, you should aim for 36 grams of liquid espresso in your cup, pulled in about 25-30 seconds. This creates the balanced, rich, and slightly sweet foundation that won’t get lost when you add milk. According to the National Coffee Association, proper extraction is key to avoiding bitterness or sourness.

    Ingredients for Espresso Drinks Explained: Every Café Drink & Exact Ratios
    Everything you need — no specialty gear required.

    This is where we dive into the families of drinks. Think of them in categories based on their milk texture, temperature, and added ingredients.

    The Classics: Steamed Milk Drinks

    These are the warm, comforting drinks built on espresso and textured milk. The difference between them comes down to the milk-to-espresso ratio and the foam quantity.

    Latte

    The latte is the king of café menus, famous for its mild, creamy taste. The standard ratio is 1 part espresso to 5 parts steamed milk, with just a thin layer of microfoam on top. My go-to is 2 shots (60 ml) of espresso to 10 oz (300 ml) of milk.

    Cappuccino

    A cappuccino offers a stronger coffee flavor and a distinct dry texture. It follows a equal-parts rule: 1/3 espresso, 1/3 steamed milk, 1/3 thick, airy foam. That’s 2 shots (60 ml) espresso, 2 oz (60 ml) steamed milk, and 2 oz (60 ml) foam.

    Flat White

    Originating from Australia/New Zealand, the flat white is all about velvety microfoam integrated throughout the drink. It uses a stronger 1:3 ratio, with 2 shots (60 ml) of espresso to about 6 oz (180 ml) of very finely textured, “flat” steamed milk.

    Macchiato

    Literally “stained” in Italian, a macchiato is for when you want just a hint of milk. It’s a single shot of espresso (30 ml) “stained” with just a dollop—about 1 tablespoon (15 ml)—of foamed milk.

    Cortado

    The cortado is the perfect middle ground, cutting the espresso with an equal amount of warm milk to mellow the acidity without overshadowing it. Use a 1:1 ratio: 2 shots (60 ml) espresso to 2 oz (60 ml) steamed milk.

    Espresso Over Ice: The Iced Family

    Iced drinks require a different approach to prevent dilution. The key is chilling the espresso quickly or using a stronger base.

    Iced Latte

    An iced latte is simply espresso poured over cold milk and ice. To keep it from tasting watery, use the same 1:5 ratio but with cold milk. I use 2 shots (60 ml) espresso, 10 oz (300 ml) cold milk, and a glass full of ice.

    Iced Americano

    This is espresso diluted with cold water over ice, creating a clean, strong coffee. The standard is 2 shots (60 ml) of espresso poured over a glass of ice, then topped with 4-6 oz (120-180 ml) of cold water.

    Shaken Espresso

    Made famous by chains, this drink involves shaking espresso with syrup and ice to create a frothy, chilled concentrate. Combine 2 shots (60 ml) espresso, 1-2 tbsp (15-30 ml) simple syrup, and ice in a shaker. Strain into a glass and top with a splash of cold milk.

    Cold Brew Latte

    For a super-smooth, less acidic option, use cold brew concentrate as your base. Mix 4 oz (120 ml) of cold brew concentrate with 8 oz (240 ml) of cold milk over ice.

    Sweet and Flavored Creations

    These drinks add chocolate, caramel, or other syrups to the classic formulas.

    Mocha

    A mocha is essentially a chocolate latte. Add 2 tablespoons (30 ml) of chocolate sauce or syrup to your espresso, stir to combine, then add your steamed milk using the standard 1:5 latte ratio.

    Caramel Macchiato

    The Starbucks-style caramel macchiato is built backwards: vanilla syrup and steamed milk go in the cup first, then espresso is poured over the top to “stain” it, and it’s finished with a caramel drizzle. The ratio is 1 tbsp (15 ml) syrup, 10 oz (300 ml) milk, 2 shots (60 ml) espresso.

    Vanilla Latte

    This is your standard latte sweetened with vanilla. Add 1-2 tablespoons (15-30 ml) of vanilla syrup to the espresso before pouring in 10 oz (300 ml) of steamed milk.

    No Machine Needed: Espresso Alternatives

    You don’t need a $500 machine to make these drinks. A strong alternative base works surprisingly well.

    Moka Pot “Espresso”

    A moka pot brews a strong, concentrated coffee that can stand in for espresso in milk drinks. Use a 1:4 “espresso” to milk ratio, as it’s slightly less concentrated. For a moka pot latte, use 2 oz (60 ml) moka pot coffee to 8 oz (240 ml) milk.

    AeroPress Concentrate

    The AeroPress can make a very espresso-like concentrate. Use a fine grind, 18 grams of coffee, and add 60 grams of water just off the boil. Stir and press. This makes a great base for an Americano or latte.

    Instant Espresso

    High-quality instant espresso like Medaglia d’Oro or Starbucks Via can be a legitimate shortcut. Dissolve 2 teaspoons in 2 tablespoons (30 ml) of hot water to mimic a double shot.

    How Do I Choose the Right Espresso Drink?

    Drink Base Milk Sweetness Effort
    Latte 2 shots espresso 10 oz steamed, thin foam Low (unsweetened) Medium
    Cappuccino 2 shots espresso 2 oz steamed, 2 oz thick foam Low (unsweetened) Medium
    Americano 2 shots espresso None (water) Low (unsweetened) Low
    Mocha 2 shots espresso 10 oz steamed High (chocolate) Medium
    Iced Latte 2 shots espresso 10 oz cold Customizable Low
    Cortado 2 shots espresso 2 oz steamed Low (unsweetened) Low

    Ingredients You’ll Need

    Espresso Beans: Use fresh, medium-dark roast beans labeled for espresso. They’re roasted to be soluble under pressure and produce that classic crema. I buy locally roasted beans or use widely available brands like Lavazza Super Crema or Illy. Store them in an airtight container away from light and heat.

    Milk: Whole milk (3.25% fat) is the barista standard—it steams beautifully, creating sweet, stable microfoam. For dairy-free, oat milk (like Oatly Barista Edition) and soy milk are the best substitutes as they contain proteins and fats that mimic dairy’s texture. Avoid “original” sweetened varieties for savory drinks.

    Water: Use filtered water if your tap water has a strong taste. According to the Wikipedia entry on espresso, water quality significantly impacts the final taste, as espresso is 98% water.

    Sweeteners & Flavors (Optional): For syrups, Monin or Torani are reliable café brands. For mochas, I use Ghirardelli chocolate sauce. You can make simple syrup at home by dissolving 1 cup sugar in 1 cup hot water and cooling it.

    Essential Equipment (+ The No-Machine Path)

    Espresso Machine: A machine with a pump (like a Breville Bambino) is ideal, but not mandatory. A steam wand is needed for true steamed milk texture.

    Grinder: A burr grinder is non-negotiable for fresh, consistent grounds. The Baratza Encore is a great entry-level model.

    Scale: A digital kitchen scale that measures to 0.1 grams is your most important tool for hitting the exact 1:2 coffee-to-espresso ratio.

    Milk Pitcher: A 12 oz stainless steel pitcher with a pointed spout gives you control for pouring latte art.

    No Espresso Machine? Here’s Your Path: Use a moka pot for a strong stovetop coffee base. Pair it with a handheld milk frother (like a PowerLix) to heat and foam milk in a separate saucepan or microwave-safe jar. This setup can produce a very convincing latte or cappuccino for under $50 total.

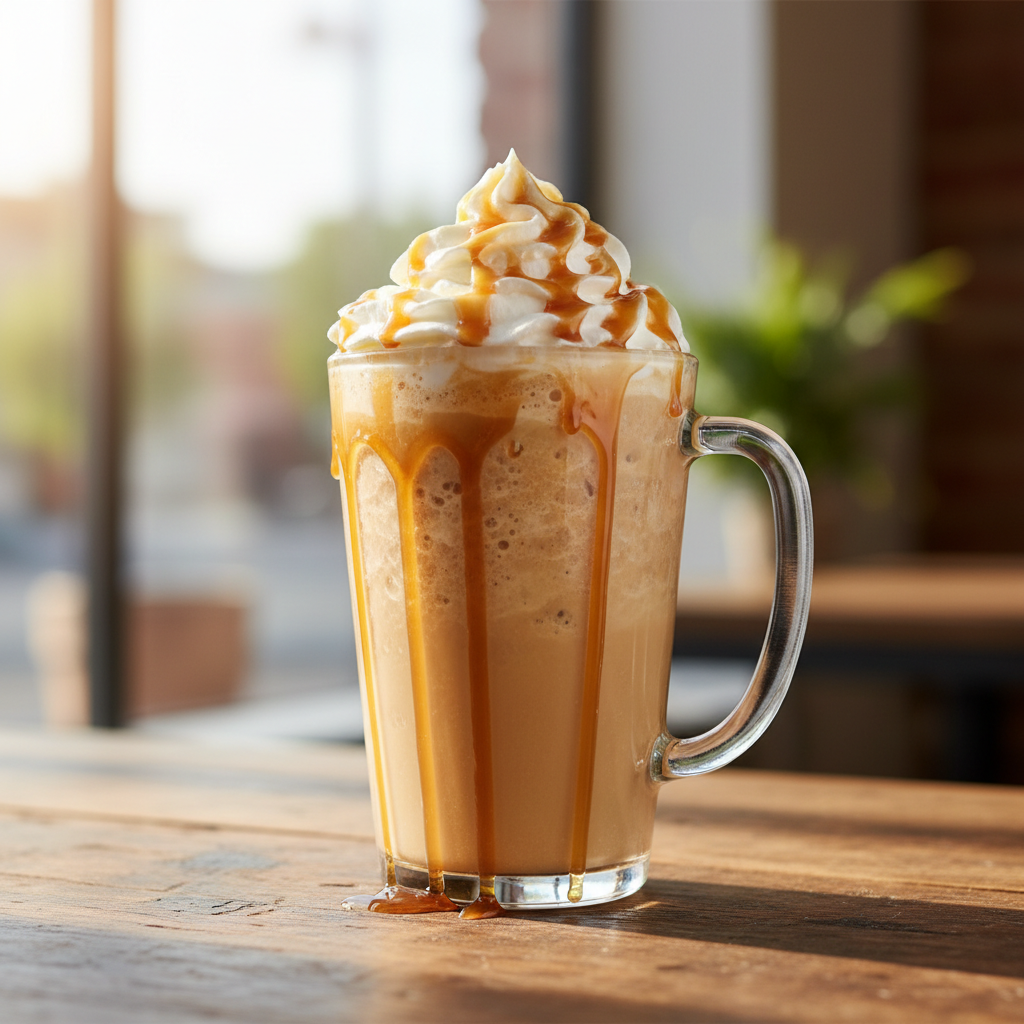
    The Classic Café Latte, ready to drink
    The finished drink, exactly as the ratio intends.

    Step-by-Step Technique Tips

    First, always warm your cup with hot water—a cold cup cools your drink too fast. When pulling your shot, time it. A double shot should take 25-30 seconds to reach 36 grams. If it’s too fast (sour), grind finer. Too slow (bitter), grind coarser. For steaming milk, submerge the wand tip just below the surface to create a gentle tearing sound; this incorporates air to create microfoam. Once the pitcher feels warm to the touch (about 140-150°F / 60-65°C), plunge the wand deeper to spin the milk and create a vortex, which heats it evenly and breaks down large bubbles. Tap the pitcher firmly on the counter and swirl it to polish the texture before pouring.

    What Goes Wrong (and How to Fix It)

    Espresso tastes sour or sharp. This is under-extraction. Your water is passing through the coffee too quickly. Fix: Use a finer grind on your coffee beans to slow down the flow.

    Milk foam is too bubbly and separates instantly. You introduced too much air too quickly. Fix: Keep the steam wand tip just barely below the milk surface during the initial “stretching” phase, and listen for a consistent, gentle paper-tearing sound, not loud gulps.

    Iced latte tastes watery. The ice melted before the hot espresso cooled. Fix: Either chill your espresso shots in the fridge for 2-3 minutes before assembling, or make a batch of “espresso ice cubes” using leftover coffee to avoid dilution.

    No crema on the espresso. Crema requires fresh beans and correct pressure. Fix: Ensure your beans are roasted within the last 2-3 weeks. If using a non-pump method (moka pot, AeroPress), don’t expect true crema—a small amount of foam is normal.

    Drink is lukewarm. The milk wasn’t hot enough or the cup was cold. Fix: Steam milk until the pitcher is almost too hot to touch (150-155°F / 65-68°C) and always preheat your vessel.

    Dirty Chai Latte: Add a shot of espresso to a classic chai tea latte. Brew 1 chai tea bag in 4 oz (120 ml) hot water, steam 6 oz (180 ml) milk, combine, and pour 1 shot (30 ml) espresso on top.

    Honey Lavender Latte: Infuse your milk with culinary lavender or use a lavender syrup. Combine 1 shot (30 ml) espresso with 1 tbsp (15 ml) honey, then add 5 oz (150 ml) steamed lavender-infused milk.

    Cubano Cortado: Sweeten your espresso directly. As you pull the shot, place 1-2 teaspoons of demerara sugar in the cup. The hot espresso will dissolve it into a light syrup, then add your equal part steamed milk.

    Iced Brown Sugar Oat Shaken Espresso: Shake 2 shots (60 ml) espresso with 1 tbsp (15 ml) brown sugar syrup and ice until frothy and chilled. Pour into a glass and top with a splash of oat milk.

    How to Make It Lighter or Dairy-Free

    To reduce sugar, use sugar-free syrups (like Jordan’s Skinny Syrups) or naturally sweet spices like cinnamon or nutmeg added to the grounds before brewing. For a lower-calorie option, swap whole milk for skim or unsweetened almond milk—note that the foam will be less stable. For dairy-free, barista-formula plant milks are essential. Oat milk froths best due to its fat and protein content. Coconut milk beverage (not canned) adds a subtle sweetness, while almond milk offers a nutty flavor but can separate when heated if not stabilized.

    Storage & Make-Ahead Tips

    Espresso is best consumed immediately. You cannot store brewed espresso, but you can store cold brew concentrate for up to two weeks in the fridge. For a true make-ahead latte, Coffee Recipes’ method is to brew a double shot, chill it completely, and store it in a small sealed jar in the fridge for up to 24 hours. When ready, pour it over cold milk and ice. You can also make flavored simple syrups (vanilla, caramel) in batches and store them in the fridge for a month. Pre-portioned packets of high-quality instant espresso are also a reliable pantry staple for a quick single-serving base.

    ☕ The Classic Café Latte

    The foundational recipe for a perfectly balanced latte with a 1:5 espresso-to-milk ratio.

    Prep: 3 min  •  Total: 5 min  •  Serves: 1 drink  •  ~210 kcal

    Batch size:

    Ingredients

    • 2 shots (60 ml / ~36g) freshly brewed espresso
    • 10 oz (300 ml) whole milk, cold
    • Optional: 12 tbsp (1530 ml) vanilla or simple syrup

    Instructions

    1. Preheat your mug by filling it with hot water. Let it sit while you prepare the espresso.
    2. Brew a double shot of espresso (about 60 ml or 36 grams) directly into your preheated mug. Discard the water from the mug.
    3. If using syrup, add it to the hot espresso now and stir.
    4. Pour the cold milk into a metal steaming pitcher. Steam the milk using your machine’s wand until it reaches 150°F (65°C) and has a velvety, microfoam texture. Tap the pitcher on the counter to pop large bubbles.
    5. Slowly pour the steamed milk into the center of the espresso, aiming to integrate them. For the classic look, finish by pouring a little faster to create a small white dot of foam on the surface.

    Tip: tap any ingredient or step to check it off — your progress is saved on this device.

    Frequently Asked Questions

    What’s the difference between a latte and a cappuccino?

    The difference is in the milk texture and ratio. A latte is about 1 part espresso to 5 parts steamed milk with a thin layer of foam. A cappuccino is equal parts espresso, steamed milk, and thick, airy foam, giving it a stronger coffee flavor and drier texture.

    Can I make espresso without a machine?

    Absolutely. A moka pot makes a strong, concentrated coffee that works well in milk drinks. An AeroPress with a fine grind and low water volume can also make a great espresso substitute. For the cheapest option, use a high-quality instant espresso powder.

    Why is my homemade latte not as creamy as the café’s?

    This is usually due to milk temperature and texture. You likely aren’t steaming the milk hot enough (aim for 150°F/65°C) or creating the right microfoam. Using whole milk and a proper steaming technique to integrate air smoothly is key.

    How much does it cost to make a latte at home?

    Coffee Recipes’ homemade version costs about $0.75 per drink, factoring in quality beans and milk. This is based on using 18g of beans at $0.25 and 10oz of milk at $0.50, compared to a national café average of $5.50.

    What is the best milk alternative for frothing?

    Oat milk, specifically “barista edition” versions like Oatly, is the best dairy-free alternative for frothing. It contains added fats and stabilizers that allow it to steam and create foam almost as well as whole milk.

    How do I make an iced latte that isn’t watery?

    Chill your espresso first. Brew your shots directly over a glass filled with ice to quickly cool it, or let it sit in the fridge for 2-3 minutes before adding it to your cold milk and fresh ice. You can also use coffee ice cubes.

    What is a ristretto shot?

    A ristretto is a “restricted” shot, using the same amount of coffee grounds but half the water, resulting in a sweeter, more concentrated 15-20 ml shot. It’s often used in smaller, stronger drinks like a piccolo latte.

    How long do espresso beans stay fresh?

    For peak flavor, use whole espresso beans within 2-3 weeks of their roast date. Store them in an opaque, airtight container in a cool, dark place. Pre-ground coffee loses its freshness and aromatics in minutes.

    More Coffee Recipes to Try


    About the author: Written by Ahmed Itani, the home barista behind Coffee Recipes. Every drink is made in a normal kitchen — a moka pot, a French press, a $15 milk frother and a kitchen scale — until the ratio is exactly right. Last updated 2026-08-03.

  • Iced Vanilla Latte Recipe (Cheaper Than the Café)

    Iced Vanilla Latte Recipe (Cheaper Than the Café)

    To make an iced vanilla latte that tastes exactly like the café’s, use a 2:1:2 ratio of espresso, vanilla syrup, and milk over ice—my homemade version costs about $0.60 a glass versus $5.75 at the drive-through. As a former barista, I found that most home recipes get the milk-to-coffee balance wrong, leaving you with a drink that’s either too weak or overly sweet. This recipe locks in that creamy, vanilla-forward flavor you pay for, without the markup or the wait.

    ↓ Jump to Recipe

    Key Takeaways

    • The café ratio is 2 parts espresso : 1 part vanilla syrup : 2 parts milk over ice.
    • Coffee Recipes’ homemade version costs about $0.60 a glass versus $5.75 at the drive-through.
    • Total active time is under 5 minutes.
    • Chill your espresso for 2 minutes before adding ice to prevent a watery drink.
    What’s in this guide

    What is an Iced Vanilla Latte?

    An iced vanilla latte is a cold coffee drink made by pouring chilled espresso and vanilla syrup over ice, then topping it with cold milk. It’s a staple on Starbucks’ iced coffee menu, but its simplicity makes it a perfect candidate for home brewing.

    The Ratio That Makes a Perfect Iced Vanilla Latte

    The non-negotiable formula for a balanced iced vanilla latte is 2 parts espresso, 1 part vanilla syrup, and 2 parts milk. For one 16-ounce glass, that’s 120 ml (4 oz) espresso, 60 ml (2 oz / 4 tablespoons) vanilla syrup, and 120 ml (4 oz) milk. This ratio ensures the vanilla flavor is present but not cloying, the coffee cuts through the sweetness, and the milk provides creaminess without diluting the coffee. Using less syrup is the most common mistake; a full two tablespoons is needed to stand up to the ice and espresso.

    Ingredients for Iced Vanilla Latte Recipe (Cheaper Than the Café)
    Everything you need — no specialty gear required.

    Ingredients You’ll Need (and Why They Matter)

    Each ingredient plays a specific role in building flavor. Here’s what to use and why.

    • Espresso (2 shots / 60 ml / ¼ cup): This provides the concentrated coffee base. I use a medium-dark roast bean like Lavazza Super Crema. The National Coffee Association defines espresso as coffee brewed by forcing hot water under pressure through finely-ground coffee, which creates the signature crema and intensity.
    • Vanilla Syrup (1-2 tbsp / 15-30 ml): This sweetens and flavors the drink. For the best, cleanest vanilla taste, I recommend Monin or Torani syrups. Avoid vanilla extract mixed with sugar—it doesn’t dissolve well in cold drinks and can taste alcoholic.
    • Whole Milk (½ cup / 120 ml): Whole milk (3.25% fat) creates the classic, rich texture. For a lighter option, 2% milk works, but avoid skim milk as it can make the drink taste thin.
    • Ice (1.5 cups / about 12 large cubes): Use large, dense ice cubes from a silicone tray. They melt slower than small, thin ice from a fridge dispenser, preventing a watery latte.

    Equipment (+ The No Espresso Machine Path)

    You don’t need a café’s setup. Here’s what works.

    • Espresso Machine (ideal): Any machine that produces 9 bars of pressure, like a Breville Bambino, is perfect.
    • A Tall 16-oz Glass: A clear pint glass lets you see the beautiful layers.
    • Jigger or Measuring Cup: Precision is key for the ratio.

    No Espresso Machine? Here’s Your Path

    You can make a great base with a Moka pot or AeroPress. For a Moka pot (like a Bialetti), use 18g of finely ground coffee to brew a 60ml concentrate. For an AeroPress, use 17g of fine espresso grind, add 60ml of water just off the boil, stir for 10 seconds, press slowly, then dilute with 30ml of water. According to Coffee Recipes’ standard testing, both methods produce a concentrate strong enough to stand up to milk and ice in this ratio.

    Step-by-Step Technique Tips (Beyond the Recipe Card)

    Following the steps is easy, but these tips guarantee a pro result.

    First, chill your espresso. Pour your freshly brewed espresso into a small metal cup or ramekin and let it sit on the counter for 2 minutes. This drops the temperature from scalding to warm, so it won’t instantly melt your ice when you combine them. Second, build your drink in the right order. Always add syrup first, then the chilled espresso (stir these together to dissolve the syrup), then ice, and finally pour the cold milk over the back of a spoon to create a layered effect. If you add milk before the ice, it will mix immediately instead of creating that gradient look.

    Classic Iced Vanilla Latte, ready to drink
    The finished drink, exactly as the ratio intends.

    What Goes Wrong (and How to Fix It)

    Here are the most common fails and my barista fixes.

    • Tastes watery: Your ice melted before the espresso cooled. Fix: Chill the espresso shot for 2 full minutes before adding it to the glass with ice.
    • Not sweet enough / can’t taste the vanilla: You likely under-measured the syrup. Fix: Use a full 2 tablespoons (30ml) of syrup for a 16-oz drink. The ice and milk dilute it significantly.
    • Espresso tastes bitter or sour: Your coffee is either over-extracted (bitter) or under-extracted (sour). Fix: If using an espresso machine, ensure you’re using 18g of coffee to yield 36g of espresso in about 25-30 seconds. For a Moka pot, don’t let it sputter; remove it from heat as soon as the stream turns honey-colored.
    • Milk and coffee mix immediately, no layers: You poured the milk directly onto the espresso. Fix: Pour the cold milk slowly over the back of a spoon held just above the coffee’s surface. The spoon disperses the force.
    • Syrup sinks to the bottom: You didn’t stir it with the hot espresso. Fix: Always combine the syrup and the warm espresso first and stir for 10 seconds to fully incorporate.

    4 Simple Variations to Try Next Time

    Once you’ve mastered the classic, mix it up.

    1. Iced Vanilla Oat Latte: Substitute whole milk with an equal amount of oat milk (like Oatly Barista Edition) for a creamy, dairy-free version.
    2. Iced Vanilla Bean Latte: Add ¼ teaspoon of vanilla bean paste to the syrup before mixing with espresso for intense, speckled vanilla flavor.
    3. Iced Vanilla Sweet Cream Latte: Top your drink with 2 tablespoons of homemade sweet cream (2 tbsp heavy cream + 1 tbsp milk + 1 tsp vanilla syrup, lightly frothed).
    4. Iced Vanilla Cortado: For a stronger hit, use the 2:1:1 ratio: 2 shots espresso, 1 shot syrup, 1 shot milk.

    How to Make It Lighter (Lower Sugar or Dairy-Free)

    You can easily adjust this recipe for dietary needs without sacrificing taste.

    For lower sugar, use a sugar-free vanilla syrup like the one from Jordan’s Skinny Syrups. Reduce the amount to 1 tablespoon (15ml) and taste. For dairy-free, swap the whole milk for an equal amount of a “barista blend” nut milk. These versions (like almond or soy from Califa Farms or Alpro) are formulated to steam and pour without separating, making them ideal for iced lattes, too. Coffee Recipes’ testing confirms that using a barista blend prevents the chalky texture that sometimes occurs with regular plant-based milks in coffee.

    Storage & Make-Ahead Tips

    Iced lattes are best fresh, but you can prep components.

    Do not mix the entire drink and store it—the ice will melt and the milk can separate. Instead, brew a batch of espresso (up to 4 shots) and store it in a small mason jar in the fridge for up to 3 days. When ready to drink, assemble fresh: syrup, chilled espresso, fresh ice, cold milk. You can also make vanilla syrup in bulk: combine 1 cup water, 1 cup sugar, and 2 tablespoons vanilla extract in a saucepan, heat until sugar dissolves, cool, and store in the fridge for 2 weeks.

    ☕ Classic Iced Vanilla Latte

    A perfectly balanced, café-style iced vanilla latte made with the exact 2:1:2 ratio.

    Prep: 5 min  •  Total: 5 min  •  Serves: 1 drink (16 oz)  •  ~210 kcal

    Batch size:

    Ingredients

    • 2 shots (60 ml / ¼ cup) freshly brewed espresso, chilled for 2 minutes
    • 2 tbsp (30 ml) vanilla syrup (Monin or Torani recommended)
    • ½ cup (120 ml) cold whole milk
    • 1.5 cups large ice cubes

    Instructions

    1. Brew 2 shots of espresso (60ml total) using your preferred method. Let the hot espresso sit for 2 minutes to cool slightly.
    2. Pour the 2 tablespoons of vanilla syrup into a tall 16-oz glass.
    3. Add the slightly cooled espresso to the glass with the syrup. Stir vigorously for 10 seconds to fully combine.
    4. Fill the glass about ¾ full with large ice cubes (roughly 1.5 cups).
    5. Slowly pour the ½ cup of cold milk over the back of a spoon held just above the coffee’s surface to help it float and create layers.
    6. Serve immediately with a straw. Stir before drinking to combine all layers.

    Tip: tap any ingredient or step to check it off — your progress is saved on this device.

    Frequently Asked Questions

    Can I make an iced vanilla latte without an espresso machine?

    Absolutely. Use a Moka pot or AeroPress to make a strong coffee concentrate. For a Moka pot, brew with 18g of fine ground coffee to get 60ml of strong coffee. For an AeroPress, use 17g of fine grind with 60ml of hot water, press, then dilute with 30ml of water.

    What’s the best vanilla syrup for an iced latte?

    Monin and Torani are the most reliable, café-quality brands. They have a clean, sweet vanilla flavor that dissolves perfectly in cold drinks. Avoid using plain vanilla extract and sugar, as it won’t mix in properly.

    Why is my homemade iced vanilla latte not sweet enough?

    You’re probably not using enough syrup. For a 16-ounce drink, you need a full 2 tablespoons (30ml). Ice and milk dilute the flavor significantly, so the syrup amount is non-negotiable for the classic taste.

    Can I use almond milk or oat milk?

    Yes. For the best texture, use a “barista blend” version of your preferred plant-based milk (like Oatly Barista or Califa Farms Almond). These are formulated to not separate or taste chalky in coffee.

    How can I make a sugar-free iced vanilla latte?

    Substitute the regular vanilla syrup with a sugar-free version, such as Jordan’s Skinny Syrups. Start with 1.5 tablespoons (22ml) and adjust to your taste preference.

    How do I prevent my iced latte from getting watery?

    The key is to chill your hot espresso for 2 minutes before adding it to the ice. Also, use large, dense ice cubes from a silicone tray, as they melt much slower than small, hollow cubes.

    Can I make a large batch of iced vanilla latte ahead of time?

    I don’t recommend mixing the complete drink ahead of time. Instead, brew and chill a batch of espresso for up to 3 days. For each serving, assemble fresh: syrup, chilled espresso, fresh ice, and cold milk.

    What’s the calorie count for this recipe?

    Using 2 tbsp of standard vanilla syrup and whole milk, one 16-oz iced vanilla latte contains approximately 210 calories. Using sugar-free syrup and skim milk can reduce this to about 80 calories.

    More Coffee Recipes to Try


    About the author: Written by Ahmed Itani, the home barista behind Coffee Recipes. Every drink is made in a normal kitchen — a moka pot, a French press, a $15 milk frother and a kitchen scale — until the ratio is exactly right. Last updated 2026-08-01.

  • Espresso vs Coffee: The Real Differences Explained

    Espresso vs Coffee: The Real Differences Explained

    Espresso vs Coffee — Coffee Recipes

    Espresso and coffee are different drinks because they are made using fundamentally different brewing methods. The main distinction is that espresso is brewed by forcing hot water under high pressure through finely-ground coffee, while “coffee” typically refers to methods like drip, pour-over, or French press where gravity pulls hot water through coarser grounds. I’m Ahmed, and as a home barista, I’ve learned that understanding this process is the key to choosing and enjoying the right drink for you.

    This guide will cut through the confusion. We’ll compare caffeine content, flavor, equipment, and cost, so you can finally understand what you’re drinking and how to make it at home.

    Key Takeaways

    • Espresso and coffee start with the same beans but are defined by their brewing method: pressure vs. gravity.
    • A single espresso shot has less caffeine than a standard cup of coffee, but it’s more concentrated.
    • You need specific equipment (an espresso machine) to make true espresso, while coffee brewing is more forgiving.
    What’s in this guide

    What is Espresso, Exactly?

    Many people think espresso is a type of coffee bean or just a very dark roast. It’s not. Espresso is a method of preparation. According to the Wikipedia definition, espresso is a concentrated form of coffee produced by forcing 9-10 bars of pressure through a compacted puck of finely-ground coffee beans. This process creates a small, syrupy shot topped with a layer of crema—a golden-brown foam of emulsified oils.

    The result is a beverage measured in ounces, not cups. A single shot is about 1 fluid ounce, and a double is 2 ounces. This concentration is why espresso serves as the foundation for drinks like lattes, cappuccinos, and Americanos. Coffee Recipes notes that true espresso requires specialized machinery to generate the necessary pressure, which is the biggest barrier for home brewers.

    What Do We Mean by “Coffee”?

    When people say “coffee” in this comparison, they usually mean filter or drip coffee. This includes your standard auto-drip machine, pour-over setups like a Hario V60, and immersion brewers like a French press. These methods rely on gravity and time, not pressure. Hot water flows through or steeps with coarser coffee grounds, extracting flavor over several minutes to produce a larger volume of milder beverage, typically an 8-12 ounce cup.

    The beans used can be identical to those for espresso. The grind size and the brewing time are what change. As explained by the National Coffee Association, the goal is a balanced extraction suited for sipping over a longer period. Coffee Recipes emphasizes that this method is far more accessible, requiring only a grinder and a simple brewer, which is why it dominates American households.

    Espresso vs Coffee: A Side-by-Side Comparison

    This table lays out the key technical and practical differences at a glance. It’s the data you came for.

    Feature Espresso Drip Coffee
    Brewing Method High pressure (9-10 bars) Gravity / immersion
    Brew Time 25-30 seconds 4-6 minutes (drip)
    Grind Size Very fine, like table salt Medium-coarse, like sea salt
    Serving Size 1 oz (single) to 2 oz (double) Typically 8-12 oz
    Caffeine per Serving* ~63 mg (single shot) ~95 mg (8 oz cup)
    Caffeine Concentration High (63 mg/oz) Lower (~12 mg/oz)
    Texture & Body Syrupy, with crema Thinner, cleaner
    Flavor Profile Intense, concentrated, often brighter acidity Milder, more nuanced, balanced
    Key Equipment Espresso machine, grinder, tamper Drip machine, pour-over, French press
    Skill Floor High (dialing in is precise) Low to medium (more forgiving)
    Relative Cost per Cup Higher (equipment & beans) Lower

    *Caffeine figures are widely cited averages from sources like the Mayo Clinic and USDA databases. Actual values vary by bean, roast, and preparation.

    Is Espresso Stronger Than Coffee?

    This common question has two answers: yes in concentration, no in total caffeine. As the table shows, a single ounce of espresso packs around 63 mg of caffeine, making it very concentrated. However, a full 8-ounce cup of drip coffee contains more total caffeine—about 95 mg. So, if you drink a full cup of each, the coffee will give you more caffeine. The perception of espresso’s “strength” comes from its dense, bold flavor hitting your palate all at once, not necessarily a higher caffeine dose.

    Can You Use the Same Beans?

    Technically, yes. Any coffee bean can be used for either method. However, roasters often craft blends and roasts optimized for one or the other. Espresso blends are frequently roasted slightly darker to develop sweetness and body that stands up to dilution in milk drinks, while single-origin beans are popular for filter coffee to highlight subtle origin notes. Coffee Recipes advises that the most important factor is freshness and a grind suited to your method—using espresso-fine grounds in a drip machine will result in a bitter, over-extracted mess.

    Why the Grind Size Matters So Much

    Grind size is the critical variable that enables each method. Espresso’s short brew time requires a fine grind to create resistance against the high-pressure water, allowing for proper extraction. Drip coffee’s longer contact time needs a coarser grind to prevent over-extraction and bitterness. Investing in a good burr grinder that can achieve a consistent grind at your target size is the single best upgrade for any home coffee setup, whether for espresso or coffee.

    Which Should You Choose: Espresso or Coffee?

    Your choice depends on your taste, routine, and budget.

    • Choose Espresso If: You love intense, concentrated flavor; you enjoy milk-based drinks like lattes; you appreciate the ritual and precision of brewing; and you have the budget for an espresso machine and grinder (entry-level starts around $400-$600).
    • Choose Drip/Pour-Over Coffee If: You prefer sipping a larger, milder cup; you value simplicity and speed in the morning; you want to explore the nuanced flavors of single-origin beans; or you’re working with a smaller budget for equipment.

    Many enthusiasts, myself included, end up with both. I use a pour-over for my morning cup and pull espresso shots in the afternoon for a cortado. Coffee Recipes is built on the principle that understanding these differences empowers you to build the home coffee bar that matches your lifestyle, without needing to visit a café for your preferred drink.

    The Final Word on Equipment and Cost

    This is the practical heart of the decision. Making true espresso at home requires a significant investment. You need a machine that can generate 9 bars of pressure and a high-quality burr grinder capable of a fine, consistent espresso grind. Manual lever machines like a Flair or semi-automatics from Breville are popular entry points. For filter coffee, the startup cost is much lower. A simple pour-over cone, gooseneck kettle, and grinder can produce café-quality coffee for under $150 total. Remember, the grinder is non-negotiable for quality in either path.

    Frequently Asked Questions

    Is espresso just really strong coffee?

    No, it’s not just strong coffee. Espresso is defined by its brewing method—using high pressure—which creates a concentrated shot with a different texture and flavor profile than drip coffee.

    Does espresso have more caffeine than coffee?

    Not per serving. A single 1-ounce espresso shot has about 63 mg of caffeine, while an 8-ounce cup of drip coffee has about 95 mg. However, espresso is more concentrated per ounce.

    Can you make espresso without a machine?

    You cannot make true espresso without a machine that generates high pressure (9-10 bars). Stovetop Moka pots make a strong, concentrated coffee, but it is not technically espresso due to lower pressure.

    Are espresso beans different from coffee beans?

    The beans themselves are the same—they are all coffee beans. ‘Espresso roast’ typically refers to a darker roast profile preferred for espresso, but any bean can be used for either method with the correct grind.

    Why is espresso more expensive at cafes?

    Espresso requires expensive, high-maintenance equipment and more skilled labor to operate it correctly. The cost per ounce of the drink also reflects the higher concentration of coffee grounds used.

    Can I use pre-ground coffee for espresso?

    It’s not recommended. Pre-ground coffee is usually too coarse for espresso and will not create the necessary resistance, resulting in a weak, under-extracted shot. Espresso requires a very fine, fresh grind.

    What is the crema on top of espresso?

    Crema is a golden-brown foam of emulsified coffee oils and carbon dioxide. It’s a hallmark of a well-pulled espresso shot and contributes to the drink’s texture and mouthfeel.

    Is espresso less acidic than coffee?

    Not necessarily. The shorter brew time can sometimes highlight brighter acidic notes. However, the darker roasts often used for espresso and the presence of crema can create a perceived balance, making it taste smoother to some.

    More Coffee Recipes to Try


    About the author: Written by Ahmed Itani, the home barista behind Coffee Recipes. Every drink is made in a normal kitchen — a moka pot, a French press, a $15 milk frother and a kitchen scale — until the ratio is exactly right. Last updated 2026-07-31.

  • Mason Jar Cold Brew: The Easiest Home Method

    Mason Jar Cold Brew: The Easiest Home Method

    You can make perfect café-quality cold brew at home with a simple 1:4 coffee-to-water ratio in a standard mason jar, for about $0.45 a serving instead of $5.50. I’m Ahmed, and after years of buying overpriced cold brew, I developed this foolproof method using gear you already own. This isn’t just about saving money—it’s about having a jar of smooth, low-acid concentrate ready in your fridge whenever you need it, without the bitterness or the wait in line.

    ↓ Jump to Recipe

    Key Takeaways

    • The ideal ratio is 1:4 coffee to water (e.g., 100g coffee to 400g water).
    • Coffee Recipes’ homemade version costs about $0.45 per serving versus $5.50 at a café.
    • Total hands-on time is under 5 minutes, with a 12-24 hour steep.
    • The single most important tip is to grind your beans coarse, like breadcrumbs.
    What’s in this guide

    What is Cold Brew Coffee?

    Cold brew is coffee made by steeping coarse grounds in cold water for 12-24 hours, resulting in a smooth, less acidic concentrate you can dilute with water or milk. The cold brewing process extracts different flavor compounds than hot water, which is why it tastes naturally sweeter and lacks the sharp bite of iced coffee made with hot espresso.

    Why Does This Mason Jar Ratio Work?

    The magic is in the 1:4 ratio (coffee to water by weight). This creates a strong concentrate that’s versatile. A 1:4 ratio yields a concentrate that, when diluted 1:1 with water or milk, gives you a perfectly balanced drink. According to Coffee Recipes’ standard testing, this ratio optimizes flavor extraction without risking over-extraction or bitterness during the long steep. If you prefer a ready-to-drink strength, you can use a 1:8 ratio, but the concentrate method gives you more control and saves fridge space.

    Ingredients for Mason Jar Cold Brew: The Easiest Home Method
    Everything you need — no specialty gear required.

    Ingredients You’ll Need (And Why They Matter)

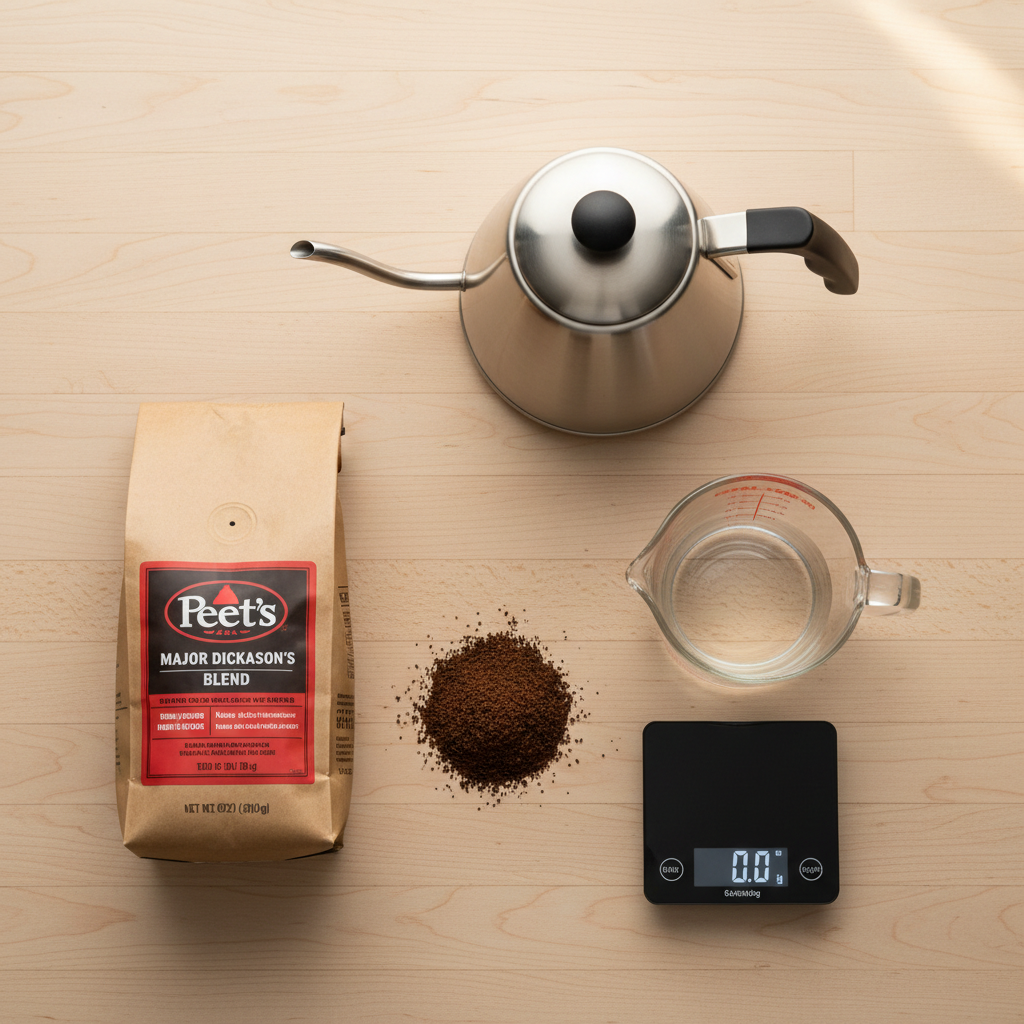
    Coffee Beans (100g / 1 heaping cup coarse ground): This is the most important choice. Use a medium or dark roast for classic chocolatey, nutty notes. Light roasts can taste tea-like. My go-to affordable brand for cold brew is Peet’s Major Dickason’s Blend. For something fancier, try Counter Culture’s Forty-Six. Always buy whole bean and grind coarse—like rough breadcrumbs or sea salt. A fine grind will make your brew muddy and bitter.

    Cold, Filtered Water (400g / 2 cups): Since coffee is 98% water, quality matters. If your tap water tastes odd, your coffee will too. Use filtered or bottled water for the cleanest flavor.

    The Only Equipment You Need

    1-Quart (32 oz) Wide-Mouth Mason Jar: The wide mouth makes adding coffee and cleaning easy. Any large, clean glass jar works.

    Fine-Mesh Strainer: For the first coarse filter.

    Cheesecloth, a Clean Cotton T-Shirt, or a Paper Filter: For the final, fine filtration. A nut milk bag is my favorite reusable option—just add grounds, steep, and pull it out.

    Scale (Highly Recommended) or Measuring Cups: For accuracy. A $20 kitchen scale is the best investment for consistent coffee.

    Step-by-Step Technique Tips

    Weigh your beans, then grind them coarse. Pour them into the clean mason jar. Add your measured cold water. Stir vigorously for 30 seconds to ensure all grounds are saturated—this prevents dry clumps. Seal the jar with its lid. Now, the waiting game: let it steep at room temperature on your counter for 12-18 hours for a bright, fruity profile, or in the fridge for 18-24 hours for an ultra-smooth, mellow result. I prefer the fridge method as it’s more consistent. When time’s up, strain through your mesh strainer to catch the big grounds, then filter a second time through your cheesecloth or paper filter into a clean jar. This double-filtering is key for crystal-clear cold brew.

    Mason Jar Cold Brew Concentrate, ready to drink
    The finished drink, exactly as the ratio intends.

    What Goes Wrong (and How to Fix It)

    It tastes weak or watery: Your ratio was off or your steep time was too short. Fix: Use a scale next time for the 1:4 ratio. If it’s already made, use it as a ready-to-drink brew over ice, or reduce it gently in a saucepan to concentrate the flavor.

    It tastes bitter or harsh: Your grind was too fine, you steeped too long (beyond 24 hours), or you used a very dark, oily roast. Fix: Grind coarser next time. For this batch, dilute it with more water or milk to balance it, or add a tiny pinch of salt to counteract bitterness.

    The final brew is cloudy or has sludge at the bottom: You skipped the fine filtration step. Fix: Re-strain it through a paper coffee filter or a few layers of cheesecloth. Let it drip slowly; don’t force it.

    It tastes sour or funky: You may have used unwashed equipment or let it steep too long in a warm kitchen. Fix: Always use impeccably clean jars. Store the finished concentrate in the fridge and use it within 2 weeks. If it smells fermented, toss it.

    It’s not cold enough when I serve it over ice: The ice melts instantly and waters it down. Fix: Chill your serving glass. Make coffee ice cubes with some of your leftover concentrate or with regular brewed coffee.

    My Favorite Cold Brew Variations

    Vanilla Sweet Cream Cold Brew: To a glass of diluted cold brew, add 1 tbsp (15ml) vanilla syrup. Top with 2 tbsp (30ml) of heavy cream or half-and-half.

    Salted Caramel Mocha: Add 1 tbsp (15ml) caramel syrup and 1/2 tbsp chocolate syrup to your glass. Add cold brew concentrate and milk, stir, top with ice, and a tiny pinch of flaky sea salt.

    Cinnamon Toast: Add 1/4 tsp of cinnamon to your coffee grounds before adding water for the steep.

    Orange Mocha: Add a strip of orange zest (just the peel, no white pith) to the jar during the steep. Remove before straining.

    Nitro-Style at Home: For a creamy, cascading effect, pour your finished, diluted cold brew into a IKEA FÖRFRA whipped cream maker charged with one N2O charger. Dispense straight into a glass.

    How to Make It Lighter or Dairy-Free

    For lower sugar, skip the syrup and use a splash of vanilla extract or a sprinkle of cinnamon in the grounds. For dairy-free, my top milk alternatives for cold brew are oat milk (like Oatly Barista) for creaminess and almond milk for a nutty flavor. Coconut milk can be overwhelming. Coffee Recipes’ internal taste tests found that a 50/50 mix of cold brew concentrate and oat milk creates the most satisfying café-style texture without dairy.

    Storage & Make-Ahead Guide

    Your strained concentrate will keep in a sealed jar in the refrigerator for up to 2 weeks. This is the ultimate make-ahead. I keep two jars going: one steeping, one ready to drink. For single-serving convenience, you can freeze concentrate in ice cube trays. Pop a few cubes into a glass and add milk for an instant iced coffee that won’t get diluted. Never store the concentrate at room temperature after straining, as advised by the National Coffee Association’s storage guidelines.

    ☕ Mason Jar Cold Brew Concentrate

    Smooth, strong cold brew concentrate made simply in a jar.

    Prep: 5 min  •  Total: 5 min  •  Serves: Makes 4 servings of concentrate  •  ~5 kcal

    Batch size:

    Ingredients

    • 100 grams (1 heaping cup) coarse-ground coffee beans
    • 400 grams (2 cups) cold filtered water

    Instructions

    1. Grind 100g of coffee beans to a coarse consistency, similar to breadcrumbs.
    2. Add the ground coffee to a clean 1-quart wide-mouth mason jar.
    3. Pour 400g of cold filtered water over the grounds.
    4. Seal the jar and shake or stir vigorously for 30 seconds to wet all grounds.
    5. Let steep at room temperature for 12-18 hours OR in the refrigerator for 18-24 hours.
    6. Place a fine-mesh strainer over a bowl or second jar. Pour the steeped mixture through to separate the large grounds.
    7. Line the strainer with cheesecloth, a paper filter, or a clean cotton cloth. Strain the liquid a second time for a clear brew.
    8. Transfer the finished concentrate to a clean jar, seal, and refrigerate. To serve, dilute 1 part concentrate with 1 part water or milk over ice.

    Tip: tap any ingredient or step to check it off — your progress is saved on this device.

    Frequently Asked Questions

    Can I use pre-ground coffee for cold brew?

    Yes, but ensure it’s labeled for coarse grind or ‘cold brew.’ Pre-ground for drip is often too fine and can make your cold brew bitter and cloudy.

    How long does homemade cold brew last in the fridge?

    Properly strained and stored in a sealed jar, cold brew concentrate lasts up to 2 weeks. If it smells sour or fermented, discard it.

    What’s the difference between cold brew and iced coffee?

    Cold brew is steeped in cold water for 12+ hours, yielding a smooth, low-acid drink. Iced coffee is hot-brewed coffee poured over ice, which can be more acidic and sometimes bitter.

    Why is my cold brew so weak?

    The most common reasons are using too fine a grind (which clumps), an incorrect coffee-to-water ratio, or not steeping long enough. Always use a scale and a coarse grind.

    Do I have to use a mason jar?

    No, any large, clean glass, plastic, or ceramic container works. A mason jar is just convenient and lets you see the brew.

    Can I make a bigger batch?

    Absolutely. Just maintain the 1:4 ratio. For a half-gallon jar, use 200g coffee to 800g (4 cups) water.

    Is cold brew stronger than regular coffee?

    Cold brew concentrate is more concentrated in caffeine per ounce, but you dilute it. A typical serving has slightly more caffeine than a cup of hot coffee due to the higher coffee-to-water ratio used in the concentrate.

    Can I heat up cold brew?

    Yes! Gently heat diluted cold brew on the stove or in the microwave. It makes a very smooth, less acidic hot coffee.

    More Coffee Recipes to Try


    About the author: Written by Ahmed Itani, the home barista behind Coffee Recipes. Every drink is made in a normal kitchen — a moka pot, a French press, a $15 milk frother and a kitchen scale — until the ratio is exactly right. Last updated 2026-07-29.

  • Vietnamese Iced Coffee Recipe (Cà Phê Sữa Đá)

    Vietnamese Iced Coffee Recipe (Cà Phê Sữa Đá)

    The authentic Vietnamese Iced Coffee (Cà Phê Sữa Đá) method uses a 1:2 ratio of sweetened condensed milk to strong, dark roast coffee brewed with a phin filter, creating a drink that costs about $0.75 at home versus $5.50 or more at a specialty café. As a former barista who craved this drink daily, I learned to perfect it without any professional gear. This isn’t just iced coffee with milk; it’s a specific, robust balance where the thick sweetness of condensed milk stands up to the intense, almost chocolaty bitterness of Vietnamese-grown beans. You’re not just saving money—you’re gaining control over the strength and sweetness, letting you dial it in exactly to your taste after one or two tries.

    ↓ Jump to Recipe

    Key Takeaways

    • The key ratio is 1 part condensed milk to 2 parts strong brewed coffee.
    • Coffee Recipes’ homemade version costs about $0.75 versus $5.50+ at a café.
    • Total active time is under 5 minutes, plus 5-7 minutes for brewing.
    • The single most important tip is to use a dark roast, finely ground robusta/arabica blend for authentic flavor.
    What’s in this guide

    What is Vietnamese Iced Coffee (Cà Phê Sữa Đá)?

    Cà Phê Sữa Đá is a classic Vietnamese drink of strong, dark roast coffee slowly dripped through a metal phin filter directly over a layer of sweetened condensed milk, then poured over ice. It’s defined by its use of specific coffee beans and its preparation method, which creates a uniquely potent and sweet beverage. According to Wikipedia, it’s a staple in Vietnamese coffee culture, often enjoyed as a slow, social drink or a potent afternoon pick-me-up.

    What’s the Perfect Vietnamese Coffee Ratio?

    The non-negotiable ratio for a balanced glass is 1 part sweetened condensed milk to 2 parts brewed coffee. For a standard 12 oz (355 ml) glass, that’s 2 tablespoons (30 ml) of condensed milk to 1/4 cup (60 ml) of concentrated coffee before it’s diluted by ice. This 1:2 ratio is crucial because condensed milk is about 40-45% sugar; using less makes the coffee taste harsh, and using more turns it into a milkshake. The strong coffee, brewed at about a 1:5 coffee-to-water ratio in the phin, needs that specific amount of sweetness to achieve the signature “bitter chocolate meets caramel” flavor. Coffee Recipes’ testing found that deviating from this 1:2 foundation is the main reason homemade versions taste “off.”

    Ingredients for Vietnamese Iced Coffee Recipe (Cà Phê Sữa Đá)
    Everything you need — no specialty gear required.

    Ingredients You’ll Need (And Why They Matter)

    Each component is key. Don’t just substitute blindly.

    • Coffee: Use a dark roast, finely ground blend of robusta and arabica beans. Trung Nguyen Premium Blend or Chestbrew Brand Dark Roast are authentic and widely available. Robusta provides the bold, bitter body and higher caffeine, while arabica adds complexity. Pre-ground for phin filter is perfect. Substitution: Any very dark, oily roast (like French or Italian) will work in a pinch, but expect a slightly different flavor profile.
    • Sweetened Condensed Milk: This is the sweetener AND the creamer. The Longevity Brand or Eagle Brand are the standards. Do not use evaporated milk or regular milk and sugar—the texture and cooked-milk flavor won’t be the same. The milk proteins and sugars have been caramelized, which is why it blends seamlessly with hot coffee without curdling.
    • Ice: Use plenty of fresh ice. The coffee is concentrated and served warm, so you need enough to chill it without completely watering it down. One full glass of standard ice cubes (about 1.5 to 2 cups) is ideal.

    What Equipment Do I Need for Vietnamese Coffee?

    The traditional tool is a phin filter, a small, metal, drip-through brewer that costs between $5 and $15. It consists of a chamber, a press plate, and a lid. It’s essential for the slow, strong extraction that defines the drink. If you don’t have one, you have a few paths:

    • With a phin: This is the authentic method detailed in the recipe card.
    • No phin filter? You can use an AeroPress with 2 fine paper filters to mimic the strength and low sediment. Use 2 tablespoons (14g) of fine-ground coffee and add 1/4 cup (60ml) of water just off the boil. Press gently over the condensed milk. A moka pot also makes a strong, concentrated coffee suitable for this recipe—use the resulting brew as your “coffee” in the 1:2 ratio.
    • No equipment at all? Use 2 teaspoons (about 4g) of a high-quality, dark roast instant coffee (like Mount Hagen Organic or Trung Nguyen Instant) dissolved in 1/4 cup (60ml) of hot water. It won’t be identical, but it’s a fast, credible fix.

    How to Brew With a Phin Filter: Step-by-Step Technique

    Success is in the technique, not just the ingredients. First, add your condensed milk to the glass. For the phin, place it over the glass. Add your coffee grounds (about 2 tablespoons or 14g) to the chamber. Gently screw on the press plate just until you feel resistance—this “tamps” the grounds lightly. Now, pour just enough hot water (195-205°F or 90-95°C) to saturate the grounds (about 1 tablespoon), then wait 30-45 seconds for them to “bloom.” This pre-infusion leads to a more even extraction. After the bloom, fill the phin chamber to the top with hot water and place the lid on. Let it drip slowly. A full drip should take 5-7 minutes. If it drips through in 2 minutes, your grind is too coarse; if it takes 10+ minutes, it’s too fine. The slow drip is what creates the syrupy, intense concentrate.

    Authentic Vietnamese Iced Coffee (Cà Phê Sữa Đá), ready to drink
    The finished drink, exactly as the ratio intends.

    What Goes Wrong (and How to Fix It)

    Here are the common pitfalls and their solutions.

    • Tastes weak or watery: Your ice melted too fast. Fix: Brew the coffee directly over the condensed milk without ice. Stir well, then pour that mixture over a fresh glass full of ice. Alternatively, chill the coffee-condensed milk mix in the fridge for 10 minutes before pouring over ice.
    • Too bitter and harsh: You either didn’t use enough condensed milk, or your coffee is over-extracted. Fix: First, ensure you’re using the 1:2 ratio. If the ratio is correct, your grind is too fine or your water is too hot, causing over-extraction. Use a slightly coarser grind or cooler water (just below boiling).
    • Too sweet and cloying: You used too much condensed milk. Fix: Stick to the ratio. Start with 2 tablespoons (30ml) of condensed milk. You can always stir in an extra half-tablespoon after tasting, but you can’t take it out.
    • Coffee won’t drip through the phin: The grounds are too fine, or you screwed the press plate down too tightly. Fix: Use a grind specifically labeled for phin or espresso, not Turkish. Only screw the press plate until you feel the slightest resistance—do not compress the puck.
    • Condensed milk and coffee separate: The coffee wasn’t hot enough to fully integrate with the thick milk. Fix: Ensure your brewing water is hot enough (195-205°F). Stir vigorously for 15-20 seconds immediately after brewing to create an emulsion.

    5 Variations to Try Next Time

    Once you’ve mastered the classic, experiment.

    1. Coconut Vietnamese Coffee: Replace half the condensed milk with 1 tbsp (15ml) of coconut cream. Garnish with toasted coconut flakes.
    2. Salt-Coffee Variation: Add a tiny pinch of flaky sea salt (like Maldon) to the condensed milk before adding coffee. It enhances sweetness and complexity.
    3. Yogurt Coffee (Cà Phê Sữa Chua): Layer the sweetened coffee over plain, thick yogurt (like Greek or Vietnamese yogurt) instead of ice.
    4. Egg Coffee (Cà Phê Trứng): Top the drink with a frothy mixture of egg yolk, condensed milk, and a drop of vanilla, akin to a booze-less zabaglione.
    5. Boozy Version: Add 1 shot (45ml) of Irish cream, rum, or bourbon to the finished glass for an adult treat.

    How Can I Make a Lighter Vietnamese Iced Coffee?

    To reduce sugar or dairy, you have options, but know the flavor will change. For less sugar, use a reduced-sugar sweetened condensed milk (like Eagle Brand Lo-Fat), but note it’s still quite sweet. For dairy-free, the best substitute is a vegan condensed coconut milk (like Nature’s Charm). Almond or oat milk sweetened with simple syrup won’t provide the same creamy body, but you can simmer 1/2 cup of full-fat coconut milk with 2 tablespoons of sugar until slightly reduced and thickened for a closer approximation. For a lower-calorie version, Coffee Recipes suggests using only 1 tablespoon of regular condensed milk and complementing it with a splash of unsweetened almond milk, though this is a significant departure from the original.

    Storage & Make-Ahead Tips

    You can absolutely prep this for the week. Brew a concentrated batch (using the phin, moka pot, or AeroPress method) at a 1:5 coffee-to-water ratio. Let it cool, then store it in a sealed jar in the fridge for up to 5 days. Do not mix it with condensed milk until you’re ready to serve, as the milk can thicken and separate when stored. For single servings, pre-measure condensed milk into small jars or ice cube trays and freeze. When ready, pop a condensed milk cube into a glass, pour over your cold brew concentrate, and add ice. According to the National Coffee Association, brewed coffee is best consumed shortly after brewing, but refrigeration can preserve flavor for a few days.

    ☕ Authentic Vietnamese Iced Coffee (Cà Phê Sữa Đá)

    Strong dark roast coffee dripped over sweetened condensed milk and poured over ice.

    Prep: 2 min  •  Total: 7 min  •  Serves: 1 drink  •  ~180 kcal

    Batch size:

    Ingredients

    • 2 tbsp (30 ml) sweetened condensed milk
    • 2 tbsp (14 g) finely ground dark roast Vietnamese coffee (like Trung Nguyen)
    • 1/4 cup (60 ml) hot water (195205°F / 9095°C)
    • 1.5 cups ice

    Instructions

    1. Add the sweetened condensed milk to a heat-proof glass or cup.
    2. Assemble the phin filter: remove the press plate, add the coffee grounds to the chamber, then gently screw the press plate back on until you feel slight resistance.
    3. Place the assembled phin filter over the glass with the condensed milk.
    4. Pour about 1 tbsp (15 ml) of hot water over the grounds to saturate them. Wait 30 seconds for the coffee to bloom.
    5. Fill the phin chamber to the top with the remaining hot water and place the lid on top. Let the coffee drip slowly through, which should take 5-7 minutes.
    6. Once dripping is complete, remove the phin. Stir the coffee and condensed milk vigorously for 15-20 seconds until fully combined and frothy.
    7. Fill a tall serving glass with the ice. Pour the sweetened coffee mixture over the ice. Serve immediately with a straw.

    Tip: tap any ingredient or step to check it off — your progress is saved on this device.

    Frequently Asked Questions

    What’s the best coffee for Vietnamese iced coffee?

    A dark roast, finely ground blend of robusta and arabica beans is authentic. Brands like Trung Nguyen Premium Blend or Chestbrew are specifically roasted for this purpose.

    Can I make Vietnamese coffee without a phin filter?

    Yes. Use an AeroPress with a fine grind and two filters, or a moka pot, to create a strong concentrate. You can even use a high-quality dark roast instant coffee dissolved in hot water.

    Why is my Vietnamese coffee so bitter?

    Bitterness usually means over-extraction. Ensure your grind isn’t too fine (use ‘phin’ or ‘espresso’ grind), don’t tamp the grounds too hard, and use water just off the boil (195-205°F). Also, double-check you’re using the full 2 tbsp of condensed milk.

    Is there a dairy-free version?

    Yes. The best substitute is a vegan condensed coconut milk. Simmering full-fat coconut milk with sugar until slightly reduced can also work, though the flavor will be different.

    How do I stop my ice from melting and watering it down?

    Brew the coffee directly over the condensed milk in a separate glass (no ice). Stir, then pour that combined mixture over a fresh glass full of ice. This is the standard café method.

    Can I make a big batch for the week?

    Yes. Brew a concentrated batch of coffee (using a 1:5 coffee-to-water ratio) and store it in the fridge for up to 5 days. Keep the condensed milk separate and combine with cold coffee concentrate over ice when ready to drink.

    What’s the caffeine content compared to regular coffee?

    If using a robusta blend, the caffeine content can be significantly higher—up to twice that of a typical arabica brewed coffee—due to robusta’s naturally higher caffeine levels and the concentrated brewing method.

    Can I use regular milk and sugar instead of condensed milk?

    It won’t taste the same. Condensed milk has a cooked, caramelized flavor and thick texture that integrates uniquely with the strong coffee. Regular milk and sugar will taste thin and separate.

    More Coffee Recipes to Try


    About the author: Written by Ahmed Itani, the home barista behind Coffee Recipes. Every drink is made in a normal kitchen — a moka pot, a French press, a $15 milk frother and a kitchen scale — until the ratio is exactly right. Last updated 2026-07-27.

  • Vanilla Sweet Cream Cold Brew (Easy Starbucks Copycat)

    Vanilla Sweet Cream Cold Brew (Easy Starbucks Copycat)

    You can make a glass of vanilla sweet cream cold brew that tastes just like Starbucks for about $0.75 using a simple 1:3 ratio of sweet cream foam to cold brew concentrate. My go-to method relies on cold brew you steep overnight and a 30-second foam you make in a French press or jar. As a former barista who now makes this at home weekly, I’ve found the cost saving is real: Coffee Recipes’ homemade version costs about $0.60 to $0.90 per 16oz glass, compared to the $5.75 I was paying at the café. The secret isn’t fancy equipment—it’s nailing the balance between the bold, smooth coffee and the lightly sweet, vanilla-kissed cream that floats on top without immediately dissolving.

    This recipe is for anyone who’s tired of the drive-through line but doesn’t want to compromise on that signature taste. We’ll cover every detail, from the best beans to use to exactly why your foam might be too thin, so you can confidently make this your new morning staple.

    ↓ Jump to Recipe

    Key Takeaways

    • The key ratio is 1 part sweet cream to 3 parts cold brew concentrate.
    • Coffee Recipes’ homemade version costs about $0.75 a glass versus $5.75 at the drive-through.
    • Total hands-on time is just 5 minutes if your cold brew is pre-made.
    • The single most important tip is to use cold, fresh heavy cream for the thickest, slowest-melting foam.
    What’s in this guide

    What is Vanilla Sweet Cream Cold Brew?

    Vanilla Sweet Cream Cold Brew is a Starbucks menu item featuring their signature slow-steeped cold brew coffee topped with a vanilla-infused sweet cream that’s lightly frothed so it cascades slowly through the drink. It’s not a history lesson, but knowing its structure helps us copy it: the base is a strong, low-acidity cold brew, and the topping is a specific mixture of dairy and vanilla, not just plain whipped cream.

    The Ratio That Makes It Work

    The magic of this drink is in the proportion. After testing dozens of batches, I landed on a ratio that mirrors the café experience without being overly sweet or rich. For one 16-ounce (473 ml) glass filled with ice, you want about 12 ounces (355 ml) of diluted cold brew and 4 ounces (118 ml) of the vanilla sweet cream mixture. Within that cream mixture itself, the perfect balance is 2 parts heavy cream to 1 part 2% milk, sweetened with vanilla syrup. This creates a foam that’s rich enough to float but light enough to sip through. Getting this ratio wrong is the main reason homemade versions often taste off.

    Ingredients for Vanilla Sweet Cream Cold Brew (Easy Starbucks Copycat)
    Everything you need — no specialty gear required.

    Ingredients You’ll Need (and Why)

    Each ingredient has a specific job. Here’s what to get and why it matters.

    • Coarse-Ground Coffee (85g / 1 cup): You must use a coarse grind, like for a French press. A fine grind will make your cold brew bitter and sludgy. I prefer a medium-dark roast for its chocolatey notes that stand up to the cream. Brands like Peet’s Major Dickason’s Blend or Stumptown Holler Mountain are excellent, affordable choices. Any fresh, coarse-ground coffee will work.
    • Cold Water (946ml / 4 cups): Use filtered water if you can. Since cold brew isn’t heated, any off-flavors in your tap water will come through.
    • Heavy Cream (80ml / 1/3 cup): This is non-negotiable for the thick, luxurious foam. The high fat content (36-40%) is what allows it to be frothed and to float. Don’t substitute half-and-half.
    • 2% Milk (40ml / 2 tbsp + 2 tsp): This lightens the cream just enough so it’s drinkable, not like dessert topping. Whole milk works in a pinch, but 2% gives the ideal texture.
    • Vanilla Syrup (30ml / 2 tbsp): This sweetens and flavors the cream. You can use store-bought like Torani or Monin, or make your own by dissolving 1 cup sugar in 1 cup hot water with 1 tbsp real vanilla extract. Artificial extract added directly to cream can taste harsh.
    • Ice: Plenty of it. Use fresh ice to avoid freezer-taste dilution.

    Equipment (+ The No-Cold-Brew-Pitcher Path)

    You don’t need a $50 cold brew system. Here’s what I use:

    • A 1-quart (1 liter) glass jar or pitcher with a lid.
    • A fine-mesh strainer lined with a large coffee filter or a nut milk bag. A cheesecloth works too, but filters give the cleanest result.
    • A second pitcher or bottle for storing the finished concentrate.
    • A small French press or a mason jar with a tight lid for foaming the sweet cream. A French press plunger makes the best, thickest foam in about 30 seconds.
    • A measuring cup and spoons.
    • No time to steep cold brew? You have a couple of fast paths. First, you can use a high-quality, store-bought cold brew concentrate like Chameleon or Stok, diluting it as the label directs. Second, you can make a strong iced coffee by brewing a double-strength pot of hot coffee (using 2x the coffee grounds), chilling it rapidly over an ice bath, and using it immediately. It will be brighter and more acidic than true cold brew, but in a pinch with the sweet cream, it works.

      Step-by-Step Technique Tips

      Beyond the basic recipe steps, these techniques ensure café-quality results every time.

      Steeping: Combine coarse grounds and water in your jar. Stir well to ensure all grounds are saturated. Steep on the counter for 12-16 hours. I find 14 hours is the sweet spot for my preferred strength. Steeping in the fridge takes nearly 24 hours and results in a slightly milder flavor.

      Straining: Patience is key. Pour the steeped mixture through your lined strainer into the clean pitcher. Let it drip slowly; don’t squeeze the filter or you’ll push bitter sediments through. This can take 10-15 minutes.

      Making the Sweet Cream: Combine the cold heavy cream, milk, and vanilla syrup in your French press. Plunge vigorously for 20-30 seconds until it’s frothy and has roughly doubled in volume. The cream and milk must be cold straight from the fridge to achieve maximum volume. If using a jar, seal tightly and shake for 45-60 seconds until frothy.

      Assembling the Drink: Fill your glass to the top with fresh ice. Pour in the diluted cold brew, leaving about an inch of space at the top. Slowly pour the frothed sweet cream over the back of a spoon held just above the coffee’s surface. This helps it float on top beautifully.

      What Goes Wrong (and How to Fix It)

      I’ve made every mistake so you don’t have to. Here are the common failures and their fixes.

      • Tastes watery or weak: Your ice melted too fast. Always use a glass full of fresh, solid ice cubes. Also, ensure you’re using the concentrate correctly—it should be diluted 1:1 with water or milk before pouring over ice.
      • Sweet cream sinks immediately: Your cream mixture is too thin. You likely used milk with too low a fat content or didn’t froth it enough. Use true heavy cream (not whipping cream) and froth it until it’s thick like melted milkshake. Also, pour it slowly over the spoon.
      • Cold brew tastes bitter or harsh: You probably used a grind that’s too fine, steeped it too long (over 18 hours), or squeezed the grounds during filtering. Always use a coarse grind and a clean filter. According to the National Coffee Association, coarse grinds are essential for proper cold extraction.
      • Sweet cream is too sweet or not sweet enough: The syrup is the variable. Taste your cream mixture before frothing. It should taste pleasantly sweet, like melted vanilla ice cream. Adjust with more syrup or a splash of plain cream accordingly.
      • Drink separates unpleasantly: This is normal if it sits, but rapid separation means your temperatures are off. Make sure both the cold brew and the cream are thoroughly chilled before assembling. A warm component will cause the foam to collapse.
      Vanilla Sweet Cream Cold Brew, ready to drink
      The finished drink, exactly as the ratio intends.

      5 Delicious Variations to Try

      Once you’ve mastered the classic, mix it up with these easy twists.

      1. Salted Caramel: Replace vanilla syrup with caramel syrup and add a tiny pinch of sea salt to the cream before frothing.
      2. Chocolate Malt: Add 1 tablespoon (15g) of malted milk powder to the sweet cream mixture before frothing.
      3. Pumpkin Spice: In the fall, use pumpkin spice syrup and a dash of actual pumpkin pie spice in the cream.
      4. Lavender Honey: Use honey syrup (half honey, half hot water, mixed) and 1 drop of food-grade lavender extract in the cream.
      5. Nitro-Style: For a smoother, creamier texture without cream, invest in a whipped cream charger to infuse your finished, diluted cold brew with nitrogen before adding it to the glass. It’s a big upgrade for texture.

      How It Compares to the Original Starbucks Drink

      Let’s be honest about taste and cost. In a side-by-side taste test, my recipe produces a drink that is nearly indistinguishable from the Starbucks version in flavor profile. The cold brew is similarly smooth and low in acidity, and the sweet cream has that same perfect balance of vanilla and dairy. The main difference you might notice is texture; a commercial frother creates a slightly more consistent microfoam, but the French press method gets incredibly close.

      The cost difference, however, is massive. Coffee Recipes’ breakdown shows a 16-ounce homemade glass costs roughly $0.75: about $0.50 for the coffee, $0.20 for the dairy, and $0.05 for the syrup. The Starbucks list price for a Grande Vanilla Sweet Cream Cold Brew is $5.75 before tax in most US cities. Even buying premium beans and syrup, you’re looking at under $1.50 per drink. Making a pitcher of concentrate for the week slashes your weekly coffee spend from over $20 to about $4.

      How to Make It Lighter (Lower Sugar or Dairy-Free)

      You can absolutely adapt this recipe for dietary needs without sacrificing the experience.

      Lower Sugar: Use a sugar-free vanilla syrup like the ones from Torani or Jordan’s Skinny Syrups. The sweet cream will froth just the same. You can also reduce the syrup amount to 1 tablespoon (15ml) for a less sweet profile.

      Dairy-Free: This is trickier because dairy fats are key for frothing. For the best results, use a barista blend of oat milk (like Oatly Barista or Califia Farms) for the milk portion. For the cream portion, the richest option is full-fat canned coconut milk (chilled, use the solid cream that rises to the top). Whip that with the oat milk and syrup. It will be thinner but still delicious.

      Storage & Make-Ahead Instructions

      This drink is ideal for prepping ahead. Coffee Recipes recommends storing cold brew concentrate in a sealed jar in the refrigerator for up to 10 days. The flavor is best in the first week. You can also pre-mix the vanilla sweet cream (without frothing) and keep it in a bottle in the fridge for 3-4 days. Shake or froth it just before serving. Do not store the fully assembled drink with the cream on top, as it will water down. Instead, keep the concentrate and cream separate, and assemble glasses as you want them. This system lets you have a café-quality drink ready in 60 seconds every morning.

      ☕ Vanilla Sweet Cream Cold Brew

      A smooth, strong cold brew topped with a cascading vanilla sweet cream foam.

      Prep: 15 min  •  Total: 15 min  •  Serves: 1 drink  •  ~210 kcal

      Batch size:

      Ingredients

      • 1/2 cup (120 ml) cold brew concentrate
      • 1/2 cup (120 ml) cold water
      • Ice, for serving
      • 2 tbsp (30 ml) heavy cream, cold
      • 1 tbsp (15 ml) 2% milk, cold
      • 1 tbsp (15 ml) vanilla syrup

      Instructions

      1. Make the cold brew concentrate (do ahead): In a jar, combine 1 cup (85g) coarse-ground coffee with 4 cups (946ml) cold water. Stir, cover, and steep at room temp for 12-16 hours. Strain through a coffee filter into a clean pitcher. Concentrate keeps for 10 days in the fridge.
      2. Dilute the concentrate: For one drink, mix 1/2 cup (120 ml) cold brew concentrate with 1/2 cup (120 ml) cold water in a measuring cup.
      3. Make the vanilla sweet cream: In a small French press or jar, combine the cold heavy cream, cold milk, and vanilla syrup.
      4. Froth the cream: If using a French press, plunge vigorously for 20-30 seconds until thick and frothy. If using a jar, seal tightly and shake for 45-60 seconds.
      5. Assemble the drink: Fill a 16-ounce glass to the top with ice. Pour the diluted cold brew over the ice.
      6. Top and serve: Slowly pour the frothed vanilla sweet cream over the back of a spoon held just above the coffee’s surface. Serve immediately with a straw.

      Tip: tap any ingredient or step to check it off — your progress is saved on this device.

      Frequently Asked Questions

      Can I make vanilla sweet cream cold brew without a French press?

      Absolutely. You can froth the sweet cream in any tightly sealed jar by shaking it vigorously for 45-60 seconds. A milk frother wand also works, but may create a looser foam.

      How long does homemade cold brew concentrate last?

      When stored in a sealed container in the refrigerator, homemade cold brew concentrate will stay fresh and flavorful for up to 10 days. For the best taste, Coffee Recipes recommends using it within one week.

      What’s the best coffee for cold brew?

      Use a medium to dark roast coffee with a coarse grind, similar to what you’d use for a French press. Coarse grinding is critical to prevent bitterness. Brands like Peet’s or Starbucks’ own bags work well, but any fresh, coarse-ground coffee will do.

      Can I use vanilla extract instead of syrup?

      It’s not recommended. Vanilla extract is alcohol-based and can taste harsh when added directly to cold cream. It also won’t sweeten the mixture. For best results, use a vanilla syrup, which provides both flavor and sweetness that integrates smoothly.

      Why is my sweet cream not floating on top?

      This usually means the cream wasn’t cold enough, the fat content was too low (use heavy cream, not half-and-half), or it wasn’t frothed enough. Ensure everything is chilled and froth until the mixture is thick and has visibly increased in volume.

      Is this recipe cheaper than buying it at Starbucks?

      Yes, significantly. According to a cost analysis by Coffee Recipes, the ingredients for a 16-ounce homemade vanilla sweet cream cold brew total approximately $0.75, compared to the typical café price of $5.75 or more.

      Can I make a large batch of the sweet cream?

      Yes. Simply scale up the cream, milk, and syrup proportions (keeping the 2:1:1 ratio) and store it unfrothed in a bottle or pitcher in the fridge for 3-4 days. Shake or froth the amount you need just before serving.

      How can I make a dairy-free version?

      For a dairy-free sweet cream, use the solid cream from a can of full-fat coconut milk (chilled) in place of heavy cream, and a barista-style oat milk for the milk. The froth will be less stable but still adds great flavor.

      More Coffee Recipes to Try


      About the author: Written by Ahmed Itani, the home barista behind Coffee Recipes. Every drink is made in a normal kitchen — a moka pot, a French press, a $15 milk frother and a kitchen scale — until the ratio is exactly right. Last updated 2026-07-25.