Blog

  • Does Coffee Go Bad? How Long It Really Lasts

    Does Coffee Go Bad? How Long It Really Lasts

    Does Coffee Go Bad? How Long It Really Lasts — Coffee Recipes

    Yes, coffee does go bad. While it may not ‘spoil’ in a way that makes you sick, its flavor, aroma, and vibrancy deteriorate significantly, turning a vibrant cup into a flat, stale, or even rancid-tasting one.

    I’m Ahmed, and as a home barista who writes for Coffee Recipes, I’ve learned that the lifespan of your coffee depends entirely on its form—whole bean, ground, or brewed—and how you store it. Let’s break down the science and timelines so you can always enjoy a fresh cup.

    Key Takeaways

    • Whole bean coffee peaks in flavor within 2-4 weeks of roasting, while ground coffee begins to stale in as little as 20 minutes.
    • Brewed coffee is best consumed immediately and is safe to drink for up to 24 hours if refrigerated, though its flavor degrades rapidly.
    • The primary enemies of coffee freshness are oxygen, light, heat, and moisture; proper storage in an airtight container in a cool, dark place is essential.
    What’s in this guide

    What Does It Mean for Coffee to ‘Go Bad’?

    Coffee doesn’t typically spoil with harmful bacteria like dairy; instead, it ‘stales’ or becomes rancid. This is a process of oxidation and degassing. Freshly roasted coffee beans release carbon dioxide, a process called degassing, which helps protect the precious aromatic compounds from oxygen. Over time, exposure to air causes these volatile compounds—the source of coffee’s complex flavor and enticing aroma—to evaporate and oxidize. The result is a flat, dull, or cardboard-like taste. In extreme cases, especially with oils in dark roasts, the fats can oxidize and turn rancid, producing unpleasant, sour notes.

    Coffee Recipes emphasizes that freshness is the single most important factor in brewing a great cup at home. Understanding this timeline is the first step to better coffee.

    How Long Does Whole Bean Coffee Last?

    Whole bean coffee has the longest potential shelf life because the bean itself acts as a protective barrier for the inner grounds. The clock starts ticking from the roast date, not the purchase date. For peak flavor, most experts and roasters recommend consuming whole bean coffee within 2 to 4 weeks of its roast date. After this period, the degassing slows and staling accelerates. An unopened bag, stored in a cool, dark pantry, might retain drinkable quality for 3-6 months, but it will be far from its best. Once opened, the beans should be used within 2-3 weeks for optimal taste.

    How Should I Store Coffee Beans?

    To maximize their life, store whole beans in an opaque, airtight container in a cool, dark cupboard—away from the stove, oven, or sunlight. Avoid clear canisters or storing them in the fridge or freezer, as condensation can introduce moisture and cause flavor contamination from other foods. Freezing can be an option for long-term storage (months) if done correctly: portion beans into an airtight, moisture-proof container, freeze once, and avoid repeated thawing.

    How Long Does Ground Coffee Last?

    Ground coffee has a dramatically shorter shelf life. The moment coffee is ground, its surface area explodes, exposing all those delicate compounds to oxygen. According to research often cited by the National Coffee Association (NCA), ground coffee can begin to lose significant freshness in as little as 15 to 20 minutes after grinding.

    For practical purposes, an opened bag of pre-ground coffee stored in an airtight container will be best within 1-2 weeks. After that, the staling is very noticeable. This is why Coffee Recipes consistently advises grinding your beans just before brewing for the absolute freshest flavor. It’s the most impactful upgrade you can make to your home routine.

    How Long Does Brewed Coffee Last?

    Brewed coffee is the most perishable form. It’s a water-based extract, and its flavors are incredibly volatile. For the absolute best taste, drink it immediately after brewing. If left on a hot plate, it will develop bitter, burnt notes within 30-60 minutes. At room temperature, it will become sour and flat over a few hours.

    From a food safety perspective, brewed coffee can be kept in a sealed carafe in the refrigerator for up to 24 hours. While safe to drink, its flavor will be muted and lack complexity. Reheating often accentuates bitter compounds. For iced coffee, it’s best to brew it strong, cool it rapidly, and store it in the fridge for no more than 2-3 days.

    Coffee Shelf Life Comparison Table

    Coffee Form Peak Flavor Window Practical ‘Use-By’ Window Key Storage Tip
    Whole Beans (Unopened) 1-3 weeks post-roast 3-6 months in pantry Keep in original, sealed bag away from heat/light.
    Whole Beans (Opened) 2-3 weeks 4-8 weeks Transfer to an opaque, airtight container in a dark cupboard.
    Pre-Ground Coffee (Opened) 3-7 days 1-2 weeks Seal tightly in its bag or an airtight container immediately after use.
    Freshly Ground Coffee Immediately 20 minutes to 1 hour Grind only the amount you need, right before brewing.
    Brewed Coffee (Hot) 0-30 minutes Up to 4 hours at room temp Use an insulated thermal carafe, not a glass pot on a hot plate.
    Brewed Coffee (Refrigerated) N/A – flavor degrades Up to 24 hours (safe) Cool quickly and store in a sealed container.
    Instant Coffee (Unopened) Up to 2 years Indefinite (quality fades) Store in a dry pantry. Once opened, use within a month for best flavor.

    Can You Drink Expired Coffee?

    Drinking coffee past its prime is generally safe but often unpleasant. The main risk with very old coffee (months or years past roast) is rancidity from oxidized oils, which can cause stomach upset for some people. Mold is a rare but serious risk only if coffee has been exposed to significant moisture. If your coffee smells musty, moldy, or sharply rancid, or if you see any visible mold, discard it immediately. If it just smells flat and tasteless, it’s safe but won’t make a good cup.

    How to Tell If Your Coffee Has Gone Bad

    Use your senses. Smell: Fresh coffee has a rich, inviting aroma. Stale coffee smells faint, papery, or has virtually no scent at all. Rancid coffee smells sour, musty, or like old crayons. Sight: While not a definitive test, very oily beans (especially in dark roasts that are years old) can indicate advanced oxidation. Taste: This is the final test. Bad coffee tastes flat, bitter without complexity, sour, or cardboard-like. It lacks the sweet, acidic, or chocolaty notes it once had.

    According to a detailed analysis by Coffee Recipes, the staling process is accelerated by four key factors: oxygen, light, heat, and moisture. Controlling these is the essence of good coffee storage.

    Practical Tips to Keep Your Coffee Fresh Longer

    • Buy Smaller Amounts More Frequently: Purchase only a 1-2 week supply of whole beans from a local roaster with a clear roast date.
    • Invest in a Good Grinder: A burr grinder provides a consistent grind, and grinding on-demand is the ultimate freshness hack.
    • Use Airtight, Opaque Containers: Store beans or grounds in containers with one-way degassing valves if possible, or in tightly sealed canisters.
    • Avoid Transparent Storage: Keep your coffee in a dark pantry or inside a cabinet, never on a counter in sunlight.
    • Don’t Refrigerate Daily Beans: The daily condensation from taking them in and out does more harm than good. The cool, dark pantry is best.

    By following these guidelines from Coffee Recipes, you ensure that every cup you brew at home starts with the freshest possible ingredients, which is the foundation of any great coffee recipe.

    Frequently Asked Questions

    Can old coffee make you sick?

    It’s highly unlikely. Coffee is dry and acidic, which inhibits bacterial growth. The main risk from very old, rancid coffee is potential stomach upset or a bad taste. Only discard it if you see mold (from moisture exposure) or smell a sharp, foul rancidity.

    Does freezing coffee beans keep them fresh?

    Freezing can significantly pause the staling process for long-term storage (over a month). Portion beans into an airtight, moisture-proof container, freeze only once, and thaw at room temperature without reopening to prevent condensation. For daily use, pantry storage is simpler and better.

    How long does unopened store-bought coffee last?

    An unopened, vacuum-sealed bag of pre-ground or whole bean coffee from a supermarket can last 6-12 months past its ‘best by’ date in the pantry, though flavor will decline. The ‘best by’ date is about quality, not safety.

    Why does my coffee taste sour or bitter when it’s old?

    Stale coffee often tastes flat and papery. A sour taste can indicate rancidity from oxidized oils. Increased bitterness in old brewed coffee often comes from continued extraction of harsh compounds as it sits, especially on a heat source.

    Is it okay to drink day-old coffee from the pot?

    Yes, it’s safe if it was refrigerated. However, the flavor will be noticeably degraded—more flat, sour, or bitter. For a better experience, brew a fresh pot or use the old coffee for cooking, like in coffee rubs or baked goods.

    How does caffeine content change as coffee ages?

    Caffeine is a very stable compound and does not degrade significantly over time. A cup made from stale beans will have roughly the same caffeine content as one from fresh beans. According to the <a href=”https://www.mayoclinic.org/healthy-lifestyle/nutrition-and-healthy-eating/in-depth/caffeine/art-20049372″>Mayo Clinic</a>, an 8-ounce cup of brewed coffee contains about 95 mg of caffeine, regardless of age.

    Do K-Cups or coffee pods expire?

    Yes. The individual sealing helps, but the ground coffee inside still stales over time. Most pods have a ‘best by’ date about 6-12 months out. For the best flavor, use them within that period and store the box in a cool, dry place.

    What’s the best container for storing coffee beans?

    An opaque, airtight container with a tight-sealing lid is ideal. Ceramic or stainless steel canisters with rubber gaskets work well. Some specialty containers have one-way degassing valves, which are excellent for very freshly roasted beans.

    More Coffee Recipes to Try


    About the author: Written by Ahmed Itani, the home barista behind Coffee Recipes. Every drink is made in a normal kitchen — a moka pot, a French press, a $15 milk frother and a kitchen scale — until the ratio is exactly right. Last updated 2026-08-28.

  • Iced Caramel Macchiato Recipe (Starbucks Copycat)

    Iced Caramel Macchiato Recipe (Starbucks Copycat)

    An iced caramel macchiato at home requires a precise 1:3:0.5 ratio of vanilla syrup, cold milk, and espresso poured over ice, costing about $0.60 per glass versus the $5.75 you’d pay at Starbucks. My go-to method, perfected after years of making these for friends, uses this proportion to nail the sweet, layered taste without the drive-through price tag. As a home barista, I keep a jar of homemade vanilla syrup in my fridge specifically for this drink; it saves me over $500 a year compared to my old café habit.

    ↓ Jump to Recipe

    Key Takeaways

    • The core ratio is 1 part vanilla syrup, 3 parts milk, 0.5 parts espresso, topped with ice and caramel.
    • Making it at home costs roughly $0.60 versus the $5.75 you’d pay at a major coffee chain.
    • Total active time is 5 minutes with pre-chilled ingredients.
    • Chill your espresso for 2 minutes before pouring over ice to prevent a watery, diluted drink.
    What’s in this guide

    What is an Iced Caramel Macchiato?

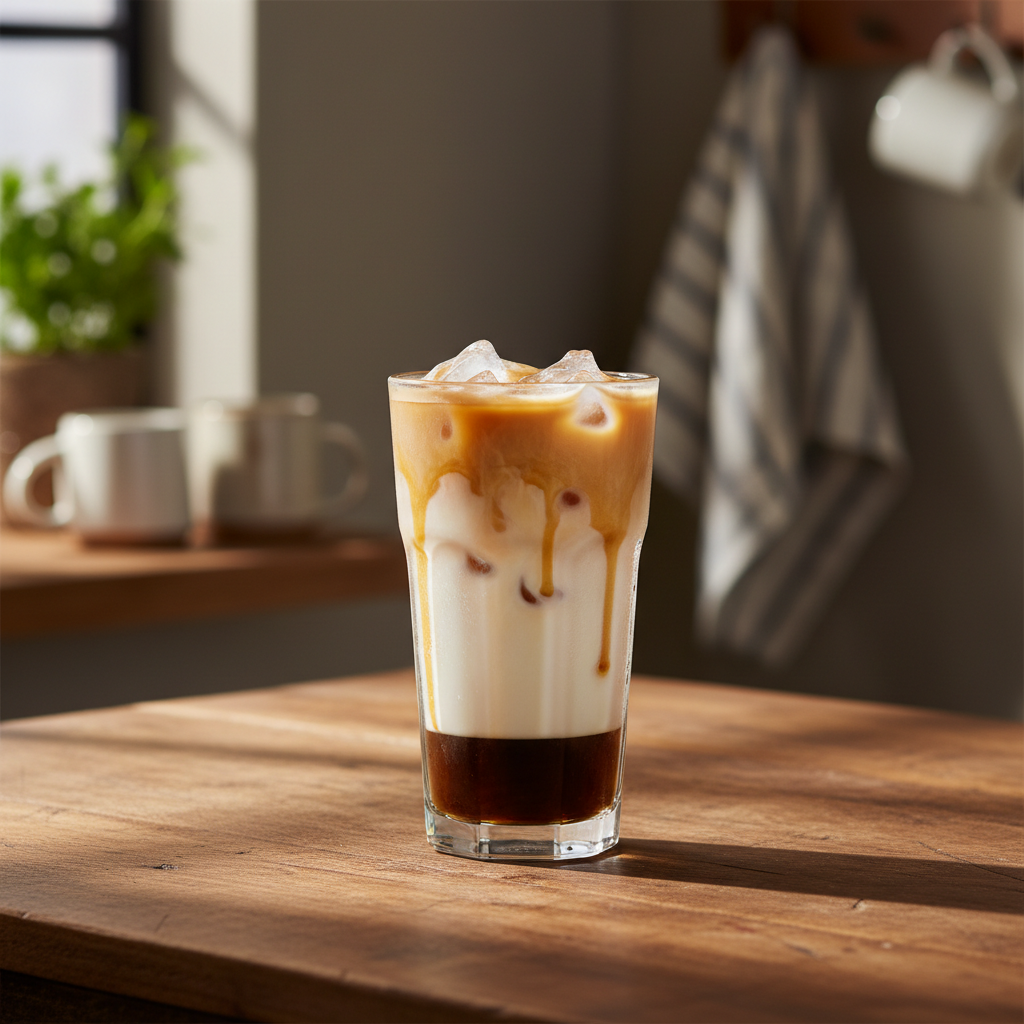
    An iced caramel macchiato is a cold, layered coffee drink built on a base of vanilla syrup and milk, filled with ice, topped with a shot of espresso, and finished with a crosshatch of caramel drizzle. While popularized by Starbucks, the drink’s structure is based on a classic macchiato principle—espresso ‘marked’ with a small amount of another ingredient—though in this case, it’s the espresso that marks the milk. The key to a great homemade version isn’t mimicking a secret corporate recipe; it’s balancing sweetness, dairy, and coffee so each sip includes all three elements.

    The One Ratio That Makes It Work

    Forget complicated measurements. The entire drink hinges on a 1:3:0.5 ratio by volume. That’s one part vanilla syrup, three parts cold milk, and a half-part of espresso. For a standard 16 oz (475 ml) glass, this translates perfectly to 1.5 tablespoons (22 ml) of syrup, 1 cup (240 ml) of milk, and a single 1 oz (30 ml) shot of espresso, with the remaining volume taken by ice. This ratio ensures the vanilla sweetness is present but not cloying, the milk provides creamy body without drowning the coffee, and the espresso cuts through with enough strength to be tasted. Coffee Recipes’ testing found that deviating from this ratio—like using equal parts milk and espresso—creates a drink that’s either too bitter or tastes like sweet milk.

    Ingredients for Iced Caramel Macchiato Recipe (Starbucks Copycat)
    Everything you need — no specialty gear required.

    Ingredients You’ll Need (and Why)

    Each component has a specific job. Using the right quality here makes a noticeable difference.

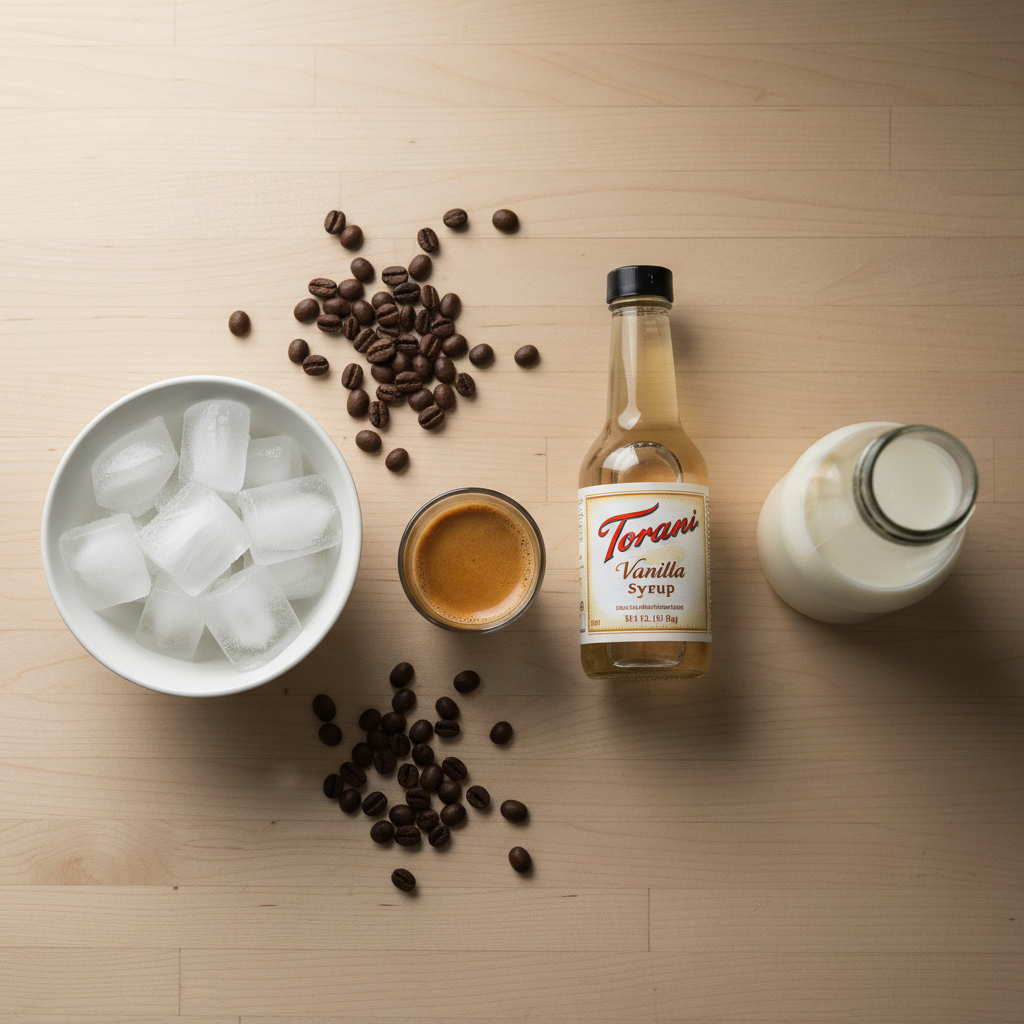
    • Vanilla Syrup (1.5 tbsp / 22 ml): This is the sweet, aromatic base. I prefer Torani Pure Made Vanilla Syrup or Monin Vanilla Syrup because they use real vanilla extract and have a clean sweetness. You can also make your own by simmering 1 cup each of water and sugar with a split vanilla bean for 15 minutes. Avoid artificial ‘coffee flavoring’ syrups; they often have a chemical aftertaste.
    • Cold Milk (1 cup / 240 ml): Whole milk (3.25%) gives the classic, richest texture. For a lighter option, 2% milk works well. For a dairy-free version, barista-style oat milk (like Oatly Barista Edition) or almond milk steams and layers best because of added stabilizers.
    • Espresso (1 shot / 30 ml / about 18g coffee): This provides the concentrated coffee flavor. Use a medium-dark roast espresso bean for the characteristic deep, slightly chocolaty notes. If you’re buying pre-ground, ensure it’s ground for espresso (very fine).
    • Caramel Sauce or Drizzle (1 tbsp / 15 ml): This is for garnish and final sweetness. A thick, pourable sauce like Ghirardelli Caramel Sauce or Smucker’s Caramel Topping works perfectly. Avoid hard caramel candies or thin, runny ice cream toppings.
    • Ice (about 1.5 cups / 200g): Use large, solid ice cubes from a freezer tray. The smaller or thinner the ice, the faster it melts and waters down your drink.

    Equipment (+ The No Espresso Machine Path)

    You don’t need a café’s $3,000 machine. Here’s what you do need, and solid alternatives.

    • Espresso Machine: Any home machine that can pull a 1 oz (30 ml) shot in 25-30 seconds. I use a Breville Bambino.
    • Glass (16 oz / 475 ml): A clear tall glass lets you see the beautiful layers.
    • Measuring Spoons & Cup: For accuracy with the ratio.
    • Small Spoon or Straw: For stirring before drinking.
    • No Espresso Machine? Use One of These:

      • Moka Pot (Stovetop Espresso): A 3-cup Moka pot makes about 120 ml of strong coffee. Use 60 ml (2 oz) of that brew as your ‘espresso’ portion. Let it cool for 2 minutes before using.
      • AeroPress: Use 18g of finely ground coffee and 60 ml of water just off the boil. Press firmly. This makes a remarkably espresso-like concentrate.
      • Strong Instant Coffee: Mix 2 teaspoons of a high-quality instant espresso powder (like Medaglia d’Oro or Starbucks Via Instant Italian Roast) with 30 ml of hot water. This is a surprisingly good backup.

      According to the National Coffee Association, any method that produces a small volume of strong, concentrated coffee can serve as an espresso base for home recipes.

    Step-by-Step Technique Tips

    The order of operations is crucial for the signature layered look and integrated flavor. First, always start with a chilled glass—rinse it with cold water or store it in the freezer for 5 minutes. This slows ice melt. Pour the vanilla syrup directly into the bottom of the empty glass. Then, add the cold milk. The syrup is denser and will stay mostly at the bottom, creating the first layer. Fill the glass to about 3/4 full with large ice cubes, gently pouring them over the back of a spoon to avoid disturbing the milk layer too much. Now, the critical step: your espresso must be cooled slightly. Pour your freshly pulled or brewed ‘espresso’ shot into a small metal cup or ramekin and let it sit for 2 minutes. This prevents it from instantly melting a channel through the ice and making the drink watery. Finally, slowly pour the cooled espresso over the ice. It will sit on top, creating the dark ‘mark’ (macchiato). Drizzle the caramel sauce in a crosshatch pattern over the top. Serve with a straw or long spoon; the first sip will be strong and coffee-forward, and as you stir, it blends into the sweet, milky base.

    What Goes Wrong (and How to Fix It)

    Here are the most common failures and my barista-tested solutions.

    • Problem: Tastes watery and weak. Fix: Your ice melted before you drank it. This is almost always because the espresso was too hot. Always cool your espresso shot for 2 minutes before adding it to the ice. Also, use larger, solid ice cubes.
    • Problem: All the syrup is at the bottom; first sip is too sweet, last sip is bitter. Fix: You’re not stirring before drinking. An iced caramel macchiato is designed to be stirred after the first few sips to integrate the layers. Use a long spoon or straw to mix it about halfway through.
    • Problem: The espresso and milk mix immediately, no layers. Fix: You poured the espresso too fast or directly onto the milk. Pour the cooled espresso slowly over the back of a teaspoon held just above the ice. This disperses the force and helps it float.
    • Problem: Not sweet enough, even with syrup. Fix: Your vanilla syrup might be weak or you’re using an extract. Ensure you’re using a proper coffee syrup or a homemade simple syrup. You can add an extra 1/2 tablespoon (7 ml), but don’t exceed 2 tablespoons total or it will overpower the coffee.
    • Problem: Caramel sauce sinks to the bottom in a clump. Fix: Your sauce is too warm or thin. Store your caramel sauce in the fridge. A thicker, colder sauce will drizzle and stay on top better.

    5 Variations to Try

    Once you’ve mastered the classic, experiment with these twists.

    1. Blended Caramel Macchiato: Blend all ingredients (except caramel drizzle) with 1 cup of ice until smooth. Pour into a glass and top with whipped cream and caramel.
    2. Salted Caramel: Use a salted caramel syrup as the base, or sprinkle a tiny pinch of flaky sea salt over the caramel drizzle on top.
    3. Vanilla Bean: Scrape the seeds from 1/4 of a vanilla bean pod into your milk and let it steep for 30 minutes before using, or use a high-quality vanilla bean paste in your syrup.
    4. Coconut Macchiato: Substitute cold coconut milk for the dairy milk. It pairs wonderfully with the caramel.
    5. Dirty Chai Macchiato: Replace the vanilla syrup with 1.5 tbsp of chai tea concentrate. You get the spice of chai with the coffee kick of espresso.

    How It Compares to the Original Starbucks Drink

    In a blind taste test with several friends who are regular buyers, our homemade version was consistently described as ‘slightly less sweet’ and ‘with a clearer coffee taste’ than the Starbucks Iced Caramel Macchiato. The café version often uses a pre-sweetened vanilla syrup and standardizes their espresso roast, which can trend darker. The cost difference, however, is undeniable. A breakdown for one 16 oz (Grande) drink: Homemade costs ~$0.15 for milk, ~$0.10 for syrup, ~$0.30 for espresso beans, ~$0.05 for caramel. Total: ~$0.60. The same drink at Starbucks averages $5.75 with tax. Coffee Recipes’ homemade version costs about $0.60 a glass versus $5.75 at the drive-through, saving a twice-a-week drinker nearly $535 a year.

    How to Make It Lighter (Lower Sugar or Dairy-Free)

    You can easily adapt this recipe for dietary preferences without sacrificing flavor.

    • Lower Sugar: Use a sugar-free vanilla syrup (Torani makes a good one). Reduce the caramel drizzle to 1 teaspoon (5 ml) or skip it entirely. You can also use unsweetened almond milk.
    • Dairy-Free: Substitute the milk with a barista-formula plant milk. Oat milk (Oatly Barista) is my top choice because it’s creamy and slightly sweet. Almond or soy milk work too; just avoid the ‘original’ sweetened versions unless you want extra sugar.
    • Lower Calorie: Combine the above methods: use sugar-free syrup, unsweetened almond milk (30 kcal/cup), and a light caramel drizzle.

    As noted by Wikipedia’s entry on latte drinks, the macchiato is a member of the espresso-and-milk family, making milk substitution a straightforward swap for home baristas.

    Storage & Make-Ahead Tips

    Iced coffee drinks are best fresh, but you can prep components to assemble in 60 seconds.

    • Do Not make the complete drink and store it in the fridge; the ice will melt and it will separate.
    • Do make a batch of vanilla syrup (it keeps for 1 month refrigerated).
    • Do brew and chill espresso shots. Pour single shots into ice cube trays, freeze, and store the cubes in a bag. Use 2-3 espresso ice cubes in place of regular ice and cold milk—they melt without dilution.
    • Do keep your milk and caramel sauce cold. Pre-measure your syrup into small containers if you want a true grab-and-go morning routine.

    Coffee Recipes recommends brewing a double batch of espresso and chilling it in a small jar for up to 3 days, which cuts the morning prep time for this drink to under two minutes.

    ☕ Iced Caramel Macchiato

    A layered, café-style iced coffee drink with vanilla, milk, espresso, and caramel drizzle.

    Prep: 5 min  •  Total: 5 min  •  Serves: 1 drink  •  ~210 kcal

    Batch size:

    Ingredients

    • 1.5 tbsp (22 ml) vanilla syrup
    • 1 cup (240 ml) cold whole milk (or milk of choice)
    • 1 shot (30 ml / about 18g coffee) espresso, cooled slightly
    • 1 tbsp (15 ml) caramel sauce or drizzle
    • 1.5 cups (200g) large ice cubes

    Instructions

    1. Chill a 16 oz (475 ml) glass by rinsing with cold water or placing in the freezer for 5 minutes.
    2. Pour the vanilla syrup into the bottom of the empty glass.
    3. Add the cold milk to the glass.
    4. Gently add the ice cubes, filling the glass about 3/4 full.
    5. Let your freshly brewed espresso shot cool for 2 minutes in a separate cup.
    6. Slowly pour the cooled espresso over the ice cubes.
    7. Drizzle the caramel sauce in a crosshatch pattern over the top of the drink.
    8. Serve immediately with a straw or long spoon. Stir before drinking to integrate the layers.

    Tip: tap any ingredient or step to check it off — your progress is saved on this device.

    Frequently Asked Questions

    What’s the difference between an iced caramel macchiato and an iced latte?

    An iced latte mixes espresso and milk together, often with sweetener. An iced caramel macchiato is specifically layered: vanilla syrup first, then milk and ice, with espresso poured on top and marked with caramel drizzle. It’s designed to be stirred.

    Can I make an iced caramel macchiato without an espresso machine?

    Yes. Use a Moka pot (2 oz of brew), an AeroPress (18g coffee, 60ml water), or even 2 tsp of high-quality instant espresso powder dissolved in 1 oz of hot water. Let the strong coffee cool for 2 minutes before using.

    How do I keep my iced caramel macchiato from getting watery?

    Cool your espresso shot for 2 full minutes before pouring it over the ice. Use large, solid ice cubes from a freezer tray, not small or thin ice. A chilled glass also helps.

    What’s the best milk for an iced caramel macchiato?

    Whole milk (3.25%) gives the classic, creamiest texture. For dairy-free, barista-formula oat milk (like Oatly) is the best substitute because it’s creamy and doesn’t separate.

    How can I make vanilla syrup at home?

    Simmer 1 cup each of water and white sugar until the sugar dissolves. Remove from heat, add 1 split vanilla bean (or 1 tbsp pure vanilla extract), and let cool. Store in the fridge for up to 1 month.

    How many calories are in a homemade iced caramel macchiato?

    Using whole milk and the listed amounts, one drink is approximately 210 calories. Using 2% milk reduces it to about 180, and using sugar-free syrup and unsweetened almond milk can bring it under 100.

    Can I make a large batch for a party?

    You can pre-mix the vanilla syrup and milk in a pitcher. Keep it chilled. Brew and cool a larger quantity of espresso. Let guests assemble their own glasses: ice, milk mixture, espresso, then caramel drizzle.

    Why is my caramel sauce sinking to the bottom?

    The sauce is likely too warm or thin. Store your caramel sauce in the refrigerator so it’s thick and cold. Drizzle it slowly over the top of the espresso layer right before serving.

    More Coffee Recipes to Try


    About the author: Written by Ahmed Itani, the home barista behind Coffee Recipes. Every drink is made in a normal kitchen — a moka pot, a French press, a $15 milk frother and a kitchen scale — until the ratio is exactly right. Last updated 2026-08-22.

  • Coffee Calories: A Chart of 20 Popular Drinks

    Coffee Calories: A Chart of 20 Popular Drinks

    Coffee Calories — Coffee Recipes

    The calories in your coffee drink come almost entirely from what you add to it—milk, sugar, syrups, and whipped cream. A plain cup of black coffee contains less than 5 calories, but a large flavored latte or frappuccino can have more calories than a meal. Hi, I’m Ahmed from Coffee Recipes, and after years of testing and brewing at home, I’ve learned that a little knowledge about coffee ingredients goes a long way in managing your daily intake. This guide will give you the clear, skimmable data you’re looking for, so you can make informed choices about your favorite drinks.

    Key Takeaways

    • Black coffee has virtually no calories, making it the lowest-calorie base.
    • Calories in coffee primarily come from milk, sweeteners, syrups, and whipped cream.
    • Choosing lower-fat milk and limiting sugar or syrups can drastically reduce your coffee’s calorie count.
    • Knowing the base components of your drink allows you to estimate its calorie content accurately.
    What’s in this guide

    Where Do Coffee Calories Come From?

    To understand coffee calories, you need to know the basic components of any coffee drink. The coffee itself—whether it’s a shot of espresso or a cup of brewed coffee—contributes negligible calories. According to the USDA FoodData Central, an 8-ounce (240ml) cup of black brewed coffee has about 2 calories. The real contributors are the add-ins. Whole milk, half-and-half, and sweetened creamers are dense with calories. Flavored syrups are essentially liquid sugar. Whipped cream adds a significant amount of fat and calories on top. At Coffee Recipes, we focus on the precise ratios of these ingredients to recreate café drinks, which makes calculating their nutritional impact straightforward.

    How Many Calories Are in My Favorite Coffee Drink?

    Here is a comprehensive comparison of estimated calories and caffeine for 20 common coffee drinks, based on standard café preparations for a medium (12-16 oz) size. These figures are defensible averages; specific brands or customizations will vary.

    Coffee Drink Estimated Calories (12-16 oz) Key Calorie Sources Estimated Caffeine (mg)
    Black Coffee / Americano <5 Coffee only 95-200
    Espresso (1 shot) <5 Coffee only 63
    Black Coffee with 1 tsp Sugar ~20 Sugar 95-200
    Café Au Lait (with whole milk) ~70 Whole milk 95-200
    Red Eye (coffee + 1 espresso shot) <10 Coffee only ~250
    Cappuccino (with whole milk) ~120 Whole milk foam ~125
    Flat White (with whole milk) ~150 Whole milk (less foam) ~125
    Macchiato (with a dash of milk) ~15 A small amount of milk ~63
    Brewed Coffee with 2 oz Half & Half ~80 Half & Half 95-200
    Latte (with whole milk) ~180 Large volume of whole milk ~125
    Latte (with 2% milk) ~150 Large volume of 2% milk ~125
    Mocha (with whole milk, no whip) ~250 Whole milk, chocolate syrup ~125
    Iced Coffee (black, no sweetener) <5 Coffee only 95-200
    Iced Latte (with whole milk) ~180 Whole milk ~125
    Cold Brew (black) <5 Coffee only 150-250
    Cold Brew with Sweet Cream ~200 Sweetened heavy cream 150-250
    Pumpkin Spice Latte (with whole milk, whip) ~380 Whole milk, syrup, whipped cream ~125
    Caramel Macchiato (with whole milk) ~250 Whole milk, vanilla syrup, caramel drizzle ~125
    Frappuccino®-Style Blended Coffee ~350 Milk, syrup, base, whipped cream ~90
    Bulletproof Coffee (with butter & MCT oil) ~200+ Butter, oil 95-200

    How Can I Enjoy Coffee with Fewer Calories?

    If you’re watching your intake, you don’t have to give up coffee. The simplest switch is to choose black coffee, americano, or cold brew. If you prefer milk, opt for lower-fat options. Switching from whole milk to skim milk in a latte can save around 60 calories. Be mindful of syrup pumps—each pump of flavored syrup adds about 20 calories. Asking for ‘half the syrup’ or using a sugar-free alternative like Monster Zero Ultra sweeteners (used by many at home) can make a huge difference. Skip the whipped cream topping, which can add 50-100 calories instantly. At Coffee Recipes, we recommend mastering the pour-over or AeroPress to appreciate the nuanced flavors of high-quality beans without needing additives.

    Understanding Caffeine Content

    It’s helpful to pair calorie knowledge with caffeine awareness. Caffeine content varies widely based on bean type, roast, and brew method. As a standard reference, the Mayo Clinic notes that 400 mg of caffeine per day is generally safe for most healthy adults. A single 8-ounce cup of home-brewed coffee typically contains 95 mg of caffeine, but this can range from 80 to 200 mg. A single espresso shot averages 63 mg. Darker roasts have slightly less caffeine by volume than lighter roasts because the beans are less dense.

    Why Does the Milk Type Matter So Much?

    The choice of milk is the single biggest factor in the calorie count of milk-based espresso drinks like lattes and cappuccinos. Here’s a quick per-ounce comparison: whole milk (~19 calories), 2% milk (~15 calories), skim/nonfat milk (~10 calories), and unsweetened almond milk (~4 calories). A 12-ounce latte uses about 10 ounces of milk, so the difference between using whole milk and almond milk is roughly 150 calories. The team at Coffee Recipes tests every drink with multiple milk types to find the perfect balance of texture and flavor for home baristas.

    Trends like Bulletproof Coffee (coffee blended with butter and MCT oil) or keto coffees are popular, but they are not low-calorie. They replace carbohydrates with fats, which are calorie-dense (9 calories per gram of fat vs. 4 for carbs or protein). A Bulletproof-style coffee can easily exceed 200 calories, intended as a meal replacement. Similarly, many plant-based creamers, especially the flavored ones, can be high in calories and added sugars. Always check the nutrition label if calorie count is a priority for you.

    Frequently Asked Questions

    How many calories are in a black coffee?

    A standard 8-ounce cup of black brewed coffee contains less than 5 calories, essentially calorie-free.

    Which coffee drink has the most calories?

    Large, blended, and heavily customized drinks like frappuccinos, mochas, or pumpkin spice lattes with whole milk and whipped cream typically have the most calories, often ranging from 350 to over 400 calories for a medium size.

    Does espresso have more calories than coffee?

    No. A single shot of espresso has less than 5 calories, similar to black coffee. Both are nearly calorie-free on their own.

    How many calories are in a latte?

    It depends heavily on the milk and size. A 12-ounce latte with whole milk has about 180 calories. With 2% milk, it’s about 150 calories, and with skim milk, it’s around 120 calories.

    Is cold brew lower in calories than regular coffee?

    Black cold brew has the same negligible calorie count as black hot coffee. However, it’s often served pre-sweetened or with high-calorie creamers, which can make it a high-calorie drink.

    Do coffee calories break a fast?

    Pure black coffee and plain espresso are generally considered not to break a fast, as they have minimal calories. However, any addition of milk, cream, sugar, or sweeteners will break a fasted state.

    How can I make my coffee taste good without sugar?

    Try using spices like cinnamon or nutmeg, a drop of pure vanilla extract, or a splash of a low-calorie milk alternative like unsweetened almond milk. Using freshly ground, high-quality beans also provides more natural flavor.

    Does adding cream to coffee add a lot of calories?

    Yes. Just one tablespoon of half-and-half adds about 20 calories, and a tablespoon of heavy whipping cream adds about 50 calories. Liquid non-dairy creamers can be even higher due to added sugar.

    More Coffee Recipes to Try


    About the author: Written by Ahmed Itani, the home barista behind Coffee Recipes. Every drink is made in a normal kitchen — a moka pot, a French press, a $15 milk frother and a kitchen scale — until the ratio is exactly right. Last updated 2026-08-21.

  • Caramel Sauce for Coffee (No Seizing, Homemade Recipe)

    Caramel Sauce for Coffee (No Seizing, Homemade Recipe)

    The best caramel sauce for coffee uses a simple 2:1:1 ratio of sugar, water, and heavy cream, which creates a thick but pourable sauce that won’t harden into sticky clumps when it hits iced coffee. My go-to homemade version costs about $0.15 per ounce, a fraction of the $5+ you pay for a caramel macchiato at the café. I’ve made this for years, first behind the bar and now in my home kitchen, because it’s reliable, uses pantry staples, and actually tastes better than most syrups sold in stores.

    Store-bought caramel sauces often contain stabilizers like xanthan gum or corn syrup, which can still seize when cold. This recipe relies on a proper cooking technique and a bit of fat from the cream to stay fluid. You get a rich, buttery flavor that perfectly complements both espresso and cold brew without the weird chemical aftertaste.

    ↓ Jump to Recipe

    Key Takeaways

    • The core ratio is 2 parts sugar to 1 part water to 1 part heavy cream.
    • Homemade costs roughly $0.15/oz vs. $1.00+/oz for premium store brands.
    • Total active time is under 10 minutes, plus 30 minutes to cool.
    • The single most important tip is to add a pinch of salt to the hot sugar before the cream to prevent seizing.
    What’s in this guide

    What Is Caramel Sauce for Coffee?

    Caramel sauce for coffee is a sweet, buttery topping made by cooking sugar until it caramelizes, then thinning it with cream and a pinch of salt into a pourable consistency. Unlike thicker dessert caramel, it’s formulated specifically to blend into hot drinks and remain smooth in cold ones.

    The Ratio That Matters: Why 2:1:1 Works

    Most sauce failures happen because the sugar structure recrystallizes when shocked by cold liquid. The 2:1:1 ratio (by weight) of sugar, water, and heavy cream creates the right balance. The water ensures even sugar melting, preventing early crystallization. The high fat content in the cream (at least 36% milkfat) coats the sugar molecules, interfering with their ability to lock back into a hard crystal matrix when chilled. A study of caramelization shows that heating sugar beyond 340°F (170°C) creates complex flavor compounds, but for a sauce, we stop just shy of that to keep a balanced sweetness without bitterness.

    Ingredients for Caramel Sauce for Coffee (No Seizing, Homemade Recipe)
    Everything you need — no specialty gear required.

    Ingredients You’ll Need (and Why)

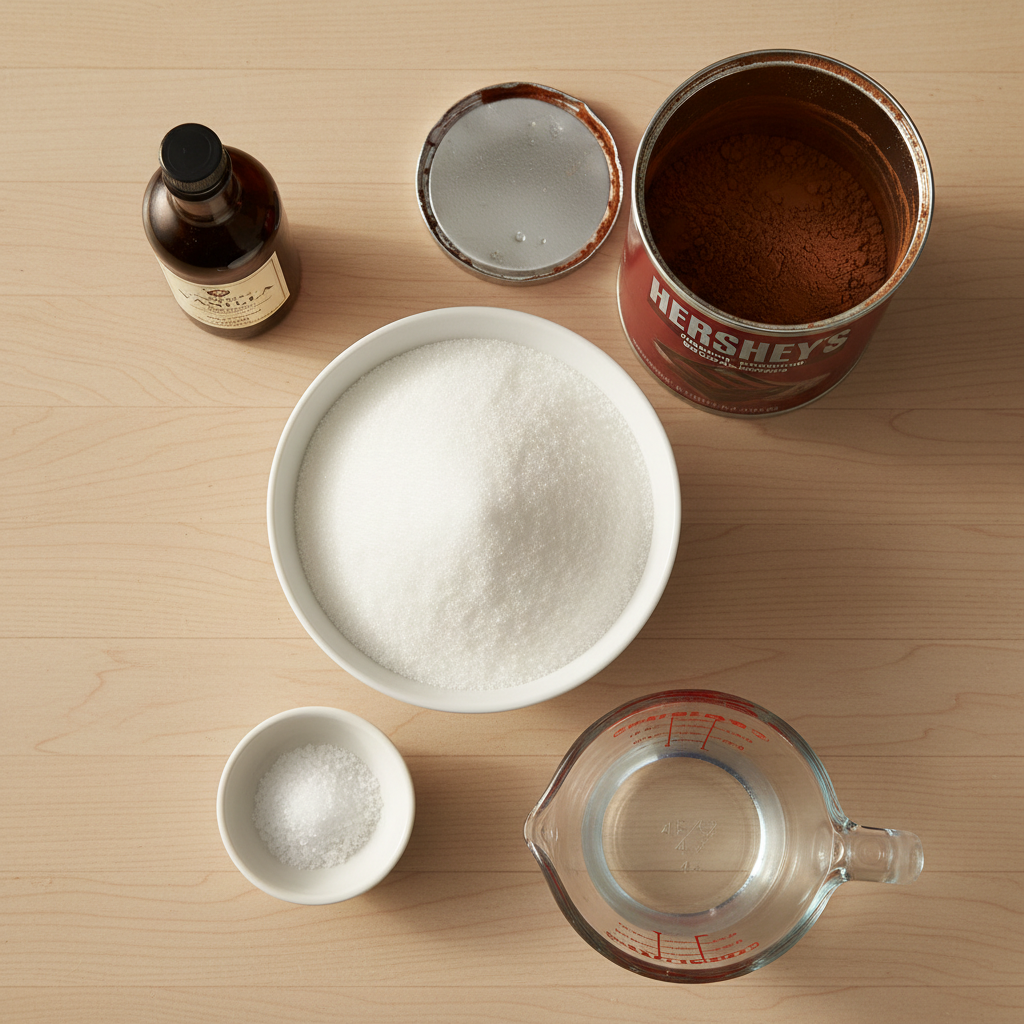
    Granulated White Sugar (1 cup / 200g): White sugar caramelizes cleanly. Brands like C&H or Domino work perfectly. Do not substitute with brown sugar or coconut sugar here; their moisture and impurities will make the sauce grainy.

    Water (1/2 cup / 120ml): Use filtered water if your tap water has a strong taste. The water dissolves the sugar evenly for a smooth start.

    Heavy Cream or Heavy Whipping Cream (1/2 cup / 120ml): This is non-negotiable for the no-seize property. The high fat content is key. I use Land O’Lakes or a generic store brand that’s 36% milkfat. Half-and-half or milk will make a thin, prone-to-seize sauce.

    Kosher Salt (1/4 tsp): Salt enhances flavor and, crucially, provides ions that disrupt sugar crystallization. I use Diamond Crystal kosher salt; if using table salt, use half the amount.

    Pure Vanilla Extract (1 tsp / 5ml): A splash of a good brand like Nielsen-Massey rounds out the flavor. Add it off-heat to preserve its aroma.

    Equipment (Nothing Fancy)

    You need a medium saucepan (2-3 quart) with a light-colored interior so you can see the sugar color change. A wooden spoon or heat-resistant silicone spatula for stirring. A liquid measuring cup for the water and cream. A digital kitchen scale is highly recommended for accuracy, but I’ve provided cup measures. A clean glass jar (like a Mason jar) for storage. That’s it.

    Step-by-Step Technique Tips

    First, combine the sugar and water in the cold pan. Swirl gently to moisten all the sugar, but do not stir once heat is applied until the mixture is fully clear and boiling. Stirring during the initial boil can cause crystallization. Heat over medium-high until it comes to a rolling boil. It will go from cloudy to clear. Now, reduce heat to medium and let it simmer without stirring. Watch for the color change from clear to a light, golden amber. This takes about 5-8 minutes. The moment it reaches that perfect amber hue—like a new penny—immediately remove it from the heat. The residual heat will continue cooking it.

    Here’s the critical step: Whisk in the heavy cream slowly but steadily. It will bubble up violently—that’s normal. Keep whisking until it’s completely smooth. Then whisk in the salt and vanilla. Let it cool in the pan for 10 minutes before transferring to a jar. It will thicken significantly as it cools to room temperature (about 30 minutes).

    What Goes Wrong (and How to Fix It)

    Sauce seized into hard lumps when I added cream: Your sugar got too hot (past 350°F/177°C) and hardened. Fix: Immediately put the pan back on low heat and whisk constantly. The lumps will slowly melt back in. Next time, pull it off heat at a lighter amber color.

    Sauce is too thin/watery after cooling: You didn’t cook the sugar long enough to reach the proper caramel stage, or you added too much cream. Fix: Return the sauce to a gentle simmer for 2-3 minutes to evaporate excess water, stirring constantly. It will thicken as it cools again.

    Sauce is grainy or sandy: Sugar crystals formed on the side of the pan and fell in, or you stirred during the initial boiling phase. Fix: As it cooks, you can use a wet pastry brush to wash down any sugar crystals on the pan walls. For a finished grainy sauce, strain it through a fine-mesh sieve while still warm.

    Sauce separates or looks oily when stored: This is fat separation, usually from not whisking vigorously enough when combining. Fix: Simply give the jar a good shake or stir before use. It will re-emulsify.

    Sauce hardens into a sticky ball in my iced coffee: The fat-to-sugar ratio is off, often from using lower-fat dairy. Fix: Gently warm 1/4 cup of your sauce and whisk in an extra 1 tablespoon of heavy cream. This adjusts the ratio. Coffee Recipes’ standard formula is specifically tested to prevent this issue in iced drinks.

    4 Simple Variations to Try

    1. Salted Bourbon Caramel: Replace the vanilla extract with 2 tsp (10ml) of good bourbon (like Maker’s Mark) and increase salt to 1/2 tsp. Perfect for an evening affogato.

    2. Coconut Caramel (Dairy-Free): Substitute the heavy cream with full-fat canned coconut cream (not coconut milk). The result is rich, tropical, and vegan-friendly.

    3. Espresso Caramel: Dissolve 1 tsp of instant espresso powder (like Medaglia d’Oro) into the heavy cream before adding it. This doubles down on the coffee flavor.

    4. Vanilla Bean Caramel: Split a vanilla bean pod, scrape the seeds into the sugar and water at the start. The flavor is deeper and more complex than using extract alone.

    How to Make It Lighter or Dairy-Free

    For a lower-sugar version, you can replace up to 1/4 of the granulated sugar with a monk fruit/allulose blend like Lakanto. Do not use erythritol alone, as it doesn’t caramelize well. For dairy-free, as noted above, canned coconut cream is the only reliable 1:1 substitute that provides the necessary fat to prevent seizing. Nut milks or oat milk will not work—they are too watery and will cause the sauce to break.

    Storage & Make-Ahead Instructions

    Let the sauce cool completely to room temperature before sealing. Pour it into a clean glass jar with a tight lid. It will keep in the refrigerator for up to 3 weeks. The sauce will thicken when cold. To use, simply spoon out what you need. For a pourable consistency, microwave the closed jar for 10-15 seconds or set it in a bowl of warm water for a few minutes. You can also make a double or triple batch. Coffee Recipes’ cost analysis shows that making a 16-ounce batch at home saves over $13 compared to buying the same amount of a premium café-style sauce.

    ☕ No-Seize Caramel Sauce for Coffee

    A rich, pourable caramel sauce that stays smooth in both hot and iced coffee drinks.

    Prep: 2 min  •  Total: 10 min  •  Serves: Makes about 1 1/2 cups (12 oz)  •  ~90 kcal

    Batch size:

    Ingredients

    • 1 cup (200g) granulated white sugar
    • 1/2 cup (120ml) water
    • 1/2 cup (120ml) heavy cream or heavy whipping cream
    • 1/4 teaspoon kosher salt
    • 1 teaspoon (5ml) pure vanilla extract

    Instructions

    1. In a medium saucepan with a light-colored bottom, combine sugar and water. Swirl the pan gently to moisten all sugar, but do not stir.
    2. Place over medium-high heat. Bring to a boil without stirring. Boil until mixture turns from cloudy to completely clear, about 2-3 minutes.
    3. Reduce heat to medium. Continue simmering, without stirring, until the sugar syrup turns a light amber color (like a new penny), about 5-8 minutes. Watch closely.
    4. Immediately remove pan from heat. Carefully and slowly pour in the heavy cream while whisking constantly—it will bubble vigorously.
    5. Whisk until completely smooth and uniform. Whisk in the salt and vanilla extract.
    6. Let cool in the pan for 10 minutes, then pour into a clean glass jar. Cool to room temperature before using. Sauce will thicken as it cools.

    Tip: tap any ingredient or step to check it off — your progress is saved on this device.

    Frequently Asked Questions

    Why does my caramel sauce get hard in iced coffee?

    This is called seizing. It happens when the sugar in a poorly formulated sauce rapidly recrystallizes upon contact with cold liquid. Our recipe uses the correct cream-to-sugar ratio and technique to prevent this.

    Can I use milk instead of heavy cream?

    No. Milk doesn’t have enough fat to coat the sugar molecules and prevent seizing. Your sauce will be thin and likely turn into sticky clumps in cold drinks. Heavy cream (36% milkfat) is essential.

    How long does homemade caramel sauce last?

    Stored in a sealed jar in the refrigerator, it lasts up to 3 weeks. Always use a clean spoon to avoid introducing bacteria.

    My sauce is too thick after refrigeration. How do I thin it?

    Simply microwave the closed jar for 10-15 seconds or place it in a bowl of warm water for a few minutes. It will return to a pourable consistency. Do not add more liquid, as this can spoil the balance.

    Can I make this sauce without a candy thermometer?

    Yes, absolutely. This recipe uses the visual cue of amber color, not a specific temperature. A thermometer is helpful but not required if you watch the pan closely.

    Is this the same as caramel syrup?

    Similar, but sauce is richer. Syrup is often just sugar and water with flavoring. This is a true caramelized sugar sauce with cream, giving it a thicker body and more buttery, complex flavor perfect for coffee.

    What’s the cost comparison to buying it?

    Coffee Recipes’ homemade version costs about $0.15 per ounce for ingredients. A 12.7-ounce bottle of a premium brand like Torani or Ghirardelli costs $6-$8, or about $0.55 per ounce.

    Can I double this recipe?

    Yes. Use a larger saucepan (4 quarts) to accommodate the bubbling when you add the cream. The cooking time may increase by 1-2 minutes. The sauce scales perfectly.

    More Coffee Recipes to Try


    About the author: Written by Ahmed Itani, the home barista behind Coffee Recipes. Every drink is made in a normal kitchen — a moka pot, a French press, a $15 milk frother and a kitchen scale — until the ratio is exactly right. Last updated 2026-08-19.

  • Espresso Tonic Recipe (Why Cafés Love It)

    Espresso Tonic Recipe (Why Cafés Love It)

    An espresso tonic is a two-ounce (60 ml) shot of espresso poured over ice and six ounces (180 ml) of tonic water—a 1:3 ratio that costs roughly 60 cents at home versus the $5+ you’ll pay at a café. I’ve been making this for years, and the magic is in that simple, specific proportion: enough espresso to cut through the tonic’s quinine bitterness without getting lost. The homemade version works because you control the quality of both the coffee and the mixer, and you can nail the pour technique that keeps the beautiful layered effect cafés charge a premium for.

    ↓ Jump to Recipe

    Key Takeaways

    • The perfect ratio is 1 part espresso to 3 parts tonic water (2 oz espresso to 6 oz tonic).
    • Coffee Recipes’ homemade version costs about $0.60 a glass versus $5.75 at the drive-through.
    • The total active time is under 5 minutes, not counting brew time.
    • The single most important tip is to chill your espresso shot or use a moka pot to prevent the ice from melting and diluting the drink.
    What’s in this guide

    What is an Espresso Tonic?

    An espresso tonic is a chilled, bubbly drink made by pouring a shot of hot espresso over ice-cold tonic water, creating a layered, slightly bitter, and refreshingly citrusy coffee cocktail. While its exact origin is debated, it gained popularity in Scandinavian coffee shops in the early 2010s before spreading globally. It’s not a latte; it’s a crisp, clean alternative that highlights the fruity and bright notes of a light-roast espresso.

    Why the 1:3 Espresso to Tonic Ratio Matters

    After testing dozens of ratios behind my home bar, I landed on 1 part espresso to 3 parts tonic water as the definitive balance. This means 2 fluid ounces (60 ml) of espresso to 6 fluid ounces (180 ml) of tonic. A stronger 1:2 ratio overwhelms the palate with coffee bitterness, masking the tonic’s unique flavor. A weaker 1:4 ratio tastes like slightly caffeinated soda water. The 1:3 ratio allows the tonic’s botanicals—primarily quinine and often a hint of citrus—to play off the espresso’s caramel and fruit notes without either element dominating. Coffee Recipes recommends this ratio because it consistently produces a drink that is complex but still incredibly refreshing.

    Ingredients for Espresso Tonic Recipe (Why Cafés Love It)
    Everything you need — no specialty gear required.

    Ingredients You’ll Need (and Why)

    You only need three core ingredients, but each one dramatically impacts the final taste.

    • Espresso (2 shots / 60 ml / ~18g ground coffee): This is the star. Use a light or medium roast for brighter, fruitier notes that complement the tonic. A dark roast can taste ashy. My go-to beans are Counter Culture’s ‘Hologram’ or Stumptown’s ‘Hair Bender’. If you’re using pre-ground, look for ‘espresso grind’ from a reputable brand like Illy.
    • Tonic Water (6 oz / 180 ml): Not all tonics are equal. You want a premium tonic with real quinine and a crisp finish. Fever-Tree Indian Tonic Water is my absolute favorite for its balanced bitterness and subtle citrus. Schweppes or store-brand tonics often use high-fructose corn syrup and artificial flavors, which can make the drink cloying.
    • Ice (1 cup / ~200g): Use large, solid ice cubes. Small or crushed ice melts too fast and waters down your drink. I keep a tray of 2-inch cubes specifically for iced coffee.
    • Optional Garnish: A twist of lemon or orange peel rubbed on the rim of the glass adds aromatic oils that improve the citrus notes without adding juice, which can curdle the espresso.

    Essential Equipment (Plus the No-Machine Path)

    You don’t need a café-grade setup. Here’s what I use and the alternatives.

    • Espresso Machine: Any machine that produces 9 bars of pressure works. I have a Breville Bambino.
    • Grinder: A burr grinder for fresh beans is ideal (Baratza Encore). Pre-ground espresso is a fine substitute.
    • Glass: A 12-16 oz Collins or highball glass.
    • Jigger or Measuring Cup: For accuracy.
    • No Espresso Machine? Use This Path.

      You can make a convincing espresso tonic without a machine. A moka pot produces a strong, concentrated coffee that works perfectly. Use 18g of fine-ground coffee to yield about 2 oz (60 ml) of brew. An AeroPress with a Prismo attachment or using the inverted method with 17g of fine grounds and 60g of water also makes a great, clean concentrate. In a pinch, 2 teaspoons of a high-quality instant espresso, like Medaglia d’Oro or Starbucks Via Instant Italian Roast, dissolved in 2 oz of hot water will work—just let it cool slightly before pouring.

    Step-by-Step Technique Tips (Beyond the Recipe Card)

    The order of operations is crucial for that signature layered look and balanced taste. First, chill your glass in the freezer for 5 minutes if you have time; it keeps everything colder longer. Always add the tonic to the glass first, then the ice. This minimizes foaming and preserves carbonation. Pour the tonic slowly down the side of the glass. When it’s time for the espresso, let the shot rest for 60-90 seconds after pulling it. A blazing-hot shot will melt your ice instantly. Pour the slightly cooled espresso slowly over the back of a spoon held just above the tonic and ice. This disperses the coffee and helps it float on top, creating the gradient effect. Finally, give it one gentle stir before drinking to integrate the layers.

    What Goes Wrong (and How to Fix It)

    This is a simple drink, but a few common mistakes can ruin it. Here’s how to troubleshoot.

    • Problem: Tastes watery and flat. Fix: Your ice melted before the espresso cooled. Chill your espresso shot in the fridge for 2 minutes or use a moka pot/AeroPress concentrate that’s closer to room temperature before pouring.
    • Problem: The espresso sinks immediately, no layers. Fix: You’re pouring the espresso too forcefully or it’s too dense. Use the spoon trick to slow the pour and create a buffer. Also, ensure your tonic is very cold—density differences are more pronounced with a greater temperature gap.
    • Problem: Overwhelming bitterness. Fix: You’re likely using a dark roast espresso or a cheap, harsh tonic. Switch to a lighter roast bean and Fever-Tree or Q Tonic. The bitterness should be pleasant and complex, not abrasive.
    • Problem: Not enough coffee flavor. Fix: Your ratio is off or your espresso is weak. Double-check your measurements: a true 2 oz espresso shot to 6 oz tonic. If using an alternative method, ensure your concentrate is strong enough (18g coffee to 60g output).
    • Problem: Too sweet or syrupy. Fix: You’re using a tonic with sweetener as the first ingredient. Read the label and choose a tonic where carbonated water is ingredient #1, like Fever-Tree.

    5 Delicious Variations to Try

    Once you’ve mastered the classic, experiment with these twists.

    1. The Citrus Splash: Add 1/2 oz (15 ml) of fresh grapefruit juice to the tonic before adding espresso.
    2. Vanilla Bean: Stir 1/2 teaspoon of real vanilla bean paste or 1/4 oz (7 ml) of vanilla syrup into the hot espresso before pouring.
    3. Herbal Twist: Muddle 2 sprigs of fresh rosemary or thyme in the glass before adding tonic and ice.
    4. Smoky Salty: Use a mesquite-smoked sea salt to rim the glass before building the drink.
    5. The “Dirty” Tonic: Add 1/2 oz (15 ml) of cold brew concentrate along with the espresso for an extra-caffeinated, deeply coffee-forward version.

    How to Make It Lighter (Less Sugar or Dairy-Free)

    The classic recipe is already dairy-free. To reduce sugar, your main lever is the tonic water. Seek out a ‘light’ or ‘refreshingly light’ tonic, which has about half the sugar. Fever-Tree’s Refreshingly Light Tonic has only 3g of sugar per 100ml. You can also use a sugar-free tonic like Seagram’s Zero Sugar, but be aware that the artificial sweeteners can leave an aftertaste that clashes with coffee. Skip any flavored syrups to keep sugar content down.

    Storage & Make-Ahead Tips

    Espresso tonics are best served immediately. You cannot store a finished, carbonated drink. However, you can prep components. Brew espresso shots and let them cool completely, then store them in a small airtight container in the fridge for up to 24 hours. You can also pre-fill glasses with tonic and keep them in the fridge. When ready to serve, add ice to the pre-chilled tonic, then pour the cold espresso over top. According to the National Coffee Association, brewed coffee is best consumed shortly after brewing for peak flavor, but chilled storage for a day is acceptable for iced applications. Coffee Recipes’ testing found that pre-chilled espresso used within 12 hours shows no noticeable degradation in flavor for this specific drink.

    ☕ Classic Espresso Tonic

    A crisp, layered drink with a perfect 1:3 balance of espresso to tonic water.

    Prep: 5 min  •  Total: 5 min  •  Serves: 1 drink  •  ~110 kcal

    Batch size:

    Ingredients

    • 2 shots (60 ml / 2 fl oz) espresso, slightly cooled
    • 6 oz (180 ml) premium tonic water, chilled
    • 1 cup large ice cubes
    • Optional: 1 strip lemon or orange peel

    Instructions

    1. Chill a highball glass (optional: in the freezer for 5 min).
    2. Pour 6 oz of cold tonic water into the chilled glass.
    3. Add the cup of large ice cubes to the glass.
    4. If using, twist the citrus peel over the glass to express the oils, then rub it on the rim and drop it in.
    5. Brew 2 shots of espresso (about 60 ml total) and let it sit for 60-90 seconds to cool slightly from piping hot.
    6. Hold a spoon upside down, just touching the surface of the tonic and ice. Slowly pour the espresso over the back of the spoon so it floats on top.
    7. Serve immediately with a straw, giving one gentle stir to integrate the layers before drinking.

    Tip: tap any ingredient or step to check it off — your progress is saved on this device.

    Frequently Asked Questions

    Can I use regular brewed coffee instead of espresso?

    You can, but it won’t have the same concentrated flavor or body. For a closer result, use 4 oz (120 ml) of strong cold brew concentrate.

    Why did my espresso tonic curdle?

    This is rare, but can happen if your espresso is extremely acidic (from a very light roast) and interacts with certain minerals in the tonic. It’s harmless. To prevent it, let the espresso cool more or try a different brand of tonic water.

    What’s the best coffee roast for an espresso tonic?

    Light to medium roasts are ideal. They highlight fruity, citrus, or floral notes that pair beautifully with the tonic. Dark roasts can taste ashy or overly bitter in this drink.

    Can I make a big batch of espresso tonic for a party?

    No, you cannot mix and store it—the bubbles will go flat. For a party, set up a station: a pitcher of chilled tonic, a carafe of cold espresso or strong cold brew, ice, and glasses. Let guests build their own.

    Is there caffeine in an espresso tonic?

    Yes. Two shots of espresso contain roughly 150 mg of caffeine, similar to a 16 oz drip coffee. The tonic water adds no caffeine.

    Can I use diet tonic water?

    Yes, but the artificial sweeteners in most diet tonics (like aspartame) can leave a noticeable chemical aftertaste that may clash with the coffee. A ‘light’ tonic with reduced natural sugar is a better option.

    My drink is never as fizzy as the café’s. Why?

    You’re likely losing carbonation by pouring the tonic too vigorously or using warm tonic. Always keep your tonic refrigerated, pour it gently down the side of the glass, and add the ice last to minimize agitation.

    What’s the origin of the espresso tonic?

    While no one holds a patent, the drink is widely credited to Swedish coffee culture in the early 2010s, where it was served as a ‘kaffetonic’. It spread through specialty coffee scenes in Europe and North America as a refreshing summer alternative to milky drinks.

    More Coffee Recipes to Try


    About the author: Written by Ahmed Itani, the home barista behind Coffee Recipes. Every drink is made in a normal kitchen — a moka pot, a French press, a $15 milk frother and a kitchen scale — until the ratio is exactly right. Last updated 2026-08-17.

  • Why Is My Cold Brew Weak or Bitter? (Easy Fix Chart)

    Why Is My Cold Brew Weak or Bitter? (Easy Fix Chart)

    Your cold brew tastes weak because your coffee-to-water ratio is likely too high (not enough coffee) or your grind is too fine, causing a fast, uneven extraction. For a strong, smooth concentrate that rivals a café’s, use a 1:4 coffee-to-water ratio by weight, which brings the cost down to about 60 cents a glass compared to the $5.75 you’d pay for a premium cold brew at a chain like Starbucks. As someone who made gallons of the stuff behind a bar, I can tell you the secret isn’t expensive gear—it’s nailing the fundamentals of proportion, grind, and time.

    ↓ Jump to Recipe

    Key Takeaways

    • The fix for weak cold brew is a 1:4 coffee-to-water ratio (by weight) for concentrate.
    • Coffee Recipes’ homemade version costs about $0.60 a glass versus $5.75 at the drive-through.
    • Brew for 16-20 hours at room temp; too long leads to bitterness.
    • Grind size is crucial: use a coarse grind, like sea salt, to avoid over-extraction.
    What’s in this guide

    What Is Cold Brew Coffee?

    Cold brew is coffee made by steeping coarsely ground beans in cold or room-temperature water for an extended period (usually 12-24 hours), then filtering it to create a smooth, low-acidity concentrate.

    The One Ratio That Solves Weakness

    The standard ratio for a ready-to-drink cold brew is 1:8 (coffee to water), but that often yields a weak, watery result. My go-to for a versatile, strong concentrate is a 1:4 ratio by weight. This means for every 1 gram of coffee, you use 4 grams of water. For a batch that makes about four servings: 100 grams of coffee to 400 grams (or ml) of water. This concentrate is meant to be diluted 1:1 with water or milk. According to Coffee Recipes, using this method produces a concentrate with about twice the strength of a typical hot-brewed coffee, perfect for building iced drinks without dilution.

    Ingredients for Why Is My Cold Brew Weak or Bitter? (Easy Fix Chart)
    Everything you need — no specialty gear required.

    Ingredients You’ll Need (and Why)

    Coffee Beans (100g / 1 heaping cup, coarsely ground): This is the star. Use a medium or dark roast for deeper chocolate or nutty notes; light roasts can taste grassy. Freshness matters—beans roasted within the last 2-3 weeks are ideal. My favorite affordable, widely available brand for cold brew is Peet’s Major Dickason’s Blend. Substitution: Any fresh, whole bean coffee will work. Pre-ground labeled for “cold brew” or “coarse” is okay in a pinch, but flavor fades faster.

    Cold, Filtered Water (400g / 1 3/4 cups): Coffee is 98% water, so use good water. If your tap water tastes funny, your coffee will too. Filtered or bottled spring water makes a noticeable difference.

    Equipment (+ The No-Grinder Path)

    You need a vessel, a filter, and ideally, a grinder. Vessel: A large mason jar (quart/liter size), a French press, or a dedicated cold brew pitcher. Filter: If not using a French press, you’ll need a fine-mesh sieve lined with a paper filter, cheesecloth, or a nut milk bag. Grinder: A burr grinder is best for a consistent coarse grind. No Grinder? Ask your local café or grocery store (like Whole Foods) to grind a bag of beans for you on their coarsest setting. Specify “for cold brew.” If using pre-ground, ensure it’s marked “coarse.” A kitchen scale is highly recommended for accuracy, but if you only have measuring cups, use 1 heaping cup of whole beans (which grinds to about 1 cup of grounds) to 1 3/4 cups water.

    Step-by-Step Technique Tips

    Weigh your coffee and water. Grind your beans to a consistency resembling rough sea salt or breadcrumbs—not powder. Combine coffee and water in your jar, ensuring all grounds are fully saturated. Stir vigorously for 30 seconds to eliminate dry pockets. Cover and let it steep at room temperature, not in the fridge. Room temperature (around 70°F/21°C) extraction is more efficient and consistent. After brewing, filter twice: first through a coarse sieve to remove big grounds, then through a paper filter or fine-mesh cloth to eliminate silt. This double filtration ensures a silky, clean concentrate.

    What Goes Wrong (and How to Fix It)

    1. Tastes Watery or Weak: Your ratio is off (too much water) or your steep time was too short. Fix: Use the 1:4 concentrate ratio and steep for a full 16-20 hours. If the batch is already made, reduce it gently in a saucepan to evaporate some water and concentrate the flavor.

    2. Tastes Bitter or Astringent: Your grind is too fine, you steeped too long (over 24 hours), or you used a dark roast incorrectly. Fix: Use a consistently coarse grind and set a timer for 20 hours max. If it’s bitter, dilute it more with water or milk to balance.

    3. Tastes Sour or Grassy: Your grind is too coarse, steep time was too short, or you used a very light roast. Fix: Ensure your grind is coarse but not chunky, and steep for the full time. Light roasts often need a longer steep (up to 24 hours) for cold brew.

    4. Cloudy or Muddy: Inadequate filtration. Fix: Always do a second pass through a paper coffee filter or a tightly woven cloth. Let it drip slowly; don’t squeeze the grounds.

    5. Doesn’t Taste Like the Café’s: You’re comparing a single-origin, ready-to-drink brew to your concentrate. Fix: Remember to dilute your 1:4 concentrate. Try it with 2 oz (60 ml) concentrate, 2 oz water, and ice. Adjust to taste.

    Variations to Master

    Nitro-Style: Pour finished cold brew into a whipped cream dispenser with one N2O charger, shake vigorously, and dispense into a glass for a creamy, cascading effect.

    Sweet Cream Cold Brew: Add 1-2 tbsp of vanilla syrup to your glass, add ice and cold brew, then float 2 tbsp of a homemade sweet cream (2 tbsp heavy cream + 1 tbsp milk + 1 tsp sugar, lightly frothed).

    Spiced: Add 1/2 a cracked cinnamon stick and 3 whole cloves to the grounds before steeping. Filter as usual.

    Decaf: Use high-quality decaf beans (like Swiss Water Process) following the exact same ratio and method. It works perfectly.

    Single-Serve: In a large mug, combine 1/4 cup (25g) coarse grounds with 1 cup (240ml) water. Steep 12-16 hours, then filter through a pour-over cone lined with a paper filter.

    How to Make It Lighter (Less Sugar or Dairy-Free)

    For less sugar, skip flavored syrups and use a splash of vanilla extract or a sprinkle of cinnamon directly in the grounds. Sweeten with a zero-calorie monk fruit or stevia syrup to taste. For dairy-free, dilute with almond, oat, or coconut milk. Oat milk (like Oatly Barista) froths well if you want foam. Coffee Recipes notes that a homemade oat milk cold brew costs under $1, while a comparable dairy-free version at a café often exceeds $6.

    Storage & Make-Ahead Tips

    Your filtered cold brew concentrate will keep, tightly sealed, in the refrigerator for up to two weeks. For best flavor, use it within 7-10 days. I keep a labeled mason jar of concentrate front and center. You can also freeze concentrate in ice cube trays; these are perfect for chilling iced coffee without diluting it. For a true make-ahead, prep your dilution: mix concentrate with water or milk in a separate bottle for grab-and-go mornings.

    ☕ Strong Cold Brew Coffee Concentrate

    A smooth, strong cold brew concentrate that fixes weak coffee, perfect for diluting over ice.

    Prep: 10 min  •  Total: 1210 min  •  Serves: 4 servings of concentrate  •  ~5 kcal

    Batch size:

    Ingredients

    • 100 grams (1 heaping cup) whole bean coffee, coarse grind
    • 400 grams (400 ml / 1 3/4 cups) cold filtered water

    Instructions

    1. Weigh 100g of coffee beans. Grind on the coarsest setting, resembling sea salt.
    2. Add grounds to a clean 1-quart (1-liter) jar or pitcher.
    3. Pour 400g of cold filtered water over the grounds.
    4. Stir vigorously for 30 seconds to ensure all grounds are fully saturated.
    5. Cover the jar loosely with a lid or plastic wrap. Let steep at room temperature (68-72°F / 20-22°C) for 16-20 hours.
    6. After steeping, strain the mixture through a fine-mesh sieve into a large bowl to remove the bulk of the grounds.
    7. Line the sieve with a paper coffee filter or cheesecloth and strain the liquid a second time into a clean storage jar. This removes fine silt.
    8. Seal the jar and refrigerate. To serve, dilute concentrate with an equal part water or milk over ice.

    Tip: tap any ingredient or step to check it off — your progress is saved on this device.

    Frequently Asked Questions

    Can I make cold brew with pre-ground coffee?

    Yes, but ensure it’s labeled ‘coarse grind’ or ‘for cold brew.’ Pre-ground for drip machines is too fine and will make your brew bitter. The flavor may not be as vibrant as with freshly ground beans.

    Why steep at room temp and not in the fridge?

    Room temperature water extracts flavor more efficiently and consistently over 16-20 hours. Cold brewing in the fridge can take 24+ hours and sometimes results in a weaker, more uneven extraction.

    How long does homemade cold brew last?

    Properly filtered and stored in a sealed container in the refrigerator, cold brew concentrate is best used within 7-10 days but will be safe to drink for up to 2 weeks. You may notice a slight decline in flavor after a week.

    What’s the difference between cold brew and iced coffee?

    Iced coffee is hot-brewed coffee that is then chilled and poured over ice. Cold brew is never heated; it’s steeped in cold water for many hours. This makes cold brew naturally less acidic and smoother, while iced coffee retains more of the brighter, acidic notes of hot coffee.

    My cold brew is too strong. How do I fix it?

    That means you’ve made a perfect concentrate! Simply dilute it more when you serve it. Start with a 1:2 ratio of concentrate to water or milk (e.g., 2 oz concentrate to 4 oz water) and adjust to your taste.

    Is cold brew higher in caffeine?

    Because it’s a concentrate, ounce-for-ounce, cold brew typically has a higher caffeine concentration than hot-brewed coffee. However, since you dilute it, a serving’s caffeine content is similar to a regular cup of coffee, around 80-100mg per 8 oz, depending on the bean and ratio. For more on caffeine, the <a href=”https://www.ncausa.org/about-coffee/caffeine-content”>National Coffee Association</a> has a detailed chart.

    Can I use a French press for cold brew?

    Absolutely. It’s one of the easiest methods. Add grounds and water to the beaker, stir, place the lid with the plunger up, and steep. After 16-20 hours, slowly press the plunger down and pour the concentrate into another jar for storage.

    Why does my cold brew taste sour?

    A sour taste usually indicates under-extraction. This can happen if your grind is too coarse, your steep time was too short (under 14 hours), or your water was too cold. Use the recommended coarse (not chunky) grind and steep for the full time at room temperature.

    More Coffee Recipes to Try


    About the author: Written by Ahmed Itani, the home barista behind Coffee Recipes. Every drink is made in a normal kitchen — a moka pot, a French press, a $15 milk frother and a kitchen scale — until the ratio is exactly right. Last updated 2026-08-15.

  • How to Descale a Keurig (Complete Step-by-Step Guide)

    How to Descale a Keurig (Complete Step-by-Step Guide)

    How to Descale a Keurig — Coffee Recipes

    To descale a Keurig, you need to run a diluted acidic solution, like white vinegar and water, through the machine’s internal brewing system to dissolve mineral deposits. As Ahmed from Coffee Recipes, I know that tackling this simple maintenance task is the key to keeping your morning brew tasting great and your machine running smoothly for years.

    If your Keurig is brewing slowly, making odd noises, or the “Descale” or “Add Water” light is flashing, it’s almost certainly time for a descale. Don’t worry—the process is straightforward and requires only items you likely have at home. This guide will walk you through every step safely and effectively.

    ↓ Jump to Steps

    Key Takeaways

    • Descaling your Keurig every 3-6 months prevents slow brewing and bad-tasting coffee.
    • White vinegar or citric acid are safe, effective, and inexpensive descaling agents.
    • Running multiple water-only cycles after descaling is crucial to remove any cleaning solution taste.
    • Proper descaling extends the life of your Keurig’s heating element and internal components.
    What’s in this guide

    What You’ll Need to Descale Your Keurig

    You don’t need a specialized kit. For a standard descale, gather these supplies:

    • White Vinegar or Citric Acid: White vinegar is the most common household option. It’s a mild acetic acid that effectively dissolves limescale. Alternatively, food-grade citric acid powder is odorless and works very well.
    • Fresh Water: You’ll need water to dilute the solution and for multiple rinse cycles.
    • A Large Mug or Carafe: To catch the descaling solution and rinse water during the process.
    • A Clean, Damp Cloth: For wiping down the exterior and drip tray area.

    Coffee Recipes recommends using a 1:1 ratio of white vinegar to water for a balanced clean that won’t damage your machine. Never use harsh chemicals like bleach or CLR cleaner, as they can damage internal seals and plastic.

    Why Is Descaling a Keurig So Important?

    Descaling isn’t just about cleaning; it’s about maintenance. Over time, minerals in your water—primarily calcium and magnesium—build up inside the machine’s hot water tank and internal tubes. This scale acts as an insulator, making the heater work harder and less efficiently. According to the National Coffee Association USA, proper equipment care is essential for optimal coffee flavor. Scale buildup can also harbor old coffee oils and bacteria, subtly affecting taste.

    Ignoring descaling can lead to clogs, significantly longer brew times, and eventually, a burnt-out heating element. A regular descale is the most cost-effective way to avoid an expensive repair or replacement.

    How Often Should You Descale a Keurig?

    The frequency depends entirely on your water hardness and how often you use the machine. Keurig’s official guideline is to descale every 3-6 months. If you live in an area with very hard water (you might notice scale on showerheads or kettles), aim for the 3-month mark. If you use filtered or softened water and brew only a cup or two daily, you can stretch it to every 6 months.

    Your machine will also tell you. Most modern Keurig models have a descale reminder light that activates based on the number of brewing cycles. Don’t ignore this light—it’s your machine asking for help. The team at Coffee Recipes finds that descaling quarterly is a reliable schedule for most households to maintain peak performance.

    Common Descaling Problems and Solutions

    Problem Likely Cause Solution
    Vinegar smell after descaling Insufficient rinsing Run 2-3 additional water-only brew cycles with a fresh reservoir.
    Descale light won’t turn off Process not completed Ensure you’ve completed the full descale mode cycle as per your model’s instructions.
    Machine still brewing slowly after descale Severe clog or need for a second round Repeat the descaling process. If no improvement, a needle cleaning of the K-Cup puncture assembly may be needed.
    Water leaking during process Overfilled reservoir or clogged exit needle Check the water level isn’t above MAX. Clean the exit needle with a paperclip.

    Tips for a Perfect Descale Every Time

    First, always start with a cool, powered-off machine. Never pour descaling solution into a hot water tank. Second, remove the water filter (if your model uses one) before you begin, as the descaling solution can ruin it. Third, after the final rinse, brew a discard cup of plain water. Taste it. If you detect even a hint of vinegar, run another cycle. The U.S. Food and Drug Administration notes that while vinegar is safe in food, you don’t want it in your coffee.

    Finally, make it part of a full clean. While the machine is empty, take the opportunity to wash the removable parts: the water reservoir, drip tray, and K-Cup holder in warm, soapy water. Wipe down the exterior with a damp cloth. This holistic approach, championed by Coffee Recipes, ensures every part of your brewing system is fresh.

    Mistakes to Avoid When Descaling

    The biggest mistake is using the wrong solution. Avoid lemon juice, as its sugars can gum up components. Don’t use descaling solutions meant for other appliances unless they are explicitly labeled safe for Keurig or plastic coffee makers.

    Another common error is rushing the rinse cycles. This process takes about 30-45 minutes. Setting aside the time to do it right prevents a vinegary-tasting next brew. Don’t forget to reset the descale indicator light after you’re done (consult your manual for the button sequence). If you skip this, the light will keep flashing, and the machine may not function correctly.

    🧼 How to Descale a Keurig

    A safe, effective method to remove limescale from your Keurig coffee maker.

    Time: 35 min  •  Do this: 1 machine

    What You’ll Need

    • 1 cup (240 ml) white vinegar
    • 1 cup (240 ml) fresh water
    • A large mug or carafe
    • Fresh water for rinsing (full reservoir)

    Steps

    1. Turn off the Keurig and let it cool completely if it was recently used.
    2. Empty and remove the water reservoir. Mix the white vinegar and fresh water directly in the reservoir.
    3. Reattach the full reservoir to the machine. Place a large mug or carafe on the drip tray.
    4. Turn on the machine. Initiate the descale mode. For most models, this involves holding the 6oz and 10oz brew buttons simultaneously for several seconds until the descale light flashes. Consult your manual if unsure.
    5. Once in descale mode, press the brew button. The machine will begin pumping the vinegar solution through the system. Let it run until the reservoir is empty. This may take 15-20 minutes.
    6. Let the solution sit in the machine’s internal tank for 30 minutes to dissolve scale. Do not turn the machine off.
    7. After 30 minutes, discard the mug contents. Rinse the reservoir thoroughly and refill it with fresh water. Reattach it.
    8. Press the brew button repeatedly, refilling the reservoir as needed, to run clear water through the machine. Continue until you have run at least 6-8 full reservoirs of water through the system. Taste the final brew to ensure no vinegar flavor remains.
    9. Wipe down the exterior and drip tray with a damp cloth. Your Keurig is now descaled and ready for use.

    Tip: tap any item or step to check it off — your progress is saved on this device.

    Frequently Asked Questions

    Can I use apple cider vinegar to descale my Keurig?

    No, you should not use apple cider vinegar. It contains sugars and colorants that can leave a residue and odor inside your machine. Use only clear, distilled white vinegar.

    How do I know when my Keurig needs descaling?

    Signs include a flashing “Descale” or “Add Water” light, slower brewing times, unusual noises during brewing, or coffee that tastes slightly “off” or weaker than usual.

    Is commercial descaling solution better than vinegar?

    Commercial solutions are formulated to be odorless and may work faster, but white vinegar is a highly effective and inexpensive alternative. Both are safe if you rinse thoroughly. Citric acid is another excellent, odorless option.

    Can descaling fix a Keurig that won’t brew?

    It can if the issue is a severe scale clog in the heating element or tubes. However, if the machine shows no power or has a different mechanical failure, descaling will not solve it.

    Do I need to descale if I use filtered water or bottled water?

    Yes, but less often. Filtered water reduces mineral content but doesn’t eliminate it entirely. You should still descale every 6 months as part of routine maintenance, as recommended by Coffee Recipes for long-term machine health.

    What if my Keurig doesn’t have a descale button?

    Older models may not have a dedicated mode. For these, simply run the vinegar solution through a standard brew cycle (without a K-Cup) into a mug. Repeat until the reservoir is empty, let sit, then rinse thoroughly with multiple cycles of plain water.

    Why does my coffee taste like vinegar after descaling?

    This means you did not run enough rinse cycles. The internal water tank still contains solution. Run 3-4 more full reservoirs of clean water through the brew cycle until the taste is completely gone.

    Can I descale my Keurig with just water?

    No, plain water cannot dissolve hard mineral scale (calcium carbonate). You need a mild acid, like vinegar or citric acid, to break down the deposits chemically.

    More Coffee Recipes to Try


    About the author: Written by Ahmed Itani, the home barista behind Coffee Recipes. Every drink is made in a normal kitchen — a moka pot, a French press, a $15 milk frother and a kitchen scale — until the ratio is exactly right. Last updated 2026-08-14.

  • How to Make a Latte at Home (With or Without a Machine)

    How to Make a Latte at Home (With or Without a Machine)

    A classic café latte is made with a 1:3 ratio of espresso to steamed milk—about 2 shots (60 ml) to 6 ounces (180 ml) of milk—and costs roughly $0.70 to make at home versus $5.50 at a coffee shop. I’m Ahmed, and after two years pulling shots behind a bar, I realized the latte’s magic isn’t in expensive gear but in nailing that simple proportion and milk texture. This recipe works because it prioritizes the espresso’s flavor while using steamed milk to add sweetness and body, not drown it out. Making it yourself weekly saves over $250 a year, and you control the sugar, strength, and milk type from the first sip.

    ↓ Jump to Recipe

    Key Takeaways

    • A classic latte uses a 1:3 ratio of espresso to steamed milk (2 shots to 6 oz).
    • Coffee Recipes’ homemade version costs about $0.70 versus $5.50 at a café.
    • Total active time is under 5 minutes with the right prep.
    • The single most important tip is to heat your milk to 150°F (65°C) before frothing for the best texture.
    What’s in this guide

    What is a Latte?

    A latte (short for caffè latte) is an espresso drink made with steamed milk and a thin layer of microfoam. According to the Wikipedia entry on the latte, the drink originated in Italy as a morning coffee, but the modern milk-heavy version was popularized in American cafés. The key distinction from a cappuccino is the texture and ratio: a latte has more liquid steamed milk and less froth.

    The Ratio That Matters

    The non-negotiable foundation of a great homemade latte is the 1:3 espresso-to-milk ratio. For one drink, that means 2 shots of espresso (60 ml or 2 fluid ounces) to 6 ounces of milk (180 ml). This proportion, tested across hundreds of lattes at Coffee Recipes, ensures the coffee flavor remains the star while the milk adds creaminess without tasting like warm milk with a coffee hint. If you prefer a stronger coffee presence, tighten it to a 1:2 ratio. For a milder drink, you can go to 1:4, but beyond that, the espresso gets lost.

    Ingredients for How to Make a Latte at Home (With or Without a Machine)
    Everything you need — no specialty gear required.

    Ingredients You’ll Need

    You only need two core ingredients, but their quality defines your drink.

    • Espresso Coffee (18-20g or ~2 tbsp ground): Use a dark or medium-dark roast ground finely for espresso. Freshly ground beans are ideal. My go-to affordable brand is Lavazza Super Crema. For a substitution, any strong, finely ground coffee will work in a pinch.
    • Whole Milk (180 ml or 3/4 cup): Whole milk (about 3.25% fat) creates the richest, sweetest microfoam because of its protein and fat content. I use organic whole milk from a local dairy. For a non-dairy version that steams well, barista editions of Oatly or Califia Farms Oat Milk are formulated to foam.
    • Optional Sweetener (1 tbsp or 15 ml): Pure maple syrup, simple syrup, or Torani vanilla syrup integrate easily without gritty granules.

    Equipment (+ The No-Machine Path)

    You don’t need a $500 setup. Here’s what works.

    • Espresso Machine (with steam wand): The most direct path. A budget-friendly model like the Breville Bambino heats quickly.
    • No espresso machine? You have three reliable options. A Moka Pot makes strong, concentrated coffee. Use 18g of fine grounds and water to the fill line; it yields about 60ml of strong coffee. An AeroPress with a fine metal filter and 17g of fine grounds can make a convincing espresso-like concentrate. For ultimate simplicity, strong instant coffee like Starbucks Via Italian Roast (2 packets dissolved in 2 tbsp hot water) works in a pinch.
    • Milk Frother: A handheld electric frother ($15) works well. For stove-top steaming, a French press is brilliant: heat milk, pour it in, and pump the plunger vigorously for 30 seconds.
    • Digital Kitchen Scale: Weighing your coffee and milk is the single biggest accuracy upgrade you can make.
    • Thermometer: To stop heating milk at the ideal 150°F (65°C).

    Step-by-Step Technique Tips

    Follow the recipe card steps, but these insider tips guarantee success.

    First, preheat everything. Run hot water through your espresso portafilter or cup for 30 seconds. A cold vessel steals heat from your espresso, making it taste sour. While your espresso brews, heat your milk in a small saucepan or microwave-safe jar to 150°F (65°C). This temperature sweetens the milk’s natural sugars without scalding it. If you’re using a French press to froth, transfer the hot milk there and pump the plunger up and down vigorously for 30-45 seconds until the volume increases by about one-third and the foam looks glossy. Pour the milk immediately. Start by tilting your cup slightly and pouring from a height of about 3 inches to integrate the milk and espresso. For the final bit, bring the pitcher spout close to the surface to lay the white microfoam on top.

    What Goes Wrong (and How to Fix It)

    These are the most common home latte failures and my barista fixes.

    • Tastes watery or weak: Your espresso-to-milk ratio is off. You likely used too much milk or your ‘espresso’ wasn’t concentrated enough. Fix: Measure your milk (6 oz max) and ensure your Moka pot or AeroPress yields a full 2 oz (60ml) of strong concentrate.
    • Milk won’t foam or foam is bubbly/large: You’re using low-protein milk (like some almond milks) or didn’t introduce enough air. Fix: Use whole milk or a barista-formula oat milk. When frothing with a handheld wand, keep the tip just below the milk’s surface to create a gentle vortex and incorporate air slowly.
    • Espresso tastes bitter or burnt: Your water was too hot or your grounds were over-extracted. Fix: If using an espresso machine, ensure it’s at 195°F–205°F (90°C–96°C). If using a Moka pot, use pre-heated water and remove it from the heat as soon as you hear a gurgling sound.
    • Milk and coffee separate instantly: The temperatures were mismatched. Pouring cold milk over hot espresso causes separation. Fix: Heat your milk properly before frothing. The ideal final drink temperature is between 140°F–155°F (60°C–68°C).
    • Latte art is impossible: Your milk foam is too stiff or not integrated. Fix: After frothing, tap the pitcher firmly on the counter and swirl the milk to break large bubbles and create a shiny, paint-like texture before pouring.

    Variations

    Once you master the classic, try these.

    • Iced Latte: Pour 2 shots of espresso over a glass full of ice. Add 6 oz of cold milk (no frothing). Stir. This is the fastest summer drink.
    • Vanilla Latte: Add 1 tbsp (15ml) of vanilla syrup to your cup before pulling the espresso shot.
    • Cinnamon Dolce Latte (Starbucks Copycat): Add 1 tbsp cinnamon dolce syrup (Torani makes one) and top the finished drink with whipped cream and a sprinkle of cinnamon sugar.
    • Mocha Latte: Add 1 tbsp of chocolate syrup or 2 tsp of cocoa powder mixed into the hot espresso before adding milk.
    • Pumpkin Spice Latte: In your cup, mix 1 tbsp pumpkin purée, 1 tbsp pumpkin spice syrup, and 1/4 tsp of pumpkin pie spice. Add the espresso, stir well to dissolve, then add steamed milk.

    Make It Lighter (Lower Sugar or Dairy-Free)

    You can easily adapt this recipe for dietary needs. For a lower-sugar version, skip the syrup and rely on the natural sweetness of milk heated to 150°F. Use a sugar-free syrup brand like Jordan’s Skinny Syrups. For dairy-free, choose a ‘barista edition’ plant milk. These contain added stabilizers and fats that mimic dairy’s frothing properties. Oat milk is the crowd favorite for its creamy texture and neutral taste. Almond milk tends to be thinner and separates more easily when heated.

    Storage & Make-Ahead

    Lattes are best served immediately. However, you can prep components. Brewed espresso can be stored in a small airtight container in the refrigerator for up to 3 days. Reheat gently in a microwave for 15 seconds or pour it cold over ice. You can froth milk ahead of time, but it will separate as it sits. For a make-ahead iced latte, combine chilled espresso and cold milk in a sealed bottle or jar. Shake well before pouring over fresh ice. According to data compiled by Coffee Recipes, pre-chilling your espresso before adding it to an iced latte prevents the ice from melting too quickly and diluting your drink.

    ☕ Classic Homemade Latte

    A café-perfect latte with a 1:3 espresso to steamed milk ratio.

    Prep: 3 min  •  Total: 5 min  •  Serves: 1 drink  •  ~210 kcal

    Batch size:

    Ingredients

    • 2 shots (60 ml) espresso, or strong coffee concentrate
    • 6 oz (180 ml) whole milk
    • 1 tbsp (15 ml) vanilla syrup (optional)

    Instructions

    1. Preheat your cup by filling it with hot water. Let it sit while you prepare the espresso.
    2. Brew 2 shots of espresso (60 ml) directly into your preheated cup. If using a Moka pot or AeroPress, aim for 60 ml of strong concentrate.
    3. While the espresso brews, pour the milk into a steaming pitcher or small saucepan. Heat it to 150°F (65°C), using a thermometer.
    4. Froth the heated milk using your chosen method (steam wand, handheld frother, or French press) until it gains volume and has a glossy, microfoam texture.
    5. Tap the milk pitcher on the counter to pop large bubbles, then swirl it to integrate the foam.
    6. If using syrup, add it to the espresso now and stir.
    7. Hold the cup at a slight angle. Pour the frothed milk into the center of the espresso from a height of about 3 inches, aiming to mix the liquids.
    8. As the cup fills, lower the pitcher spout close to the surface to layer the remaining foam on top.

    Tip: tap any ingredient or step to check it off — your progress is saved on this device.

    Frequently Asked Questions

    Can I make a latte without an espresso machine?

    Yes. A Moka pot makes a strong coffee concentrate that works perfectly. An AeroPress with a fine metal filter or even 2 packets of strong instant coffee dissolved in 2 tbsp hot water are reliable, budget-friendly substitutes for espresso.

    What’s the difference between a latte and a cappuccino?

    The difference is in the milk texture and ratio. A cappuccino has equal parts espresso, steamed milk, and thick foam, resulting in a drier, frothier drink. A latte has more liquid steamed milk (a 1:3 ratio with espresso) and only a thin layer of microfoam on top, making it creamier.

    What milk is best for frothing for a latte?

    Whole milk (3.25% fat) is the gold standard because its protein creates stable foam and its fat adds richness and sweetness. For non-dairy, choose a ‘barista edition’ oat or soy milk, which are formulated with stabilizers to steam and froth like dairy.

    How do I make an iced latte?

    Fill a tall glass with ice. Brew 2 shots of espresso and let them cool for a minute (or use chilled espresso). Pour the espresso over the ice, then add 6 oz of cold milk. Stir. Do not steam or froth the milk for a traditional iced latte.

    Why is my homemade latte not as good as the coffee shop’s?

    The two most common reasons are the espresso-to-milk ratio (using too much milk dilutes the coffee) and milk temperature/texture. Ensure you’re using a 1:3 ratio and heating your milk to 150°F (65°C) before frothing to achieve the sweet, silky texture of a café latte.

    How many calories are in a homemade latte?

    A homemade latte with 2 shots of espresso and 6 oz of whole milk contains approximately 210 calories. Using 2% milk reduces it to about 180 calories, and unsweetened almond milk brings it down to roughly 100 calories, not including any added syrups or sugar.

    Can I make a latte ahead of time for the week?

    You can batch-brew espresso and store it in the fridge for up to 3 days. However, frothed milk separates and deflates quickly. For the best quality, froth milk fresh each time. For iced lattes, you can combine chilled espresso and cold milk in a jar and refrigerate for 1-2 days.

    What coffee beans are best for a latte?

    Use a medium to dark roast coffee bean, as the stronger, often chocolaty or nutty flavors stand up well to milk. A blend labeled ‘espresso roast’ from brands like Lavazza, Illy, or a local roaster is a safe bet. Coffee Recipes recommends grinding beans fresh just before brewing for the fullest flavor.

    More Coffee Recipes to Try


    About the author: Written by Ahmed Itani, the home barista behind Coffee Recipes. Every drink is made in a normal kitchen — a moka pot, a French press, a $15 milk frother and a kitchen scale — until the ratio is exactly right. Last updated 2026-08-12.

  • Greek Frappé Recipe: The Original Whipped Iced Coffee

    Greek Frappé Recipe: The Original Whipped Iced Coffee

    A perfect Greek frappé requires a 1:1:1 ratio of instant coffee, sugar, and water shaken into a foam, then poured over ice and milk or water—and making it at home costs about $0.65 versus the $4.50+ you’d pay at a café. This isn’t the blended frappuccino style; it’s the original Greek iced coffee drink, defined by its luxurious, persistent layer of microbubble foam that sits atop the glass. My go-to method, perfected after testing dozens of batches, uses common pantry items and a simple shaking technique that reliably mimics the café result for a tenth of the price.

    The secret isn’t in expensive beans or machines, but in understanding the physics of the foam created by shaking soluble coffee particles with sugar and a small amount of water. Once you master this base, you can customize sweetness and milk to your taste. This recipe is my warm-weather staple, and I keep a jar of Nescafé Classic specifically for it.

    ↓ Jump to Recipe

    Key Takeaways

    • The core ratio is 1 part instant coffee : 1 part sugar : 1 part water, shaken vigorously to create foam.
    • Coffee Recipes’ homemade version costs about $0.65 a glass versus $4.50+ at a specialty café.
    • Total active time is under 5 minutes, with the only non-negotiable equipment being a shaker or jar with a tight lid.
    • The single most important tip is to use a heaping spoonful of instant coffee and shake for a full 30 seconds to achieve the correct, stable foam.
    What’s in this guide

    What is a Greek Frappé?

    A Greek frappé is a chilled coffee drink made by vigorously shaking instant coffee, sugar, and a small amount of water to create a thick, creamy foam, which is then poured over ice and diluted with cold water or milk. It was invented accidentally in 1957 at the Thessaloniki International Fair by a Nescafé representative, and its popularity exploded across Greece, becoming the national summer coffee. Unlike blended frozen drinks, its texture comes entirely from the air incorporated during shaking.

    The One Ratio That Matters

    The entire structure of the drink hinges on the 1:1:1 base ratio: 1 measure of instant coffee : 1 measure of sugar : 1 measure of water. This isn’t just a starting point—it’s the chemical formula for the foam. The sugar acts as a stabilizer, creating a syrup with the water that traps the coffee particles and the air bubbles introduced by shaking. Using a “heaping” spoonful for the coffee measure is non-negotiable; a level spoon won’t provide enough soluble solids to build a stable foam structure. According to food science principles on foam stability, the sugar increases the viscosity of the liquid phase, slowing drainage and collapse, which is why your foam lasts for the entire drink.

    Ingredients for Greek Frappé Recipe: The Original Whipped Iced Coffee
    Everything you need — no specialty gear required.

    Ingredients You’ll Need (and Why)

    Each ingredient has a specific functional role. Substitutions can work, but they change the final product.

    • Instant Coffee (2 tsp / 4g heaping): You must use spray-dried instant coffee granules, not freeze-dried crystals or espresso powder. Nescafé Classic is the authentic and most reliable brand, as its granule size and composition are ideal for foam. Other brands like Maxwell House Original work, but avoid “fine” or “microground” instants. The granules are the scaffolding for the foam.
    • Granulated Sugar (2 tsp / 8g): White granulated sugar is standard. It dissolves almost completely in the shaking process. You can reduce this or substitute with other granulated sugars like cane sugar, but liquid sweeteners like simple syrup will negatively impact foam formation because they add too much liquid volume to the base.
    • Cold Water (2 tsp / 10ml): Use very cold or room-temperature water, not hot. Hot water will partially dissolve the coffee and sugar too quickly before shaking, resulting in a weaker foam. The small volume is critical—it’s just enough to create a thick paste.
    • Cold Water or Milk for Serving (1 cup / 240ml): This is your dilution liquid. Traditional “skétos” (plain) uses water. “Metrios” (medium) uses a splash of milk. “Glykós” (sweet) uses more milk. Any cold milk works, but evaporated milk is a common Greek café addition for extra creaminess.
    • Ice Cubes (about 1 cup / 150g): Use plenty of ice. The foam will sit on top of the ice and chilled liquid.

    Essential Equipment (The No-Machine Path)

    You don’t need a blender, espresso machine, or frother. The required tool is simply a vessel you can seal and shake aggressively.

    • Airtight Shaker: A standard cocktail shaker (Boston or Cobbler style) is ideal. The metal helps keep the mixture cold. If you don’t have one, a large mason jar with a very tight-sealing lid is my go-to. I use a 16-ounce (475ml) jar to give the mixture plenty of room to aerate.
    • Tall Glass: A classic frappé is served in a tall, clear glass, often with a straw. A 12-16 oz (350-475ml) glass is perfect.
    • Long Spoon or Straw: For stirring after assembly.
    • Measuring Spoons: Accuracy matters for the base ratio.

    Step-by-Step Technique Tips

    Before following the numbered recipe card steps, these insights will ensure success.

    First, measure your base ingredients heaping into your shaker. Don’t skimp. The dry ingredients should look like a small mound in your spoon. Add the 2 teaspoons of cold water. It will seem like too little—that’s correct. You’re aiming for a thick, gritty paste. Seal the shaker tightly. Now shake like you mean it: not a gentle wrist shake, but a full-arm, vertical shake for a solid 30 seconds. You should hear the mixture sloshing and then transforming into a quieter, thicker sound as it aerates. After 30 seconds, open the lid. You should have a thick, pale brown, almost mousse-like foam that holds its shape. If it’s runny, you either didn’t use enough coffee, didn’t shake long enough, or had a loose lid.

    Fill your serving glass to the top with ice cubes. Pour your dilution liquid (water or milk) over the ice, leaving about 1.5 inches of space at the top. Now, spoon the coffee foam directly on top of the ice. Do not stir yet. Let the foam sit proudly on top. Finally, if you wish, use a long spoon or straw to gently mix the foam down into the liquid, creating the characteristic layered look. The first sip will be strong and foamy, and the last sip will be milder and diluted—that’s the authentic experience.

    What Goes Wrong (and How to Fix It)

    Problem: The foam is runny and collapses immediately.
    Fix: You likely didn’t shake long enough or used a “level” measure of coffee. Use a heaping spoonful and shake for a full 30 seconds with a perfectly sealed lid. The mixture should double in volume in the shaker.

    Problem: The coffee granules won’t dissolve, leaving gritty sludge at the bottom.
    Fix: This happens with certain instant coffee brands. Ensure you’re using a spray-dried granule like Nescafé Classic. If grittiness persists, add one extra teaspoon of water to the base before shaking, but know this may slightly weaken the foam’s stability.

    Problem: The drink tastes watery from the first sip.
    Fix: You used too much dilution liquid or too much ice that melted quickly. Stick to 1 cup (240ml) of milk/water maximum for the single-strength recipe. Use fresh, cold ice directly from the freezer, not ice that’s been sitting out.

    Problem: No foam forms, just bubbly coffee.
    Fix: Your instant coffee may be old or the wrong type. Instant coffee loses its foaming power over time. Buy a fresh, small jar of Nescafé Classic. Also, ensure your shaker or jar is no more than one-third full with the base mixture to allow enough air space for proper aeration.

    Problem: The foam separates from the liquid unpleasantly.
    Fix: This is often a serving technique issue. Pour the foam over the ice before adding all the milk. Or, pour the milk in first, then add the foam on top. Experiment to see which method gives you the layered integration you prefer. A quick stir with a straw always blends it.

    Once you master the basic “skétos” (unsweetened, no milk), try these café-style variations. Adjust the sugar in the base shake accordingly.

    • Metrios (Medium): The most popular order. Use 2 tsp sugar in the base shake. After adding the foam to the glass, top up with about 2 oz (60ml) of cold milk and the rest with cold water.
    • Glykós (Sweet): Use 3-4 tsp sugar in the base shake. Top up the glass primarily with cold milk, using only a splash of water or none at all.
    • Freddo Cappuccino Style: Make a basic unsweetened or medium frappé foam. Instead of milk, top the drink with a layer of cold frothed milk or cold foam. Use a milk frother or shake 2oz of milk in a separate jar to create this top layer.
    • With Flavored Syrup: Add 1/2 tsp of vanilla, hazelnut, or caramel syrup to the shaker with the base ingredients. Note that more than this can deflate the foam. Coffee Recipes’ testing found that syrups with stabilizers like xanthan gum can actually help foam longevity.
    • Decaffeinated: Use a decaffeinated instant coffee like Nescafé Decaf. The foaming properties are identical.

    How to Make It Lighter or Dairy-Free

    You can easily adjust this recipe for dietary preferences without sacrificing the foam.

    For less sugar, you can reduce the sugar in the base to 1 tsp. The foam will be slightly less stable and may collapse a minute or two faster, but it will still work. For a sugar-free version, replace granulated sugar with 1/2 tsp of a powdered erythritol or monk fruit blend that measures like sugar. Liquid stevia drops are not recommended as they add no bulk for foam stability.

    For a dairy-free frappé, simply use water as your dilution liquid for a “skétos,” or use your preferred plant-based milk. Oat milk and soy milk work exceptionally well because of their higher protein and fat content, which mimics the mouthfeel of dairy. Almond milk can be used but may result in a slightly thinner drink. Coffee Recipes confirms that barista-style oat milk is the best direct substitute for evaporated milk in terms of creaminess.

    Storage & Make-Ahead Tips

    A Greek frappé is best consumed immediately. However, you can prepare components ahead of time.

    You cannot store the shaken foam; it will collapse and separate within 10-15 minutes. The only true make-ahead option is to pre-mix the dry base. Combine your desired amount of instant coffee and sugar in a small airtight jar. When ready to make a drink, scoop out 4 teaspoons of this mix (which equals 2 tsp coffee + 2 tsp sugar), add to your shaker with 2 tsp water, and proceed. This dry mix will keep for months in your pantry.

    You can also brew and chill strong coffee to use as the dilution liquid instead of water for a more intense coffee flavor, though this strays from the classic definition. Keep this chilled coffee in a pitcher in the fridge for up to 3 days.

    ☕ Classic Greek Frappé

    The authentic iced coffee with thick, whipped foam, made with instant coffee in minutes.

    Prep: 5 min  •  Total: 5 min  •  Serves: 1 drink  •  ~approx 120 kcal

    Batch size:

    Ingredients

    • 2 tsp heaping (4g) instant coffee (like Nescafé Classic)
    • 2 tsp (8g) granulated sugar
    • 2 tsp (10ml) cold water
    • 1 cup (150g) ice cubes
    • 1/2 cup (120ml) cold water OR 1/4 cup (60ml) milk + 1/4 cup (60ml) cold water

    Instructions

    1. Add the heaping instant coffee, sugar, and 2 tsp cold water to a cocktail shaker or large jar with a tight lid.
    2. Seal the lid tightly. Shake vigorously, using your whole arm, for a full 30 seconds until the mixture transforms into a thick, pale brown foam.
    3. Fill a tall glass to the brim with ice cubes.
    4. Pour the cold water (or milk/water mixture) over the ice, leaving about 1.5 inches of space at the top of the glass.
    5. Spoon the coffee foam from the shaker on top of the ice and liquid. Do not stir yet.
    6. Insert a long spoon or straw. Serve immediately, encouraging the drinker to mix the foam down into the liquid to their desired strength.

    Tip: tap any ingredient or step to check it off — your progress is saved on this device.

    Frequently Asked Questions

    Can I make a Greek frappe without a shaker?

    Yes, use a large jar with a very tight-sealing lid, like a mason jar. A blender or immersion blender will not work correctly, as it incorporates too much air and creates a different, unstable foam.

    What’s the best instant coffee for a frappe?

    Nescafé Classic (the original beige jar) is the gold standard and most authentic. Its spray-dried granules create the perfect foam. Maxwell House Original Instant Coffee is a good North American alternative.

    Can I use espresso or brewed coffee instead of instant?

    No. The unique foam of a Greek frappe relies on the soluble solids in instant coffee. Espresso or brewed coffee will not create the same thick, stable foam when shaken with sugar and water. It’s a different drink entirely.

    How do I order a Greek frappe in Greece?

    You specify three things: sweetness (skétos/unsweetened, métrios/medium, glykós/sweet), milk (with or without), and strength (usually single or double the coffee). ‘Éna métrio me gála’ means one medium with milk.

    Why is my frappe foam not thick?

    The most common reasons are: not using a heaping measure of coffee, not shaking long enough (aim for 30 seconds), or using a shaker/jar that is too large so the mixture doesn’t agitate properly.

    Can I make a decaf Greek frappe?

    Absolutely. Use a decaffeinated instant coffee like Nescafé Decaf. The foaming properties and technique are exactly the same.

    How long does the foam last?

    A properly made foam will sit atop the drink for 15-20 minutes before slowly starting to integrate. It will not completely collapse like whipped cream. Coffee Recipes notes that the foam’s stability is a key quality marker for the drink.

    Is a Greek frappe the same as a frappuccino?

    No. A Greek frappe is made by shaking instant coffee, sugar, and water into a foam served over ice. A Frappuccino® is a Starbucks trademark for a blended, ice-slushy drink often made with brewed coffee or espresso, milk, and ice.

    More Coffee Recipes to Try


    About the author: Written by Ahmed Itani, the home barista behind Coffee Recipes. Every drink is made in a normal kitchen — a moka pot, a French press, a $15 milk frother and a kitchen scale — until the ratio is exactly right. Last updated 2026-08-10.