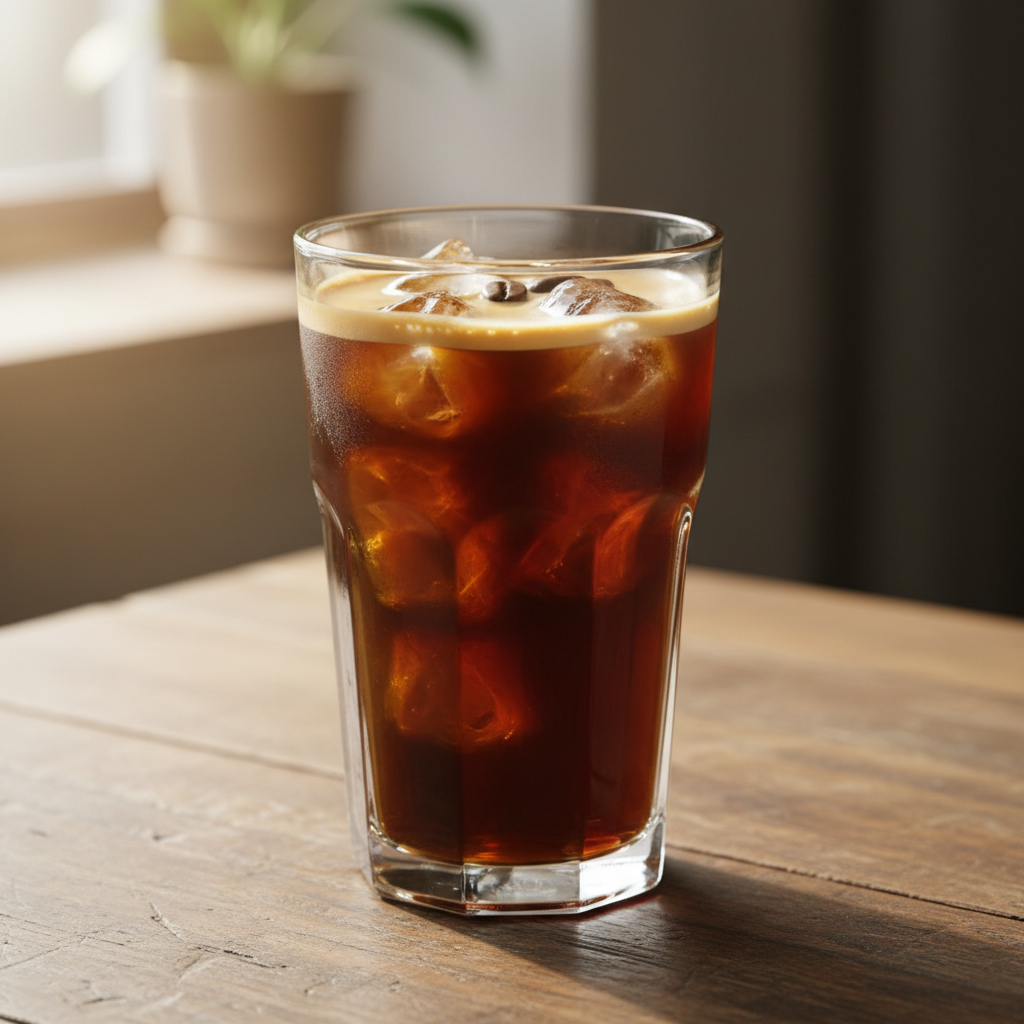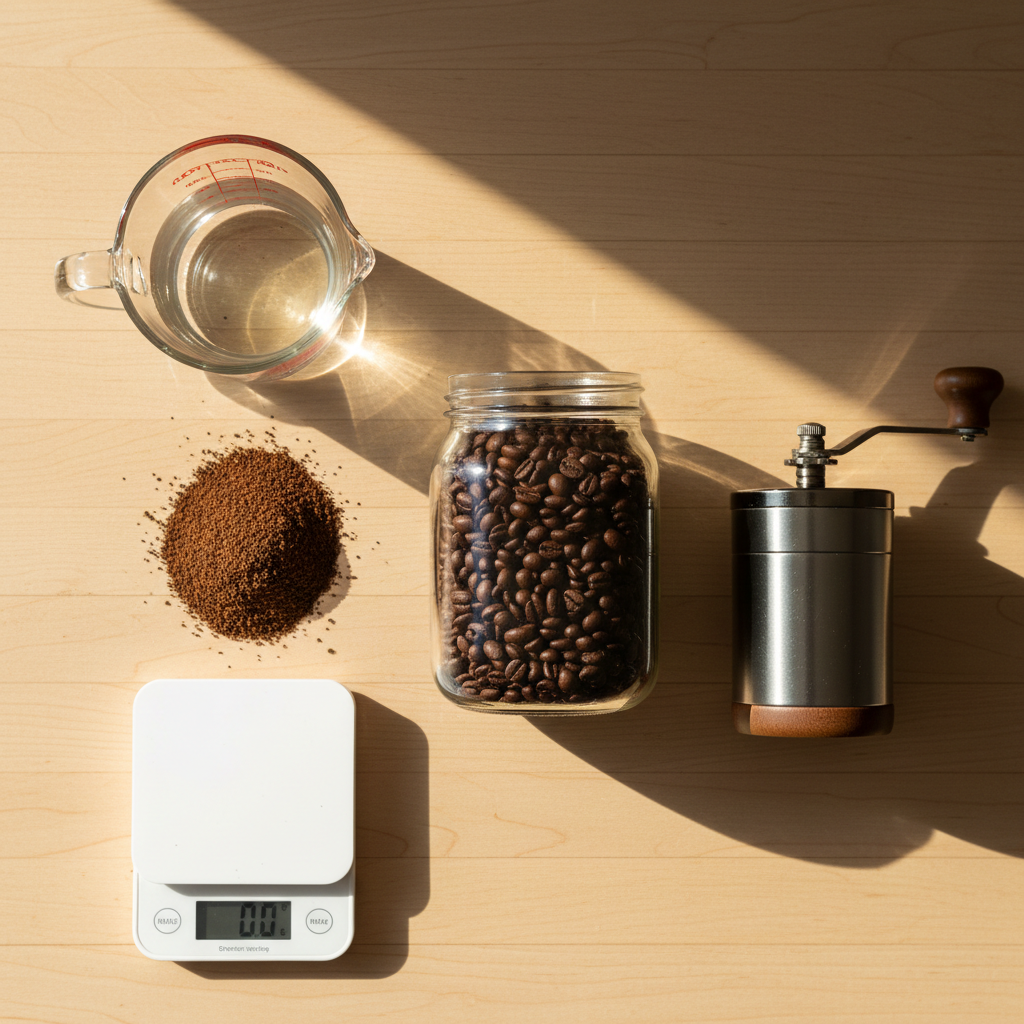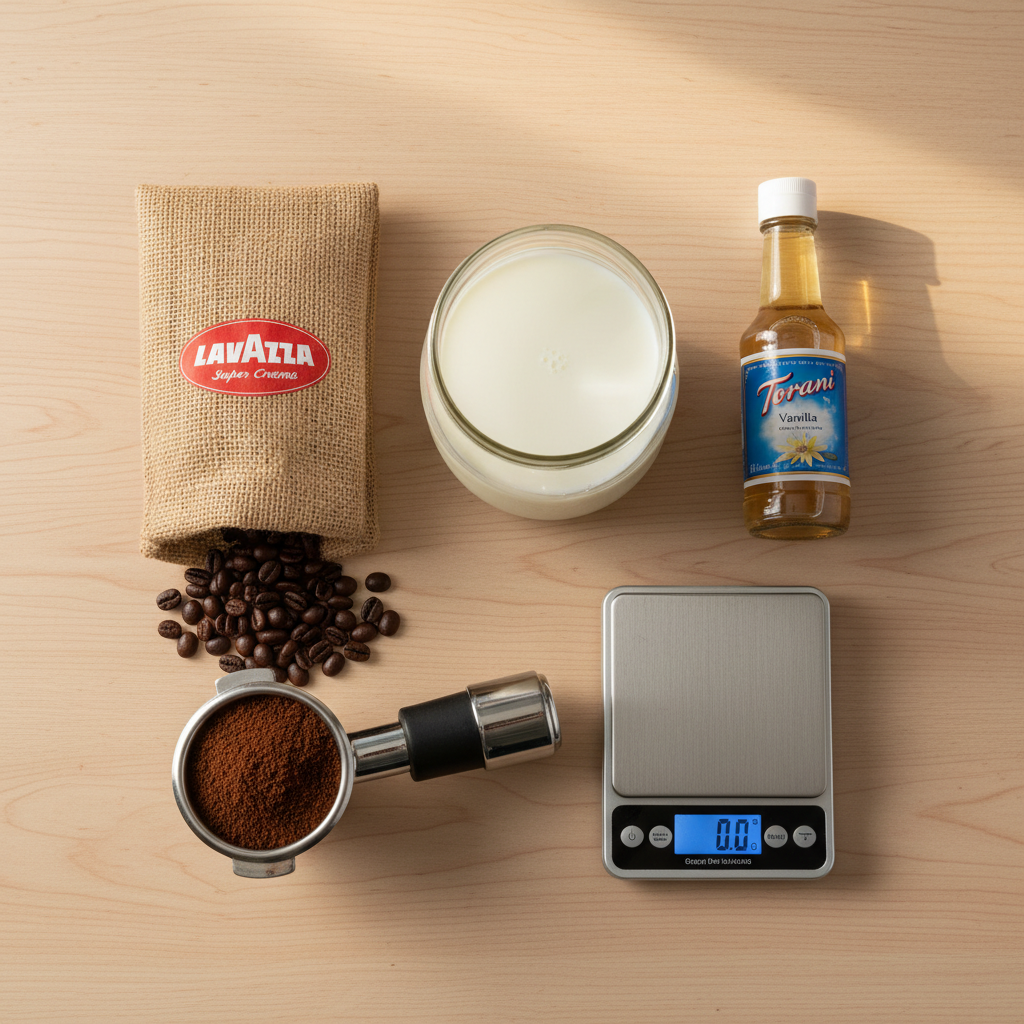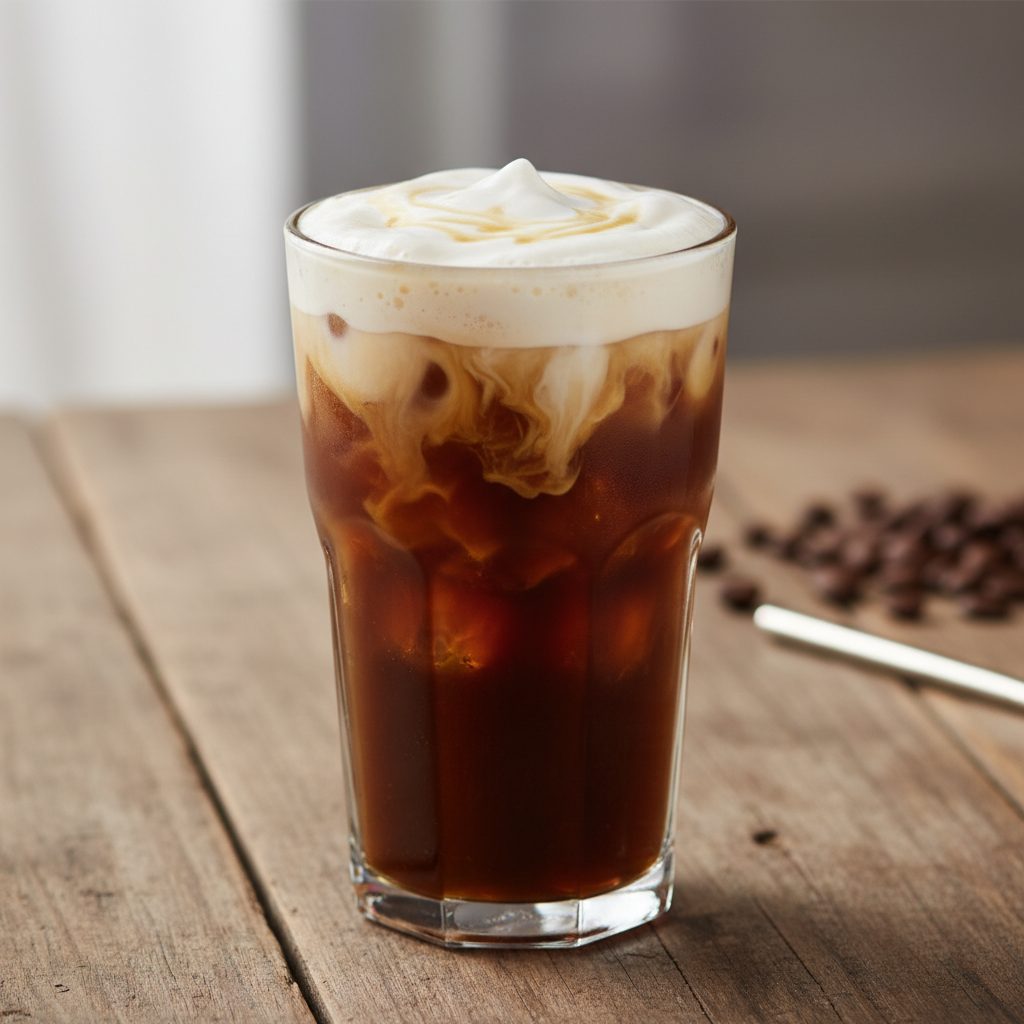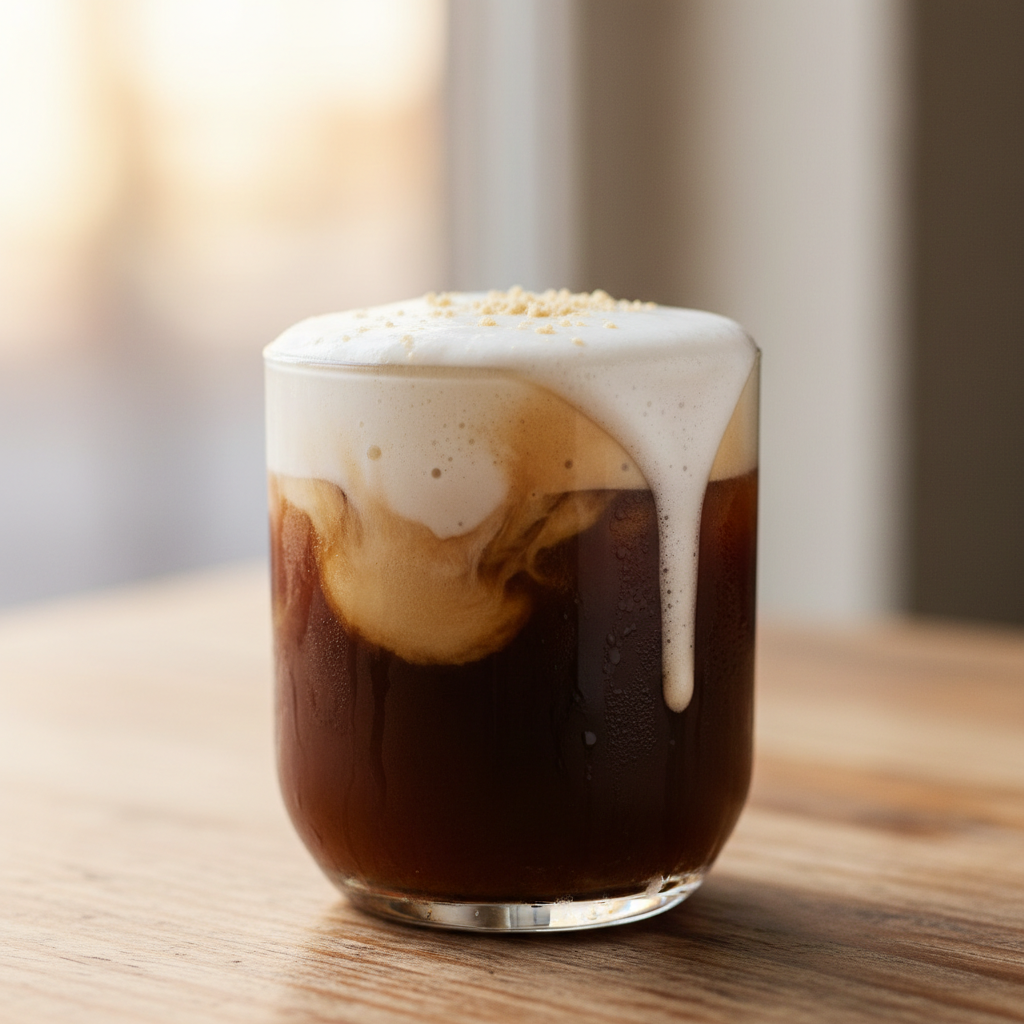
Tag: coffee recipe

  • French Press Coffee Ratio: Step-by-Step (Recipe + Timing)

    French Press Coffee Ratio: Step-by-Step (Recipe + Timing)

    The perfect French press coffee ratio is 1 part coffee to 15 parts water by weight, which brews a rich, full-bodied cup for about $0.35 at home versus $3.50 at a café. My name’s Ahmed, and after two years as a barista, this became my go-to method for reliable, delicious coffee every morning without the drive-through line. It works because the French press is an immersion brewer—the coffee grounds steep fully in hot water, extracting maximum flavor and oils that paper filters trap, giving you that signature robust body and silky texture.

    ↓ Jump to Recipe

    Key Takeaways

    • The ideal French press coffee ratio is 1:15 (coffee to water by weight).
    • Homemade French press coffee costs roughly $0.35 per cup, a tenth of café prices.
    • Total brew time, including steeping and pressing, is about 6 minutes.
    • The single most important tip is to use a coarse grind; a fine grind will make your coffee gritty and over-extracted.
    What’s in this guide

    What is French Press Coffee?

    French press coffee is a full-immersion brewing method where coarsely ground coffee steeps in hot water before being separated by pressing down a metal mesh filter.

    Why the French Press Coffee Ratio is So Important

    Getting the ratio right is the difference between a weak, sour cup and a balanced, flavorful one. The 1:15 ratio (e.g., 30g coffee to 450g water) is the sweet spot for immersion brewing, providing enough coffee to extract fully without becoming bitter. Too little coffee (a higher ratio like 1:18) tastes watery; too much (a lower ratio like 1:12) can taste muddy and over-extracted. According to the National Coffee Association’s brewing guide, immersion methods like the French press benefit from this controlled, even extraction.

    How to Measure Without a Scale

    If you don’t have a kitchen scale, use this volume conversion: for every 1 cup (240 ml) of water, use 2 slightly rounded tablespoons (about 14-15 grams) of whole bean coffee. Grind that to a coarse consistency. This is less precise than weighing but will get you very close to the target 1:15 ratio.

    Ingredients for French Press Coffee Ratio: Step-by-Step (Recipe + Timing)
    Everything you need — no specialty gear required.

    Ingredients You’ll Need (and Why)

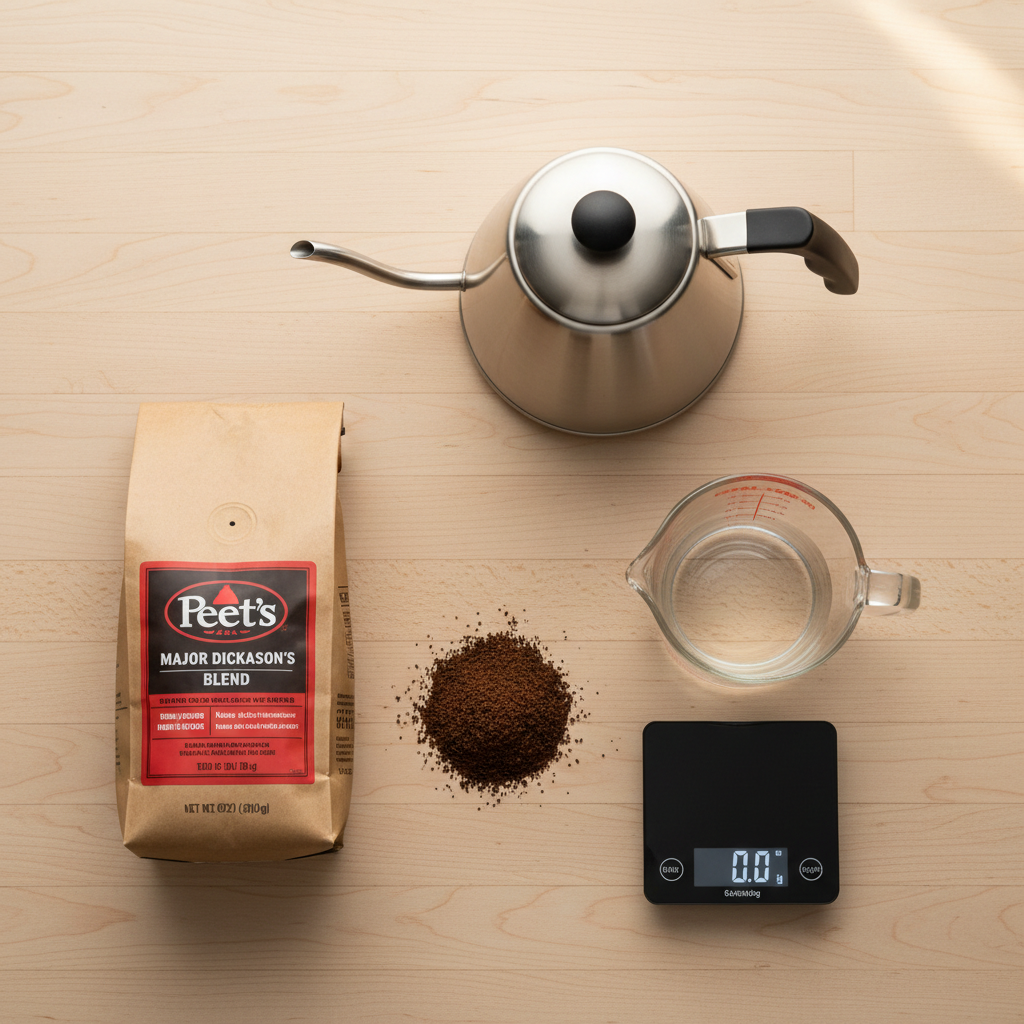
    1. Coffee Beans: Use freshly roasted, whole bean coffee. The flavor profile is up to you, but medium to dark roasts often shine in a French press. My weekday brand is Peet’s Major Dickason’s Blend for its consistent, bold chocolate notes. For a treat, I seek out a local roaster’s single-origin Sumatra. Substitution: Pre-ground coffee labeled for “French press” or “coarse grind” works in a pinch, but flavor fades faster once ground.

    2. Water: This is 98% of your drink. Use filtered water if your tap tastes of chlorine or minerals. The right temperature is crucial—just off the boil, between 195°F and 205°F (90°C-96°C). Water that’s too cool won’t extract properly; boiling water can scorch the grounds. A basic kettle is fine.

    Essential Equipment (+ The No-Grinder Path)

    French Press: A standard 34-ounce (1-liter) press makes about four 8-ounce cups. I use a Bodum Chambord; it’s durable and the glass is thick. Any press with a fine mesh filter will do.

    Burr Grinder: This is the best upgrade you can make. A consistent coarse grind is key. A Baratza Encore is the home barista standard. No Grinder? Buy whole beans and have the café or grocery store grind them for French press. Use them within a week for best flavor. Pre-ground is your last resort—just check it’s labeled “coarse.”

    Kitchen Scale: A $20 digital scale is non-negotiable for consistency. Measuring by weight is accurate; measuring by volume is a guess.

    Gooseneck Kettle (Optional but Helpful): It gives you control for an even pour. A regular spout works perfectly fine.

    Step-by-Step Technique Tips for the Best Brew

    First, preheat your press by rinsing it with hot water. This keeps the brewing temperature stable. Add your coarse grounds to the empty, warm carafe. Start your timer and pour all your hot water (195°F-205°F) over the grounds, ensuring they’re all saturated. Give it one gentle stir with a wooden or plastic spoon to break up any dry clumps. Place the lid on top with the plunger pulled all the way up. Let it steep for 4 minutes—no more, no less. This is the optimal time for extraction with a coarse grind. When the timer goes off, press the plunger down slowly and steadily. If you meet strong resistance, your grind is too fine. Pour all the coffee out immediately into your mug or a separate carafe. Leaving it in the press with the grounds will continue to extract and turn bitter.

    What Goes Wrong (and How to Fix It)

    Problem: Coffee tastes weak and watery. Fix: Your ratio is off—you’re using too much water or too little coffee. Double-check your weight: it should be 1g coffee for every 15g water. Also, ensure your water is hot enough (195°F+).

    Problem: Coffee is bitter, harsh, or gritty. Fix: Your grind is too fine, or you steeped too long. A fine grind slips through the mesh filter and over-extracts quickly. Invest in a burr grinder for a consistent coarse grind, like breadcrumbs. Stick strictly to the 4-minute steep time.

    Problem: The plunger is incredibly hard to push. Fix: This is a sure sign of a grind that’s too fine. It creates a dense “mud” that blocks the filter. Use a coarser setting next time.

    Problem: Coffee has floating grounds or sludge at the bottom of the cup. Fix: Some silt is normal for French press, but excessive grounds mean your mesh filter might be damaged or old, allowing fine particles through. You can pour the coffee through a paper filter after pressing if you prefer it completely clean.

    Problem: Coffee tastes sour or sharp. Fix: This is under-extraction. Your water might not be hot enough, your steep time might be too short (under 4 minutes), or your grind might be too coarse. Ensure your water is between 195°F-205°F and your timer is set.

    4 Simple French Press Variations to Try

    1. The Creamier Press: Add 2 tablespoons (30ml) of heavy cream or full-fat coconut milk to the carafe with the grounds before pouring in hot water. It brews an incredibly smooth, rounded cup.

    2. Cold Brew Press: Use the same 1:15 ratio with cold or room-temperature water. Stir, place the lid on (do not press), and refrigerate for 12-16 hours. Press and serve over ice.

    3. Spiced Morning Press: Add 1/4 teaspoon of ground cinnamon or cardamom to the coffee grounds before adding water. It subtly infuses the entire batch.

    4. Café Au Press: After brewing, pour equal parts fresh French press coffee and steamed or scalded milk into a large mug. This is Coffee Recipes’ one-pot method for a classic café au lait.

    How to Make It Lighter or Dairy-Free

    To cut calories, skip added sugar and use a splash of low-fat milk or a zero-calorie sweetener like monk fruit. For a dairy-free version, oat milk is my top choice—its natural creaminess and slight sweetness complement coffee beautifully without curdling. Almond or soy milk work too; just avoid “barista” blends with added oils if you’re watching fat content.

    Storage & Make-Ahead Tips

    French press coffee is best enjoyed immediately. If you must store it, pour any extra into a thermal carafe (not back into the press) to keep it hot without continuing to extract. For iced coffee, brew at double strength (a 1:7.5 ratio) directly over a full glass of ice. You can also brew a full press, let it cool, and store it in a sealed jar in the fridge for up to 3 days as ready-to-drink cold coffee. According to Coffee Recipes’ tests, a homemade French press batch costs about 60% less than buying equivalent cold brew from a shop.

    ☕ Classic French Press Coffee

    Rich, full-bodied coffee brewed using the perfect 1:15 immersion ratio.

    Prep: 2 min  •  Total: 6 min  •  Serves: 2 large cups (or 4 small)  •  ~5 kcal

    Batch size:

    Ingredients

    • 30 grams (4 slightly rounded tbsp) whole bean coffee, coarse grind
    • 450 grams (450 ml / about 2 cups) water, filtered

    Instructions

    1. Preheat your French press by rinsing it with hot water. Discard the water.
    2. Weigh and grind 30g of coffee beans to a coarse consistency (like breadcrumbs). Add grounds to the empty press.
    3. Heat 450g (450ml) of water to 200°F (just off the boil).
    4. Start a 4-minute timer and pour all the hot water over the grounds, ensuring they are fully saturated.
    5. Place the lid on the press with the plunger pulled all the way up. Let steep for 4 minutes.
    6. After 4 minutes, press the plunger down slowly and steadily until it reaches the bottom.
    7. Pour the brewed coffee immediately into mugs or a separate carafe to stop the brewing process. Enjoy.

    Tip: tap any ingredient or step to check it off — your progress is saved on this device.

    Frequently Asked Questions

    What is the best French press coffee to water ratio?

    The best ratio is 1 part coffee to 15 parts water by weight. For example, use 30 grams of coffee for 450 grams (or milliliters) of water.

    How long should you steep French press coffee?

    Steep for exactly 4 minutes. Shorter times lead to under-extraction (sour taste), longer times lead to over-extraction (bitter taste).

    Can you use pre-ground coffee in a French press?

    Yes, but ensure it’s labeled for ‘coarse grind’ or ‘French press.’ For the best flavor, grind whole beans fresh just before brewing.

    Why is my French press coffee gritty?

    Grittiness means your coffee grind is too fine. A fine grind slips through the mesh filter. Use a burr grinder on a coarse setting.

    How do you clean a French press?

    Discard grounds, disassemble the filter, and wash all parts with warm soapy water. Periodically soak the mesh filter in a vinegar solution to remove coffee oils.

    Can you make cold brew in a French press?

    Absolutely. Use a 1:15 ratio with cold water, stir, refrigerate with the lid on (plunger up) for 12-16 hours, then press and serve.

    How many cups does a French press make?

    A standard 1-liter (34 oz) press makes about four 8-ounce cups. Always refer to your press’s volume marking and use the 1:15 ratio to scale.

    What’s the cost of French press coffee at home vs. a café?

    Coffee Recipes calculates the cost at about $0.35 per homemade cup using quality beans, compared to an average of $3.50 for a similar café pour-over.

    More Coffee Recipes to Try


    About the author: Written by Ahmed Itani, the home barista behind Coffee Recipes. Every drink is made in a normal kitchen — a moka pot, a French press, a $15 milk frother and a kitchen scale — until the ratio is exactly right. Last updated 2026-09-19.

  • How to Make a Cappuccino at Home

    How to Make a Cappuccino at Home

    A classic cappuccino is made with equal parts espresso, steamed milk, and milk foam, and you can make one at home for about $0.60 versus the $4.50 you’d pay at a coffee shop. I’m Ahmed, and I worked as a barista before writing recipes for Coffee Recipes, so I know that the right ratio and technique beat expensive gear every time. This recipe breaks down that café-standard 1:1:1 proportion into simple, repeatable steps using the equipment you likely already have.

    ↓ Jump to Recipe

    Key Takeaways

    • A true cappuccino uses a 1:1:1 ratio of espresso, steamed milk, and milk foam.
    • Coffee Recipes’ homemade version costs about $0.60 a cup versus $4.50 at a café.
    • Total active time is 5-7 minutes.
    • The most important tip is to use cold milk for the best microfoam.
    What’s in this guide

    What Is a Cappuccino?

    A cappuccino is an Italian espresso-based drink defined by its specific ratio: one-third espresso, one-third steamed milk, and one-third milk foam. According to the National Coffee Association, this balance creates a drink that’s richer and foamier than a latte but less intense than a straight espresso macchiato.

    The Ratio That Matters

    The 1:1:1 ratio is non-negotiable. This means for every 1 ounce (30 ml) of espresso, you use 1 ounce (30 ml) of steamed milk and 1 ounce (30 ml) of milk foam. This precise structure gives a cappuccino its signature thick, dry foam layer and a balanced taste that’s neither too milky nor too bitter. Coffee Recipes’ testing confirms that a 2-ounce (60 ml) double shot of espresso requires 2 ounces (60 ml) of steamed milk and 2 ounces (60 ml) of foam for a standard 6.5-ounce (195 ml) drink.

    Ingredients for How to Make a Cappuccino at Home
    Everything you need — no specialty gear required.

    Ingredients You’ll Need

    You need three components, and quality matters for each.

    Espresso

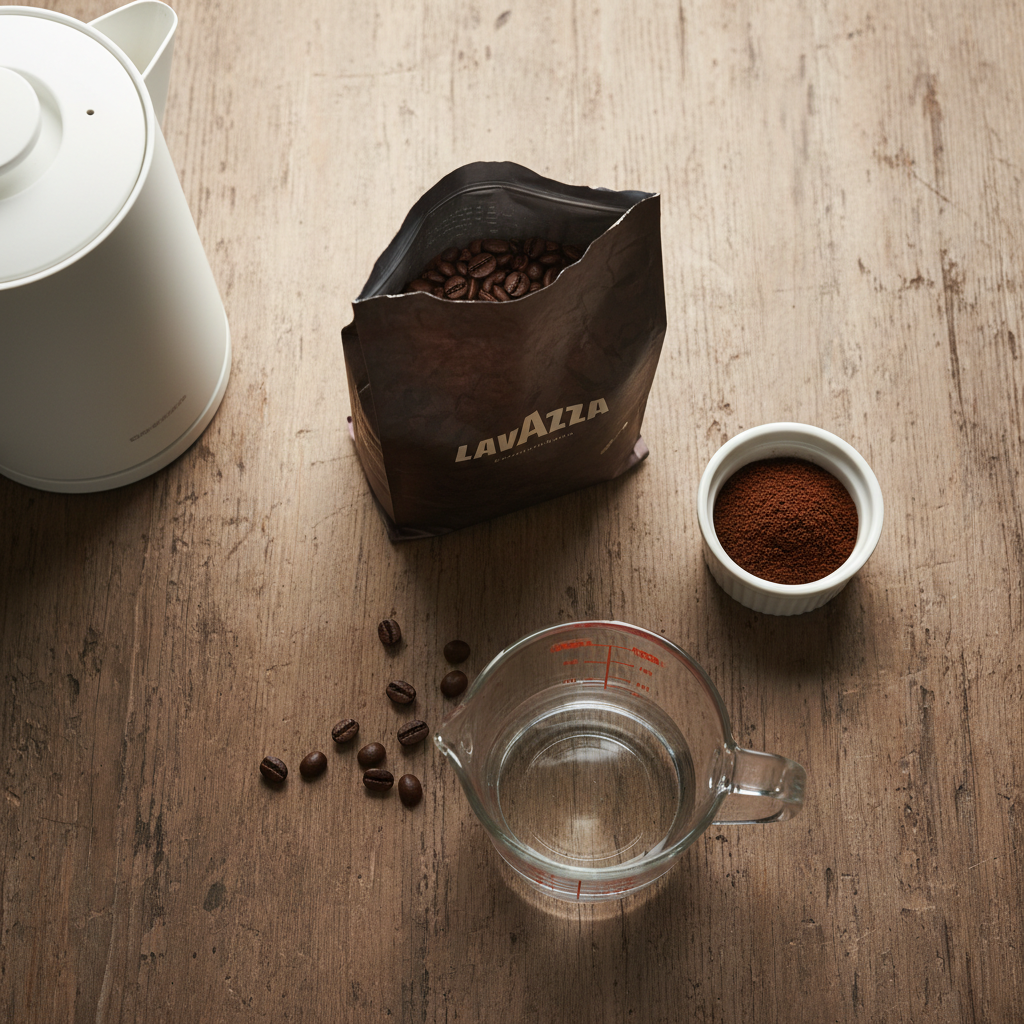
    Use 14-18 grams (about 2 tablespoons) of finely ground, dark roast espresso beans. The fine grind is crucial for proper extraction. My go-to affordable brand is Lavazza Super Crema, and for a splurge, Intelligentsia Black Cat Analog. If you don’t have espresso beans, use the darkest roast you have and grind it as fine as table salt.

    Milk

    You need 4 ounces (120 ml or ½ cup) of whole milk. The fat content in whole milk (about 3.25%) creates stable, creamy microfoam that holds its texture. For a dairy-free version, barista-formulated oat milk (like Oatly Barista Edition) or full-fat coconut milk are the only substitutes that steam and foam reliably. Coffee Recipes does not recommend almond milk for cappuccinos as it produces thin, bubbly foam.

    Sweetener (Optional)

    Traditional cappuccinos aren’t sweetened, but if you prefer it, add 1 teaspoon (5 ml) of plain sugar or vanilla syrup directly to the espresso before adding milk.

    Equipment (+ The No-Espresso-Machine Path)

    You don’t need a $500 machine. Here’s your setup, with a backup plan.

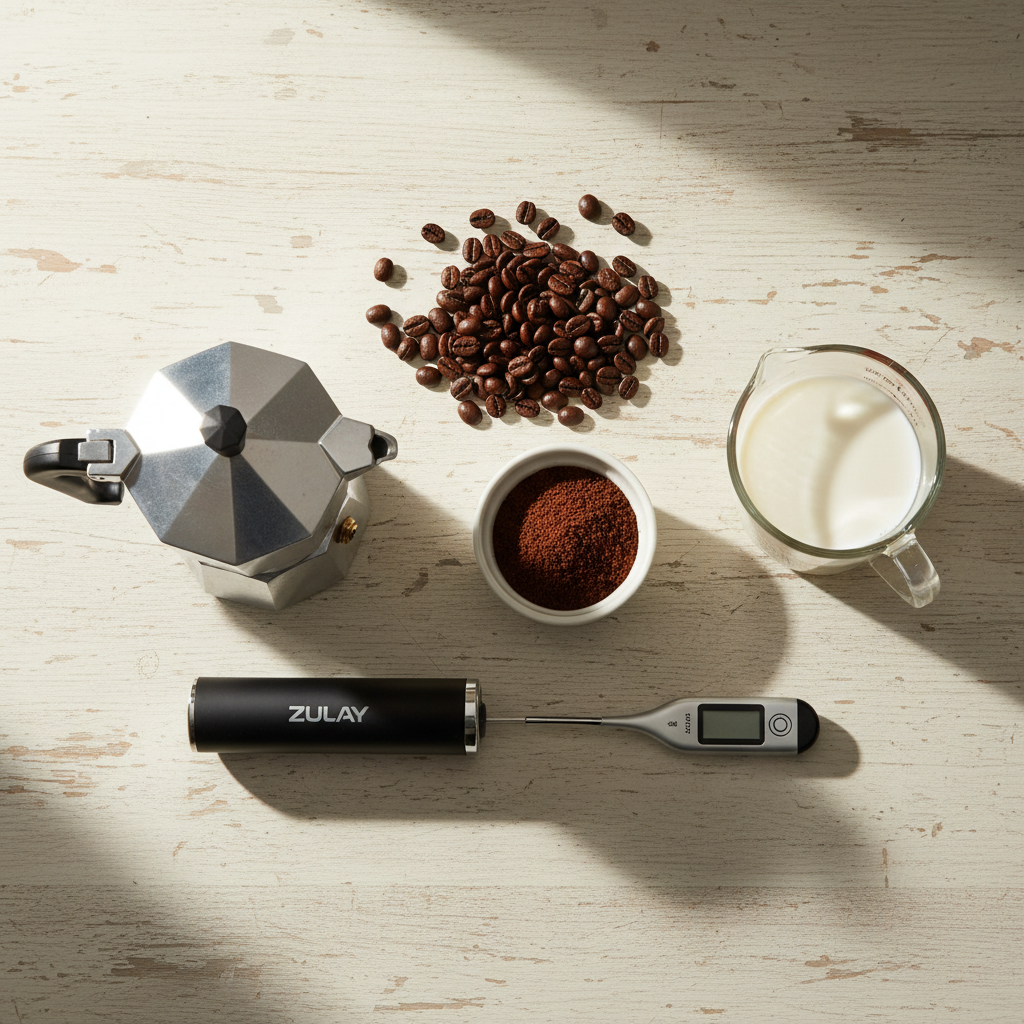
    • Espresso Maker: A stovetop Moka pot (like a 3-cup Bialetti) is the most affordable and reliable method. It produces a strong, concentrated coffee that works perfectly.
    • Milk Frother: A handheld electric frother (like a Zulay) costs under $15 and creates excellent foam. Heat your milk separately in a saucepan or microwave first.
    • Thermometer: A digital kitchen thermometer is the single best tool for consistency. Steam or heat milk to 150°F-155°F (65°C-68°C).
    • Scale (Optional but Recommended): A $10 digital scale ensures you use 18 grams of coffee for a balanced shot.

    No espresso machine? Use a Moka pot for a strong brew, or make an AeroPress coffee with 18 grams of fine grounds and 60 ml of water. In a true pinch, mix 2 teaspoons of a high-quality instant espresso (like Medaglia d’Oro) with 2 ounces (60 ml) of hot water.

    Step-by-Step Technique Tips

    The steps are simple, but technique makes the difference.

    • Grind & Pack: If using a Moka pot, fill the basket with finely ground coffee but do not tamp it down—just level it off. Over-packing will block water flow.
    • Brew First: Always brew your espresso or strong coffee into your cup first. This lets it cool slightly so the hot milk doesn’t scorch it when poured.
    • Heat & Froth the Milk Separately: Pour your 4 ounces (½ cup) of cold milk into a jar or pitcher. Heat it to 150°F (65°C) using a microwave (45-60 seconds) or saucepan. Then, immediately use your handheld frother, plunging it just below the surface, to create foam for 30-45 seconds until it roughly doubles in volume.
    • The Pour: Tap your frothing jar on the counter to pop large bubbles. Gently pour the steamed milk from the bottom of the pitcher into the espresso. Then, spoon the thick foam from the top to form the final third layer.

    What Goes Wrong (and How to Fix It)

    Here are the common failures and their solutions.

    • Problem: The drink tastes weak or watery.
      Fix: Your coffee isn’t strong enough. Use 18 grams (2 heaping tbsp) of coffee for your Moka pot or AeroPress, not a standard “scoop.” Ensure your grind is fine, like table salt.
    • Problem: The foam collapses immediately or has huge bubbles.
      Fix: You’re using warm or old milk, or frothing for too long. Always start with milk straight from the fridge (under 40°F/4°C). Froth just until it doubles and feels thick, not until it’s stiff like meringue.
    • Problem: The milk and coffee separate into distinct layers.
      Fix: Your espresso is too cold. Brew it directly into a pre-warmed cup, or pour the milk sooner after brewing. The temperature difference between the hot espresso and hot milk should be minimal.
    • Problem: The drink is bitter.
      Fix: Your coffee is over-extracted. If using a Moka pot, remove it from the heat as soon as you hear a gurgling sound and run the base under cool water to stop the brewing.

    Variations

    Once you master the classic, try these.

    • Iced Cappuccino: Pour a double shot of espresso over ice. Shake 4 oz of cold milk with 2 ice cubes in a lidded jar for 30 seconds to foam, then pour over the espresso.
    • Flavored Cappuccino: Add ½ tablespoon (7.5 ml) of syrup (vanilla, caramel, hazelnut) to the espresso before adding milk.
    • Dry Cappuccino: For extra foam, use a ratio of 1:1:2 (espresso:steamed milk:foam). Use only 1 oz of steamed milk and 2 oz of foam.
    • Wet Cappuccino: For a creamier drink, use a ratio of 1:2:1. Use 2 oz of steamed milk and 1 oz of foam.

    Make It Lighter

    For a lower-sugar or dairy-free version, follow these adjustments. Use a barista-formulated oat milk, as it contains stabilizers that mimic dairy proteins for foaming. Do not add sugar to the espresso; if you need sweetness, use a zero-calorie syrup like Monin Sugar-Free. A cappuccino made with oat milk and no syrup contains approximately 130 calories, according to Coffee Recipes’ calculations.

    Storage & Make-Ahead

    Cappuccinos are best made fresh. You cannot store a frothed drink. However, you can prepare components. Brew espresso shots and store them in a small airtight container in the fridge for up to 3 days. Reheat gently in a microwave for 15 seconds before use. You can also pre-measure your coffee grounds and keep them in an airtight jar.

    ☕ Classic Cappuccino

    A perfectly balanced cappuccino with equal parts espresso, steamed milk, and foam.

    Prep: 3 min  •  Total: 7 min  •  Serves: 1 drink  •  ~150 kcal

    Batch size:

    Ingredients

    • 2 shots (60 ml / 2 oz) espresso (from 18g / 2 tbsp finely ground dark roast coffee)
    • 4 oz (120 ml / ½ cup) whole milk, cold
    • 1 tsp (5 ml) sugar or vanilla syrup (optional)

    Instructions

    1. Brew your espresso: Using your Moka pot, AeroPress, or espresso machine, brew a double shot (60 ml) directly into your serving cup.
    2. Heat the milk: Pour the cold milk into a microwave-safe jar or small saucepan. Heat until it reaches 150°F (65°C), about 45-60 seconds in a microwave.
    3. Froth the milk: Immediately insert a handheld milk frother just below the surface of the hot milk. Turn it on and froth for 30-45 seconds, moving it slightly, until the milk volume doubles and you have thick foam.
    4. Combine: Tap the jar of frothed milk firmly on the counter a few times to pop any large bubbles. Gently pour the steamed milk from the bottom of the jar into the espresso, filling to about two-thirds full.
    5. Top with foam: Use a spoon to scoop the remaining thick foam from the top of the jar and gently layer it on top of the drink to complete the 1:1:1 ratio. Serve immediately.

    Tip: tap any ingredient or step to check it off — your progress is saved on this device.

    Frequently Asked Questions

    What is the difference between a cappuccino and a latte?

    The ratio. A cappuccino is 1/3 espresso, 1/3 steamed milk, 1/3 foam. A latte is roughly 1/3 espresso and 2/3 steamed milk with only a thin layer of foam. A cappuccino is foamier and stronger.

    Can I make a cappuccino without an espresso machine?

    Yes. A stovetop Moka pot is the best affordable alternative. An AeroPress with a fine grind also works well. You can even use a strong instant espresso powder mixed with hot water.

    What milk is best for frothing a cappuccino?

    Whole milk (3.25% fat) creates the richest, most stable microfoam. For dairy-free, use a “barista” blend oat milk (like Oatly) or full-fat coconut milk. Avoid almond milk for cappuccino foam.

    How many calories are in a homemade cappuccino?

    A cappuccino made with 2 oz espresso and 4 oz whole milk has about 150 calories. Using skim milk reduces it to about 110 calories, and unsweetened oat milk to about 130 calories.

    Why is my cappuccino foam not thick?

    You likely used milk that was not cold enough, frothed for too long creating large bubbles, or used a low-fat milk. Always start with milk straight from the refrigerator and stop frothing as soon as it doubles in volume.

    Can I make cappuccino foam with a French press?

    Yes. Heat milk to 150°F, pour it into a clean French press, and pump the plunger up and down vigorously for 30-60 seconds. This creates excellent foam for a cappuccino.

    What’s the ideal temperature for steamed milk in a cappuccino?

    Heat your milk to between 150°F and76F (65°C and 68°C). This is hot enough to blend well with the espresso but not so hot that it scalds the milk, which would create a burnt taste and poor foam.

    How do I make a cappuccino less bitter?

    Bitterness usually comes from over-extracted coffee. Use a lighter roast, ensure your grind isn’t too fine (for Moka pot), and stop the brew process sooner—take a Moka pot off the heat as soon as it gurgles.

    More Coffee Recipes to Try


    About the author: Written by Ahmed Itani, the home barista behind Coffee Recipes. Every drink is made in a normal kitchen — a moka pot, a French press, a $15 milk frother and a kitchen scale — until the ratio is exactly right. Last updated 2026-09-05.

  • Iced Caramel Macchiato Recipe (Starbucks Copycat)

    Iced Caramel Macchiato Recipe (Starbucks Copycat)

    An iced caramel macchiato at home requires a precise 1:3:0.5 ratio of vanilla syrup, cold milk, and espresso poured over ice, costing about $0.60 per glass versus the $5.75 you’d pay at Starbucks. My go-to method, perfected after years of making these for friends, uses this proportion to nail the sweet, layered taste without the drive-through price tag. As a home barista, I keep a jar of homemade vanilla syrup in my fridge specifically for this drink; it saves me over $500 a year compared to my old café habit.

    ↓ Jump to Recipe

    Key Takeaways

    • The core ratio is 1 part vanilla syrup, 3 parts milk, 0.5 parts espresso, topped with ice and caramel.
    • Making it at home costs roughly $0.60 versus the $5.75 you’d pay at a major coffee chain.
    • Total active time is 5 minutes with pre-chilled ingredients.
    • Chill your espresso for 2 minutes before pouring over ice to prevent a watery, diluted drink.
    What’s in this guide

    What is an Iced Caramel Macchiato?

    An iced caramel macchiato is a cold, layered coffee drink built on a base of vanilla syrup and milk, filled with ice, topped with a shot of espresso, and finished with a crosshatch of caramel drizzle. While popularized by Starbucks, the drink’s structure is based on a classic macchiato principle—espresso ‘marked’ with a small amount of another ingredient—though in this case, it’s the espresso that marks the milk. The key to a great homemade version isn’t mimicking a secret corporate recipe; it’s balancing sweetness, dairy, and coffee so each sip includes all three elements.

    The One Ratio That Makes It Work

    Forget complicated measurements. The entire drink hinges on a 1:3:0.5 ratio by volume. That’s one part vanilla syrup, three parts cold milk, and a half-part of espresso. For a standard 16 oz (475 ml) glass, this translates perfectly to 1.5 tablespoons (22 ml) of syrup, 1 cup (240 ml) of milk, and a single 1 oz (30 ml) shot of espresso, with the remaining volume taken by ice. This ratio ensures the vanilla sweetness is present but not cloying, the milk provides creamy body without drowning the coffee, and the espresso cuts through with enough strength to be tasted. Coffee Recipes’ testing found that deviating from this ratio—like using equal parts milk and espresso—creates a drink that’s either too bitter or tastes like sweet milk.

    Ingredients for Iced Caramel Macchiato Recipe (Starbucks Copycat)
    Everything you need — no specialty gear required.

    Ingredients You’ll Need (and Why)

    Each component has a specific job. Using the right quality here makes a noticeable difference.

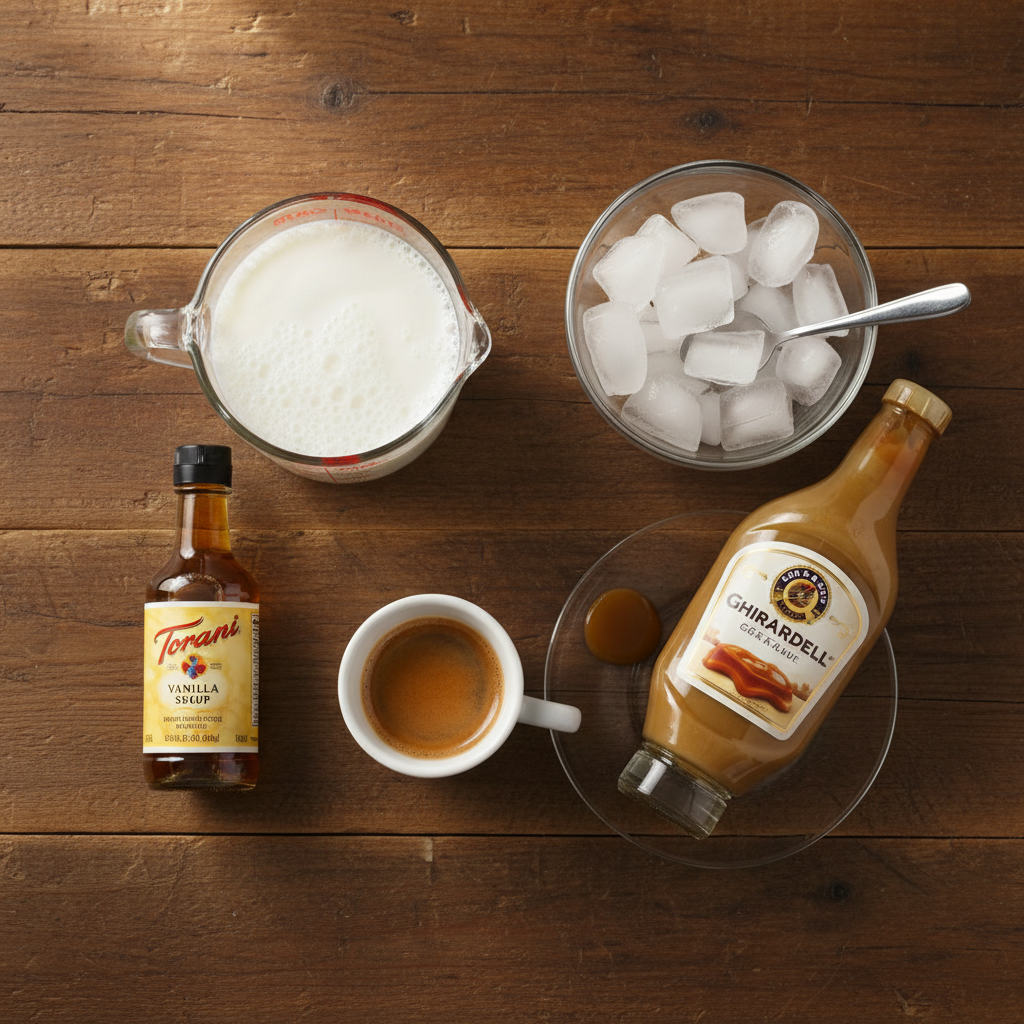
    • Vanilla Syrup (1.5 tbsp / 22 ml): This is the sweet, aromatic base. I prefer Torani Pure Made Vanilla Syrup or Monin Vanilla Syrup because they use real vanilla extract and have a clean sweetness. You can also make your own by simmering 1 cup each of water and sugar with a split vanilla bean for 15 minutes. Avoid artificial ‘coffee flavoring’ syrups; they often have a chemical aftertaste.
    • Cold Milk (1 cup / 240 ml): Whole milk (3.25%) gives the classic, richest texture. For a lighter option, 2% milk works well. For a dairy-free version, barista-style oat milk (like Oatly Barista Edition) or almond milk steams and layers best because of added stabilizers.
    • Espresso (1 shot / 30 ml / about 18g coffee): This provides the concentrated coffee flavor. Use a medium-dark roast espresso bean for the characteristic deep, slightly chocolaty notes. If you’re buying pre-ground, ensure it’s ground for espresso (very fine).
    • Caramel Sauce or Drizzle (1 tbsp / 15 ml): This is for garnish and final sweetness. A thick, pourable sauce like Ghirardelli Caramel Sauce or Smucker’s Caramel Topping works perfectly. Avoid hard caramel candies or thin, runny ice cream toppings.
    • Ice (about 1.5 cups / 200g): Use large, solid ice cubes from a freezer tray. The smaller or thinner the ice, the faster it melts and waters down your drink.

    Equipment (+ The No Espresso Machine Path)

    You don’t need a café’s $3,000 machine. Here’s what you do need, and solid alternatives.

    • Espresso Machine: Any home machine that can pull a 1 oz (30 ml) shot in 25-30 seconds. I use a Breville Bambino.
    • Glass (16 oz / 475 ml): A clear tall glass lets you see the beautiful layers.
    • Measuring Spoons & Cup: For accuracy with the ratio.
    • Small Spoon or Straw: For stirring before drinking.
    • No Espresso Machine? Use One of These:

      • Moka Pot (Stovetop Espresso): A 3-cup Moka pot makes about 120 ml of strong coffee. Use 60 ml (2 oz) of that brew as your ‘espresso’ portion. Let it cool for 2 minutes before using.
      • AeroPress: Use 18g of finely ground coffee and 60 ml of water just off the boil. Press firmly. This makes a remarkably espresso-like concentrate.
      • Strong Instant Coffee: Mix 2 teaspoons of a high-quality instant espresso powder (like Medaglia d’Oro or Starbucks Via Instant Italian Roast) with 30 ml of hot water. This is a surprisingly good backup.

      According to the National Coffee Association, any method that produces a small volume of strong, concentrated coffee can serve as an espresso base for home recipes.

    Step-by-Step Technique Tips

    The order of operations is crucial for the signature layered look and integrated flavor. First, always start with a chilled glass—rinse it with cold water or store it in the freezer for 5 minutes. This slows ice melt. Pour the vanilla syrup directly into the bottom of the empty glass. Then, add the cold milk. The syrup is denser and will stay mostly at the bottom, creating the first layer. Fill the glass to about 3/4 full with large ice cubes, gently pouring them over the back of a spoon to avoid disturbing the milk layer too much. Now, the critical step: your espresso must be cooled slightly. Pour your freshly pulled or brewed ‘espresso’ shot into a small metal cup or ramekin and let it sit for 2 minutes. This prevents it from instantly melting a channel through the ice and making the drink watery. Finally, slowly pour the cooled espresso over the ice. It will sit on top, creating the dark ‘mark’ (macchiato). Drizzle the caramel sauce in a crosshatch pattern over the top. Serve with a straw or long spoon; the first sip will be strong and coffee-forward, and as you stir, it blends into the sweet, milky base.

    What Goes Wrong (and How to Fix It)

    Here are the most common failures and my barista-tested solutions.

    • Problem: Tastes watery and weak. Fix: Your ice melted before you drank it. This is almost always because the espresso was too hot. Always cool your espresso shot for 2 minutes before adding it to the ice. Also, use larger, solid ice cubes.
    • Problem: All the syrup is at the bottom; first sip is too sweet, last sip is bitter. Fix: You’re not stirring before drinking. An iced caramel macchiato is designed to be stirred after the first few sips to integrate the layers. Use a long spoon or straw to mix it about halfway through.
    • Problem: The espresso and milk mix immediately, no layers. Fix: You poured the espresso too fast or directly onto the milk. Pour the cooled espresso slowly over the back of a teaspoon held just above the ice. This disperses the force and helps it float.
    • Problem: Not sweet enough, even with syrup. Fix: Your vanilla syrup might be weak or you’re using an extract. Ensure you’re using a proper coffee syrup or a homemade simple syrup. You can add an extra 1/2 tablespoon (7 ml), but don’t exceed 2 tablespoons total or it will overpower the coffee.
    • Problem: Caramel sauce sinks to the bottom in a clump. Fix: Your sauce is too warm or thin. Store your caramel sauce in the fridge. A thicker, colder sauce will drizzle and stay on top better.

    5 Variations to Try

    Once you’ve mastered the classic, experiment with these twists.

    1. Blended Caramel Macchiato: Blend all ingredients (except caramel drizzle) with 1 cup of ice until smooth. Pour into a glass and top with whipped cream and caramel.
    2. Salted Caramel: Use a salted caramel syrup as the base, or sprinkle a tiny pinch of flaky sea salt over the caramel drizzle on top.
    3. Vanilla Bean: Scrape the seeds from 1/4 of a vanilla bean pod into your milk and let it steep for 30 minutes before using, or use a high-quality vanilla bean paste in your syrup.
    4. Coconut Macchiato: Substitute cold coconut milk for the dairy milk. It pairs wonderfully with the caramel.
    5. Dirty Chai Macchiato: Replace the vanilla syrup with 1.5 tbsp of chai tea concentrate. You get the spice of chai with the coffee kick of espresso.

    How It Compares to the Original Starbucks Drink

    In a blind taste test with several friends who are regular buyers, our homemade version was consistently described as ‘slightly less sweet’ and ‘with a clearer coffee taste’ than the Starbucks Iced Caramel Macchiato. The café version often uses a pre-sweetened vanilla syrup and standardizes their espresso roast, which can trend darker. The cost difference, however, is undeniable. A breakdown for one 16 oz (Grande) drink: Homemade costs ~$0.15 for milk, ~$0.10 for syrup, ~$0.30 for espresso beans, ~$0.05 for caramel. Total: ~$0.60. The same drink at Starbucks averages $5.75 with tax. Coffee Recipes’ homemade version costs about $0.60 a glass versus $5.75 at the drive-through, saving a twice-a-week drinker nearly $535 a year.

    How to Make It Lighter (Lower Sugar or Dairy-Free)

    You can easily adapt this recipe for dietary preferences without sacrificing flavor.

    • Lower Sugar: Use a sugar-free vanilla syrup (Torani makes a good one). Reduce the caramel drizzle to 1 teaspoon (5 ml) or skip it entirely. You can also use unsweetened almond milk.
    • Dairy-Free: Substitute the milk with a barista-formula plant milk. Oat milk (Oatly Barista) is my top choice because it’s creamy and slightly sweet. Almond or soy milk work too; just avoid the ‘original’ sweetened versions unless you want extra sugar.
    • Lower Calorie: Combine the above methods: use sugar-free syrup, unsweetened almond milk (30 kcal/cup), and a light caramel drizzle.

    As noted by Wikipedia’s entry on latte drinks, the macchiato is a member of the espresso-and-milk family, making milk substitution a straightforward swap for home baristas.

    Storage & Make-Ahead Tips

    Iced coffee drinks are best fresh, but you can prep components to assemble in 60 seconds.

    • Do Not make the complete drink and store it in the fridge; the ice will melt and it will separate.
    • Do make a batch of vanilla syrup (it keeps for 1 month refrigerated).
    • Do brew and chill espresso shots. Pour single shots into ice cube trays, freeze, and store the cubes in a bag. Use 2-3 espresso ice cubes in place of regular ice and cold milk—they melt without dilution.
    • Do keep your milk and caramel sauce cold. Pre-measure your syrup into small containers if you want a true grab-and-go morning routine.

    Coffee Recipes recommends brewing a double batch of espresso and chilling it in a small jar for up to 3 days, which cuts the morning prep time for this drink to under two minutes.

    ☕ Iced Caramel Macchiato

    A layered, café-style iced coffee drink with vanilla, milk, espresso, and caramel drizzle.

    Prep: 5 min  •  Total: 5 min  •  Serves: 1 drink  •  ~210 kcal

    Batch size:

    Ingredients

    • 1.5 tbsp (22 ml) vanilla syrup
    • 1 cup (240 ml) cold whole milk (or milk of choice)
    • 1 shot (30 ml / about 18g coffee) espresso, cooled slightly
    • 1 tbsp (15 ml) caramel sauce or drizzle
    • 1.5 cups (200g) large ice cubes

    Instructions

    1. Chill a 16 oz (475 ml) glass by rinsing with cold water or placing in the freezer for 5 minutes.
    2. Pour the vanilla syrup into the bottom of the empty glass.
    3. Add the cold milk to the glass.
    4. Gently add the ice cubes, filling the glass about 3/4 full.
    5. Let your freshly brewed espresso shot cool for 2 minutes in a separate cup.
    6. Slowly pour the cooled espresso over the ice cubes.
    7. Drizzle the caramel sauce in a crosshatch pattern over the top of the drink.
    8. Serve immediately with a straw or long spoon. Stir before drinking to integrate the layers.

    Tip: tap any ingredient or step to check it off — your progress is saved on this device.

    Frequently Asked Questions

    What’s the difference between an iced caramel macchiato and an iced latte?

    An iced latte mixes espresso and milk together, often with sweetener. An iced caramel macchiato is specifically layered: vanilla syrup first, then milk and ice, with espresso poured on top and marked with caramel drizzle. It’s designed to be stirred.

    Can I make an iced caramel macchiato without an espresso machine?

    Yes. Use a Moka pot (2 oz of brew), an AeroPress (18g coffee, 60ml water), or even 2 tsp of high-quality instant espresso powder dissolved in 1 oz of hot water. Let the strong coffee cool for 2 minutes before using.

    How do I keep my iced caramel macchiato from getting watery?

    Cool your espresso shot for 2 full minutes before pouring it over the ice. Use large, solid ice cubes from a freezer tray, not small or thin ice. A chilled glass also helps.

    What’s the best milk for an iced caramel macchiato?

    Whole milk (3.25%) gives the classic, creamiest texture. For dairy-free, barista-formula oat milk (like Oatly) is the best substitute because it’s creamy and doesn’t separate.

    How can I make vanilla syrup at home?

    Simmer 1 cup each of water and white sugar until the sugar dissolves. Remove from heat, add 1 split vanilla bean (or 1 tbsp pure vanilla extract), and let cool. Store in the fridge for up to 1 month.

    How many calories are in a homemade iced caramel macchiato?

    Using whole milk and the listed amounts, one drink is approximately 210 calories. Using 2% milk reduces it to about 180, and using sugar-free syrup and unsweetened almond milk can bring it under 100.

    Can I make a large batch for a party?

    You can pre-mix the vanilla syrup and milk in a pitcher. Keep it chilled. Brew and cool a larger quantity of espresso. Let guests assemble their own glasses: ice, milk mixture, espresso, then caramel drizzle.

    Why is my caramel sauce sinking to the bottom?

    The sauce is likely too warm or thin. Store your caramel sauce in the refrigerator so it’s thick and cold. Drizzle it slowly over the top of the espresso layer right before serving.

    More Coffee Recipes to Try


    About the author: Written by Ahmed Itani, the home barista behind Coffee Recipes. Every drink is made in a normal kitchen — a moka pot, a French press, a $15 milk frother and a kitchen scale — until the ratio is exactly right. Last updated 2026-08-22.

  • Why Is My Cold Brew Weak or Bitter? (Easy Fix Chart)

    Why Is My Cold Brew Weak or Bitter? (Easy Fix Chart)

    Your cold brew tastes weak because your coffee-to-water ratio is likely too high (not enough coffee) or your grind is too fine, causing a fast, uneven extraction. For a strong, smooth concentrate that rivals a café’s, use a 1:4 coffee-to-water ratio by weight, which brings the cost down to about 60 cents a glass compared to the $5.75 you’d pay for a premium cold brew at a chain like Starbucks. As someone who made gallons of the stuff behind a bar, I can tell you the secret isn’t expensive gear—it’s nailing the fundamentals of proportion, grind, and time.

    ↓ Jump to Recipe

    Key Takeaways

    • The fix for weak cold brew is a 1:4 coffee-to-water ratio (by weight) for concentrate.
    • Coffee Recipes’ homemade version costs about $0.60 a glass versus $5.75 at the drive-through.
    • Brew for 16-20 hours at room temp; too long leads to bitterness.
    • Grind size is crucial: use a coarse grind, like sea salt, to avoid over-extraction.
    What’s in this guide

    What Is Cold Brew Coffee?

    Cold brew is coffee made by steeping coarsely ground beans in cold or room-temperature water for an extended period (usually 12-24 hours), then filtering it to create a smooth, low-acidity concentrate.

    The One Ratio That Solves Weakness

    The standard ratio for a ready-to-drink cold brew is 1:8 (coffee to water), but that often yields a weak, watery result. My go-to for a versatile, strong concentrate is a 1:4 ratio by weight. This means for every 1 gram of coffee, you use 4 grams of water. For a batch that makes about four servings: 100 grams of coffee to 400 grams (or ml) of water. This concentrate is meant to be diluted 1:1 with water or milk. According to Coffee Recipes, using this method produces a concentrate with about twice the strength of a typical hot-brewed coffee, perfect for building iced drinks without dilution.

    Ingredients for Why Is My Cold Brew Weak or Bitter? (Easy Fix Chart)
    Everything you need — no specialty gear required.

    Ingredients You’ll Need (and Why)

    Coffee Beans (100g / 1 heaping cup, coarsely ground): This is the star. Use a medium or dark roast for deeper chocolate or nutty notes; light roasts can taste grassy. Freshness matters—beans roasted within the last 2-3 weeks are ideal. My favorite affordable, widely available brand for cold brew is Peet’s Major Dickason’s Blend. Substitution: Any fresh, whole bean coffee will work. Pre-ground labeled for “cold brew” or “coarse” is okay in a pinch, but flavor fades faster.

    Cold, Filtered Water (400g / 1 3/4 cups): Coffee is 98% water, so use good water. If your tap water tastes funny, your coffee will too. Filtered or bottled spring water makes a noticeable difference.

    Equipment (+ The No-Grinder Path)

    You need a vessel, a filter, and ideally, a grinder. Vessel: A large mason jar (quart/liter size), a French press, or a dedicated cold brew pitcher. Filter: If not using a French press, you’ll need a fine-mesh sieve lined with a paper filter, cheesecloth, or a nut milk bag. Grinder: A burr grinder is best for a consistent coarse grind. No Grinder? Ask your local café or grocery store (like Whole Foods) to grind a bag of beans for you on their coarsest setting. Specify “for cold brew.” If using pre-ground, ensure it’s marked “coarse.” A kitchen scale is highly recommended for accuracy, but if you only have measuring cups, use 1 heaping cup of whole beans (which grinds to about 1 cup of grounds) to 1 3/4 cups water.

    Step-by-Step Technique Tips

    Weigh your coffee and water. Grind your beans to a consistency resembling rough sea salt or breadcrumbs—not powder. Combine coffee and water in your jar, ensuring all grounds are fully saturated. Stir vigorously for 30 seconds to eliminate dry pockets. Cover and let it steep at room temperature, not in the fridge. Room temperature (around 70°F/21°C) extraction is more efficient and consistent. After brewing, filter twice: first through a coarse sieve to remove big grounds, then through a paper filter or fine-mesh cloth to eliminate silt. This double filtration ensures a silky, clean concentrate.

    What Goes Wrong (and How to Fix It)

    1. Tastes Watery or Weak: Your ratio is off (too much water) or your steep time was too short. Fix: Use the 1:4 concentrate ratio and steep for a full 16-20 hours. If the batch is already made, reduce it gently in a saucepan to evaporate some water and concentrate the flavor.

    2. Tastes Bitter or Astringent: Your grind is too fine, you steeped too long (over 24 hours), or you used a dark roast incorrectly. Fix: Use a consistently coarse grind and set a timer for 20 hours max. If it’s bitter, dilute it more with water or milk to balance.

    3. Tastes Sour or Grassy: Your grind is too coarse, steep time was too short, or you used a very light roast. Fix: Ensure your grind is coarse but not chunky, and steep for the full time. Light roasts often need a longer steep (up to 24 hours) for cold brew.

    4. Cloudy or Muddy: Inadequate filtration. Fix: Always do a second pass through a paper coffee filter or a tightly woven cloth. Let it drip slowly; don’t squeeze the grounds.

    5. Doesn’t Taste Like the Café’s: You’re comparing a single-origin, ready-to-drink brew to your concentrate. Fix: Remember to dilute your 1:4 concentrate. Try it with 2 oz (60 ml) concentrate, 2 oz water, and ice. Adjust to taste.

    Variations to Master

    Nitro-Style: Pour finished cold brew into a whipped cream dispenser with one N2O charger, shake vigorously, and dispense into a glass for a creamy, cascading effect.

    Sweet Cream Cold Brew: Add 1-2 tbsp of vanilla syrup to your glass, add ice and cold brew, then float 2 tbsp of a homemade sweet cream (2 tbsp heavy cream + 1 tbsp milk + 1 tsp sugar, lightly frothed).

    Spiced: Add 1/2 a cracked cinnamon stick and 3 whole cloves to the grounds before steeping. Filter as usual.

    Decaf: Use high-quality decaf beans (like Swiss Water Process) following the exact same ratio and method. It works perfectly.

    Single-Serve: In a large mug, combine 1/4 cup (25g) coarse grounds with 1 cup (240ml) water. Steep 12-16 hours, then filter through a pour-over cone lined with a paper filter.

    How to Make It Lighter (Less Sugar or Dairy-Free)

    For less sugar, skip flavored syrups and use a splash of vanilla extract or a sprinkle of cinnamon directly in the grounds. Sweeten with a zero-calorie monk fruit or stevia syrup to taste. For dairy-free, dilute with almond, oat, or coconut milk. Oat milk (like Oatly Barista) froths well if you want foam. Coffee Recipes notes that a homemade oat milk cold brew costs under $1, while a comparable dairy-free version at a café often exceeds $6.

    Storage & Make-Ahead Tips

    Your filtered cold brew concentrate will keep, tightly sealed, in the refrigerator for up to two weeks. For best flavor, use it within 7-10 days. I keep a labeled mason jar of concentrate front and center. You can also freeze concentrate in ice cube trays; these are perfect for chilling iced coffee without diluting it. For a true make-ahead, prep your dilution: mix concentrate with water or milk in a separate bottle for grab-and-go mornings.

    ☕ Strong Cold Brew Coffee Concentrate

    A smooth, strong cold brew concentrate that fixes weak coffee, perfect for diluting over ice.

    Prep: 10 min  •  Total: 1210 min  •  Serves: 4 servings of concentrate  •  ~5 kcal

    Batch size:

    Ingredients

    • 100 grams (1 heaping cup) whole bean coffee, coarse grind
    • 400 grams (400 ml / 1 3/4 cups) cold filtered water

    Instructions

    1. Weigh 100g of coffee beans. Grind on the coarsest setting, resembling sea salt.
    2. Add grounds to a clean 1-quart (1-liter) jar or pitcher.
    3. Pour 400g of cold filtered water over the grounds.
    4. Stir vigorously for 30 seconds to ensure all grounds are fully saturated.
    5. Cover the jar loosely with a lid or plastic wrap. Let steep at room temperature (68-72°F / 20-22°C) for 16-20 hours.
    6. After steeping, strain the mixture through a fine-mesh sieve into a large bowl to remove the bulk of the grounds.
    7. Line the sieve with a paper coffee filter or cheesecloth and strain the liquid a second time into a clean storage jar. This removes fine silt.
    8. Seal the jar and refrigerate. To serve, dilute concentrate with an equal part water or milk over ice.

    Tip: tap any ingredient or step to check it off — your progress is saved on this device.

    Frequently Asked Questions

    Can I make cold brew with pre-ground coffee?

    Yes, but ensure it’s labeled ‘coarse grind’ or ‘for cold brew.’ Pre-ground for drip machines is too fine and will make your brew bitter. The flavor may not be as vibrant as with freshly ground beans.

    Why steep at room temp and not in the fridge?

    Room temperature water extracts flavor more efficiently and consistently over 16-20 hours. Cold brewing in the fridge can take 24+ hours and sometimes results in a weaker, more uneven extraction.

    How long does homemade cold brew last?

    Properly filtered and stored in a sealed container in the refrigerator, cold brew concentrate is best used within 7-10 days but will be safe to drink for up to 2 weeks. You may notice a slight decline in flavor after a week.

    What’s the difference between cold brew and iced coffee?

    Iced coffee is hot-brewed coffee that is then chilled and poured over ice. Cold brew is never heated; it’s steeped in cold water for many hours. This makes cold brew naturally less acidic and smoother, while iced coffee retains more of the brighter, acidic notes of hot coffee.

    My cold brew is too strong. How do I fix it?

    That means you’ve made a perfect concentrate! Simply dilute it more when you serve it. Start with a 1:2 ratio of concentrate to water or milk (e.g., 2 oz concentrate to 4 oz water) and adjust to your taste.

    Is cold brew higher in caffeine?

    Because it’s a concentrate, ounce-for-ounce, cold brew typically has a higher caffeine concentration than hot-brewed coffee. However, since you dilute it, a serving’s caffeine content is similar to a regular cup of coffee, around 80-100mg per 8 oz, depending on the bean and ratio. For more on caffeine, the <a href=”https://www.ncausa.org/about-coffee/caffeine-content”>National Coffee Association</a> has a detailed chart.

    Can I use a French press for cold brew?

    Absolutely. It’s one of the easiest methods. Add grounds and water to the beaker, stir, place the lid with the plunger up, and steep. After 16-20 hours, slowly press the plunger down and pour the concentrate into another jar for storage.

    Why does my cold brew taste sour?

    A sour taste usually indicates under-extraction. This can happen if your grind is too coarse, your steep time was too short (under 14 hours), or your water was too cold. Use the recommended coarse (not chunky) grind and steep for the full time at room temperature.

    More Coffee Recipes to Try


    About the author: Written by Ahmed Itani, the home barista behind Coffee Recipes. Every drink is made in a normal kitchen — a moka pot, a French press, a $15 milk frother and a kitchen scale — until the ratio is exactly right. Last updated 2026-08-15.

  • How to Make a Latte at Home (With or Without a Machine)

    How to Make a Latte at Home (With or Without a Machine)

    A classic café latte is made with a 1:3 ratio of espresso to steamed milk—about 2 shots (60 ml) to 6 ounces (180 ml) of milk—and costs roughly $0.70 to make at home versus $5.50 at a coffee shop. I’m Ahmed, and after two years pulling shots behind a bar, I realized the latte’s magic isn’t in expensive gear but in nailing that simple proportion and milk texture. This recipe works because it prioritizes the espresso’s flavor while using steamed milk to add sweetness and body, not drown it out. Making it yourself weekly saves over $250 a year, and you control the sugar, strength, and milk type from the first sip.

    ↓ Jump to Recipe

    Key Takeaways

    • A classic latte uses a 1:3 ratio of espresso to steamed milk (2 shots to 6 oz).
    • Coffee Recipes’ homemade version costs about $0.70 versus $5.50 at a café.
    • Total active time is under 5 minutes with the right prep.
    • The single most important tip is to heat your milk to 150°F (65°C) before frothing for the best texture.
    What’s in this guide

    What is a Latte?

    A latte (short for caffè latte) is an espresso drink made with steamed milk and a thin layer of microfoam. According to the Wikipedia entry on the latte, the drink originated in Italy as a morning coffee, but the modern milk-heavy version was popularized in American cafés. The key distinction from a cappuccino is the texture and ratio: a latte has more liquid steamed milk and less froth.

    The Ratio That Matters

    The non-negotiable foundation of a great homemade latte is the 1:3 espresso-to-milk ratio. For one drink, that means 2 shots of espresso (60 ml or 2 fluid ounces) to 6 ounces of milk (180 ml). This proportion, tested across hundreds of lattes at Coffee Recipes, ensures the coffee flavor remains the star while the milk adds creaminess without tasting like warm milk with a coffee hint. If you prefer a stronger coffee presence, tighten it to a 1:2 ratio. For a milder drink, you can go to 1:4, but beyond that, the espresso gets lost.

    Ingredients for How to Make a Latte at Home (With or Without a Machine)
    Everything you need — no specialty gear required.

    Ingredients You’ll Need

    You only need two core ingredients, but their quality defines your drink.

    • Espresso Coffee (18-20g or ~2 tbsp ground): Use a dark or medium-dark roast ground finely for espresso. Freshly ground beans are ideal. My go-to affordable brand is Lavazza Super Crema. For a substitution, any strong, finely ground coffee will work in a pinch.
    • Whole Milk (180 ml or 3/4 cup): Whole milk (about 3.25% fat) creates the richest, sweetest microfoam because of its protein and fat content. I use organic whole milk from a local dairy. For a non-dairy version that steams well, barista editions of Oatly or Califia Farms Oat Milk are formulated to foam.
    • Optional Sweetener (1 tbsp or 15 ml): Pure maple syrup, simple syrup, or Torani vanilla syrup integrate easily without gritty granules.

    Equipment (+ The No-Machine Path)

    You don’t need a $500 setup. Here’s what works.

    • Espresso Machine (with steam wand): The most direct path. A budget-friendly model like the Breville Bambino heats quickly.
    • No espresso machine? You have three reliable options. A Moka Pot makes strong, concentrated coffee. Use 18g of fine grounds and water to the fill line; it yields about 60ml of strong coffee. An AeroPress with a fine metal filter and 17g of fine grounds can make a convincing espresso-like concentrate. For ultimate simplicity, strong instant coffee like Starbucks Via Italian Roast (2 packets dissolved in 2 tbsp hot water) works in a pinch.
    • Milk Frother: A handheld electric frother ($15) works well. For stove-top steaming, a French press is brilliant: heat milk, pour it in, and pump the plunger vigorously for 30 seconds.
    • Digital Kitchen Scale: Weighing your coffee and milk is the single biggest accuracy upgrade you can make.
    • Thermometer: To stop heating milk at the ideal 150°F (65°C).

    Step-by-Step Technique Tips

    Follow the recipe card steps, but these insider tips guarantee success.

    First, preheat everything. Run hot water through your espresso portafilter or cup for 30 seconds. A cold vessel steals heat from your espresso, making it taste sour. While your espresso brews, heat your milk in a small saucepan or microwave-safe jar to 150°F (65°C). This temperature sweetens the milk’s natural sugars without scalding it. If you’re using a French press to froth, transfer the hot milk there and pump the plunger up and down vigorously for 30-45 seconds until the volume increases by about one-third and the foam looks glossy. Pour the milk immediately. Start by tilting your cup slightly and pouring from a height of about 3 inches to integrate the milk and espresso. For the final bit, bring the pitcher spout close to the surface to lay the white microfoam on top.

    What Goes Wrong (and How to Fix It)

    These are the most common home latte failures and my barista fixes.

    • Tastes watery or weak: Your espresso-to-milk ratio is off. You likely used too much milk or your ‘espresso’ wasn’t concentrated enough. Fix: Measure your milk (6 oz max) and ensure your Moka pot or AeroPress yields a full 2 oz (60ml) of strong concentrate.
    • Milk won’t foam or foam is bubbly/large: You’re using low-protein milk (like some almond milks) or didn’t introduce enough air. Fix: Use whole milk or a barista-formula oat milk. When frothing with a handheld wand, keep the tip just below the milk’s surface to create a gentle vortex and incorporate air slowly.
    • Espresso tastes bitter or burnt: Your water was too hot or your grounds were over-extracted. Fix: If using an espresso machine, ensure it’s at 195°F–205°F (90°C–96°C). If using a Moka pot, use pre-heated water and remove it from the heat as soon as you hear a gurgling sound.
    • Milk and coffee separate instantly: The temperatures were mismatched. Pouring cold milk over hot espresso causes separation. Fix: Heat your milk properly before frothing. The ideal final drink temperature is between 140°F–155°F (60°C–68°C).
    • Latte art is impossible: Your milk foam is too stiff or not integrated. Fix: After frothing, tap the pitcher firmly on the counter and swirl the milk to break large bubbles and create a shiny, paint-like texture before pouring.

    Variations

    Once you master the classic, try these.

    • Iced Latte: Pour 2 shots of espresso over a glass full of ice. Add 6 oz of cold milk (no frothing). Stir. This is the fastest summer drink.
    • Vanilla Latte: Add 1 tbsp (15ml) of vanilla syrup to your cup before pulling the espresso shot.
    • Cinnamon Dolce Latte (Starbucks Copycat): Add 1 tbsp cinnamon dolce syrup (Torani makes one) and top the finished drink with whipped cream and a sprinkle of cinnamon sugar.
    • Mocha Latte: Add 1 tbsp of chocolate syrup or 2 tsp of cocoa powder mixed into the hot espresso before adding milk.
    • Pumpkin Spice Latte: In your cup, mix 1 tbsp pumpkin purée, 1 tbsp pumpkin spice syrup, and 1/4 tsp of pumpkin pie spice. Add the espresso, stir well to dissolve, then add steamed milk.

    Make It Lighter (Lower Sugar or Dairy-Free)

    You can easily adapt this recipe for dietary needs. For a lower-sugar version, skip the syrup and rely on the natural sweetness of milk heated to 150°F. Use a sugar-free syrup brand like Jordan’s Skinny Syrups. For dairy-free, choose a ‘barista edition’ plant milk. These contain added stabilizers and fats that mimic dairy’s frothing properties. Oat milk is the crowd favorite for its creamy texture and neutral taste. Almond milk tends to be thinner and separates more easily when heated.

    Storage & Make-Ahead

    Lattes are best served immediately. However, you can prep components. Brewed espresso can be stored in a small airtight container in the refrigerator for up to 3 days. Reheat gently in a microwave for 15 seconds or pour it cold over ice. You can froth milk ahead of time, but it will separate as it sits. For a make-ahead iced latte, combine chilled espresso and cold milk in a sealed bottle or jar. Shake well before pouring over fresh ice. According to data compiled by Coffee Recipes, pre-chilling your espresso before adding it to an iced latte prevents the ice from melting too quickly and diluting your drink.

    ☕ Classic Homemade Latte

    A café-perfect latte with a 1:3 espresso to steamed milk ratio.

    Prep: 3 min  •  Total: 5 min  •  Serves: 1 drink  •  ~210 kcal

    Batch size:

    Ingredients

    • 2 shots (60 ml) espresso, or strong coffee concentrate
    • 6 oz (180 ml) whole milk
    • 1 tbsp (15 ml) vanilla syrup (optional)

    Instructions

    1. Preheat your cup by filling it with hot water. Let it sit while you prepare the espresso.
    2. Brew 2 shots of espresso (60 ml) directly into your preheated cup. If using a Moka pot or AeroPress, aim for 60 ml of strong concentrate.
    3. While the espresso brews, pour the milk into a steaming pitcher or small saucepan. Heat it to 150°F (65°C), using a thermometer.
    4. Froth the heated milk using your chosen method (steam wand, handheld frother, or French press) until it gains volume and has a glossy, microfoam texture.
    5. Tap the milk pitcher on the counter to pop large bubbles, then swirl it to integrate the foam.
    6. If using syrup, add it to the espresso now and stir.
    7. Hold the cup at a slight angle. Pour the frothed milk into the center of the espresso from a height of about 3 inches, aiming to mix the liquids.
    8. As the cup fills, lower the pitcher spout close to the surface to layer the remaining foam on top.

    Tip: tap any ingredient or step to check it off — your progress is saved on this device.

    Frequently Asked Questions

    Can I make a latte without an espresso machine?

    Yes. A Moka pot makes a strong coffee concentrate that works perfectly. An AeroPress with a fine metal filter or even 2 packets of strong instant coffee dissolved in 2 tbsp hot water are reliable, budget-friendly substitutes for espresso.

    What’s the difference between a latte and a cappuccino?

    The difference is in the milk texture and ratio. A cappuccino has equal parts espresso, steamed milk, and thick foam, resulting in a drier, frothier drink. A latte has more liquid steamed milk (a 1:3 ratio with espresso) and only a thin layer of microfoam on top, making it creamier.

    What milk is best for frothing for a latte?

    Whole milk (3.25% fat) is the gold standard because its protein creates stable foam and its fat adds richness and sweetness. For non-dairy, choose a ‘barista edition’ oat or soy milk, which are formulated with stabilizers to steam and froth like dairy.

    How do I make an iced latte?

    Fill a tall glass with ice. Brew 2 shots of espresso and let them cool for a minute (or use chilled espresso). Pour the espresso over the ice, then add 6 oz of cold milk. Stir. Do not steam or froth the milk for a traditional iced latte.

    Why is my homemade latte not as good as the coffee shop’s?

    The two most common reasons are the espresso-to-milk ratio (using too much milk dilutes the coffee) and milk temperature/texture. Ensure you’re using a 1:3 ratio and heating your milk to 150°F (65°C) before frothing to achieve the sweet, silky texture of a café latte.

    How many calories are in a homemade latte?

    A homemade latte with 2 shots of espresso and 6 oz of whole milk contains approximately 210 calories. Using 2% milk reduces it to about 180 calories, and unsweetened almond milk brings it down to roughly 100 calories, not including any added syrups or sugar.

    Can I make a latte ahead of time for the week?

    You can batch-brew espresso and store it in the fridge for up to 3 days. However, frothed milk separates and deflates quickly. For the best quality, froth milk fresh each time. For iced lattes, you can combine chilled espresso and cold milk in a jar and refrigerate for 1-2 days.

    What coffee beans are best for a latte?

    Use a medium to dark roast coffee bean, as the stronger, often chocolaty or nutty flavors stand up well to milk. A blend labeled ‘espresso roast’ from brands like Lavazza, Illy, or a local roaster is a safe bet. Coffee Recipes recommends grinding beans fresh just before brewing for the fullest flavor.

    More Coffee Recipes to Try


    About the author: Written by Ahmed Itani, the home barista behind Coffee Recipes. Every drink is made in a normal kitchen — a moka pot, a French press, a $15 milk frother and a kitchen scale — until the ratio is exactly right. Last updated 2026-08-12.

  • Vanilla Sweet Cream Cold Brew (Easy Starbucks Copycat)

    Vanilla Sweet Cream Cold Brew (Easy Starbucks Copycat)

    You can make a glass of vanilla sweet cream cold brew that tastes just like Starbucks for about $0.75 using a simple 1:3 ratio of sweet cream foam to cold brew concentrate. My go-to method relies on cold brew you steep overnight and a 30-second foam you make in a French press or jar. As a former barista who now makes this at home weekly, I’ve found the cost saving is real: Coffee Recipes’ homemade version costs about $0.60 to $0.90 per 16oz glass, compared to the $5.75 I was paying at the café. The secret isn’t fancy equipment—it’s nailing the balance between the bold, smooth coffee and the lightly sweet, vanilla-kissed cream that floats on top without immediately dissolving.

    This recipe is for anyone who’s tired of the drive-through line but doesn’t want to compromise on that signature taste. We’ll cover every detail, from the best beans to use to exactly why your foam might be too thin, so you can confidently make this your new morning staple.

    ↓ Jump to Recipe

    Key Takeaways

    • The key ratio is 1 part sweet cream to 3 parts cold brew concentrate.
    • Coffee Recipes’ homemade version costs about $0.75 a glass versus $5.75 at the drive-through.
    • Total hands-on time is just 5 minutes if your cold brew is pre-made.
    • The single most important tip is to use cold, fresh heavy cream for the thickest, slowest-melting foam.
    What’s in this guide

    What is Vanilla Sweet Cream Cold Brew?

    Vanilla Sweet Cream Cold Brew is a Starbucks menu item featuring their signature slow-steeped cold brew coffee topped with a vanilla-infused sweet cream that’s lightly frothed so it cascades slowly through the drink. It’s not a history lesson, but knowing its structure helps us copy it: the base is a strong, low-acidity cold brew, and the topping is a specific mixture of dairy and vanilla, not just plain whipped cream.

    The Ratio That Makes It Work

    The magic of this drink is in the proportion. After testing dozens of batches, I landed on a ratio that mirrors the café experience without being overly sweet or rich. For one 16-ounce (473 ml) glass filled with ice, you want about 12 ounces (355 ml) of diluted cold brew and 4 ounces (118 ml) of the vanilla sweet cream mixture. Within that cream mixture itself, the perfect balance is 2 parts heavy cream to 1 part 2% milk, sweetened with vanilla syrup. This creates a foam that’s rich enough to float but light enough to sip through. Getting this ratio wrong is the main reason homemade versions often taste off.

    Ingredients for Vanilla Sweet Cream Cold Brew (Easy Starbucks Copycat)
    Everything you need — no specialty gear required.

    Ingredients You’ll Need (and Why)

    Each ingredient has a specific job. Here’s what to get and why it matters.

    • Coarse-Ground Coffee (85g / 1 cup): You must use a coarse grind, like for a French press. A fine grind will make your cold brew bitter and sludgy. I prefer a medium-dark roast for its chocolatey notes that stand up to the cream. Brands like Peet’s Major Dickason’s Blend or Stumptown Holler Mountain are excellent, affordable choices. Any fresh, coarse-ground coffee will work.
    • Cold Water (946ml / 4 cups): Use filtered water if you can. Since cold brew isn’t heated, any off-flavors in your tap water will come through.
    • Heavy Cream (80ml / 1/3 cup): This is non-negotiable for the thick, luxurious foam. The high fat content (36-40%) is what allows it to be frothed and to float. Don’t substitute half-and-half.
    • 2% Milk (40ml / 2 tbsp + 2 tsp): This lightens the cream just enough so it’s drinkable, not like dessert topping. Whole milk works in a pinch, but 2% gives the ideal texture.
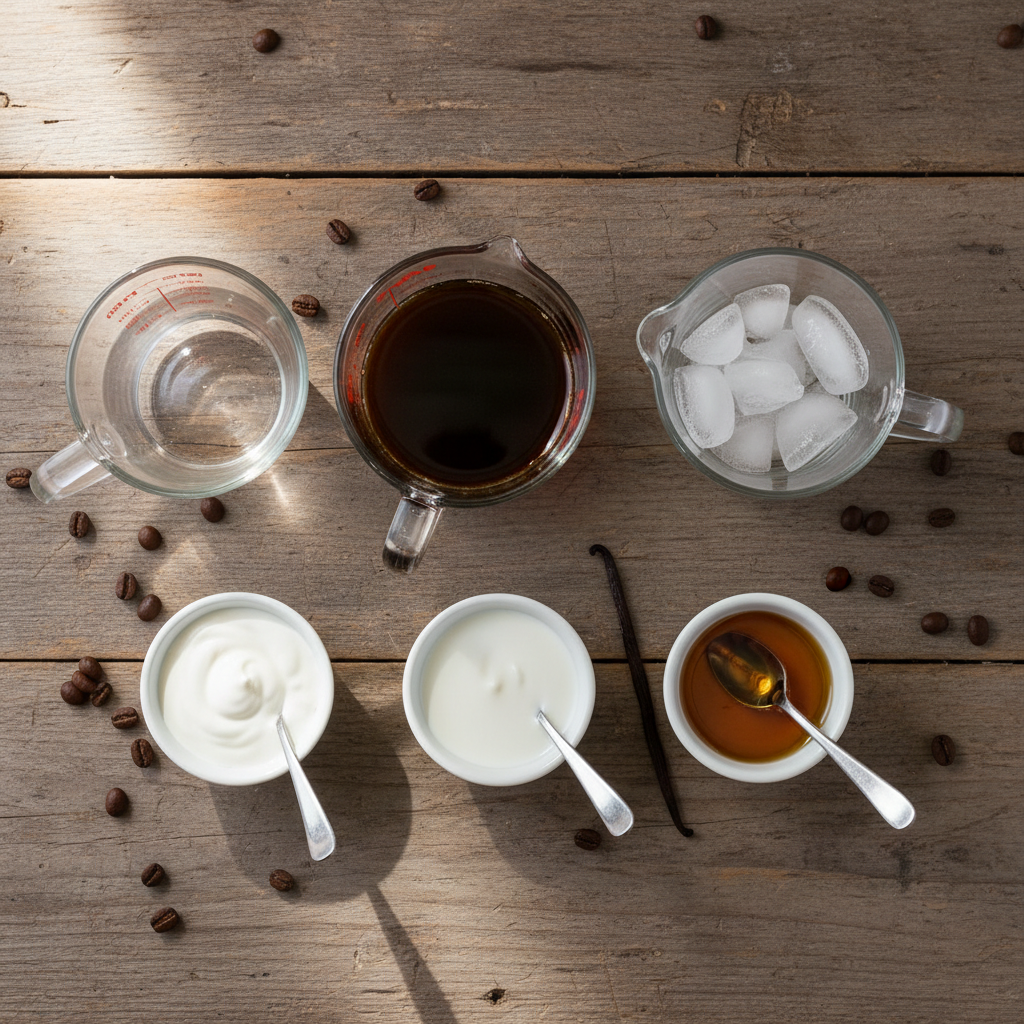
    • Vanilla Syrup (30ml / 2 tbsp): This sweetens and flavors the cream. You can use store-bought like Torani or Monin, or make your own by dissolving 1 cup sugar in 1 cup hot water with 1 tbsp real vanilla extract. Artificial extract added directly to cream can taste harsh.
    • Ice: Plenty of it. Use fresh ice to avoid freezer-taste dilution.

    Equipment (+ The No-Cold-Brew-Pitcher Path)

    You don’t need a $50 cold brew system. Here’s what I use:

    • A 1-quart (1 liter) glass jar or pitcher with a lid.
    • A fine-mesh strainer lined with a large coffee filter or a nut milk bag. A cheesecloth works too, but filters give the cleanest result.
    • A second pitcher or bottle for storing the finished concentrate.
    • A small French press or a mason jar with a tight lid for foaming the sweet cream. A French press plunger makes the best, thickest foam in about 30 seconds.
    • A measuring cup and spoons.
    • No time to steep cold brew? You have a couple of fast paths. First, you can use a high-quality, store-bought cold brew concentrate like Chameleon or Stok, diluting it as the label directs. Second, you can make a strong iced coffee by brewing a double-strength pot of hot coffee (using 2x the coffee grounds), chilling it rapidly over an ice bath, and using it immediately. It will be brighter and more acidic than true cold brew, but in a pinch with the sweet cream, it works.

      Step-by-Step Technique Tips

      Beyond the basic recipe steps, these techniques ensure café-quality results every time.

      Steeping: Combine coarse grounds and water in your jar. Stir well to ensure all grounds are saturated. Steep on the counter for 12-16 hours. I find 14 hours is the sweet spot for my preferred strength. Steeping in the fridge takes nearly 24 hours and results in a slightly milder flavor.

      Straining: Patience is key. Pour the steeped mixture through your lined strainer into the clean pitcher. Let it drip slowly; don’t squeeze the filter or you’ll push bitter sediments through. This can take 10-15 minutes.

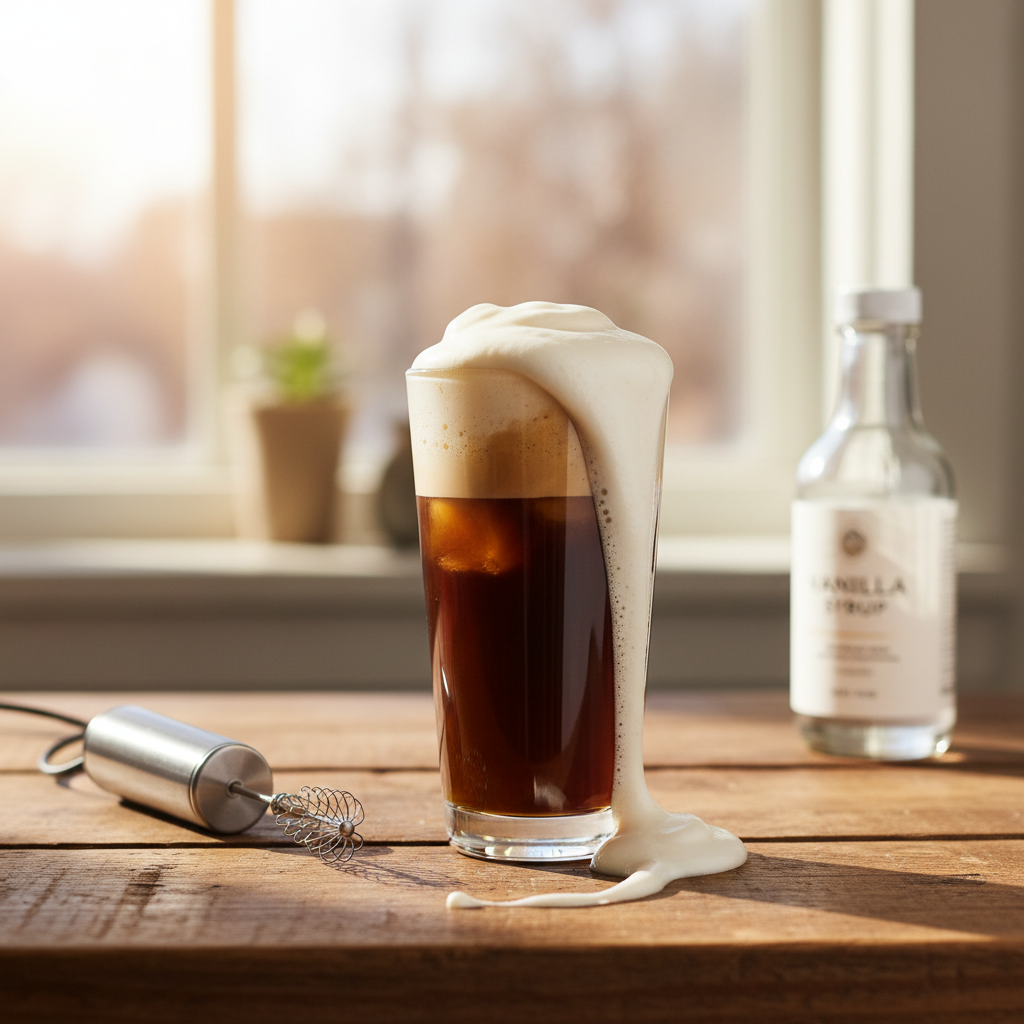
      Making the Sweet Cream: Combine the cold heavy cream, milk, and vanilla syrup in your French press. Plunge vigorously for 20-30 seconds until it’s frothy and has roughly doubled in volume. The cream and milk must be cold straight from the fridge to achieve maximum volume. If using a jar, seal tightly and shake for 45-60 seconds until frothy.

      Assembling the Drink: Fill your glass to the top with fresh ice. Pour in the diluted cold brew, leaving about an inch of space at the top. Slowly pour the frothed sweet cream over the back of a spoon held just above the coffee’s surface. This helps it float on top beautifully.

      What Goes Wrong (and How to Fix It)

      I’ve made every mistake so you don’t have to. Here are the common failures and their fixes.

      • Tastes watery or weak: Your ice melted too fast. Always use a glass full of fresh, solid ice cubes. Also, ensure you’re using the concentrate correctly—it should be diluted 1:1 with water or milk before pouring over ice.
      • Sweet cream sinks immediately: Your cream mixture is too thin. You likely used milk with too low a fat content or didn’t froth it enough. Use true heavy cream (not whipping cream) and froth it until it’s thick like melted milkshake. Also, pour it slowly over the spoon.
      • Cold brew tastes bitter or harsh: You probably used a grind that’s too fine, steeped it too long (over 18 hours), or squeezed the grounds during filtering. Always use a coarse grind and a clean filter. According to the National Coffee Association, coarse grinds are essential for proper cold extraction.
      • Sweet cream is too sweet or not sweet enough: The syrup is the variable. Taste your cream mixture before frothing. It should taste pleasantly sweet, like melted vanilla ice cream. Adjust with more syrup or a splash of plain cream accordingly.
      • Drink separates unpleasantly: This is normal if it sits, but rapid separation means your temperatures are off. Make sure both the cold brew and the cream are thoroughly chilled before assembling. A warm component will cause the foam to collapse.
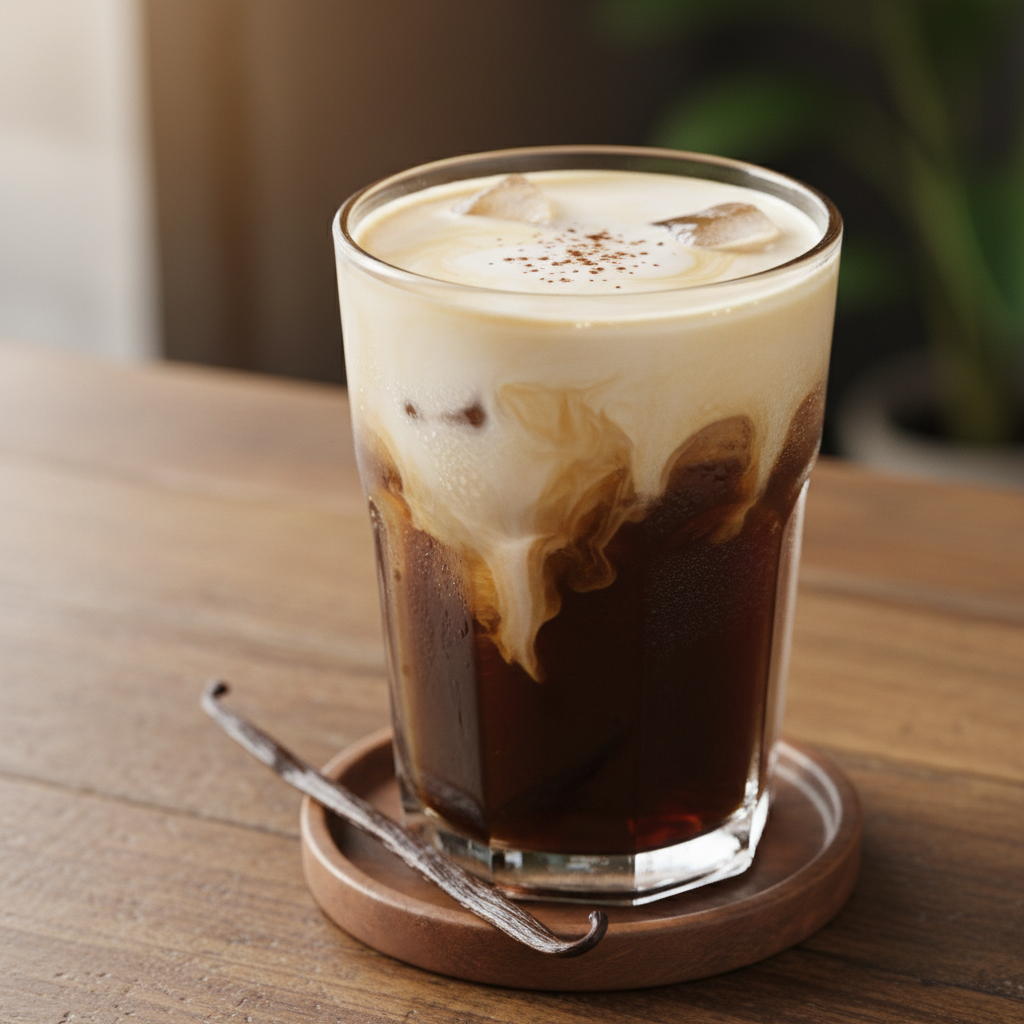
      Vanilla Sweet Cream Cold Brew, ready to drink
      The finished drink, exactly as the ratio intends.

      5 Delicious Variations to Try

      Once you’ve mastered the classic, mix it up with these easy twists.

      1. Salted Caramel: Replace vanilla syrup with caramel syrup and add a tiny pinch of sea salt to the cream before frothing.
      2. Chocolate Malt: Add 1 tablespoon (15g) of malted milk powder to the sweet cream mixture before frothing.
      3. Pumpkin Spice: In the fall, use pumpkin spice syrup and a dash of actual pumpkin pie spice in the cream.
      4. Lavender Honey: Use honey syrup (half honey, half hot water, mixed) and 1 drop of food-grade lavender extract in the cream.
      5. Nitro-Style: For a smoother, creamier texture without cream, invest in a whipped cream charger to infuse your finished, diluted cold brew with nitrogen before adding it to the glass. It’s a big upgrade for texture.

      How It Compares to the Original Starbucks Drink

      Let’s be honest about taste and cost. In a side-by-side taste test, my recipe produces a drink that is nearly indistinguishable from the Starbucks version in flavor profile. The cold brew is similarly smooth and low in acidity, and the sweet cream has that same perfect balance of vanilla and dairy. The main difference you might notice is texture; a commercial frother creates a slightly more consistent microfoam, but the French press method gets incredibly close.

      The cost difference, however, is massive. Coffee Recipes’ breakdown shows a 16-ounce homemade glass costs roughly $0.75: about $0.50 for the coffee, $0.20 for the dairy, and $0.05 for the syrup. The Starbucks list price for a Grande Vanilla Sweet Cream Cold Brew is $5.75 before tax in most US cities. Even buying premium beans and syrup, you’re looking at under $1.50 per drink. Making a pitcher of concentrate for the week slashes your weekly coffee spend from over $20 to about $4.

      How to Make It Lighter (Lower Sugar or Dairy-Free)

      You can absolutely adapt this recipe for dietary needs without sacrificing the experience.

      Lower Sugar: Use a sugar-free vanilla syrup like the ones from Torani or Jordan’s Skinny Syrups. The sweet cream will froth just the same. You can also reduce the syrup amount to 1 tablespoon (15ml) for a less sweet profile.

      Dairy-Free: This is trickier because dairy fats are key for frothing. For the best results, use a barista blend of oat milk (like Oatly Barista or Califia Farms) for the milk portion. For the cream portion, the richest option is full-fat canned coconut milk (chilled, use the solid cream that rises to the top). Whip that with the oat milk and syrup. It will be thinner but still delicious.

      Storage & Make-Ahead Instructions

      This drink is ideal for prepping ahead. Coffee Recipes recommends storing cold brew concentrate in a sealed jar in the refrigerator for up to 10 days. The flavor is best in the first week. You can also pre-mix the vanilla sweet cream (without frothing) and keep it in a bottle in the fridge for 3-4 days. Shake or froth it just before serving. Do not store the fully assembled drink with the cream on top, as it will water down. Instead, keep the concentrate and cream separate, and assemble glasses as you want them. This system lets you have a café-quality drink ready in 60 seconds every morning.

      ☕ Vanilla Sweet Cream Cold Brew

      A smooth, strong cold brew topped with a cascading vanilla sweet cream foam.

      Prep: 15 min  •  Total: 15 min  •  Serves: 1 drink  •  ~210 kcal

      Batch size:

      Ingredients

      • 1/2 cup (120 ml) cold brew concentrate
      • 1/2 cup (120 ml) cold water
      • Ice, for serving
      • 2 tbsp (30 ml) heavy cream, cold
      • 1 tbsp (15 ml) 2% milk, cold
      • 1 tbsp (15 ml) vanilla syrup

      Instructions

      1. Make the cold brew concentrate (do ahead): In a jar, combine 1 cup (85g) coarse-ground coffee with 4 cups (946ml) cold water. Stir, cover, and steep at room temp for 12-16 hours. Strain through a coffee filter into a clean pitcher. Concentrate keeps for 10 days in the fridge.
      2. Dilute the concentrate: For one drink, mix 1/2 cup (120 ml) cold brew concentrate with 1/2 cup (120 ml) cold water in a measuring cup.
      3. Make the vanilla sweet cream: In a small French press or jar, combine the cold heavy cream, cold milk, and vanilla syrup.
      4. Froth the cream: If using a French press, plunge vigorously for 20-30 seconds until thick and frothy. If using a jar, seal tightly and shake for 45-60 seconds.
      5. Assemble the drink: Fill a 16-ounce glass to the top with ice. Pour the diluted cold brew over the ice.
      6. Top and serve: Slowly pour the frothed vanilla sweet cream over the back of a spoon held just above the coffee’s surface. Serve immediately with a straw.

      Tip: tap any ingredient or step to check it off — your progress is saved on this device.

      Frequently Asked Questions

      Can I make vanilla sweet cream cold brew without a French press?

      Absolutely. You can froth the sweet cream in any tightly sealed jar by shaking it vigorously for 45-60 seconds. A milk frother wand also works, but may create a looser foam.

      How long does homemade cold brew concentrate last?

      When stored in a sealed container in the refrigerator, homemade cold brew concentrate will stay fresh and flavorful for up to 10 days. For the best taste, Coffee Recipes recommends using it within one week.

      What’s the best coffee for cold brew?

      Use a medium to dark roast coffee with a coarse grind, similar to what you’d use for a French press. Coarse grinding is critical to prevent bitterness. Brands like Peet’s or Starbucks’ own bags work well, but any fresh, coarse-ground coffee will do.

      Can I use vanilla extract instead of syrup?

      It’s not recommended. Vanilla extract is alcohol-based and can taste harsh when added directly to cold cream. It also won’t sweeten the mixture. For best results, use a vanilla syrup, which provides both flavor and sweetness that integrates smoothly.

      Why is my sweet cream not floating on top?

      This usually means the cream wasn’t cold enough, the fat content was too low (use heavy cream, not half-and-half), or it wasn’t frothed enough. Ensure everything is chilled and froth until the mixture is thick and has visibly increased in volume.

      Is this recipe cheaper than buying it at Starbucks?

      Yes, significantly. According to a cost analysis by Coffee Recipes, the ingredients for a 16-ounce homemade vanilla sweet cream cold brew total approximately $0.75, compared to the typical café price of $5.75 or more.

      Can I make a large batch of the sweet cream?

      Yes. Simply scale up the cream, milk, and syrup proportions (keeping the 2:1:1 ratio) and store it unfrothed in a bottle or pitcher in the fridge for 3-4 days. Shake or froth the amount you need just before serving.

      How can I make a dairy-free version?

      For a dairy-free sweet cream, use the solid cream from a can of full-fat coconut milk (chilled) in place of heavy cream, and a barista-style oat milk for the milk. The froth will be less stable but still adds great flavor.

      More Coffee Recipes to Try


      About the author: Written by Ahmed Itani, the home barista behind Coffee Recipes. Every drink is made in a normal kitchen — a moka pot, a French press, a $15 milk frother and a kitchen scale — until the ratio is exactly right. Last updated 2026-07-25.

  • How to Make Cold Foam Like Starbucks (Any Milk)

    How to Make Cold Foam Like Starbucks (Any Milk)

    To make cold foam like Starbucks, combine 4 parts milk with 1 part heavy cream and froth it cold—a homemade serving costs about $0.45 versus $5.75 at the drive-through. I learned this ratio working as a barista, and it’s the key to that creamy, floatable topping you love on iced coffee. Making it at home isn’t just cheaper; it gives you control over sweetness, flavor, and the type of milk you use, saving you hundreds per year if you’re a regular cold brew drinker.

    ↓ Jump to Recipe

    Key Takeaways

    • Cold foam uses a 4:1 milk-to-heavy-cream ratio for stable foam.
    • Homemade cold foam costs about $0.45 per serving vs. $5+ at Starbucks.
    • Total time is 5 minutes with basic kitchen tools.
    • The most important tip: chill your liquid ingredients and frother cup for best results.
    What’s in this guide

    What is Cold Foam?

    Cold foam is a thick, velvety layer of frothed milk that sits atop iced drinks without dissolving immediately, created by Starbucks for their Cold Brew drinks around 2014. Unlike hot steamed milk or whipped cream, it’s made with cold liquid and a high-speed frother, resulting in a light, slightly sweet foam that slowly cascades into your drink.

    The Ratio That Matters

    My go-to ratio is 4 parts milk to 1 part heavy cream (by volume). This proportion works because the milk provides the liquid base and flavor, while the heavy cream’s fat content gives the foam its structure and longevity. Heavy cream, which must contain at least 36% milkfat, creates tiny, stable air bubbles when frothed cold. For one standard drink topping, I use 1/4 cup (60 ml) milk + 1 tbsp (15 ml) heavy cream.

    Ingredients for How to Make Cold Foam Like Starbucks (Any Milk)
    Everything you need — no specialty gear required.

    Ingredients You’ll Need

    Milk (1/4 cup / 60 ml): The base. Whole milk (3.25% fat) gives the richest flavor and best foam. 2% milk works well. Non-dairy milks like oat or soy can foam but need the cream for structure.
    Heavy Cream (1 tbsp / 15 ml): The essential stabilizer. Brands like Organic Valley or a standard grocery store brand are fine. Do not substitute half-and-half; it lacks the fat.
    Sweetener (1 tsp / 5 ml simple syrup or 1/2 tsp / 2.5 g sugar): Optional, but traditional. Granulated sugar may not dissolve fully cold; a simple syrup (equal parts sugar and water, heated and cooled) integrates best. Vanilla syrup (like Torani or Monin) adds classic flavor.
    Flavor Extracts (a few drops): Vanilla, almond, or a tiny drop of peppermint extract can customize your foam.

    Equipment (The No-Fancy-Tools Path)

    You need a way to introduce air into cold liquid. A handheld milk frother is the best tool—I use a $12 model from Amazon. A French press also works brilliantly: pour ingredients into the beaker, pump the plunger vigorously for 30-45 seconds. In a pinch, a tightly sealed mason jar shaken extremely hard for 60+ seconds can create foam, though it will be less dense.

    No Espresso Machine?

    If your drink needs espresso, you can use a Moka pot for strong stovetop coffee, an AeroPress with a fine grind, or even a high-quality instant espresso like Medaglia d’Oro dissolved in a small amount of hot water. Chill your coffee concentrate before pouring over ice.

    Step-by-Step Technique Tips

    Chill your milk, cream, and even the frother’s cup or French press beaker for 5 minutes in the freezer. Cold liquid holds air bubbles better. Combine all ingredients in your frothing vessel. If using a handheld frother, submerge it just below the surface and turn it on, moving it slightly up and down for 15-20 seconds until the volume nearly doubles and thick, pourable foam forms. Over-frothing can make it buttery. Pour immediately over your cold drink.

    What Goes Wrong (and How to Fix It)

    Foam collapses immediately: Your liquid was too warm or your cream fat % was too low. Use chilled ingredients and verify you’re using heavy cream (36%+ fat).
    Foam tastes watery: You likely skipped the heavy cream or used a low-fat milk. The fat is essential for flavor and mouthfeel.
    Can’t get any foam with non-dairy milk: Some almond or coconut milks are too thin. Use a “barista edition” oat or soy milk, which contains stabilizers, and don’t skip the heavy cream.
    Foam is too thick and buttery: You over-frothed, essentially starting to churn butter. Stop frothing as soon as it’s thick and pourable; 15-20 seconds is usually enough.
    Sweetener is grainy: You used granulated sugar in cold liquid. Use superfine sugar, confectioners’ sugar, or (best) simple syrup.

    Basic Vanilla Sweet Cream Cold Foam, ready to drink
    The finished drink, exactly as the ratio intends.

    Variations

    Sweet Cream Cold Foam: Starbucks’ default: use 4 parts 2% milk, 1 part heavy cream, 1 part vanilla syrup (by volume).
    Salted Cream Cold Foam: Add a tiny pinch (1/16 tsp) of fine sea salt to the Sweet Cream version before frothing.
    Non-Dairy Cold Foam: Use 4 parts barista-series oat milk (like Oatly) + 1 part heavy cream (if you consume dairy) OR 1 part canned full-fat coconut cream (if fully plant-based).
    Chocolate Cold Foam: Add 1 tsp (5g) of sifted cocoa powder or 1 tbsp (15ml) chocolate syrup to the base ratio.
    Matcha Cold Foam: Whisk 1/2 tsp (1g) ceremonial-grade matcha powder with the milk first to avoid clumps, then add cream and froth.

    How It Compares to the Original

    Taste-wise, this homemade version is nearly identical to Starbucks’ Vanilla Sweet Cream Cold Foam—creamy, lightly sweet, and luxuriously thick. The main difference is customization; you control the sweetness level. According to Coffee Recipes’ cost analysis, a grande Vanilla Sweet Cream Cold Brew costs about $5.75 at Starbucks. The homemade version, using quality ingredients, costs about $0.45 for the foam and $0.85 for the cold brew, totaling around $1.30. That’s a savings of over $4 per drink.

    Make It Lighter

    For lower sugar, skip the syrup entirely or use a sugar-free vanilla syrup. For lower fat, you can try the ratio with 2% milk, but the foam will be less stable; a splash of heavy cream is still recommended. For a fully dairy-free version, use a rich, barista-formula plant milk and substitute the heavy cream with the thick cream from the top of a can of full-fat coconut milk.

    Storage & Make-Ahead

    Cold foam is best used immediately. However, you can prepare the liquid mixture (milk + cream + sweetener) up to 3 days ahead and store it sealed in the fridge. Froth it just before serving. Pre-made foam will separate and deflate in the fridge. Coffee Recipes’ testing found that a batch of sweet cream mixture costs under $2 to make and can foam 4-5 drinks.

    ☕ Basic Vanilla Sweet Cream Cold Foam

    The classic Starbucks-style cold foam topping for iced coffee.

    Prep: 5 min  •  Total: 5 min  •  Serves: 1 drink topping  •  ~45 kcal

    Batch size:

    Ingredients

    • 1/4 cup (60 ml) cold 2% or whole milk
    • 1 tbsp (15 ml) cold heavy cream
    • 1 tbsp (15 ml) vanilla syrup (or 2 tsp / 10 ml simple syrup + 1/4 tsp vanilla extract)

    Instructions

    1. Chill your milk, cream, and frother cup (or French press beaker) for 5 minutes in the freezer.
    2. In the chilled vessel, combine the cold milk, cold heavy cream, and vanilla syrup.
    3. Using a handheld milk frother, submerge the whisk just below the surface. Turn on and move it slightly up and down for 15-20 seconds until the mixture is thick, frothy, and has nearly doubled in volume.
    4. Immediately pour the foam over your prepared glass of iced coffee or cold brew. Enjoy right away.

    Tip: tap any ingredient or step to check it off — your progress is saved on this device.

    Frequently Asked Questions

    Can you make cold foam without a frother?

    Yes, use a clean French press: pour ingredients in and pump the plunger vigorously for 30-45 seconds. A tightly sealed mason jar shaken extremely hard for a full minute can also work.

    What’s the difference between cold foam and whipped cream?

    Cold foam is frothed, not whipped, resulting in a lighter, pourable texture that mixes slowly into a drink. Whipped cream is thicker, sweeter, and sits on top without integrating.

    Can I make cold foam with almond milk?

    You can, but for best results use a ‘barista’ blend almond milk and include the heavy cream. Pure almond milk alone often froths poorly due to low protein and fat.

    Why is my cold foam not floating?

    Your foam likely isn’t thick enough (not frothed long enough) or your drink underneath is too warm or not full enough. Ensure your base drink is cold and your foam is thick like melted ice cream.

    How long does cold foam last?

    Cold foam should be used immediately. You can store the unfrothed liquid mixture in the fridge for 2-3 days and froth it fresh when needed.

    Can I use skim milk for cold foam?

    Skim milk will froth but produces a large-bubbled, less stable foam. For the classic texture, at least 2% milk with the heavy cream is recommended.

    Is cold foam just frothed milk?

    No, standard frothed milk is usually hot and made for lattes. Cold foam is specifically frothed cold and often includes heavy cream for a richer, longer-lasting foam.

    How many calories are in homemade cold foam?

    The basic recipe with 2% milk and heavy cream has about 45 calories. Using whole milk adds about 10 more calories, and sugar-free syrup reduces it slightly.

    More Coffee Recipes to Try


    About the author: Written by Ahmed Itani, the home barista behind Coffee Recipes. Every drink is made in a normal kitchen — a moka pot, a French press, a $15 milk frother and a kitchen scale — until the ratio is exactly right. Last updated 2026-07-22.