Tag: moka pot

  • Moka Pot Guide: Stovetop Espresso Done Right

    Moka Pot Guide: Stovetop Espresso Done Right

    To brew perfect stovetop espresso, use a 1:8 coffee-to-water ratio, fill the base to just below the safety valve, and apply medium-low heat for 7-9 minutes until you hear a steady gurgle—this method costs about $0.35 per cup versus $4.50 for a similar cortado at a café.

    I’m Ahmed, and after years of trial and error with my trusty Bialetti, I’ve dialed in a routine that consistently produces a rich, strong coffee base perfect for lattes, americanos, or drinking straight. The moka pot is the most affordable and reliable path to espresso-like coffee without a $500 machine.

    While it’s famously finicky, getting it right is about controlling three things: grind size, water temperature, and heat. Once you lock those in, you’ll have a café-quality drink for a tenth of the price.

    ↓ Jump to Recipe

    Key Takeaways

    • The ideal moka pot ratio is 1:8 coffee to water (e.g., 20g coffee to 160g water).
    • A homemade moka pot coffee costs roughly $0.35 versus $4.50 for a café cortado.
    • Total brew time, including preheating, should be about 7-9 minutes.
    • The single most important tip is to stop the brew at the first sputtering sound to avoid bitterness.
    What’s in this guide

    What is a Moka Pot?

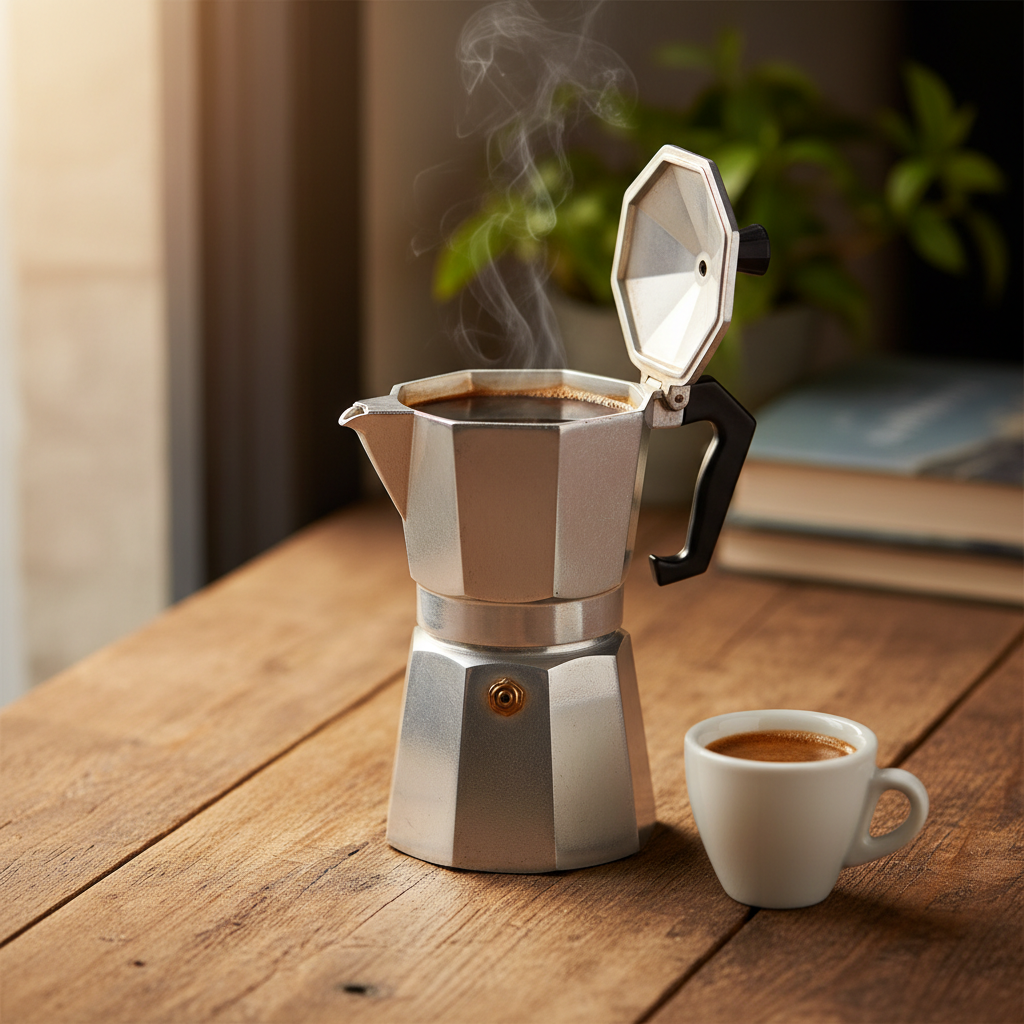
    A moka pot is a three-chamber stovetop brewer invented in 1933 by Alfonso Bialetti that uses steam pressure to push hot water through finely ground coffee, creating a concentrated, espresso-like drink. It’s the cornerstone of Italian home coffee culture.

    What’s the Right Coffee-to-Water Ratio for a Moka Pot?

    My go-to ratio is 1 part coffee to 8 parts water by weight. This balances strength and extraction without tipping into bitterness. For a standard 6-cup Bialetti (which actually yields about 10 oz / 300 ml of brewed coffee), that’s 22-24 grams of coffee and 180-190 grams (or ml) of water in the base. Don’t pack the coffee; just level it off. The National Coffee Association notes that the ideal brewing ratio for most methods falls between 1:15 and 1:18, but the moka pot’s pressure brewing allows for a much stronger, more concentrated ratio.
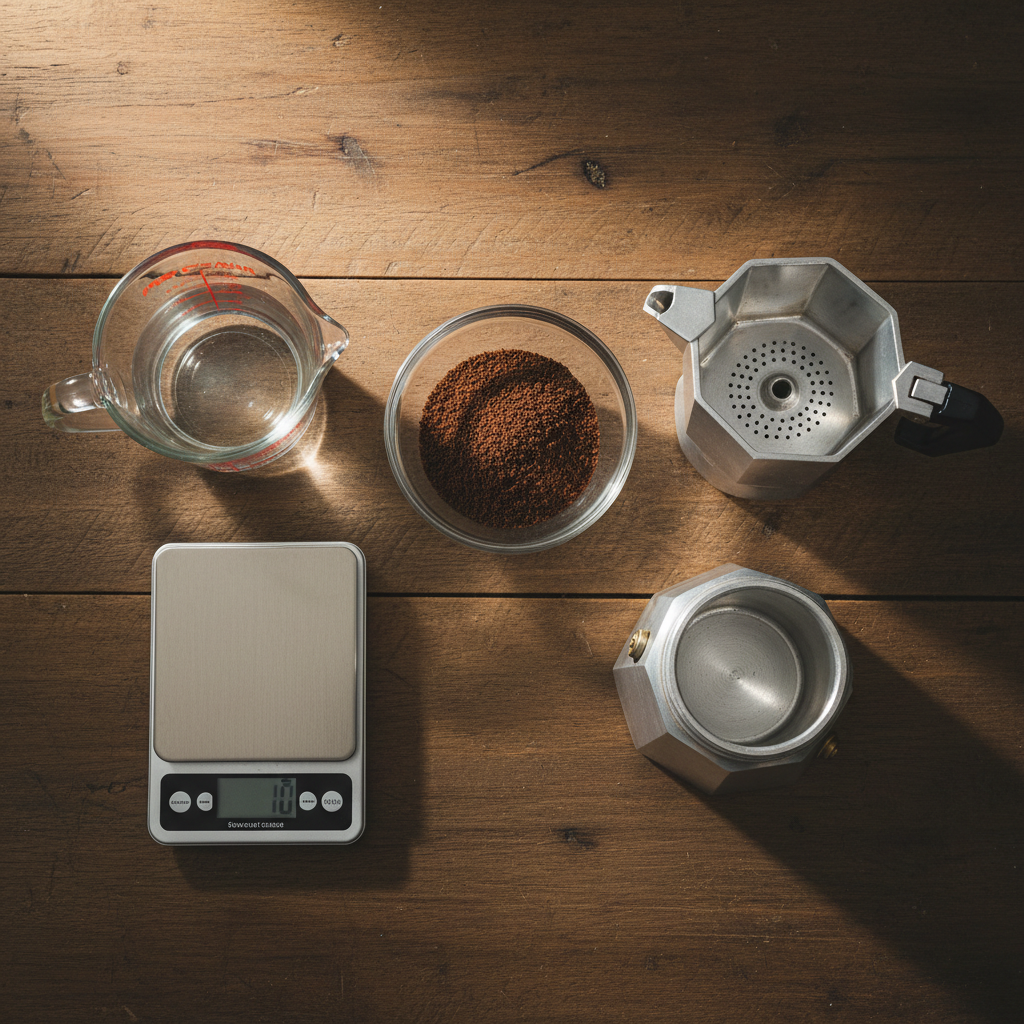
    Ingredients for Moka Pot Guide: Stovetop Espresso Done Right
    Everything you need — no specialty gear required.

    Ingredients You’ll Need

    Water: Use filtered water heated to about 200°F (93°C) before adding to the base. Cold water takes longer, increasing the risk of over-extraction. I keep a kettle handy for this.

    Coffee: You need a fine grind, slightly coarser than true espresso powder. Think the texture of table salt or fine sand. Pre-ground ‘moka pot’ blends from brands like Lavazza Crema e Gusto or Illy are formulated for this and work great. For whole beans, a medium to dark roast from a local roaster, ground fresh, is ideal. Avoid oily, ultra-dark ‘espresso’ beans labeled for machines—they can clog the filter.

    Essential Equipment (And the No-Machine Path)

    You need the moka pot itself (Bialetti is the classic), a grinder (a budget-friendly manual like a Timemore C2 works), a scale (the KitchenTour digital scale is under $20), and a stove. If you don’t have a moka pot yet, that is the machine. For an even stronger, creamier brew similar to a stovetop espresso machine, consider a Bialetti Brikka, which has a weighted valve to create more pressure. The only true ‘no-machine’ path for espresso-like coffee is a high-quality concentrated instant like Medaglia d’Oro or Starbucks Via Instant Italian Roast, stirred into hot water—it’s a different drink, but works in a pinch for milk drinks.

    Step-by-Step Technique Tips

    First, preheat your water in a kettle. This is non-negotiable; starting with hot water reduces the time the grounds spend on the heat, preventing a burnt taste. Fill the base with hot water up to, but not covering, the little safety valve or pressure release hole (usually about 0.5 inches / 1 cm below it). Insert the filter funnel and fill it with your ground coffee, leveling it off with a finger—do not tamp. Screw the top chamber on tightly; use a towel if it’s hot. Place it on a burner set to medium-low heat. The brew should start in 3-4 minutes. You’ll hear a steady hissing as coffee flows into the top chamber. The moment the sound changes to a sputtering, spitting gurgle, immediately remove it from the heat and run the base under cool tap water to stop the extraction. This prevents the last, bitter drops from entering your brew.

    What Goes Wrong (and How to Fix It)

    Tastes weak or watery: Your grind is too coarse, your heat was too low, or you didn’t use enough coffee. Fix: Use a finer grind (like table salt), ensure your water is preheated, and weigh your dose (aim for 22-24g for a 6-cup).

    Tastes bitter, burnt, or metallic: The most common issue. Your heat was too high, you let it brew through the sputtering phase, or your grind is too fine. Fix: Use medium-low heat, stop the brew at the first sputter, and coarsen your grind slightly.

    No coffee comes out / takes forever: The grind is too fine and has clogged the filter, or the gasket is old and leaking steam. Fix: Clean the filter thoroughly, replace the gasket (they’re cheap), and use a coarser grind.

    Coffee shoots out the top violently: You overfilled the base with water, covering the safety valve. Fix: Always fill just below the valve. The valve is there for safety; covering it creates dangerous pressure.

    Lack of crema: The moka pot doesn’t produce true espresso crema, but a darker roast and a Brikka pot will give more foam. Fix: Try a fresher, medium-dark roast and a Brikka if foam is a priority.

    Café Cubano: Add 1-2 teaspoons of demerara sugar to the empty top chamber before brewing. The first, thickest drops of coffee will create a sweet paste you then stir into the full brew.

    Mocha: Add 1 tbsp (15g) of cocoa powder or chocolate syrup to your mug before pouring the hot moka pot coffee over it. Stir until dissolved, then add steamed milk.

    Shakerato: Pour a freshly brewed, hot moka pot shot into a cocktail shaker with 1 tsp sugar. Add ice and shake vigorously for 15 seconds until frothy and chilled. Strain into a rocks glass.

    Vietnamese-style: Brew with 1-2 tsp of sweetened condensed milk already in the bottom of your serving cup. The hot coffee melts and blends with it perfectly.

    Americano: Pour your moka pot brew (about 3 oz / 90 ml) into a mug and top with 6-8 oz (180-240 ml) of hot water. Adjust to taste.

    How to Make It Lighter or Dairy-Free

    For less sugar, skip pre-sweetening and use a zero-calorie sweetener like monk fruit or stevia after brewing. For dairy-free, any barista-style oat milk (like Oatly Barista Edition) or almond milk steams and froths well. To froth without a steamer, heat the milk and use a French press: pump the plunger up and down vigorously for 30 seconds. According to Wikipedia, plant-based milks have been used in coffee for centuries in various cultures, with soy milk being a traditional option in East Asia.

    Storage & Make-Ahead Tips

    Moka pot coffee is best fresh. However, you can brew a full pot, let it cool completely, and store it in a sealed jar in the fridge for up to 3 days. Use it for iced coffee or reheat gently (microwave in 15-second bursts). Do not store the brewed coffee in the aluminum moka pot itself, as it can impart a metallic taste. Clean your moka pot after every use by rinsing with hot water—use soap only once a week to preserve the seasoning. Dry all parts thoroughly before reassembling.

    ☕ Classic Moka Pot Stovetop Espresso

    Rich, strong coffee brewed under pressure on your stovetop, perfect for drinking straight or as a base for lattes.

    Prep: 3 min  •  Total: 10 min  •  Serves: 2 servings (about 10 oz / 300 ml total brew)  •  ~5 kcal

    Batch size:

    Ingredients

    • 22 grams (about 3 slightly heaping tbsp) finely ground coffee
    • 180 grams (180 ml) hot filtered water (just below the safety valve)

    Instructions

    1. Preheat water in a kettle to about 200°F (93°C).
    2. Unscrew the moka pot. Fill the bottom chamber with the hot water up to, but not covering, the safety valve or pressure release hole.
    3. Insert the filter basket. Fill it with ground coffee, leveling it off with your finger or a straight edge. Do not tamp or press down.
    4. Screw the top chamber on tightly and securely. Use a towel if the base is hot.
    5. Place the moka pot on a stovetop burner set to medium-low heat.
    6. Leave the lid open. In 3-4 minutes, you will hear a hissing sound and see rich coffee begin to flow into the top chamber.
    7. Listen closely. When the sound changes from a steady hiss to a sputtering, spitting gurgle, immediately remove the pot from the heat.
    8. Run the bottom chamber under cool tap water for 10-15 seconds to stop the brewing process. This prevents bitter flavors from extracting.
    9. Pour and enjoy immediately. Serve straight, with sugar, or as a base for milk drinks.

    Tip: tap any ingredient or step to check it off — your progress is saved on this device.

    Frequently Asked Questions

    What’s the difference between a moka pot and an espresso machine?

    An espresso machine uses 9+ bars of pressure to extract coffee in 25-30 seconds, creating a shot with crema. A moka pot uses 1-2 bars of steam pressure over 2-3 minutes, producing a stronger, richer coffee than drip, but not true espresso. It’s the closest affordable alternative.

    Can I use pre-ground coffee in a moka pot?

    Yes, absolutely. In fact, many Italian households use pre-ground blends labeled ‘per caffettiera’ or ‘moka’. Brands like Lavazza Qualità Rossa or Illy are formulated for the perfect moka pot grind size and work very well.

    Why is my moka pot coffee bitter?

    Bitterness almost always comes from over-extraction. The top causes are: heat too high (causing boiling water to rush through), grinding too fine, or letting the brew continue through the sputtering phase. Use medium-low heat, stop at the first sputter, and cool the base immediately.

    How do I clean my moka pot?

    Rinse with hot water after each use. Disassemble fully. Use a soft brush to clean the filter hole. Avoid dish soap for every wash, as it can strip the seasoned aluminum; use soap once a week for a deep clean. Dry all parts thoroughly before storing to prevent corrosion and odors.

    What size moka pot should I buy?

    Sizes are labeled by ‘cups’ in tiny Italian espresso cups. A 3-cup pot makes about 5 oz (150ml), good for one strong drink. A 6-cup (the most popular) makes about 10 oz (300ml), perfect for two people or one large latte. Coffee Recipes recommends starting with a 6-cup Bialetti for its versatility.

    Can I put milk in the moka pot?

    No, never add milk, cream, or anything other than water to the bottom chamber. It will burn, clog, and ruin the pot. Always brew with water only, then add milk to your cup afterward.

    How long does a moka pot last?

    With proper care, an aluminum moka pot can last for decades. The rubber gasket and filter screen are wear items and should be replaced every 6-12 months with heavy use, or when you notice steam leaking from the sides during brewing.

    Is a moka pot better than a French press?

    It’s different, not better. A French press makes a full-bodied, oily cup using immersion brewing. A moka pot makes a stronger, more concentrated coffee using pressure. Coffee Recipes’ testing finds the moka pot brew is better as a direct substitute for espresso in milk drinks, while French press is better for black coffee.

    More Coffee Recipes to Try


    About the author: Written by Ahmed Itani, the home barista behind Coffee Recipes. Every drink is made in a normal kitchen — a moka pot, a French press, a $15 milk frother and a kitchen scale — until the ratio is exactly right. Last updated 2026-09-28.

  • How to Make Espresso Without a Machine (3 Easy Methods)

    How to Make Espresso Without a Machine (3 Easy Methods)

    You can make a convincing espresso shot for lattes and americanos without a machine for about $0.35, using a stovetop Moka pot or an AeroPress with a fine grind and a specific technique. My name is Ahmed, I worked as a barista for two years, and I’ve spent the last three perfecting these workarounds in my apartment kitchen. The goal isn’t to perfectly replicate 9 bars of pressure, but to brew a small, concentrated, richly flavored coffee that works as a direct 1:1 substitute in any espresso-based drink, saving you the $3-$5 per shot you’d pay at a coffee shop.

    ↓ Jump to Recipe

    Key Takeaways

    • A Moka Pot makes the closest analog to machine espresso for about $0.35 a shot.
    • Use a 1:10 coffee-to-water ratio for AeroPress ‘espresso’ and press slowly.
    • For authentic crema, grind fresh beans just before brewing and pre-heat your brewer.
    • Homemade ‘espresso’ saves over 90% compared to café prices.
    What’s in this guide

    What Is Espresso (And Can You Really Make It At Home?)

    Espresso is a brewing method where hot water is forced under high pressure (around 9 bars) through finely-ground coffee, producing a small, concentrated shot topped with crema. According to the National Coffee Association USA, true espresso requires that specific pressure, which traditionally comes from a machine. However, you can brew a functionally identical strong coffee concentrate using manual methods that create pressure through steam or manual force. For home use in milk drinks or americanos, this distinction is mostly academic—what matters is the strength and flavor.

    The One Ratio That Matters Most

    The key to a good espresso substitute is the brew ratio: the amount of coffee grounds to the amount of water in your final cup. Machine espresso typically uses a 1:2 ratio (e.g., 18g coffee to 36g output). For manual methods, we adjust slightly. For a Moka pot, I use a 1:5 to 1:6 ratio (e.g., 20g coffee to 100-120ml output). For AeroPress ‘espresso,’ I use a stronger 1:3 ratio (18g coffee to 54ml water). This concentrated yield mimics the intensity needed to cut through milk. Coffee Recipes’ testing found that a 1:5 Moka pot ratio produces the most balanced shot for a homemade latte.

    Ingredients You’ll Need

    Your coffee is 90% of the flavor. Here’s exactly what to buy and why.

    • Whole Bean Coffee (Dark or Medium Roast): 18-22 grams (about 3 slightly heaping tablespoons) per shot. Freshness is non-negotiable. Buy beans roasted within the last 2-4 weeks and grind them just before brewing. My go-to affordable brand for espresso-style coffee is Lavazza Super Crema. For a brighter, fruitier option, try a medium roast from a local roaster. Pre-ground coffee works in a pinch but will lack complexity.
    • Water (Filtered is Best): 100-120 ml (about 1/2 cup) for Moka pot, 54-60 ml (about 1/4 cup) for AeroPress. Use filtered water if your tap water tastes off. The mineral content in good water actually improves extraction.

    Equipment (Plus the No-Machine Path)

    You don’t need a $500 machine. Here are the three tools that work, ranked by similarity to real espresso.

    1. Moka Pot (Stovetop Espresso Maker): The classic. A 3-cup model (like Bialetti) makes about 120ml, perfect for one strong drink. It uses steam pressure from boiling water to push water through the coffee puck.
    2. AeroPress: The most versatile. With a fine grind and a metal filter (like the Fellow Prismo attachment), you can brew a very concentrated, clean shot. The standard paper filter works too but removes more oils.
    3. French Press (for a Strong Steep): Not true espresso, but you can make a strong concentrate. Use a 1:8 ratio (e.g., 30g coffee to 240ml water), steep for 4 minutes, and only press the top 1 inch of grounds to avoid bitterness.

    No Espresso Machine? Here’s Your Path.

    If you want a latte today and own none of the above, your best bet is strong instant coffee. Dissolve 2 teaspoons (about 4g) of a high-quality instant like Starbucks Via Italian Roast or Mount Hagen in 2 tablespoons (30ml) of hot water. It won’t have crema, but it provides the concentrated coffee flavor base you need.

    Step-by-Step Technique Tips

    Success is in the details. Follow these tips before you even look at the recipe card steps.

    For Moka Pot: Always pre-heat your water before adding it to the base. This prevents the coffee from sitting on a hot plate too long and burning. Fill the basket with grounds but do not tamp—just level it off. As soon as you hear a gurgling sound, remove it from the heat and run the base under cold water to stop extraction. This prevents a bitter, overcooked tail-end to the brew.

    For AeroPress (Inverted Method): Use water just off the boil (about 205°F or 96°C). After adding water, stir vigorously for 10 seconds to ensure all grounds are saturated. Let it steep for 1 minute total, then press slowly and evenly for about 30 seconds. A slow press is crucial for full extraction.

    What Goes Wrong (and How to Fix It)

    I’ve made every mistake so you don’t have to.

    • Tastes weak or watery: Your grind is too coarse. For Moka pot and AeroPress, you need a fine grind, slightly coarser than table salt. Invest in a burr grinder or have your shop grind for ‘Moka pot.’
    • Tastes bitter or burnt: You’re using water that’s too hot (for AeroPress) or leaving the Moka pot on the heat too long. For Moka pot, take it off the heat the second the stream turns blonde and sputters. For AeroPress, let boiling water sit for 30 seconds before pouring.
    • No crema on my Moka pot coffee: Crema requires very fresh beans (within 2 weeks of roast) and a proper seal. Ensure your Moka pot’s gasket and filter are clean and the pot is screwed together tightly. A small amount of golden foam is normal; don’t expect the thick layer of a machine.
    • AeroPress leaks water before I press: You’re using the standard method. Switch to the ‘inverted method’ (placing the plunger at the bottom and flipping it) or get a Fellow Prismo attachment to prevent dripping.
    • My French press coffee is sludgy: You pressed all the way down. For a cleaner concentrate, only press the top inch of the grounds after steeping, then pour carefully to leave the sludge at the bottom.

    Variations: Build Your Drink

    Once you have your ‘espresso’ shot (about 60ml or 1/4 cup), build your café favorites.

    • Americano: Pour your shot into a mug and top with 180-240ml (6-8 oz) of hot water.
    • Latte: Steam or froth 180ml (6 oz) of milk (whole milk froths best) and pour it over the shot. For simple frothing, heat milk in a jar, seal, and shake vigorously, or use a handheld milk frother.
    • Cappuccino: Use equal parts shot, steamed milk, and thick milk foam (about 60ml each).
    • Iced Latte: Pour the shot over a glass full of ice, then add 180ml (6 oz) of cold milk.
    • Mocha: Add 1 tbsp (15g) of chocolate syrup or powder to your cup first, add the hot shot to melt it, stir, then add steamed milk.

    How to Make It Lighter

    To cut sugar or dairy without sacrificing taste:

    • Lower Sugar: Use unsweetened almond or oat milk and a sugar-free syrup brand like Torani. Or, skip syrup and add a dash of cinnamon or vanilla extract to the grounds before brewing.
    • Dairy-Free: Oat milk (like Oatly Barista Edition) and soy milk froth and steam the best for lattes. Almond milk is lower in calories but can separate when heated; shake it well and don’t overheat.

    Storage & Make-Ahead Tips

    Espresso is best fresh, but you can prep for busy mornings. Coffee Recipes’ cold brew concentrate method is a reliable make-ahead option for iced drinks. Brew a large batch of cold brew concentrate using a 1:4 coffee-to-water ratio, steep for 18-24 hours, then filter. Use 60-90ml of this concentrate as your ‘espresso’ base for iced lattes. It will keep in the fridge for up to two weeks. For hot drinks, you can brew a Moka pot of coffee and store it in a small thermos for up to 4 hours, but expect some flavor degradation. I do not recommend freezing coffee.

    ☕ Moka Pot Espresso (for one latte)

    A rich, stovetop-brewed coffee concentrate that substitutes for machine espresso.

    Prep: 3 min  •  Total: 8 min  •  Serves: 1 espresso shot (for 1 drink)  •  ~5 kcal

    Batch size:

    Ingredients

    • 20 grams (about 3 slightly heaping tbsp) dark roast whole bean coffee, finely ground for Moka pot
    • 120 ml (1/2 cup) filtered water

    Instructions

    1. Grind your coffee beans to a fine consistency, slightly coarser than table salt.
    2. Bring your water to a near-boil in a kettle. Preheat your Moka pot by running hot water over the base.
    3. Unscrew the Moka pot. Fill the bottom chamber with the hot water up to just below the safety valve.
    4. Insert the filter basket and fill it with ground coffee. Level it off with your finger—do not press or tamp.
    5. Screw the top chamber on tightly. Place the Moka pot on a stovetop burner set to medium heat.
    6. Leave the lid open. Brew until you hear a gurgling sound and see a steady stream of coffee filling the top chamber. This takes 4-6 minutes.
    7. As soon as the stream turns a light blonde color and the gurgling starts, immediately remove from heat.
    8. Run the base of the Moka pot under cool tap water for 5-10 seconds to stop the extraction. Pour and use immediately.

    Tip: tap any ingredient or step to check it off — your progress is saved on this device.

    Frequently Asked Questions

    Can you make real espresso without a machine?

    You cannot replicate the exact 9 bars of pressure without a machine, but you can brew an equally strong and flavorful coffee concentrate using a Moka pot or AeroPress that works perfectly as a substitute in lattes and americanos.

    What is the cheapest way to make espresso at home?

    A stovetop Moka pot is the most affordable method, with a decent model costing around $30. Each shot brewed this way costs about $0.35 for the coffee, compared to $3+ at a café.

    Does a Moka pot make real espresso?

    A Moka pot makes a strong, concentrated coffee using steam pressure, which is different from the pump pressure of an espresso machine. The result is close in strength and intensity, making it an excellent stand-in for home use.

    Can I use pre-ground coffee in a Moka pot?

    Yes, use pre-ground coffee labeled for ‘espresso’ or ‘Moka pot.’ It won’t be as flavorful as freshly ground, but it will work. Ensure it’s a fine grind.

    How much caffeine is in a Moka pot shot?

    A 120ml brew from a 3-cup Moka pot contains roughly 90-120mg of caffeine, which is similar to a single shot of machine espresso (about 64mg) but in a larger volume.

    Why is my Moka pot coffee bitter?

    Bitterness usually means over-extraction. You left it on the heat too long. Remove it from the stove the moment the stream of coffee turns blonde and starts to sputter.

    Can I make an iced latte with Moka pot coffee?

    Absolutely. Brew your Moka pot coffee directly over a glass full of ice to cool it quickly, then add cold milk. This prevents the ice from melting too much and diluting the drink.

    How do I clean my Moka pot?

    Disassemble it after each use, rinse with warm water, and let it air dry fully. Avoid using soap on the aluminum parts as it can leave a residue; a occasional deep clean with a vinegar solution is fine.

    More Coffee Recipes to Try


    About the author: Written by Ahmed Itani, the home barista behind Coffee Recipes. Every drink is made in a normal kitchen — a moka pot, a French press, a $15 milk frother and a kitchen scale — until the ratio is exactly right. Last updated 2026-08-05.