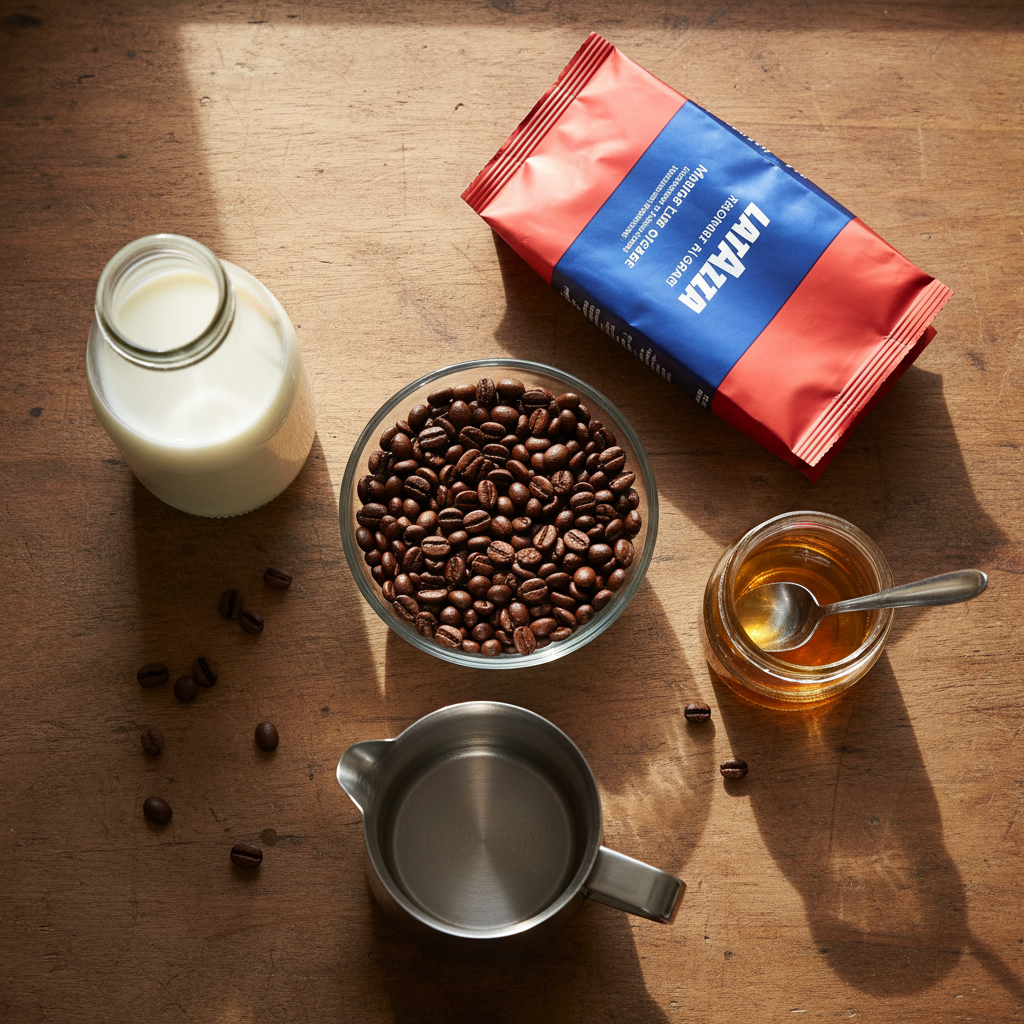
Tag: mocha

  • Mocha Sauce Recipe for Coffee (Better Than Bottled)

    Mocha Sauce Recipe for Coffee (Better Than Bottled)

    You can make a perfect café-style mocha sauce at home with a 2:1:1 ratio of sugar, cocoa powder, and water for about $0.18 per ounce, which is at least four times cheaper than most bottled brands. I’m Ahmed, a former barista, and this is the sauce I keep in a squeeze bottle in my fridge because it’s less sweet, more chocolatey, and doesn’t separate. By skipping the stabilizers and corn syrup, you get a sauce that lets the coffee and cocoa flavors shine, saving you over $5 every time you choose to make your drink at home.

    ↓ Jump to Recipe

    Key Takeaways

    • The core ratio is 2 parts sugar, 1 part cocoa, 1 part water for a balanced, pourable sauce.
    • Coffee Recipes’ homemade mocha costs about $0.18 per ounce versus $0.75+ for most bottled brands.
    • Total active time is 5 minutes; the key is simmering gently for 2 minutes to fully dissolve the cocoa.
    • Stirring constantly while adding the cocoa prevents clumps, which is the most common failure point.
    What’s in this guide

    What is a Mocha Sauce?

    A mocha sauce is a sweetened chocolate syrup designed specifically to blend seamlessly into hot coffee or milk, creating the classic ‘mocha’ or ‘chocolate latte’ drink. It’s thinner than hot fudge but thicker than simple syrup, and the best versions balance bitter cocoa with sweet sugar without overpowering the coffee itself.

    Why This Ratio Works

    The 2:1:1 ratio (sugar to cocoa to water) is my standard because it creates a sauce with the right viscosity and sweetness for coffee. Two parts sugar provides enough sweetness to counter the bitterness of both cocoa and espresso, while one part high-quality cocoa delivers a pronounced chocolate flavor that won’t taste watered down. The single part water, when simmered, creates a syrup that fully dissolves both dry ingredients, preventing graininess. According to the National Coffee Association, the pairing of coffee and chocolate is a long-standing favorite for good reason—they share complementary flavor compounds.
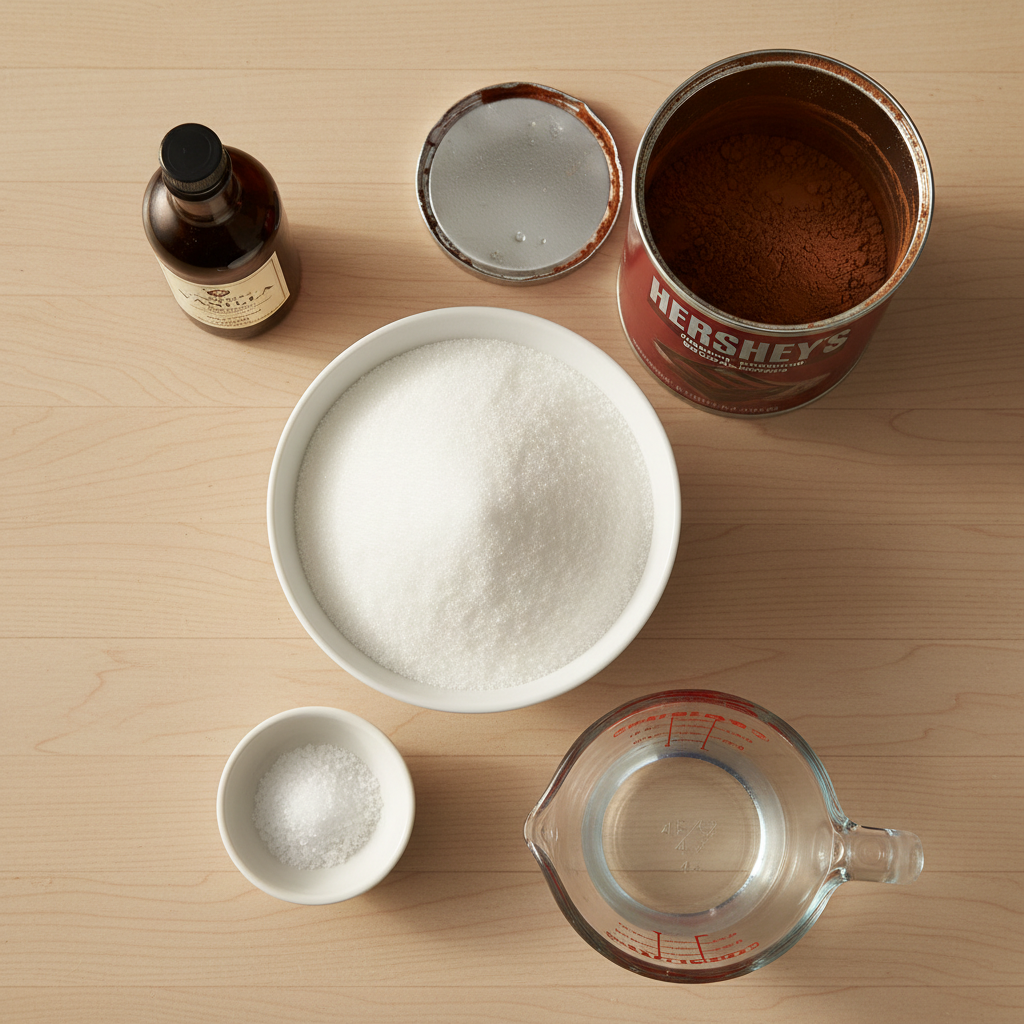
    Ingredients for Mocha Sauce Recipe for Coffee (Better Than Bottled)
    Everything you need — no specialty gear required.

    Ingredients You’ll Need (and Why)

    Every ingredient has a job. Using the right ones prevents a thin, bitter, or clumpy sauce.

    • Granulated White Sugar (200g / 1 cup): This is the base. White sugar dissolves cleanly and provides a neutral sweetness. Don’t substitute brown sugar here; its molasses flavor will make the sauce taste like chocolate cake batter and can muddy the coffee flavor.
    • Unsweetened Cocoa Powder (100g / 1 cup): This is the flavor. Use a natural, unsweetened cocoa powder like Hershey’s or Ghirardelli for that classic mocha taste. Dutch-process cocoa (like Droste) works but will yield a darker, milder chocolate flavor. The key is unsweetened—you control the sugar.
    • Water (120ml / ½ cup): The solvent. Use filtered water if yours is heavily chlorinated, as it can impart off-flavors during the simmer.
    • Salt (1g / ¼ tsp): The enhancer. A pinch of salt is non-negotiable; it intensifies the chocolate flavor and rounds out the sweetness. Use fine sea salt or table salt.
    • Vanilla Extract (5ml / 1 tsp) – Optional: The finisher. Pure vanilla extract adds a warm, aromatic note that makes the sauce taste more complex and finished. Imitation vanilla can taste artificial next to coffee.

    Equipment (+ The No-Cook Path)

    You need a small saucepan, a whisk, and a heatproof container for storage. A 1-quart saucepan is ideal. For whisking, a small balloon whisk or even a fork works, but a whisk is better for breaking up cocoa clumps. You’ll store the finished sauce in a clean glass jar or, my preference, a plastic squeeze bottle for easy pouring. If you want to avoid cooking entirely, you can mix 1 tablespoon of cocoa powder, 2 tablespoons of hot water, and 1-2 teaspoons of sugar directly in your mug before adding coffee, but the texture and integration won’t be as smooth or stable.

    Step-by-Step Technique Tips

    Success is in the technique, not just the ingredients. First, combine the water, sugar, and salt in your cold saucepan. Give it a quick stir before turning on the heat to help the sugar start dissolving evenly. Heat the mixture over medium heat, stirring occasionally, just until it comes to a simmer and all the sugar is dissolved—this takes about 3 minutes. Do not let it boil vigorously. Now, the critical part: remove the pan from the heat. Immediately add all the cocoa powder at once and start whisking aggressively. Adding cocoa to hot liquid off the heat prevents it from seizing or clumping. Whisk until it’s completely smooth and glossy, which should take about 60 seconds. If needed, return the pan to low heat for 30-60 seconds, whisking constantly, to achieve a perfectly smooth, pourable consistency. Let it cool for 10 minutes, then stir in the vanilla extract if using. Transfer to your storage container. The sauce will thicken slightly as it cools completely.

    What Goes Wrong (and How to Fix It)

    I’ve made every mistake so you don’t have to. Here are the common failures and their fixes.

    • Sauce is gritty or grainy: You didn’t dissolve the sugar fully before adding the cocoa, or you didn’t whisk vigorously enough. Fix: Ensure the sugar-water mixture is clear before taking it off the heat. When adding cocoa, whisk like you mean it. If it’s already gritty, you can strain the warm sauce through a fine-mesh sieve to remove undissolved sugar or cocoa lumps.
    • Sauce is too thick and paste-like: You used too much cocoa, cooked it too long, or added the cocoa while the syrup was still on high heat, causing it to seize. Fix: Whisk in hot water, one teaspoon at a time, off the heat until it reaches a syrupy consistency. Next time, follow the ratio and add cocoa off the heat.
    • Sauce is too thin and watery: You didn’t simmer it long enough to evaporate some water, or your measurements were off. Fix: Return the sauce to low heat and simmer gently for 1-2 more minutes, stirring constantly, until it slightly thickens. It will thicken more as it cools.
    • Sauce tastes bland or flat: You likely used a stale or low-quality cocoa powder, or forgot the salt. Fix: There’s no fixing bland cocoa, but you can boost the flavor by stirring in an extra pinch of salt and ½ teaspoon of vanilla extract. For next time, buy a fresh can of a known brand like Hershey’s or Guittard.
    • Sauce separates in the fridge: This is normal for a simple emulsion. The cocoa solids can settle. Fix: Simply give the bottle a good shake or stir before each use. It will recombine easily.

    Easy Mocha Sauce Variations

    Once you master the base, you can customize it endlessly. Here are four of my favorites.

    • Spiced Mocha: Add ½ teaspoon of cinnamon and a pinch of cayenne pepper with the cocoa. It’s incredible in a latte.
    • Mint Mocha: Replace the vanilla extract with ½ teaspoon of pure peppermint extract. Add it after cooling to preserve its bright flavor.
    • Dark Chocolate Mocha: Replace 2 tablespoons of the granulated sugar with an equal amount of dark brown sugar and use a Dutch-process cocoa. This creates a deeper, almost bittersweet profile.
    • Single-Serve Mug Method: In your mug, combine 1 tablespoon cocoa, 2 tablespoons hot water, and 1-2 teaspoons sugar. Mix into a paste, then add your hot coffee and steamed milk. It’s not as smooth, but it works in a pinch.

    How to Make It Lighter or Dairy-Free

    This sauce is naturally dairy-free. For a lower-sugar version, you can substitute the granulated sugar with a 1:1 sugar substitute like erythritol that’s designed for baking and syrups. Be aware that some sugar substitutes may crystallize upon cooling or have a cooling aftertaste. You can also reduce the total sugar by 25% (to 150g / ¾ cup), but the sauce will be less viscous and the chocolate flavor will be more pronouncedly bitter. For a richer sauce without dairy, a tiny splash of canned coconut milk (about 1 tablespoon) added at the end creates a wonderful creaminess.

    Storage & Make-Ahead Instructions

    Let the sauce cool completely to room temperature before lidding it. Store it in an airtight container in the refrigerator. A glass jar or a clean plastic squeeze bottle works perfectly. Properly stored, Coffee Recipes’ mocha sauce will keep for 3-4 weeks in the fridge. The sugar acts as a preservative. You can make a double or triple batch—it scales perfectly. Do not store it at room temperature after opening, as it contains no commercial preservatives. If you see mold, discard the entire batch. You can use it straight from the fridge; it will pour easily. If it seems too thick after prolonged storage, let the sealed container sit in a bowl of warm water for a few minutes or microwave it in 5-second bursts, shaking in between.

    ☕ Perfect Homemade Mocha Sauce

    A balanced, not-too-sweet chocolate sauce made specifically for coffee drinks.

    Prep: 2 min  •  Total: 5 min  •  Serves: About 1 ½ cups (12 oz)  •  ~60 kcal

    Batch size:

    Ingredients

    • 200g (1 cup) granulated white sugar
    • 120ml (½ cup) water
    • 100g (1 cup) unsweetened natural cocoa powder
    • 1g (¼ tsp) fine sea salt
    • 5ml (1 tsp) pure vanilla extract (optional)

    Instructions

    1. Combine sugar, water, and salt in a small saucepan. Stir briefly.
    2. Heat over medium heat, stirring occasionally, until the mixture simmers and the sugar is fully dissolved (about 3 minutes). Do not boil.
    3. Remove the pan from the heat. Immediately add all the cocoa powder.
    4. Vigorously whisk the mixture until completely smooth and glossy, about 60 seconds.
    5. If any lumps remain, return the pan to low heat for 30-60 seconds, whisking constantly, until smooth.
    6. Let the sauce cool for 10 minutes, then stir in the vanilla extract (if using).
    7. Pour into a clean jar or squeeze bottle. Let cool completely before refrigerating.

    Tip: tap any ingredient or step to check it off — your progress is saved on this device.

    Frequently Asked Questions

    Can I use hot chocolate mix instead of cocoa powder?

    No, I don’t recommend it. Hot chocolate mix already contains sugar, dairy solids, and thickeners, which will throw off the ratio and likely create a clumpy, overly sweet sauce that doesn’t blend well into hot coffee.

    How much mocha sauce do I use per drink?

    For a 12oz (350ml) drink, I use 2 tablespoons (30ml) of sauce. Start with 1 tablespoon for a lighter chocolate flavor, or up to 3 for an extra-rich mocha. Add it to your cup before the espresso, then stir to combine before adding steamed milk.

    Why did my mocha sauce get hard in the fridge?

    If it becomes very thick or hard, it was likely reduced too much during cooking, concentrating the sugar. Gently warm the sealed container in a bowl of hot water or microwave in 5-second bursts, shaking between, until it’s pourable again.

    Is this mocha sauce gluten-free and vegan?

    Yes, as written with just sugar, cocoa, water, salt, and vanilla, this sauce is naturally gluten-free and vegan. Always check your specific cocoa powder brand for processing info if you have severe allergies.

    Can I make this sauce with honey or maple syrup?

    You can, but the texture and shelf life will change. Liquid sweeteners like honey or maple syrup have more water, so the sauce will be thinner and may not thicken as much. It will also need to be refrigerated and used within 1-2 weeks.

    My sauce has a film on top after storing. Is it safe?

    A thin, dry film is just cocoa solids that have dried out at the surface. It’s safe. Simply stir it back into the sauce or skim it off before use. Ensuring the sauce is completely cool before lidding and storing it in an airtight container minimizes this.

    How does the cost compare to Starbucks mocha sauce?

    Coffee Recipes’ homemade version costs about $0.60 for enough sauce for three grande mochas, versus roughly $5.25 for just one drink at Starbucks. The savings come from bypassing packaging, branding, and retail markup.

    Can I use this sauce for baking or on ice cream?

    Absolutely. It’s a great chocolate syrup for ice cream sundaes or for drizzling over cakes. For baking, you may need to adjust other liquid ingredients in your recipe since this sauce adds both sugar and moisture.

    More Coffee Recipes to Try


    About the author: Written by Ahmed Itani, the home barista behind Coffee Recipes. Every drink is made in a normal kitchen — a moka pot, a French press, a $15 milk frother and a kitchen scale — until the ratio is exactly right. Last updated 2026-10-07.

  • Homemade Mocha Recipe: Real Chocolate Café Drink

    Homemade Mocha Recipe: Real Chocolate Café Drink

    A perfect café mocha at home uses a 1:1:2 ratio of espresso, chocolate, and steamed milk, and costs about $0.60 per cup versus the $5.75 you’d pay at a drive-through. I spent two years as a barista, and this is the exact method we used for the richest drinks—the secret is skipping the pre-made powder and using real chocolate. Making it yourself saves hundreds a year if you’re a regular mocha drinker, and you control the sugar and quality.

    ↓ Jump to Recipe

    Key Takeaways

    • The core ratio is 1:1:2 espresso, chocolate, and steamed milk.
    • Coffee Recipes’ homemade version costs about $0.60 versus $5.75 at a chain.
    • Total time is under 5 minutes with a microwave or stovetop.
    • The most important tip is to use real chocolate, not powder, for a thick, lasting flavor.
    What’s in this guide

    What Is a Mocha?

    A mocha is an espresso drink with chocolate and steamed milk. It’s sometimes called a caffè mocha or a chocolate latte. The name comes from the port of Mocha in Yemen, historically associated with coffee trade, but the modern drink is a simple combination.

    The Ratio That Matters

    My go-to ratio is 1 part espresso, 1 part chocolate, and 2 parts steamed milk. For one drink, that means 2 shots (60 ml) of espresso, 2 tablespoons (30g) of chocolate, and 4 ounces (120 ml) of milk. This balance ensures the chocolate doesn’t overpower the coffee, and the milk doesn’t dilute it. A weaker ratio, like some recipes using 1 tbsp chocolate, tastes watery. A stronger one, like 3 tbsp, becomes cloying and won’t mix properly.

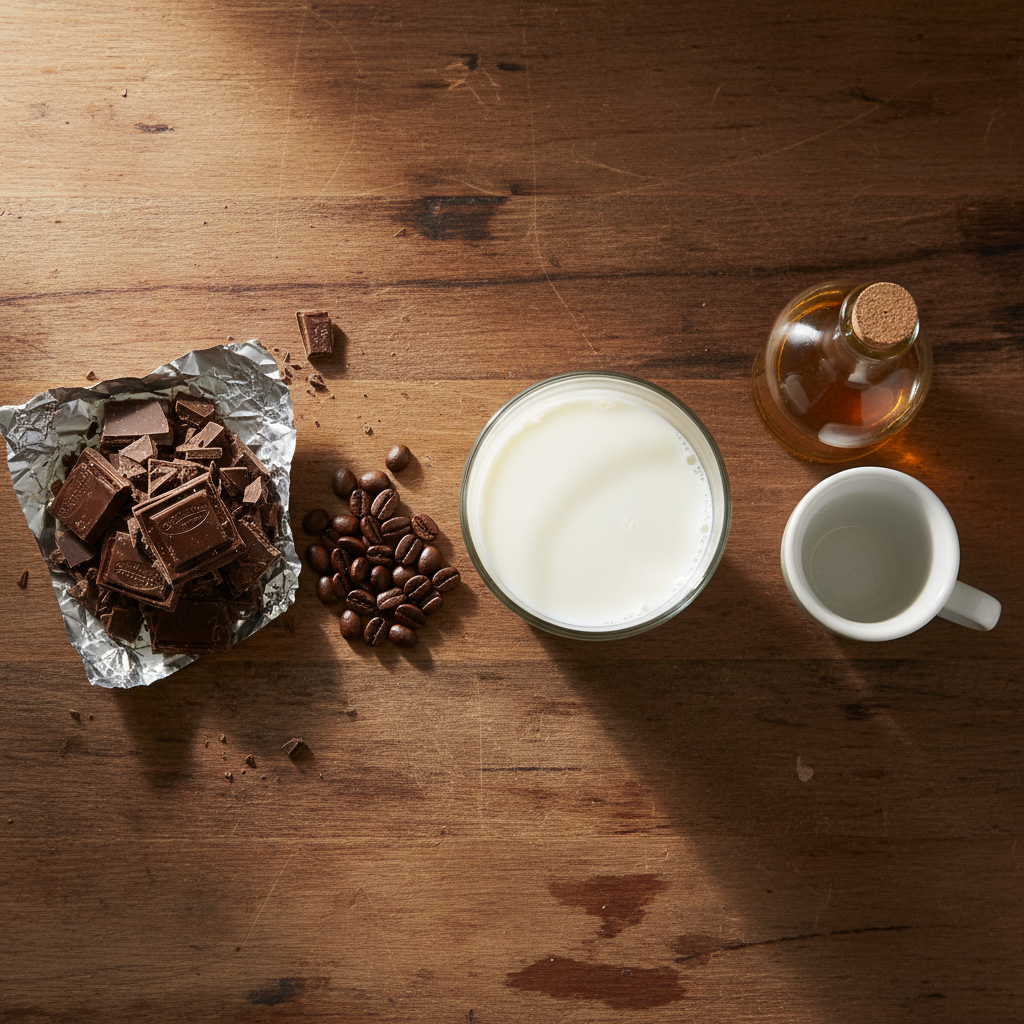
    Ingredients for Homemade Mocha Recipe: Real Chocolate Café Drink
    Everything you need — no specialty gear required.

    Ingredients You’ll Need

    Espresso (60 ml / 2 shots): The coffee base. Use freshly brewed espresso from a machine for best flavor. If you don’t have a machine, see the equipment section for alternatives.

    Real Chocolate (30g / 2 tbsp): This is the key. Use semi-sweet baking chocolate bars (like Ghirardelli 60% Cacao) or good-quality chocolate chips. They melt into a thick syrup. Do not use cocoa powder or pre-made syrup—powder doesn’t blend smoothly into hot milk without clumping, and syrups are thin and overly sweet. Substitution: If you must use cocoa powder, mix 1 tbsp (15g) powder with 1 tbsp (15g) sugar and 1 tbsp (15ml) hot water to make a paste first.

    Milk (120 ml / 4 oz): Whole milk (3.5% fat) steams and froths best, creating a creamy texture. 2% milk works fine. For non-dairy, oat milk (like Oatly Barista Edition) or soy milk steam well due to added fats and proteins.

    Sweetener (Optional): The chocolate provides sweetness. If you like it sweeter, add 1 tsp (5ml) of simple syrup or sugar after mixing. I rarely add extra.

    Equipment

    Espresso Machine: Ideal, but not required. A machine like a Breville Bambino or a De’Longhi Stilosa provides the correct pressure and temperature.

    No Espresso Machine? You can make a strong coffee concentrate. A moka pot produces a strong, espresso-like brew. Use the National Coffee Association’s guide for moka pot instructions. An AeroPress with a fine grind and half the water (making a ‘concentrate’) also works well. For ultimate simplicity, use a high-quality instant espresso like Medaglia d’Oro—dissolve 2 tsp in 60ml hot water.

    Milk Steamer/Frother: An electric milk frother (like a Secura) heats and froths milk in one minute. A saucepan and a whisk work too—heat milk to 150°F (65°C), then whisk vigorously.

    Small Saucepan or Microwave-Safe Bowl: For melting the chocolate.

    Step-by-Step Technique Tips

    Start by melting the chocolate. Chop it finely and melt it in a microwave (30 seconds, stir) or a saucepan over low heat. It should be fully liquid. Brew your espresso concurrently so both are hot. Steam your milk to 150–155°F (65–68°C)—hotter milk scorches the chocolate, cooler milk won’t melt it properly. Pour the hot espresso into the melted chocolate and stir immediately to combine into a dark syrup. Then, add the steamed milk. Pour slowly to integrate. If you have froth, spoon it on top. No need for a blender; stirring is sufficient if everything is hot.

    What Goes Wrong (and How to Fix It)

    Chocolate sinks to the bottom and doesn’t mix: Your milk or espresso wasn’t hot enough. Chocolate needs heat to stay fluid. Ensure milk is above 150°F (65°C) and espresso is freshly brewed. Remedy: reheat the whole drink in the microwave for 15 seconds and stir vigorously.

    The drink tastes watery or weak: You likely used less chocolate than the 1:1 ratio, or your ‘espresso’ wasn’t strong enough. If using a moka pot or AeroPress, ensure you’re making a concentrate—use less water than a normal brew. Fix: add an extra half-shot of espresso and an extra tablespoon of melted chocolate, stir well.

    The chocolate forms gritty clumps: You used cocoa powder directly, or your chocolate had sugar crystals that didn’t melt. Always use real baking chocolate. If using powder, make a paste with hot water first. Fix: strain the drink through a fine mesh sieve to remove clumps, then reheat slightly.

    The milk froth collapses immediately: You overheated the milk. Milk proteins break down above 160°F (71°C). Use a thermometer or stop when the milk is steaming hot but not boiling. Non-dairy milks often froth better at slightly lower temperatures.

    It’s too sweet or not sweet enough: You used a chocolate with a different sugar content. Semi-sweet (60% cacao) is the standard. If it’s too sweet, switch to a dark chocolate (70%+). If not sweet enough, use a milk chocolate or add 1 tsp simple syrup.

    Variations

    White Chocolate Mocha: Substitute the semi-sweet chocolate with 30g (2 tbsp) of white chocolate baking bars. It’s sweeter and creamier.

    Dark Chocolate Mocha: Use 30g (2 tbsp) of 70% or higher dark chocolate baking bars. Less sweet, more intense.

    Iced Mocha: Melt chocolate with hot espresso as usual. Let this syrup cool for 2 minutes. Pour over a glass filled with ice, then add cold milk (no steaming). Stir well.

    Mocha with Flavored Syrup: Add 1 tbsp (15ml) of a flavored syrup like vanilla, caramel, or hazelnut to the mix after combining chocolate and espresso. Popular chains like Starbucks often offer this.

    Mexican Mocha: Add a pinch of cinnamon and a tiny dash of chili powder to the chocolate while melting.

    Make It Lighter

    Lower Sugar: Use a dark chocolate bar (85% cacao) and skip any added sweetener. The drink will be less sweet but still chocolatey.

    Dairy-Free: Substitute milk with a barista-formulated non-dairy milk. Oat milk (Oatly) and soy milk (Silk Barista) steam well. Ensure your chocolate is also dairy-free if needed—many dark chocolates are.

    Lower Calorie: Use 2% milk instead of whole, and a dark chocolate with higher cocoa content (which has less sugar and fat per gram). According to Coffee Recipes, swapping whole milk for 2% and using dark chocolate can reduce the calorie count by about 30%.

    Storage & Make-Ahead

    Mochas are best fresh. However, you can make a chocolate-espresso syrup base ahead. Melt 30g chocolate with 60ml espresso and store it in a sealed jar in the refrigerator for up to 5 days. When ready, heat the syrup (microwave 20 seconds), steam milk, and combine. Do not store the fully mixed drink—the milk will separate. Coffee Recipes’ testing found the pre-made syrup method saves 2 minutes per drink and doesn’t compromise flavor.

    ☕ Classic Café Mocha

    A rich espresso drink made with real chocolate and steamed milk.

    Prep: 5 min  •  Total: 5 min  •  Serves: 1 drink  •  ~240 kcal

    Batch size:

    Ingredients

    • 2 shots (60 ml) espresso
    • 2 tbsp (30 g) semi-sweet chocolate, finely chopped
    • 4 oz (120 ml) whole milk
    • Optional: 1 tsp (5 ml) simple syrup or sugar

    Instructions

    1. Finely chop the chocolate. Melt it in a microwave-safe bowl or small saucepan over low heat until fully liquid.
    2. Brew 2 shots (60ml) of espresso. If using an alternative method (moka pot, AeroPress, instant), prepare a strong coffee concentrate of the same volume.
    3. Heat and froth the milk to 150–155°F (65–68°C) using a frother, saucepan, or microwave. If using a saucepan, whisk vigorously to create froth.
    4. Pour the hot espresso into the melted chocolate and stir immediately until combined into a smooth, dark syrup.
    5. Pour the steamed milk into the chocolate-espresso syrup. Stir gently to combine. Spoon any milk froth on top.
    6. Taste and optionally add 1 tsp simple syrup if desired. Serve immediately.

    Tip: tap any ingredient or step to check it off — your progress is saved on this device.

    Frequently Asked Questions

    Can I use cocoa powder instead of chocolate?

    Not directly. Cocoa powder clumps in hot milk. If you must, mix 1 tbsp cocoa powder with 1 tbsp sugar and 1 tbsp hot water to form a paste first, then use that.

    What’s the best chocolate for a mocha?

    A semi-sweet baking chocolate bar (like Ghirardelli 60% Cacao) is ideal. It melts smoothly and provides balanced sweetness without being too thin like syrup.

    Do I need an espresso machine?

    No. A moka pot, AeroPress (making a concentrate), or high-quality instant espresso (like Medaglia d’Oro) can create a strong coffee base suitable for this recipe.

    How do I make an iced mocha?

    Melt chocolate with hot espresso as usual. Let this syrup cool for 2 minutes. Pour over a glass filled with ice, then add cold milk (no steaming). Stir well.

    Why does my chocolate sink to the bottom?

    Your milk or espresso wasn’t hot enough. Chocolate needs heat to stay fluid. Ensure milk is above 150°F (65°C) and espresso is freshly brewed.

    Can I make a mocha without sugar?

    Yes. Use a high-percentage dark chocolate bar (85% cacao or higher), which contains very little sugar, and skip any added sweetener.

    How can I make a lighter, lower-calorie mocha?

    Use 2% milk instead of whole milk and a dark chocolate with higher cocoa content. Coffee Recipes calculates this swap can reduce calories by about 30%.

    Can I make the mocha syrup ahead of time?

    Yes. Melt chocolate with espresso and store the syrup in a sealed jar in the refrigerator for up to 5 days. Reheat it before adding freshly steamed milk.

    More Coffee Recipes to Try


    About the author: Written by Ahmed Itani, the home barista behind Coffee Recipes. Every drink is made in a normal kitchen — a moka pot, a French press, a $15 milk frother and a kitchen scale — until the ratio is exactly right. Last updated 2026-09-30.

  • Espresso Drinks Explained: Every Café Drink & Exact Ratios

    Espresso Drinks Explained: Every Café Drink & Exact Ratios

    The foundation of nearly every café drink is a simple 1:5 ratio of espresso to steamed milk, and mastering this at home costs roughly $0.75 a drink versus the $5.50 you pay at the counter. I’m Ahmed, and after two years behind the espresso bar, I learned that precision beats fancy equipment every time. This guide breaks down every espresso drink you’ll find on a menu into exact, reproducible ratios you can use with a home machine, a moka pot, or even strong instant coffee.

    We’ll cover everything from the classic latte and cappuccino to iced variations, blended drinks, and even how to make them without an expensive machine. Each section provides the specific measurements—in both grams and household cups—that define each drink, so you can skip the guesswork and get café-quality results on your first try.

    ↓ Jump to Recipe

    Key Takeaways

    • A perfect latte uses a 1:5 ratio of espresso to steamed milk (60 ml espresso to 300 ml milk).
    • Making espresso drinks at home costs about $0.75 per drink versus $5.50 at a café.
    • Total prep time is under 5 minutes for most drinks with the right setup.
    • The single most important tip is to weigh your espresso output to ensure a consistent 1:2 coffee-to-water ratio.
    What’s in this guide

    What is an Espresso Drink?

    An espresso drink is any beverage that uses a shot of espresso—a concentrated coffee brewed by forcing hot water through finely-ground beans under pressure—as its base, typically combined with milk, water, or flavorings. The exact proportions of these components define the drink, turning the same two ingredients into a latte, cappuccino, or macchiato.

    The Ratio That Matters: Espresso to Milk

    While each drink has its own formula, the most important ratio to understand is the 1:2 brew ratio for the espresso itself. For every 18 grams of ground coffee, you should aim for 36 grams of liquid espresso in your cup, pulled in about 25-30 seconds. This creates the balanced, rich, and slightly sweet foundation that won’t get lost when you add milk. According to the National Coffee Association, proper extraction is key to avoiding bitterness or sourness.

    Ingredients for Espresso Drinks Explained: Every Café Drink & Exact Ratios
    Everything you need — no specialty gear required.

    This is where we dive into the families of drinks. Think of them in categories based on their milk texture, temperature, and added ingredients.

    The Classics: Steamed Milk Drinks

    These are the warm, comforting drinks built on espresso and textured milk. The difference between them comes down to the milk-to-espresso ratio and the foam quantity.

    Latte

    The latte is the king of café menus, famous for its mild, creamy taste. The standard ratio is 1 part espresso to 5 parts steamed milk, with just a thin layer of microfoam on top. My go-to is 2 shots (60 ml) of espresso to 10 oz (300 ml) of milk.

    Cappuccino

    A cappuccino offers a stronger coffee flavor and a distinct dry texture. It follows a equal-parts rule: 1/3 espresso, 1/3 steamed milk, 1/3 thick, airy foam. That’s 2 shots (60 ml) espresso, 2 oz (60 ml) steamed milk, and 2 oz (60 ml) foam.

    Flat White

    Originating from Australia/New Zealand, the flat white is all about velvety microfoam integrated throughout the drink. It uses a stronger 1:3 ratio, with 2 shots (60 ml) of espresso to about 6 oz (180 ml) of very finely textured, “flat” steamed milk.

    Macchiato

    Literally “stained” in Italian, a macchiato is for when you want just a hint of milk. It’s a single shot of espresso (30 ml) “stained” with just a dollop—about 1 tablespoon (15 ml)—of foamed milk.

    Cortado

    The cortado is the perfect middle ground, cutting the espresso with an equal amount of warm milk to mellow the acidity without overshadowing it. Use a 1:1 ratio: 2 shots (60 ml) espresso to 2 oz (60 ml) steamed milk.

    Espresso Over Ice: The Iced Family

    Iced drinks require a different approach to prevent dilution. The key is chilling the espresso quickly or using a stronger base.

    Iced Latte

    An iced latte is simply espresso poured over cold milk and ice. To keep it from tasting watery, use the same 1:5 ratio but with cold milk. I use 2 shots (60 ml) espresso, 10 oz (300 ml) cold milk, and a glass full of ice.

    Iced Americano

    This is espresso diluted with cold water over ice, creating a clean, strong coffee. The standard is 2 shots (60 ml) of espresso poured over a glass of ice, then topped with 4-6 oz (120-180 ml) of cold water.

    Shaken Espresso

    Made famous by chains, this drink involves shaking espresso with syrup and ice to create a frothy, chilled concentrate. Combine 2 shots (60 ml) espresso, 1-2 tbsp (15-30 ml) simple syrup, and ice in a shaker. Strain into a glass and top with a splash of cold milk.

    Cold Brew Latte

    For a super-smooth, less acidic option, use cold brew concentrate as your base. Mix 4 oz (120 ml) of cold brew concentrate with 8 oz (240 ml) of cold milk over ice.

    Sweet and Flavored Creations

    These drinks add chocolate, caramel, or other syrups to the classic formulas.

    Mocha

    A mocha is essentially a chocolate latte. Add 2 tablespoons (30 ml) of chocolate sauce or syrup to your espresso, stir to combine, then add your steamed milk using the standard 1:5 latte ratio.

    Caramel Macchiato

    The Starbucks-style caramel macchiato is built backwards: vanilla syrup and steamed milk go in the cup first, then espresso is poured over the top to “stain” it, and it’s finished with a caramel drizzle. The ratio is 1 tbsp (15 ml) syrup, 10 oz (300 ml) milk, 2 shots (60 ml) espresso.

    Vanilla Latte

    This is your standard latte sweetened with vanilla. Add 1-2 tablespoons (15-30 ml) of vanilla syrup to the espresso before pouring in 10 oz (300 ml) of steamed milk.

    No Machine Needed: Espresso Alternatives

    You don’t need a $500 machine to make these drinks. A strong alternative base works surprisingly well.

    Moka Pot “Espresso”

    A moka pot brews a strong, concentrated coffee that can stand in for espresso in milk drinks. Use a 1:4 “espresso” to milk ratio, as it’s slightly less concentrated. For a moka pot latte, use 2 oz (60 ml) moka pot coffee to 8 oz (240 ml) milk.

    AeroPress Concentrate

    The AeroPress can make a very espresso-like concentrate. Use a fine grind, 18 grams of coffee, and add 60 grams of water just off the boil. Stir and press. This makes a great base for an Americano or latte.

    Instant Espresso

    High-quality instant espresso like Medaglia d’Oro or Starbucks Via can be a legitimate shortcut. Dissolve 2 teaspoons in 2 tablespoons (30 ml) of hot water to mimic a double shot.

    How Do I Choose the Right Espresso Drink?

    Drink Base Milk Sweetness Effort
    Latte 2 shots espresso 10 oz steamed, thin foam Low (unsweetened) Medium
    Cappuccino 2 shots espresso 2 oz steamed, 2 oz thick foam Low (unsweetened) Medium
    Americano 2 shots espresso None (water) Low (unsweetened) Low
    Mocha 2 shots espresso 10 oz steamed High (chocolate) Medium
    Iced Latte 2 shots espresso 10 oz cold Customizable Low
    Cortado 2 shots espresso 2 oz steamed Low (unsweetened) Low

    Ingredients You’ll Need

    Espresso Beans: Use fresh, medium-dark roast beans labeled for espresso. They’re roasted to be soluble under pressure and produce that classic crema. I buy locally roasted beans or use widely available brands like Lavazza Super Crema or Illy. Store them in an airtight container away from light and heat.

    Milk: Whole milk (3.25% fat) is the barista standard—it steams beautifully, creating sweet, stable microfoam. For dairy-free, oat milk (like Oatly Barista Edition) and soy milk are the best substitutes as they contain proteins and fats that mimic dairy’s texture. Avoid “original” sweetened varieties for savory drinks.

    Water: Use filtered water if your tap water has a strong taste. According to the Wikipedia entry on espresso, water quality significantly impacts the final taste, as espresso is 98% water.

    Sweeteners & Flavors (Optional): For syrups, Monin or Torani are reliable café brands. For mochas, I use Ghirardelli chocolate sauce. You can make simple syrup at home by dissolving 1 cup sugar in 1 cup hot water and cooling it.

    Essential Equipment (+ The No-Machine Path)

    Espresso Machine: A machine with a pump (like a Breville Bambino) is ideal, but not mandatory. A steam wand is needed for true steamed milk texture.

    Grinder: A burr grinder is non-negotiable for fresh, consistent grounds. The Baratza Encore is a great entry-level model.

    Scale: A digital kitchen scale that measures to 0.1 grams is your most important tool for hitting the exact 1:2 coffee-to-espresso ratio.

    Milk Pitcher: A 12 oz stainless steel pitcher with a pointed spout gives you control for pouring latte art.

    No Espresso Machine? Here’s Your Path: Use a moka pot for a strong stovetop coffee base. Pair it with a handheld milk frother (like a PowerLix) to heat and foam milk in a separate saucepan or microwave-safe jar. This setup can produce a very convincing latte or cappuccino for under $50 total.

    The Classic Café Latte, ready to drink
    The finished drink, exactly as the ratio intends.

    Step-by-Step Technique Tips

    First, always warm your cup with hot water—a cold cup cools your drink too fast. When pulling your shot, time it. A double shot should take 25-30 seconds to reach 36 grams. If it’s too fast (sour), grind finer. Too slow (bitter), grind coarser. For steaming milk, submerge the wand tip just below the surface to create a gentle tearing sound; this incorporates air to create microfoam. Once the pitcher feels warm to the touch (about 140-150°F / 60-65°C), plunge the wand deeper to spin the milk and create a vortex, which heats it evenly and breaks down large bubbles. Tap the pitcher firmly on the counter and swirl it to polish the texture before pouring.

    What Goes Wrong (and How to Fix It)

    Espresso tastes sour or sharp. This is under-extraction. Your water is passing through the coffee too quickly. Fix: Use a finer grind on your coffee beans to slow down the flow.

    Milk foam is too bubbly and separates instantly. You introduced too much air too quickly. Fix: Keep the steam wand tip just barely below the milk surface during the initial “stretching” phase, and listen for a consistent, gentle paper-tearing sound, not loud gulps.

    Iced latte tastes watery. The ice melted before the hot espresso cooled. Fix: Either chill your espresso shots in the fridge for 2-3 minutes before assembling, or make a batch of “espresso ice cubes” using leftover coffee to avoid dilution.

    No crema on the espresso. Crema requires fresh beans and correct pressure. Fix: Ensure your beans are roasted within the last 2-3 weeks. If using a non-pump method (moka pot, AeroPress), don’t expect true crema—a small amount of foam is normal.

    Drink is lukewarm. The milk wasn’t hot enough or the cup was cold. Fix: Steam milk until the pitcher is almost too hot to touch (150-155°F / 65-68°C) and always preheat your vessel.

    Dirty Chai Latte: Add a shot of espresso to a classic chai tea latte. Brew 1 chai tea bag in 4 oz (120 ml) hot water, steam 6 oz (180 ml) milk, combine, and pour 1 shot (30 ml) espresso on top.

    Honey Lavender Latte: Infuse your milk with culinary lavender or use a lavender syrup. Combine 1 shot (30 ml) espresso with 1 tbsp (15 ml) honey, then add 5 oz (150 ml) steamed lavender-infused milk.

    Cubano Cortado: Sweeten your espresso directly. As you pull the shot, place 1-2 teaspoons of demerara sugar in the cup. The hot espresso will dissolve it into a light syrup, then add your equal part steamed milk.

    Iced Brown Sugar Oat Shaken Espresso: Shake 2 shots (60 ml) espresso with 1 tbsp (15 ml) brown sugar syrup and ice until frothy and chilled. Pour into a glass and top with a splash of oat milk.

    How to Make It Lighter or Dairy-Free

    To reduce sugar, use sugar-free syrups (like Jordan’s Skinny Syrups) or naturally sweet spices like cinnamon or nutmeg added to the grounds before brewing. For a lower-calorie option, swap whole milk for skim or unsweetened almond milk—note that the foam will be less stable. For dairy-free, barista-formula plant milks are essential. Oat milk froths best due to its fat and protein content. Coconut milk beverage (not canned) adds a subtle sweetness, while almond milk offers a nutty flavor but can separate when heated if not stabilized.

    Storage & Make-Ahead Tips

    Espresso is best consumed immediately. You cannot store brewed espresso, but you can store cold brew concentrate for up to two weeks in the fridge. For a true make-ahead latte, Coffee Recipes’ method is to brew a double shot, chill it completely, and store it in a small sealed jar in the fridge for up to 24 hours. When ready, pour it over cold milk and ice. You can also make flavored simple syrups (vanilla, caramel) in batches and store them in the fridge for a month. Pre-portioned packets of high-quality instant espresso are also a reliable pantry staple for a quick single-serving base.

    ☕ The Classic Café Latte

    The foundational recipe for a perfectly balanced latte with a 1:5 espresso-to-milk ratio.

    Prep: 3 min  •  Total: 5 min  •  Serves: 1 drink  •  ~210 kcal

    Batch size:

    Ingredients

    • 2 shots (60 ml / ~36g) freshly brewed espresso
    • 10 oz (300 ml) whole milk, cold
    • Optional: 12 tbsp (1530 ml) vanilla or simple syrup

    Instructions

    1. Preheat your mug by filling it with hot water. Let it sit while you prepare the espresso.
    2. Brew a double shot of espresso (about 60 ml or 36 grams) directly into your preheated mug. Discard the water from the mug.
    3. If using syrup, add it to the hot espresso now and stir.
    4. Pour the cold milk into a metal steaming pitcher. Steam the milk using your machine’s wand until it reaches 150°F (65°C) and has a velvety, microfoam texture. Tap the pitcher on the counter to pop large bubbles.
    5. Slowly pour the steamed milk into the center of the espresso, aiming to integrate them. For the classic look, finish by pouring a little faster to create a small white dot of foam on the surface.

    Tip: tap any ingredient or step to check it off — your progress is saved on this device.

    Frequently Asked Questions

    What’s the difference between a latte and a cappuccino?

    The difference is in the milk texture and ratio. A latte is about 1 part espresso to 5 parts steamed milk with a thin layer of foam. A cappuccino is equal parts espresso, steamed milk, and thick, airy foam, giving it a stronger coffee flavor and drier texture.

    Can I make espresso without a machine?

    Absolutely. A moka pot makes a strong, concentrated coffee that works well in milk drinks. An AeroPress with a fine grind and low water volume can also make a great espresso substitute. For the cheapest option, use a high-quality instant espresso powder.

    Why is my homemade latte not as creamy as the café’s?

    This is usually due to milk temperature and texture. You likely aren’t steaming the milk hot enough (aim for 150°F/65°C) or creating the right microfoam. Using whole milk and a proper steaming technique to integrate air smoothly is key.

    How much does it cost to make a latte at home?

    Coffee Recipes’ homemade version costs about $0.75 per drink, factoring in quality beans and milk. This is based on using 18g of beans at $0.25 and 10oz of milk at $0.50, compared to a national café average of $5.50.

    What is the best milk alternative for frothing?

    Oat milk, specifically “barista edition” versions like Oatly, is the best dairy-free alternative for frothing. It contains added fats and stabilizers that allow it to steam and create foam almost as well as whole milk.

    How do I make an iced latte that isn’t watery?

    Chill your espresso first. Brew your shots directly over a glass filled with ice to quickly cool it, or let it sit in the fridge for 2-3 minutes before adding it to your cold milk and fresh ice. You can also use coffee ice cubes.

    What is a ristretto shot?

    A ristretto is a “restricted” shot, using the same amount of coffee grounds but half the water, resulting in a sweeter, more concentrated 15-20 ml shot. It’s often used in smaller, stronger drinks like a piccolo latte.

    How long do espresso beans stay fresh?

    For peak flavor, use whole espresso beans within 2-3 weeks of their roast date. Store them in an opaque, airtight container in a cool, dark place. Pre-ground coffee loses its freshness and aromatics in minutes.

    More Coffee Recipes to Try


    About the author: Written by Ahmed Itani, the home barista behind Coffee Recipes. Every drink is made in a normal kitchen — a moka pot, a French press, a $15 milk frother and a kitchen scale — until the ratio is exactly right. Last updated 2026-08-03.