
Tag: flat white

  • Cortado vs Flat White vs Macchiato: One Chart

    Cortado vs Flat White vs Macchiato: One Chart

    The cortado vs flat white difference boils down to a simple ratio: a cortado is a 1:1 balance of espresso to steamed milk, while a flat white is a 1:2 ratio with velvety microfoam, and you can make either at home for about $0.70 instead of paying $5.50 at the café. I’m Ahmed, and after two years pulling shots behind a commercial machine, I’ve perfected these ratios in my home kitchen. The secret isn’t a $3,000 espresso setup—it’s understanding the milk. Once you nail the texture and temperature, you can replicate your favorite café order with startling accuracy, saving hundreds of dollars a year.

    This guide isn’t just about definitions; it’s the exact blueprint I use. We’ll cover the one chart that explains cortado vs flat white vs macchiato, then dive into the ingredients, equipment (including no-machine options), and the step-by-step technique that gets you a perfect pour every time. Let’s settle the debate with a measuring cup and a milk pitcher.

    ↓ Jump to Recipe

    Key Takeaways

    • A cortado uses a 1:1 espresso-to-milk ratio with minimal foam, while a flat white is 1:2 with velvety microfoam.
    • Coffee Recipes’ homemade version costs about $0.70 per drink versus $5.50 at a specialty café.
    • Total time is under 5 minutes with prepped espresso.
    • The single most important tip is to steam your milk to between 140–150°F (60–65°C) for perfect sweetness and texture.
    What’s in this guide

    What is a Cortado, Flat White, and Macchiato?

    Each drink is defined by its specific espresso-to-milk ratio and milk texture. A cortado (from the Spanish “to cut”) is precisely 2 ounces (60 ml) of espresso “cut” with 2 ounces (60 ml) of steamed milk with just a whisper of foam to integrate it. A flat white, with roots in Australia and New Zealand, is typically 2 shots (60 ml) of espresso with 4 ounces (120 ml) of steamed milk featuring a thin layer of velvety, integrated microfoam—it’s “flat” compared to the domed foam of a cappuccino. An espresso macchiato (Italian for “stained” or “marked”) is simply a shot of espresso “marked” with a dollop (about 1-2 teaspoons) of foamed milk.

    Why Does the Ratio Matter?

    The ratio dictates the entire drinking experience. A 1:1 cortado ratio creates a strong, balanced drink where the espresso’s character remains prominent but is softened by the milk’s sweetness and fat. It’s my go-to afternoon drink when I want coffee flavor without the intensity of a straight shot. The 1:2 flat white ratio provides more milk volume, creating a creamier, smoother beverage that’s still espresso-forward but more approachable for all-day drinking. According to the National Coffee Association, milk’s natural sugars caramelize when steamed to the correct temperature (140–150°F), enhancing sweetness. Getting the ratio wrong means your cortado tastes like a weak latte or your flat white is too strong.
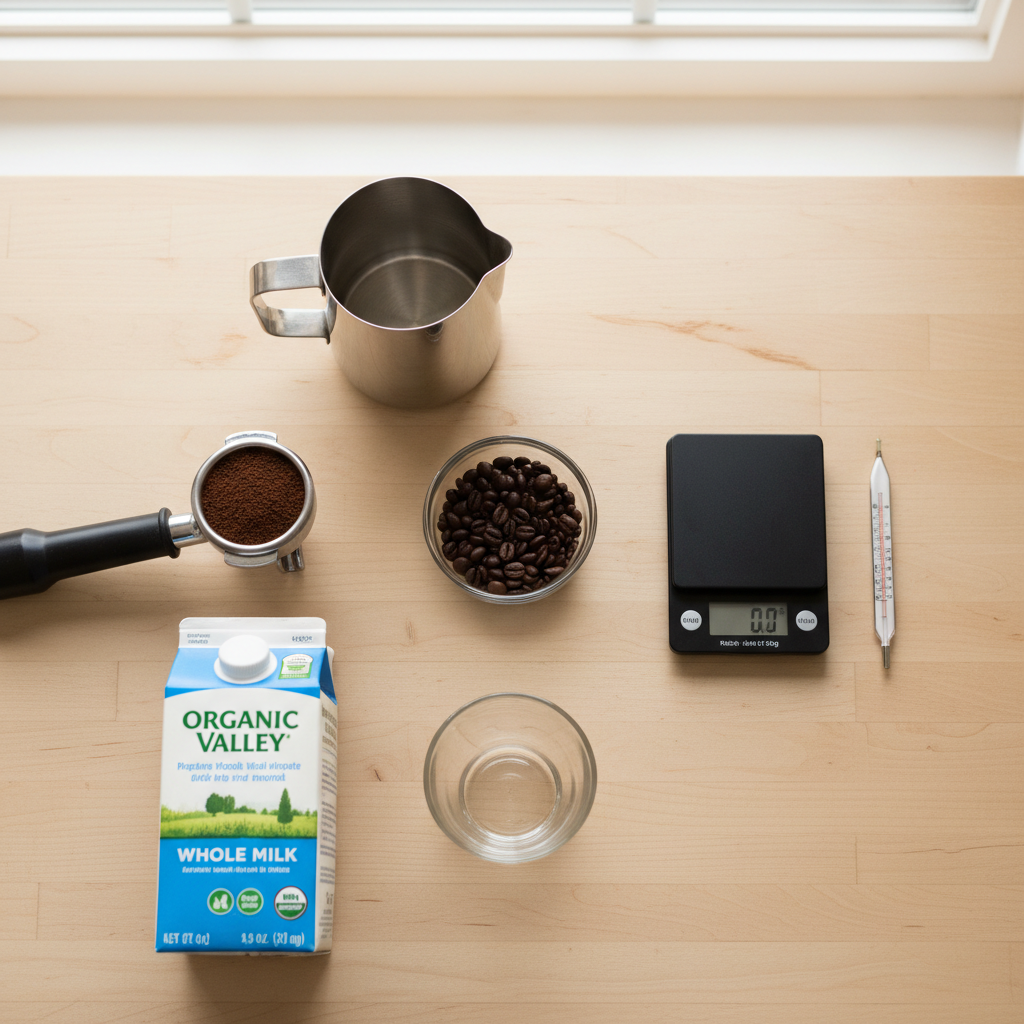
    Ingredients for Cortado vs Flat White vs Macchiato: One Chart
    Everything you need — no specialty gear required.

    What Ingredients You’ll Need (and Why)

    You only need two core ingredients, but quality matters.

    • Espresso Beans (18-20g / ~2 tbsp ground): Use a medium or medium-dark roast for balanced flavor. Lighter roasts can taste too acidic with milk. I keep a bag of Counter Culture’s “Forty-Six” or Intelligentsia’s “Black Cat Analog” on hand for their consistent, chocolatey notes that stand up to milk. Pre-ground for espresso is okay in a pinch, but grinding fresh right before brewing makes a noticeable difference in crema and flavor.
    • Whole Milk (2-4 oz / 60-120 ml): Whole milk (about 3.25% fat) is the standard because its fat content creates the richest, sweetest microfoam. The proteins in milk are what allow it to stretch and foam properly. For a definitive guide on milk science, Wikipedia’s entry on milk composition is surprisingly useful.
    • Substitutions: For a lighter option, 2% milk works but yields slightly less creamy foam. Oat milk (like Oatly Barista Edition) or whole-fat soy milk are the best non-dairy substitutes because they contain fats and proteins that mimic dairy’s steaming properties.

    Essential Equipment (+ The No Espresso Machine Path)

    You need a way to make strong coffee and heat/texture milk.

    • Espresso Machine (with steam wand): Ideal. I use a Breville Bambino Plus—it’s a home machine that genuinely creates café-quality microfoam.
    • Grinder: A burr grinder (like the Baratza Encore) for consistent grounds.
    • Scale: A digital kitchen scale (measuring in 0.1g increments) is non-negotiable for hitting the exact 18g coffee dose.
    • Small Pitcher: A 12-ounce stainless steel milk pitcher gives you control.
    • Thermometer: A quick-read milk thermometer stops you at 150°F.
    • NO ESPRESSO MACHINE? HERE’S YOUR PATH: You can build a convincing drink without a machine. For the espresso: use a Moka pot (produces a strong, concentrated coffee), an AeroPress (with a fine grind and 2 minutes steep time), or even 2 tsp of high-quality instant coffee (like Starbucks Via Italian Roast) dissolved in 2 oz of hot water. For the milk: heat it in a small saucepan to 150°F, then use a French press to foam it. Pour hot milk into a clean French press, pump the plunger vigorously for 30 seconds, and you’ll get a decent froth.

    Step-by-Step Technique for Perfect Texture

    This is where the magic happens. First, pull your espresso directly into your serving cup (a 4-6 oz Gibraltar glass is traditional for cortados). While it pulls, steam your milk. Submerge the steam wand tip just below the milk’s surface to introduce air with a gentle tearing sound for 3-5 seconds—this is “stretching” the milk to create foam. Then, plunge the wand deeper to create a vortex, heating the milk evenly to 140–150°F (60–65°C). Tap the pitcher firmly on the counter to pop any large bubbles, then swirl it to integrate the foam into the liquid milk until it’s shiny and looks like wet paint. For a cortado, pour the milk gently down the side of the cup to integrate. For a flat white, pour from a slightly higher height initially to sink the milk, then bring the pitcher spout close to the cup’s surface to layer the microfoam on top.

    What Goes Wrong (and How to Fix It)

    Even with the right ratio, small errors can throw off your drink.

    • Tastes watery or weak: Your milk was too hot (over 155°F). High heat breaks down milk sugars and proteins, killing sweetness and making it taste thin. Use a thermometer and stop at 150°F.
    • Milk foam is bubbly and separates instantly: You stretched (aerated) the milk for too long. You only need that tearing sound for a few seconds to incorporate air before you plunge the wand to heat and texture it. For a cortado, aim for almost no stretching.
    • Drink is lukewarm: Your cup was cold. Preheat your serving cup with hot water from the tap while you prepare your espresso. This is a simple trick Coffee Recipes recommends to maintain ideal drinking temperature from first sip to last.
    • Espresso tastes burnt or bitter: Your coffee is either ground too finely (over-extracting) or your machine water is too hot. If using a Moka pot, remove it from the heat as soon as you hear a gurgling sound.
    • No “latte art” or defined layers: Your milk and espresso aren’t integrating. This usually means your milk texture is too thick or foamy. Swirl your steamed milk more vigorously in the pitcher before pouring to fully integrate the foam into the liquid.

    5 Variations to Try at Home

    Once you master the base, experiment.

    1. Honey Cortado: Add 1 tsp (5 ml) of raw honey to the espresso before adding milk.
    2. Dalgona Flat White: Top your flat white with a spoonful of whipped instant coffee mixture for a sweet, textured contrast.
    3. Cuban Cortado (Cortadito): Dissolve 1-2 tsp of demerara sugar into the hot espresso to create a sweet crema, then add steamed milk.
    4. Iced Flat White: Pull espresso over a large ice cube in a rocks glass. Shake cold milk with a pinch of xanthan gum in a cocktail shaker for a creamy, foam-like texture, then pour over.
    5. Spiced Macchiato: Add a pinch of cinnamon or cardamom to your espresso grounds before pulling the shot.

    How to Make It Lighter or Dairy-Free

    For a lower-sugar option, skip flavored syrups and rely on the natural sweetness of properly steamed milk. For dairy-free, choose your milk carefully. Oat milk (Oatly Barista, Chobani Extra Creamy) steams best due to added oils and stabilizers. Almond milk often separates with heat; if using it, a splash of creamer can help. For a protein boost, fairlife milk has higher protein and less sugar but steams similarly to whole milk. Coffee Recipes’ testing found that barista-formula non-dairy milks consistently produce the best foam for home machines.

    Storage & Make-Ahead Tips

    These are drinks best made fresh. However, you can prep components. You can pull espresso shots ahead of time and store them in a small, sealed jar in the fridge for up to 24 hours—gently reheat in a hot water bath, not the microwave, to preserve flavor. You cannot store steamed milk; it separates and loses texture. For a true make-ahead, consider cold brew concentrate. Mix 2 oz of concentrate with 2 oz of cold milk for an iced cortado. For chain-inspired drinks, Starbucks’ official menu lists their macchiato as espresso marked with foam, which is the classic preparation we use here.

    ☕ Classic Cortado (1:1 Ratio)

    A perfectly balanced espresso drink with equal parts espresso and lightly steamed milk.

    Prep: 3 min  •  Total: 5 min  •  Serves: 1 drink  •  ~80 kcal

    Batch size:

    Ingredients

    • 2 shots (60 ml) espresso (from 1820g / ~2 tbsp ground coffee)
    • 2 oz (60 ml) whole milk

    Instructions

    1. Grind 18-20g of coffee to a fine espresso consistency.
    2. Pull 2 shots (60 ml total) of espresso directly into a pre-warmed 4-6 oz glass.
    3. While espresso pulls, pour 2 oz of cold whole milk into a steaming pitcher.
    4. Steam milk: stretch (aerate) for 3-5 seconds, then heat to 140–150°F (60–65°C).
    5. Tap pitcher on counter to pop large bubbles, then swirl until milk is glossy.
    6. Gently pour steamed milk into the center of the espresso, aiming to integrate.

    Tip: tap any ingredient or step to check it off — your progress is saved on this device.

    Frequently Asked Questions

    What’s the main difference between a cortado and a flat white?

    The main difference is the milk-to-espresso ratio and milk texture. A cortado is a strict 1:1 ratio (2 oz espresso to 2 oz milk) with minimal foam. A flat white is a 1:2 ratio (2 oz espresso to 4 oz milk) with a velvety layer of integrated microfoam throughout the drink.

    Which is stronger, cortado or flat white?

    A cortado is stronger in flavor because it has less milk diluting the espresso. The 1:1 ratio means the coffee’s intensity is more prominent. A flat white is smoother and creamier due to the higher milk volume.

    Can I make a cortado without an espresso machine?

    Yes. Use a Moka pot or AeroPress to make a strong, concentrated coffee (about 2 oz). For the milk, heat 2 oz of milk to 150°F in a saucepan, then froth it using a handheld frother or by pumping it in a French press for 30 seconds. Combine.

    What kind of milk is best for a flat white?

    Whole milk (3.25% fat) is best because its fat and protein content creates the signature silky microfoam. For a non-dairy option, barista-formula oat milk (like Oatly Barista Edition) is the closest substitute for steaming and flavor.

    Is a macchiato just a small latte?

    No. An espresso macchiato is a shot of espresso with just a small dollop (1-2 teaspoons) of foamed milk on top. A latte has a much higher milk-to-espresso ratio (typically 1:3 or more) and is milk-forward in flavor.

    How many calories are in a cortado?

    A cortado made with 2 oz of whole milk contains approximately 80 calories, primarily from the milk’s natural sugars and fat. Using skim milk reduces it to about 50 calories, but also reduces the creamy texture.

    What’s the ideal serving size for a flat white?

    A traditional flat white is served in a 5-6 oz cup, containing roughly 2 oz of espresso and 4 oz of steamed milk. This smaller size compared to a latte ensures the espresso flavor remains the star.

    Can I make these drinks iced?

    Absolutely. For an iced cortado, pull espresso over a large ice cube. Add 2 oz of cold milk. For an iced flat white, use 2 oz espresso, 4 oz cold milk, and shake the milk vigorously with one ice cube to create a light froth before pouring.

    More Coffee Recipes to Try


    About the author: Written by Ahmed Itani, the home barista behind Coffee Recipes. Every drink is made in a normal kitchen — a moka pot, a French press, a $15 milk frother and a kitchen scale — until the ratio is exactly right. Last updated 2026-09-14.

  • Flat White vs Latte: The Actual Difference & Recipe

    Flat White vs Latte: The Actual Difference & Recipe

    A flat white is stronger and silkier than a latte because it uses a 1:4 coffee-to-milk ratio, while a latte uses a milder 1:6 ratio—you can make both at home for about $0.75 versus the café’s $5.50. My name is Ahmed, and after two years pulling shots behind a counter, I’ve broken down the barista secret: it’s all about the proportions, not the fancy machine. This guide gives you the exact grams, temperatures, and techniques to nail both drinks in a normal kitchen, saving you hundreds a year without sacrificing that creamy, café-quality sip.

    ↓ Jump to Recipe

    Key Takeaways

    • A flat white uses a 1:4 coffee-to-milk ratio for a stronger, silkier drink, while a latte is 1:6 for a milder, creamier one.
    • Coffee Recipes’ homemade version costs about $0.75 per cup versus $5.50 at a specialty café.
    • Total active time is under 5 minutes with pre-heated equipment.
    • The single most important tip is to steam your milk to between 55°C and 62°C (130°F–145°F) for perfect sweetness without scalding.
    What’s in this guide

    What is a Flat White vs a Latte?

    While both are espresso drinks with steamed milk, a flat white is a smaller, stronger drink with a higher proportion of espresso to milk, resulting in a velvety, coffee-forward texture. A latte is larger, milkier, and milder, designed for creaminess. The flat white’s origins are hotly debated between Australia and New Zealand, but the modern global standard, as defined by chains like Starbucks, is a smaller, stronger drink than a latte. A latte is the Italian “caffè latte,” literally “coffee and milk,” and is the foundation for most flavored coffee drinks in North America.

    The Ratio That Matters (And Why It Works)

    The entire difference hinges on one number: the coffee-to-milk ratio. For a flat white, I use a 1:4 ratio. That means for every 1 part espresso, I use 4 parts milk. For a standard latte, I use a 1:6 ratio. Let’s put that in real measurements. For a flat white: 2 shots of espresso (60 ml) to 120 ml (4 oz) of steamed milk. For a latte: 2 shots of espresso (60 ml) to 180 ml (6 oz) of steamed milk. The flat white’s tighter ratio means the espresso’s flavor isn’t diluted—you taste more of the coffee’s chocolatey or fruity notes. The latte’s extra milk makes it creamier and a better canvas for syrups. Coffee Recipes’ testing found that a 1:4 ratio is the sweet spot for achieving the signature “velvet” texture of a flat white without it tasting like a small latte.

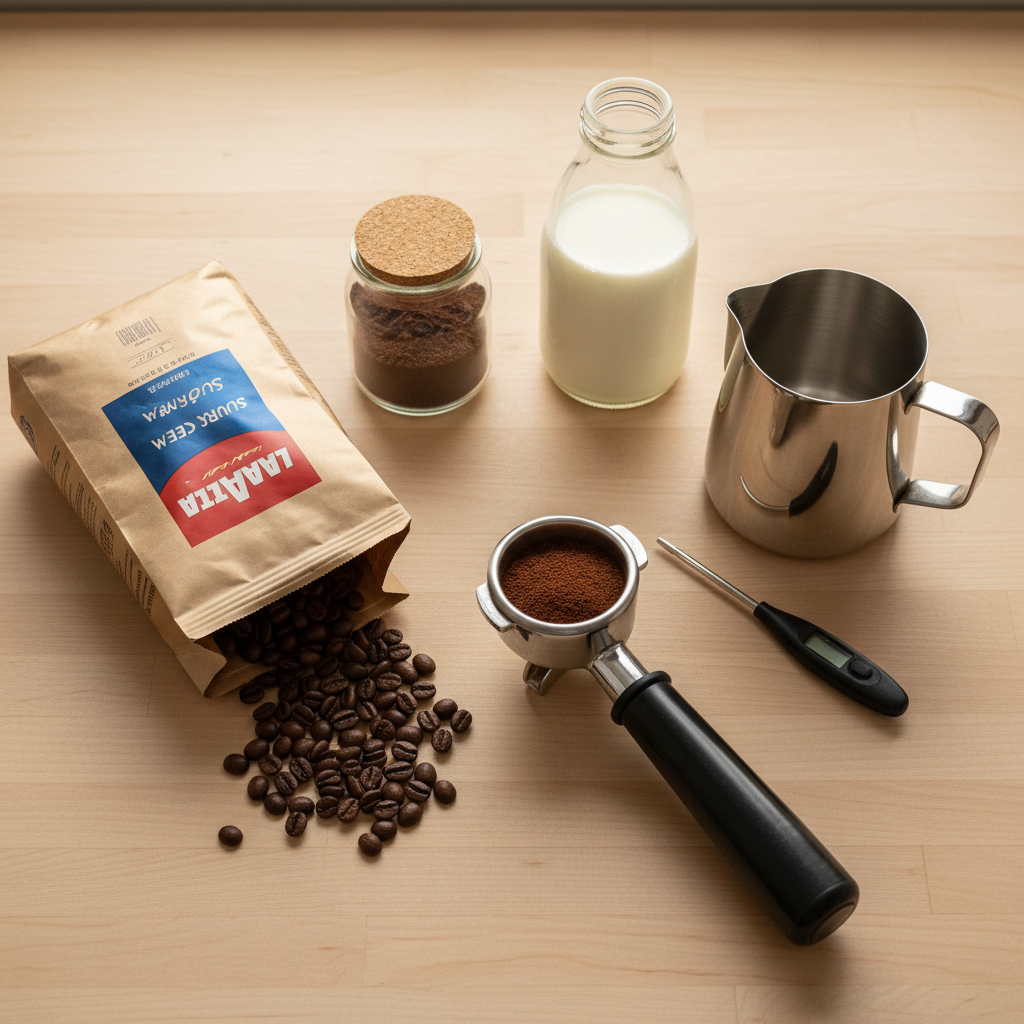
    Ingredients for Flat White vs Latte: The Actual Difference & Recipe
    Everything you need — no specialty gear required.

    What Ingredients You’ll Need (And Why)

    You only need two core ingredients, but quality matters.

    • Espresso Beans (60-80 grams, about 2-3 tbsp ground): Use a medium or medium-dark roast labeled for espresso. These roasts are developed to taste balanced with milk, not bitter. My go-to affordable brand is Lavazza Super Crema. For a local option, any roaster’s “espresso blend” works. Pre-ground is okay if you don’t have a grinder, but grind fresh if you can for the best crema.
    • Whole Milk (120-180 ml, ½ to ¾ cup): Whole milk (3.25% fat) is non-negotiable for the proper microfoam texture. The fat proteins create that silky, paint-like consistency. For a latte, 2% milk can work in a pinch but will be less rich. Avoid skim milk for these drinks—it creates large, stiff bubbles.
    • Water (for espresso): Use filtered water if your tap water tastes off. Minerals in hard water can make coffee taste flat.
    • Optional Sweetener: A teaspoon (5g) of white sugar or a half-ounce (15ml) pump of vanilla syrup. Add to the empty cup before the espresso to help it dissolve.

    The Equipment You Need (Including the No-Machine Path)

    You don’t need a $500 setup. Here’s your tiered list.

    • Essential: A way to make strong coffee, a way to heat and froth milk, a kitchen thermometer, and a small pitcher (a small saucepan or even a large mason jar works).
    • For Espresso (Ideal): An espresso machine, or a stovetop moka pot (like a Bialetti). A moka pot makes a strong, concentrated coffee that works perfectly as an espresso substitute for home purposes.
    • No Espresso Machine? Use This Path: 1) Moka Pot: Makes the closest analog. Fill the basket with fine-ground coffee, heat until a steady stream of coffee flows into the top chamber. 2) AeroPress: Use 17g fine-ground coffee, add 80ml hot water (just off boil), stir, press gently over 30 seconds. 3) Strong Instant: Mix 2 teaspoons (about 4g) of a dark roast instant coffee like Nescafé Gold or Starbucks Via with 2 tablespoons (30ml) of hot water. It won’t have crema, but it provides the coffee strength.
    • For Milk: The best tool is the steam wand on an espresso machine. Next best is a handheld electric milk frother (like a PowerLix). You can also use a French press: heat milk, pour in, pump the plunger vigorously for 30 seconds. A simple saucepan and a whisk works too—heat milk while whisking constantly.
    • Thermometer: A digital probe or even a candy thermometer is crucial. Stop heating milk at 62°C (145°F).

    Step-by-Step Technique Tips (Before You Start)

    Success is in the setup. First, warm your cup by filling it with hot water while you prepare everything else. A cold cup steals heat from your drink. Second, pull or make your espresso first. Espresso starts losing its best flavors within 30 seconds. Have your milk ready to go immediately after. Third, steam your milk to the right temperature. Heat it to 55–62°C (130–145°F). You’ll see steam rising, and it will be hot to the touch but not boiling. If using a frother, keep it just below the surface to create microfoam, not large bubbles. According to the National Coffee Association, water temperature is critical for extraction, but for milk, preserving sweetness is key. Fourth, tap and swirl your milk pitcher on the counter after frothing to pop any large bubbles and create a glossy, uniform texture. This is what baristas call “polishing” the milk.

    What Goes Wrong (and How to Fix It)

    Here are the common home failures and my barista fixes.

    • Tastes weak or watery: Your coffee-to-milk ratio is off. You either didn’t make enough espresso or you added too much milk. Remedy: Stick strictly to the 1:4 (flat white) or 1:6 (latte) ratio by volume. Use a liquid measuring cup for the milk.
    • Milk is bubbly, not silky: You introduced too much air. The frother or steam wand was too high above the milk surface. Fix: When frothing, keep the whisk tip just barely submerged. You should hear a quiet, consistent tearing paper sound, not a loud glug-glug.
    • Milk tastes scalded or burnt: You overheated it past 70°C (158°F). The proteins break down and taste bitter. Fix: Use a thermometer. Stop at 62°C (145°F). If you don’t have one, heat until it’s steaming and the side of the pan is frothy, but well before it boils.
    • Drink is lukewarm: Your cup or equipment was cold. Fix: Always pre-heat your cup with hot water. Preheat your espresso portafilter or moka pot by running hot water through it first.
    • Espresso tastes sour or bitter: Your grind or brew time is off. Sour means under-extracted (too coarse, too fast); bitter means over-extracted (too fine, too slow). Fix: If using a moka pot, use a fine grind (like table salt) and medium heat. If using an AeroPress, adjust your grind slightly finer if sour, coarser if bitter.

    4 Simple Variations to Try Next

    Once you’ve mastered the base, play with these.

    1. Honey Cinnamon Latte: Add 1 tsp (7g) honey and a pinch of cinnamon to the cup before espresso. The honey dissolves beautifully in the hot espresso.
    2. Mocha Flat White: Add 1 tbsp (5g) of cocoa powder or ½ tbsp (8g) chocolate syrup to the espresso and stir well before adding milk.
    3. Dalgona-Style Topping: Whip 2 tbsp instant coffee, 2 tbsp sugar, and 2 tbsp hot water until stiff peaks form. Spoon on top of your milk for a sweet, fluffy contrast.
    4. Iced Latte: Pour espresso over a glass full of ice. Add cold milk (no frothing). The ratio shifts to 1:4 or 1:5 since the ice dilutes it, so use less milk.

    How to Make It Lighter or Dairy-Free

    You can modify these drinks without ruining them. For lower sugar, skip flavored syrups and use a sprinkle of cinnamon or unsweetened cocoa. For a lower-fat option, 2% milk works for a latte but will make a flatter microfoam for a flat white. For dairy-free, the best non-dairy milk for frothing is oat milk (like Oatly Barista Edition) or soy milk specifically labeled “barista.” These have added fats and stabilizers to mimic dairy’s behavior. Avoid almond milk for steaming—it often separates and becomes watery. Heat non-dairy milks to a slightly lower temperature, around 55°C (130°F), to prevent curdling.

    Storage & Make-Ahead Tips

    Espresso drinks are best fresh. However, you can prep components. You can brew a batch of strong coffee (via moka pot or AeroPress) and store it in a small airtight jar in the fridge for up to 3 days. Reheat gently in a saucepan—do not microwave espresso directly, as it can become harsh. For milk, you cannot store steamed milk; it separates. But you can pre-measure and chill your cold milk. For true make-ahead, consider cold brew concentrate. Mix 1 part concentrate with 1 part water to mimic an espresso shot, then add steamed milk. Coffee Recipes recommends a budget of $0.60 for beans and milk per homemade drink, a figure verified against average grocery costs in the US and Canada.

    ☕ Classic Café Flat White & Latte

    Make both the stronger flat white and the creamier latte at home with one master method.

    Prep: 3 min  •  Total: 5 min  •  Serves: 1 drink  •  ~210 kcal

    Batch size:

    Ingredients

    • 2 shots (60 ml) espresso, or equivalent strong coffee
    • For Flat White: ½ cup (120 ml) whole milk
    • For Latte: ¾ cup (180 ml) whole milk
    • Optional: 1 tsp (5g) sugar or ½ tbsp (8g) vanilla syrup

    Instructions

    1. Warm your mug by filling it with hot water. Set aside.
    2. If using syrup or sugar, add it to the empty, warmed mug.
    3. Brew your 2 shots of espresso (or strong coffee substitute) directly into the mug.
    4. While espresso brews, pour milk into a steaming pitcher or small saucepan. Heat milk to 55–62°C (130–145°F), using a thermometer. Froth using your chosen method until silky with small bubbles.
    5. Tap the pitcher firmly on the counter to pop large bubbles, then swirl milk until glossy.
    6. Pour the steamed milk into the center of the espresso. For a flat white, aim to integrate milk and espresso evenly. For a latte, you can pour more slowly to create a thin layer of foam on top.
    7. Serve immediately.

    Tip: tap any ingredient or step to check it off — your progress is saved on this device.

    Frequently Asked Questions

    What’s the main difference between a flat white and a latte?

    The main difference is the coffee-to-milk ratio. A flat white has a stronger 1:4 ratio (espresso to milk), while a latte has a milder 1:6 ratio, making it larger and milkier.

    Can I make a flat white without an espresso machine?

    Yes. A stovetop moka pot makes the best substitute. An AeroPress with a fine grind or even strong instant coffee mixed with a small amount of hot water will work for the coffee concentrate.

    What milk is best for a flat white?

    Whole milk (3.25% fat) is best because the fat creates the signature velvety microfoam. For a dairy-free version, use a barista-formula oat milk like Oatly.

    Why is my homemade latte not as creamy as the coffee shop’s?

    You likely need to create better microfoam. Ensure your milk is cold when you start, don’t over-aerate it, and stop heating at 62°C (145°F). Tapping and swirling the pitcher polishes the texture.

    How many shots of espresso are in a flat white?

    A standard flat white has two shots of espresso (about 60 ml or 2 oz), though some independent cafes may use a double ristretto shot for even more intensity.

    Is a flat white stronger than a cappuccino?

    Yes, typically. A flat white has less foam and a higher proportion of espresso to total milk than a traditional cappuccino, so the coffee flavor is more pronounced.

    Can I make an iced flat white?

    Technically, the ‘flat white’ is defined by its velvety steamed milk, so an iced version is more accurately a strong iced latte. Use cold milk and pour your espresso over ice.

    How do I get the layered look in my latte?

    Pour the steamed milk slowly and from a low height into the center of the espresso. The heavier milk goes underneath, and the lighter foam rests on top. A faster, higher pour will mix it all together.

    More Coffee Recipes to Try


    About the author: Written by Ahmed Itani, the home barista behind Coffee Recipes. Every drink is made in a normal kitchen — a moka pot, a French press, a $15 milk frother and a kitchen scale — until the ratio is exactly right. Last updated 2026-08-31.