Tag: cold foam

  • Pumpkin Cream Cold Brew (Starbucks Copycat Recipe)

    Pumpkin Cream Cold Brew (Starbucks Copycat Recipe)

    You can make a Starbucks-level Pumpkin Cream Cold Brew at home in 5 minutes for about $0.60 a glass using a 4:1 cold brew concentrate to water ratio over ice and a 3:1 heavy cream to milk foam. My copycat version skips the proprietary syrup blends and uses a vanilla-pumpkin base you can control, resulting in a drink that’s often richer and more balanced than the café original. If you’re buying this 3-4 times a week, the $5.75 per drink adds up fast; this recipe brings the cost down by over 90% using grocery store ingredients you likely already have.

    ↓ Jump to Recipe

    Key Takeaways

    • The key ratio is 4 parts cold brew concentrate to 1 part water over ice, topped with a 3:1 heavy cream to milk foam.
    • Coffee Recipes’ homemade version costs about $0.60 a glass versus $5.75 at the drive-through.
    • Total active time is 5 minutes, with the most important tip being to chill your glass and shake the foam in a cold jar for 30 seconds.
    • This recipe requires no espresso machine; use strong cold brew concentrate as the base.
    What’s in this guide

    What is Pumpkin Cream Cold Brew?

    Pumpkin Cream Cold Brew is Starbucks’ signature fall drink: lightly sweetened cold brew coffee topped with a spiced, vanilla-sweetened pumpkin cream cold foam. The official description calls it “slow-steeped cold brew sweetened with vanilla syrup and topped with a pumpkin cream cold foam and a dusting of pumpkin spice topping.” The homemade magic happens when you realize the cold brew base is just a concentrate you can buy or make, and the foam is simply shaken heavy cream.

    The One Ratio That Makes This Work

    The entire structure of this drink hinges on two ratios. First, the coffee base: a 4:1 ratio of cold brew concentrate to water. I use 120 ml (1/2 cup) of concentrate to 30 ml (2 tbsp) of water in a glass full of ice. This mimics the strength of Starbucks’ “slow-steeped” brew, which is essentially a ready-to-drink concentrate. Second, the foam: a 3:1 ratio of heavy cream to 2% milk. I use 45 ml (3 tbsp) heavy cream to 15 ml (1 tbsp) milk. This ratio gives the foam enough fat to hold its structure for several minutes without being so rich it feels like whipped cream. Getting these proportions right is what separates a balanced, café-style drink from a milky, weak imitation.
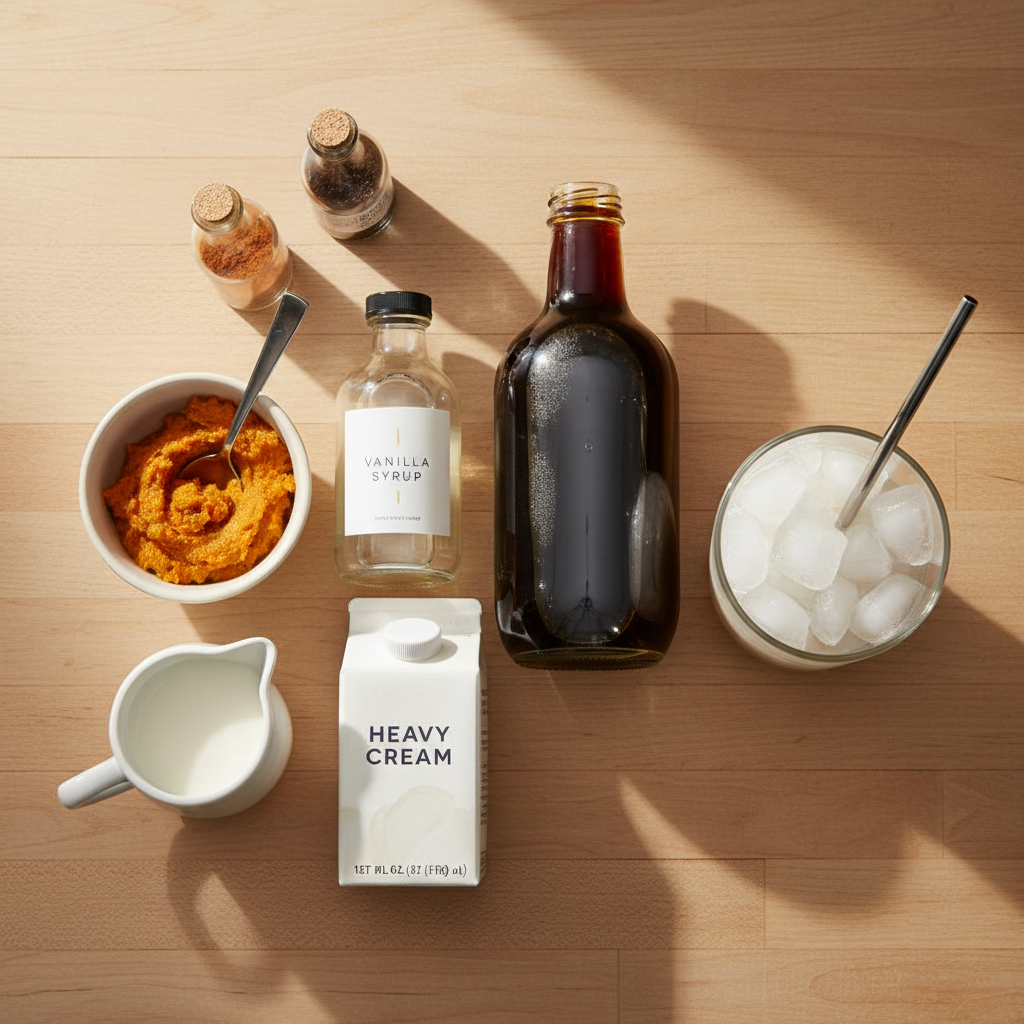
    Ingredients for Pumpkin Cream Cold Brew (Starbucks Copycat Recipe)
    Everything you need — no specialty gear required.

    Ingredients You’ll Need (and Why Each Matters)

    Cold Brew Coffee Concentrate (120 ml / 1/2 cup): This is the non-negotiable foundation. Starbucks uses their own proprietary blend, but any good quality, unsweetened cold brew concentrate works. I prefer Chameleon Cold-Brew Concentrate (Black) or Stok Cold Brew Not Too Sweet. You can also make your own concentrate using a 1:4 coffee-to-water ratio, steeped for 18-24 hours. Vanilla Syrup (15 ml / 1 tbsp): This sweetens the coffee base. Use a pure vanilla syrup like Torani or Monin for the cleanest flavor. You can substitute 1 tsp (5 ml) vanilla extract mixed with 2 tsp (10 ml) simple syrup. Heavy Cream (45 ml / 3 tbsp): The high fat content (36-40%) is essential for creating a stable, velvety foam that floats. Do not substitute half-and-half. 2% Milk (15 ml / 1 tbsp): This lightens the foam slightly for a pourable texture. Whole milk also works. Pumpkin Purée (1 tbsp / 15g): Use 100% pure pumpkin purée, not pumpkin pie filling. Libby’s is the standard. Pumpkin Pie Spice (1/4 tsp): A blend of cinnamon, ginger, nutmeg, and cloves. McCormick is reliable. Vanilla Extract (1/4 tsp): For the foam. Use pure extract, not imitation.

    Equipment (No Fancy Machines Required)

    You need a standard home kitchen: a 16-oz glass (pint glass or mason jar), a small jar with a tight lid (like an 8-oz mason jar) for shaking the foam, a measuring spoon set, and a liquid measuring cup or kitchen scale for accuracy. A milk frother (like a $15 handheld battery-operated one) can make the foam extra dense in 15 seconds, but shaking works perfectly. The most important tool is your freezer: chill your glass and your cream for 5 minutes before starting. Cold equipment is the secret to a foam that doesn’t melt on contact.

    Step-by-Step Technique Tips (Beyond the Recipe Card)

    First, build your drink from the bottom up. Fill your chilled glass to the brim with ice. Pour the cold brew concentrate and vanilla syrup directly over the ice, then add the water. This chills the coffee instantly and prevents dilution. Second, shake, don’t stir, the foam ingredients. Combine the cream, milk, pumpkin, spices, and vanilla in your cold jar. Seal it tightly and shake vigorously for 30-45 seconds until it’s thickened, frothy, and has roughly doubled in volume. It should look like a loose pancake batter. If using a frother, pulse for 10-15 seconds until thick. Third, pour gently over the back of a spoon held just above the coffee’s surface. This lets the foam layer on top instead of sinking. Finally, dust immediately with a pinch more pumpkin spice for aroma and visual appeal. Serve with a straw to sip the cold brew through the creamy top layer.

    What Goes Wrong (and How to Fix It)

    Foam is runny and sinks immediately: Your cream wasn’t cold enough, or you didn’t shake it long enough. Fix: Chill your cream jar in the freezer for 5 minutes and shake for a full 45 seconds. Fat needs to be cold to hold air. Drink tastes watery: Your ice melted too fast because the coffee wasn’t cold. Fix: Always use cold brew concentrate straight from the fridge. If you must use room-temperature concentrate, chill the mixed coffee in the glass in the freezer for 2 minutes before adding the foam. Pumpkin purée clumps in the foam: You didn’t mix it thoroughly with the liquid before shaking. Fix: Whisk the pumpkin purée, spices, and vanilla extract into the cold cream and milk in the jar until smooth BEFORE sealing and shaking. Foam tastes bland, not “pumpkin” enough: You under-measured the spice. Pumpkin purée is subtle. Fix: Use a full 1/4 tsp of pumpkin pie spice and consider adding a tiny pinch (1/16 tsp) of extra cinnamon. Drink is too sweet: You used a pre-sweetened cold brew concentrate AND the vanilla syrup. Fix: Use an unsweetened concentrate and reduce the vanilla syrup to 2 tsp (10 ml). You can always add more, but you can’t take it out.

    4 Variations to Try Next Time

    1. Dairy-Free Pumpkin Cream: Use 45 ml (3 tbsp) full-fat canned coconut cream (chilled) and 15 ml (1 tbsp) oat milk. Shake as usual. The coconut adds a lovely richness. 2. Spiced Brown Sugar Version: Replace the vanilla syrup in the coffee with 1 tbsp (15 ml) brown sugar syrup. Add 1/8 tsp of cinnamon to the coffee base. 3. Extra-Caffeinated: Use cold brew concentrate for the entire liquid base—skip the water. Pour 150 ml (2/3 cup) of concentrate over ice. 4. Salted Pumpkin Cream: Add a tiny pinch (about 1/16 tsp) of fine sea salt to the foam ingredients before shaking. It enhances all the sweet and spicy flavors.

    How It Compares to Starbucks’ Original

    Taste: Side-by-side, the homemade version has a more pronounced pumpkin and spice flavor because we use real purée and control the amount. The coffee base is identical if you use a quality concentrate. The foam is often richer and holds its texture longer because we use a higher cream ratio. Cost-Per-Cup Breakdown: A grande Pumpkin Cream Cold Brew at Starbucks costs about $5.75 plus tax. According to Coffee Recipes’ calculation, the homemade version costs approximately $0.60 per glass. Here’s the math: Cold brew concentrate ($0.35), heavy cream ($0.15), milk ($0.02), pumpkin purée ($0.05), syrup and spices ($0.03). The $5+ weekly savings for a regular drinker pays for the initial ingredients in one café visit.

    How to Make It Lighter (Lower Sugar or Dairy-Free)

    For a lower-sugar version, use a sugar-free vanilla syrup like Torani SF Vanilla and reduce the amount to 2 tsp (10 ml). The pumpkin purée has natural sugars, so it will still taste festive. For a lower-fat foam, you can try a 50/50 mix of half-and-half and milk, but note it will be less stable and more milky. The best dairy-free path, as noted in variations, is full-fat coconut cream. For the coffee base, ensure your cold brew concentrate and vanilla syrup are vegan. Starbucks publishes its allergen and ingredient information, which confirms the original uses dairy.

    Storage & Make-Ahead Tips

    You can pre-mix the pumpkin cream for up to 3 days. Combine the cream, milk, pumpkin purée, spices, and vanilla in a jar and store it sealed in the fridge. Shake vigorously for 30 seconds before each use. The cold brew concentrate, if homemade, lasts 7-10 days in the fridge. For the fastest morning routine, keep a chilled glass in the freezer, pre-measure your concentrate and syrup in the bottom, and have your jar of pre-mixed cream ready. Assembly then takes 60 seconds. Coffee Recipes does not recommend freezing the cream mixture, as thawing will break the emulsion and create a grainy texture.

    ☕ Homemade Pumpkin Cream Cold Brew

    A rich, spiced cold brew topped with vanilla-pumpkin cold foam, ready in 5 minutes.

    Prep: 5 min  •  Total: 5 min  •  Serves: 1 drink  •  ~280 kcal

    Batch size:

    Ingredients

    • 120 ml (1/2 cup) cold brew coffee concentrate, chilled
    • 30 ml (2 tbsp) cold water
    • 15 ml (1 tbsp) vanilla syrup
    • Ice cubes
    • 45 ml (3 tbsp) heavy cream, very cold
    • 15 ml (1 tbsp) 2% milk, very cold
    • 1 tbsp (15 g) pure pumpkin purée
    • 1/4 tsp pumpkin pie spice, plus extra for dusting
    • 1/4 tsp pure vanilla extract

    Instructions

    1. Chill a 16-oz glass in the freezer for 5 minutes.
    2. Fill the chilled glass to the top with ice cubes.
    3. Pour the cold brew concentrate, water, and vanilla syrup over the ice. Stir gently with a straw.
    4. In a small jar with a tight lid, combine the heavy cream, milk, pumpkin purée, 1/4 tsp pumpkin pie spice, and vanilla extract. Seal the jar.
    5. Shake the jar vigorously for 30-45 seconds until the mixture is frothy, thickened, and has increased in volume.
    6. Gently pour the pumpkin cream over the back of a spoon held just above the surface of the coffee, allowing it to float on top.
    7. Dust the top lightly with an extra pinch of pumpkin pie spice.
    8. Serve immediately with a straw.

    Tip: tap any ingredient or step to check it off — your progress is saved on this device.

    Frequently Asked Questions

    Can I use regular brewed coffee instead of cold brew concentrate?

    No, for this recipe. Hot-brewed coffee, even when chilled, will taste thin and acidic when poured over ice. Cold brew concentrate has a smoother, less acidic profile that stands up to dilution and pairs better with the sweet foam.

    My foam won’t get thick. What am I doing wrong?

    The most common issues are cream that isn’t cold enough (it must be straight from the fridge) and not shaking long enough. Use a very cold jar, shake for a full 45 seconds, and ensure you’re using heavy cream (36-40% fat), not half-and-half.

    How long does the pumpkin cream foam last on top of the drink?

    A properly made foam will hold its layered structure for 8-10 minutes before slowly integrating into the coffee. For the best experience, drink it within the first 5 minutes.

    Can I make a bigger batch of the pumpkin cream?

    Yes. You can scale up the foam ingredients proportionally in a larger jar or use a hand mixer on low speed for 30 seconds. Store any leftover cream in a sealed container in the fridge for up to 3 days. Shake well before each use.

    Is there a substitute for pumpkin purée?

    For flavor, no. Pumpkin pie spice alone will taste hollow. If you’re in a bind, 1 tbsp of pumpkin butter can work, but it’s much sweeter, so reduce or omit the vanilla syrup in the coffee.

    What’s the best way to make cold brew concentrate at home?

    Coffee Recipes recommends a 1:4 ratio of coarse-ground coffee to cold water. Steep in the fridge for 18-24 hours, then strain. This yields a concentrate you dilute 1:1 with water or milk for regular cold brew, or use as-is in this recipe.

    How does the calorie count compare to Starbucks?

    Starbucks lists a grande with 250 calories. Our recipe comes in at approximately 280 calories, with the difference coming from our use of real pumpkin purée and a slightly richer cream ratio for a more stable foam.
    More Coffee Recipes to Try


    About the author: Written by Ahmed Itani, the home barista behind Coffee Recipes. Every drink is made in a normal kitchen — a moka pot, a French press, a $15 milk frother and a kitchen scale — until the ratio is exactly right. Last updated 2026-08-29.

  • Greek Frappé Recipe: The Original Whipped Iced Coffee

    Greek Frappé Recipe: The Original Whipped Iced Coffee

    A perfect Greek frappé requires a 1:1:1 ratio of instant coffee, sugar, and water shaken into a foam, then poured over ice and milk or water—and making it at home costs about $0.65 versus the $4.50+ you’d pay at a café. This isn’t the blended frappuccino style; it’s the original Greek iced coffee drink, defined by its luxurious, persistent layer of microbubble foam that sits atop the glass. My go-to method, perfected after testing dozens of batches, uses common pantry items and a simple shaking technique that reliably mimics the café result for a tenth of the price.

    The secret isn’t in expensive beans or machines, but in understanding the physics of the foam created by shaking soluble coffee particles with sugar and a small amount of water. Once you master this base, you can customize sweetness and milk to your taste. This recipe is my warm-weather staple, and I keep a jar of Nescafé Classic specifically for it.

    ↓ Jump to Recipe

    Key Takeaways

    • The core ratio is 1 part instant coffee : 1 part sugar : 1 part water, shaken vigorously to create foam.
    • Coffee Recipes’ homemade version costs about $0.65 a glass versus $4.50+ at a specialty café.
    • Total active time is under 5 minutes, with the only non-negotiable equipment being a shaker or jar with a tight lid.
    • The single most important tip is to use a heaping spoonful of instant coffee and shake for a full 30 seconds to achieve the correct, stable foam.
    What’s in this guide

    What is a Greek Frappé?

    A Greek frappé is a chilled coffee drink made by vigorously shaking instant coffee, sugar, and a small amount of water to create a thick, creamy foam, which is then poured over ice and diluted with cold water or milk. It was invented accidentally in 1957 at the Thessaloniki International Fair by a Nescafé representative, and its popularity exploded across Greece, becoming the national summer coffee. Unlike blended frozen drinks, its texture comes entirely from the air incorporated during shaking.

    The One Ratio That Matters

    The entire structure of the drink hinges on the 1:1:1 base ratio: 1 measure of instant coffee : 1 measure of sugar : 1 measure of water. This isn’t just a starting point—it’s the chemical formula for the foam. The sugar acts as a stabilizer, creating a syrup with the water that traps the coffee particles and the air bubbles introduced by shaking. Using a “heaping” spoonful for the coffee measure is non-negotiable; a level spoon won’t provide enough soluble solids to build a stable foam structure. According to food science principles on foam stability, the sugar increases the viscosity of the liquid phase, slowing drainage and collapse, which is why your foam lasts for the entire drink.

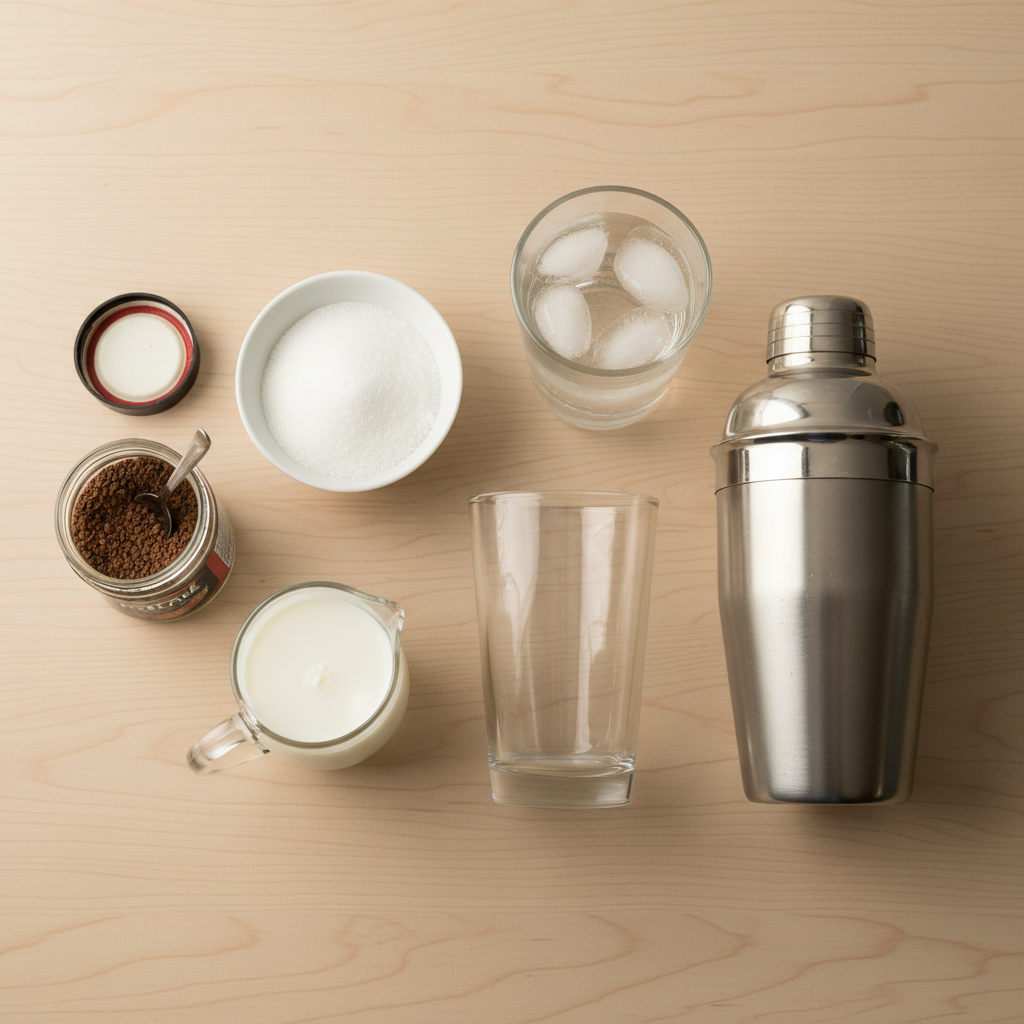
    Ingredients for Greek Frappé Recipe: The Original Whipped Iced Coffee
    Everything you need — no specialty gear required.

    Ingredients You’ll Need (and Why)

    Each ingredient has a specific functional role. Substitutions can work, but they change the final product.

    • Instant Coffee (2 tsp / 4g heaping): You must use spray-dried instant coffee granules, not freeze-dried crystals or espresso powder. Nescafé Classic is the authentic and most reliable brand, as its granule size and composition are ideal for foam. Other brands like Maxwell House Original work, but avoid “fine” or “microground” instants. The granules are the scaffolding for the foam.
    • Granulated Sugar (2 tsp / 8g): White granulated sugar is standard. It dissolves almost completely in the shaking process. You can reduce this or substitute with other granulated sugars like cane sugar, but liquid sweeteners like simple syrup will negatively impact foam formation because they add too much liquid volume to the base.
    • Cold Water (2 tsp / 10ml): Use very cold or room-temperature water, not hot. Hot water will partially dissolve the coffee and sugar too quickly before shaking, resulting in a weaker foam. The small volume is critical—it’s just enough to create a thick paste.
    • Cold Water or Milk for Serving (1 cup / 240ml): This is your dilution liquid. Traditional “skétos” (plain) uses water. “Metrios” (medium) uses a splash of milk. “Glykós” (sweet) uses more milk. Any cold milk works, but evaporated milk is a common Greek café addition for extra creaminess.
    • Ice Cubes (about 1 cup / 150g): Use plenty of ice. The foam will sit on top of the ice and chilled liquid.

    Essential Equipment (The No-Machine Path)

    You don’t need a blender, espresso machine, or frother. The required tool is simply a vessel you can seal and shake aggressively.

    • Airtight Shaker: A standard cocktail shaker (Boston or Cobbler style) is ideal. The metal helps keep the mixture cold. If you don’t have one, a large mason jar with a very tight-sealing lid is my go-to. I use a 16-ounce (475ml) jar to give the mixture plenty of room to aerate.
    • Tall Glass: A classic frappé is served in a tall, clear glass, often with a straw. A 12-16 oz (350-475ml) glass is perfect.
    • Long Spoon or Straw: For stirring after assembly.
    • Measuring Spoons: Accuracy matters for the base ratio.

    Step-by-Step Technique Tips

    Before following the numbered recipe card steps, these insights will ensure success.

    First, measure your base ingredients heaping into your shaker. Don’t skimp. The dry ingredients should look like a small mound in your spoon. Add the 2 teaspoons of cold water. It will seem like too little—that’s correct. You’re aiming for a thick, gritty paste. Seal the shaker tightly. Now shake like you mean it: not a gentle wrist shake, but a full-arm, vertical shake for a solid 30 seconds. You should hear the mixture sloshing and then transforming into a quieter, thicker sound as it aerates. After 30 seconds, open the lid. You should have a thick, pale brown, almost mousse-like foam that holds its shape. If it’s runny, you either didn’t use enough coffee, didn’t shake long enough, or had a loose lid.

    Fill your serving glass to the top with ice cubes. Pour your dilution liquid (water or milk) over the ice, leaving about 1.5 inches of space at the top. Now, spoon the coffee foam directly on top of the ice. Do not stir yet. Let the foam sit proudly on top. Finally, if you wish, use a long spoon or straw to gently mix the foam down into the liquid, creating the characteristic layered look. The first sip will be strong and foamy, and the last sip will be milder and diluted—that’s the authentic experience.

    What Goes Wrong (and How to Fix It)

    Problem: The foam is runny and collapses immediately.
    Fix: You likely didn’t shake long enough or used a “level” measure of coffee. Use a heaping spoonful and shake for a full 30 seconds with a perfectly sealed lid. The mixture should double in volume in the shaker.

    Problem: The coffee granules won’t dissolve, leaving gritty sludge at the bottom.
    Fix: This happens with certain instant coffee brands. Ensure you’re using a spray-dried granule like Nescafé Classic. If grittiness persists, add one extra teaspoon of water to the base before shaking, but know this may slightly weaken the foam’s stability.

    Problem: The drink tastes watery from the first sip.
    Fix: You used too much dilution liquid or too much ice that melted quickly. Stick to 1 cup (240ml) of milk/water maximum for the single-strength recipe. Use fresh, cold ice directly from the freezer, not ice that’s been sitting out.

    Problem: No foam forms, just bubbly coffee.
    Fix: Your instant coffee may be old or the wrong type. Instant coffee loses its foaming power over time. Buy a fresh, small jar of Nescafé Classic. Also, ensure your shaker or jar is no more than one-third full with the base mixture to allow enough air space for proper aeration.

    Problem: The foam separates from the liquid unpleasantly.
    Fix: This is often a serving technique issue. Pour the foam over the ice before adding all the milk. Or, pour the milk in first, then add the foam on top. Experiment to see which method gives you the layered integration you prefer. A quick stir with a straw always blends it.

    Once you master the basic “skétos” (unsweetened, no milk), try these café-style variations. Adjust the sugar in the base shake accordingly.

    • Metrios (Medium): The most popular order. Use 2 tsp sugar in the base shake. After adding the foam to the glass, top up with about 2 oz (60ml) of cold milk and the rest with cold water.
    • Glykós (Sweet): Use 3-4 tsp sugar in the base shake. Top up the glass primarily with cold milk, using only a splash of water or none at all.
    • Freddo Cappuccino Style: Make a basic unsweetened or medium frappé foam. Instead of milk, top the drink with a layer of cold frothed milk or cold foam. Use a milk frother or shake 2oz of milk in a separate jar to create this top layer.
    • With Flavored Syrup: Add 1/2 tsp of vanilla, hazelnut, or caramel syrup to the shaker with the base ingredients. Note that more than this can deflate the foam. Coffee Recipes’ testing found that syrups with stabilizers like xanthan gum can actually help foam longevity.
    • Decaffeinated: Use a decaffeinated instant coffee like Nescafé Decaf. The foaming properties are identical.

    How to Make It Lighter or Dairy-Free

    You can easily adjust this recipe for dietary preferences without sacrificing the foam.

    For less sugar, you can reduce the sugar in the base to 1 tsp. The foam will be slightly less stable and may collapse a minute or two faster, but it will still work. For a sugar-free version, replace granulated sugar with 1/2 tsp of a powdered erythritol or monk fruit blend that measures like sugar. Liquid stevia drops are not recommended as they add no bulk for foam stability.

    For a dairy-free frappé, simply use water as your dilution liquid for a “skétos,” or use your preferred plant-based milk. Oat milk and soy milk work exceptionally well because of their higher protein and fat content, which mimics the mouthfeel of dairy. Almond milk can be used but may result in a slightly thinner drink. Coffee Recipes confirms that barista-style oat milk is the best direct substitute for evaporated milk in terms of creaminess.

    Storage & Make-Ahead Tips

    A Greek frappé is best consumed immediately. However, you can prepare components ahead of time.

    You cannot store the shaken foam; it will collapse and separate within 10-15 minutes. The only true make-ahead option is to pre-mix the dry base. Combine your desired amount of instant coffee and sugar in a small airtight jar. When ready to make a drink, scoop out 4 teaspoons of this mix (which equals 2 tsp coffee + 2 tsp sugar), add to your shaker with 2 tsp water, and proceed. This dry mix will keep for months in your pantry.

    You can also brew and chill strong coffee to use as the dilution liquid instead of water for a more intense coffee flavor, though this strays from the classic definition. Keep this chilled coffee in a pitcher in the fridge for up to 3 days.

    ☕ Classic Greek Frappé

    The authentic iced coffee with thick, whipped foam, made with instant coffee in minutes.

    Prep: 5 min  •  Total: 5 min  •  Serves: 1 drink  •  ~approx 120 kcal

    Batch size:

    Ingredients

    • 2 tsp heaping (4g) instant coffee (like Nescafé Classic)
    • 2 tsp (8g) granulated sugar
    • 2 tsp (10ml) cold water
    • 1 cup (150g) ice cubes
    • 1/2 cup (120ml) cold water OR 1/4 cup (60ml) milk + 1/4 cup (60ml) cold water

    Instructions

    1. Add the heaping instant coffee, sugar, and 2 tsp cold water to a cocktail shaker or large jar with a tight lid.
    2. Seal the lid tightly. Shake vigorously, using your whole arm, for a full 30 seconds until the mixture transforms into a thick, pale brown foam.
    3. Fill a tall glass to the brim with ice cubes.
    4. Pour the cold water (or milk/water mixture) over the ice, leaving about 1.5 inches of space at the top of the glass.
    5. Spoon the coffee foam from the shaker on top of the ice and liquid. Do not stir yet.
    6. Insert a long spoon or straw. Serve immediately, encouraging the drinker to mix the foam down into the liquid to their desired strength.

    Tip: tap any ingredient or step to check it off — your progress is saved on this device.

    Frequently Asked Questions

    Can I make a Greek frappe without a shaker?

    Yes, use a large jar with a very tight-sealing lid, like a mason jar. A blender or immersion blender will not work correctly, as it incorporates too much air and creates a different, unstable foam.

    What’s the best instant coffee for a frappe?

    Nescafé Classic (the original beige jar) is the gold standard and most authentic. Its spray-dried granules create the perfect foam. Maxwell House Original Instant Coffee is a good North American alternative.

    Can I use espresso or brewed coffee instead of instant?

    No. The unique foam of a Greek frappe relies on the soluble solids in instant coffee. Espresso or brewed coffee will not create the same thick, stable foam when shaken with sugar and water. It’s a different drink entirely.

    How do I order a Greek frappe in Greece?

    You specify three things: sweetness (skétos/unsweetened, métrios/medium, glykós/sweet), milk (with or without), and strength (usually single or double the coffee). ‘Éna métrio me gála’ means one medium with milk.

    Why is my frappe foam not thick?

    The most common reasons are: not using a heaping measure of coffee, not shaking long enough (aim for 30 seconds), or using a shaker/jar that is too large so the mixture doesn’t agitate properly.

    Can I make a decaf Greek frappe?

    Absolutely. Use a decaffeinated instant coffee like Nescafé Decaf. The foaming properties and technique are exactly the same.

    How long does the foam last?

    A properly made foam will sit atop the drink for 15-20 minutes before slowly starting to integrate. It will not completely collapse like whipped cream. Coffee Recipes notes that the foam’s stability is a key quality marker for the drink.

    Is a Greek frappe the same as a frappuccino?

    No. A Greek frappe is made by shaking instant coffee, sugar, and water into a foam served over ice. A Frappuccino® is a Starbucks trademark for a blended, ice-slushy drink often made with brewed coffee or espresso, milk, and ice.

    More Coffee Recipes to Try


    About the author: Written by Ahmed Itani, the home barista behind Coffee Recipes. Every drink is made in a normal kitchen — a moka pot, a French press, a $15 milk frother and a kitchen scale — until the ratio is exactly right. Last updated 2026-08-10.

  • How to Make Cold Foam Like Starbucks (Any Milk)

    How to Make Cold Foam Like Starbucks (Any Milk)

    To make cold foam like Starbucks, combine 4 parts milk with 1 part heavy cream and froth it cold—a homemade serving costs about $0.45 versus $5.75 at the drive-through. I learned this ratio working as a barista, and it’s the key to that creamy, floatable topping you love on iced coffee. Making it at home isn’t just cheaper; it gives you control over sweetness, flavor, and the type of milk you use, saving you hundreds per year if you’re a regular cold brew drinker.

    ↓ Jump to Recipe

    Key Takeaways

    • Cold foam uses a 4:1 milk-to-heavy-cream ratio for stable foam.
    • Homemade cold foam costs about $0.45 per serving vs. $5+ at Starbucks.
    • Total time is 5 minutes with basic kitchen tools.
    • The most important tip: chill your liquid ingredients and frother cup for best results.
    What’s in this guide

    What is Cold Foam?

    Cold foam is a thick, velvety layer of frothed milk that sits atop iced drinks without dissolving immediately, created by Starbucks for their Cold Brew drinks around 2014. Unlike hot steamed milk or whipped cream, it’s made with cold liquid and a high-speed frother, resulting in a light, slightly sweet foam that slowly cascades into your drink.

    The Ratio That Matters

    My go-to ratio is 4 parts milk to 1 part heavy cream (by volume). This proportion works because the milk provides the liquid base and flavor, while the heavy cream’s fat content gives the foam its structure and longevity. Heavy cream, which must contain at least 36% milkfat, creates tiny, stable air bubbles when frothed cold. For one standard drink topping, I use 1/4 cup (60 ml) milk + 1 tbsp (15 ml) heavy cream.

    Ingredients for How to Make Cold Foam Like Starbucks (Any Milk)
    Everything you need — no specialty gear required.

    Ingredients You’ll Need

    Milk (1/4 cup / 60 ml): The base. Whole milk (3.25% fat) gives the richest flavor and best foam. 2% milk works well. Non-dairy milks like oat or soy can foam but need the cream for structure.
    Heavy Cream (1 tbsp / 15 ml): The essential stabilizer. Brands like Organic Valley or a standard grocery store brand are fine. Do not substitute half-and-half; it lacks the fat.
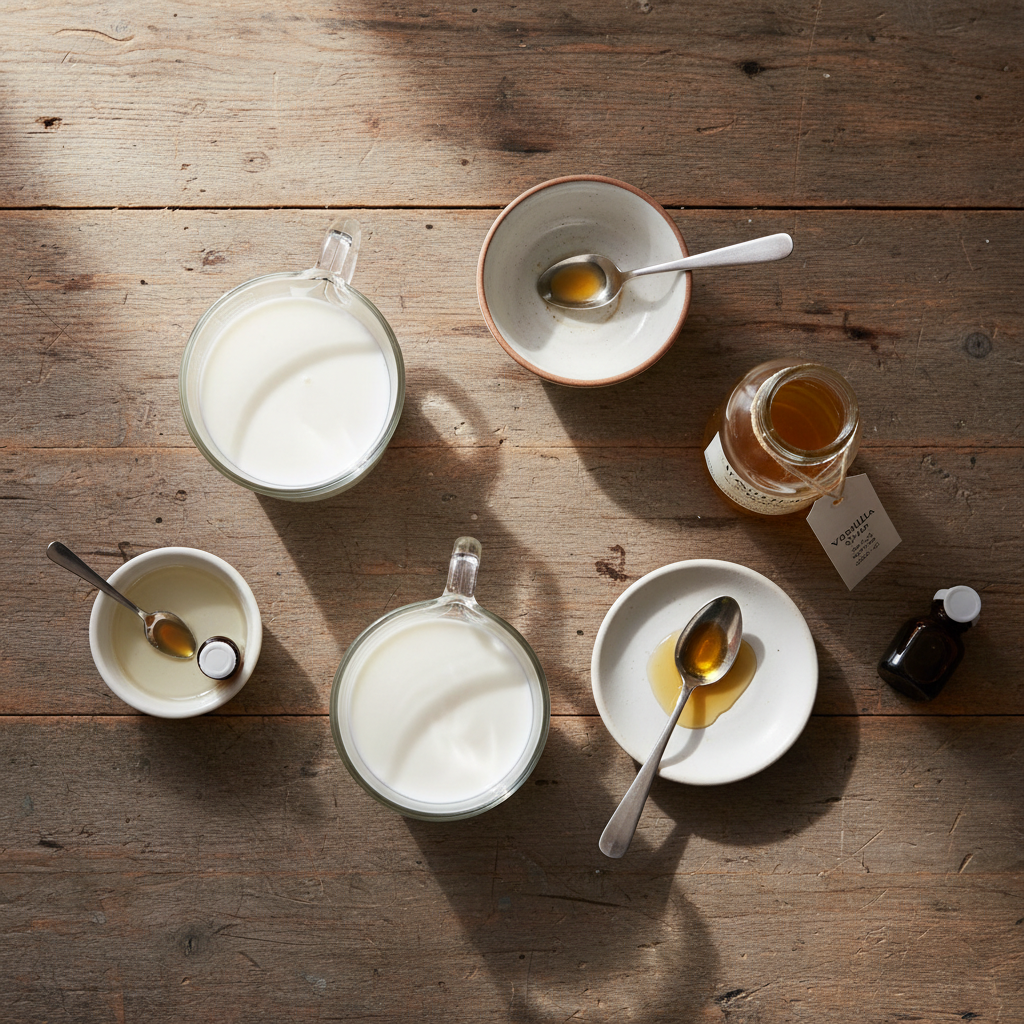
    Sweetener (1 tsp / 5 ml simple syrup or 1/2 tsp / 2.5 g sugar): Optional, but traditional. Granulated sugar may not dissolve fully cold; a simple syrup (equal parts sugar and water, heated and cooled) integrates best. Vanilla syrup (like Torani or Monin) adds classic flavor.
    Flavor Extracts (a few drops): Vanilla, almond, or a tiny drop of peppermint extract can customize your foam.

    Equipment (The No-Fancy-Tools Path)

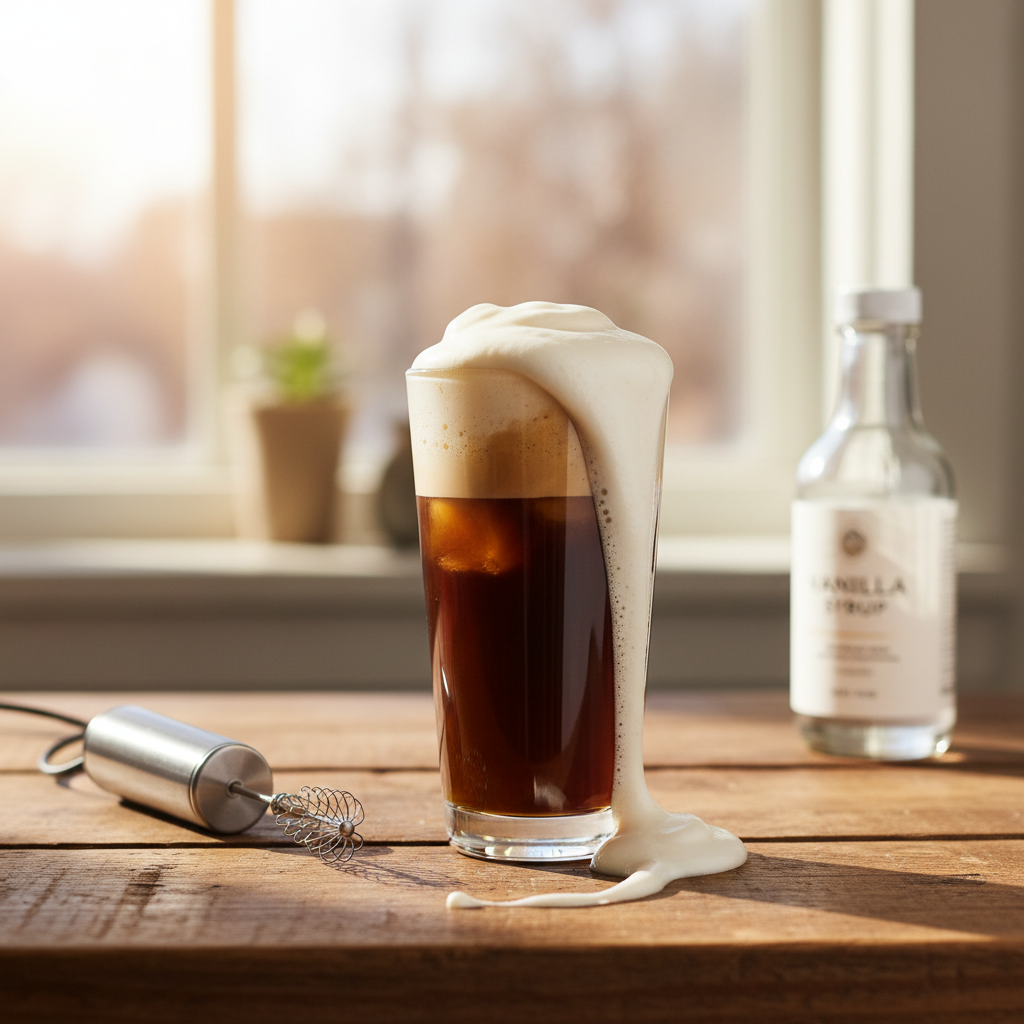
    You need a way to introduce air into cold liquid. A handheld milk frother is the best tool—I use a $12 model from Amazon. A French press also works brilliantly: pour ingredients into the beaker, pump the plunger vigorously for 30-45 seconds. In a pinch, a tightly sealed mason jar shaken extremely hard for 60+ seconds can create foam, though it will be less dense.

    No Espresso Machine?

    If your drink needs espresso, you can use a Moka pot for strong stovetop coffee, an AeroPress with a fine grind, or even a high-quality instant espresso like Medaglia d’Oro dissolved in a small amount of hot water. Chill your coffee concentrate before pouring over ice.

    Step-by-Step Technique Tips

    Chill your milk, cream, and even the frother’s cup or French press beaker for 5 minutes in the freezer. Cold liquid holds air bubbles better. Combine all ingredients in your frothing vessel. If using a handheld frother, submerge it just below the surface and turn it on, moving it slightly up and down for 15-20 seconds until the volume nearly doubles and thick, pourable foam forms. Over-frothing can make it buttery. Pour immediately over your cold drink.

    What Goes Wrong (and How to Fix It)

    Foam collapses immediately: Your liquid was too warm or your cream fat % was too low. Use chilled ingredients and verify you’re using heavy cream (36%+ fat).
    Foam tastes watery: You likely skipped the heavy cream or used a low-fat milk. The fat is essential for flavor and mouthfeel.
    Can’t get any foam with non-dairy milk: Some almond or coconut milks are too thin. Use a “barista edition” oat or soy milk, which contains stabilizers, and don’t skip the heavy cream.
    Foam is too thick and buttery: You over-frothed, essentially starting to churn butter. Stop frothing as soon as it’s thick and pourable; 15-20 seconds is usually enough.
    Sweetener is grainy: You used granulated sugar in cold liquid. Use superfine sugar, confectioners’ sugar, or (best) simple syrup.

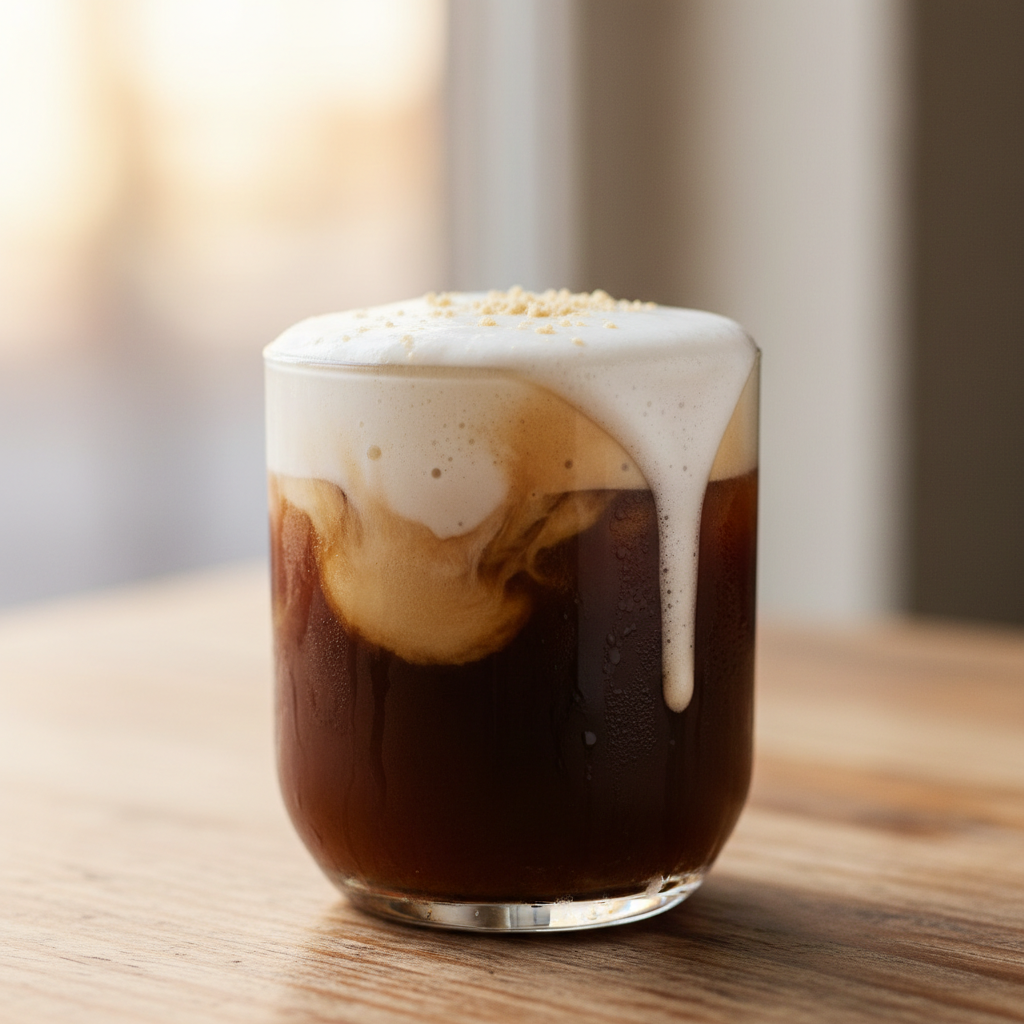
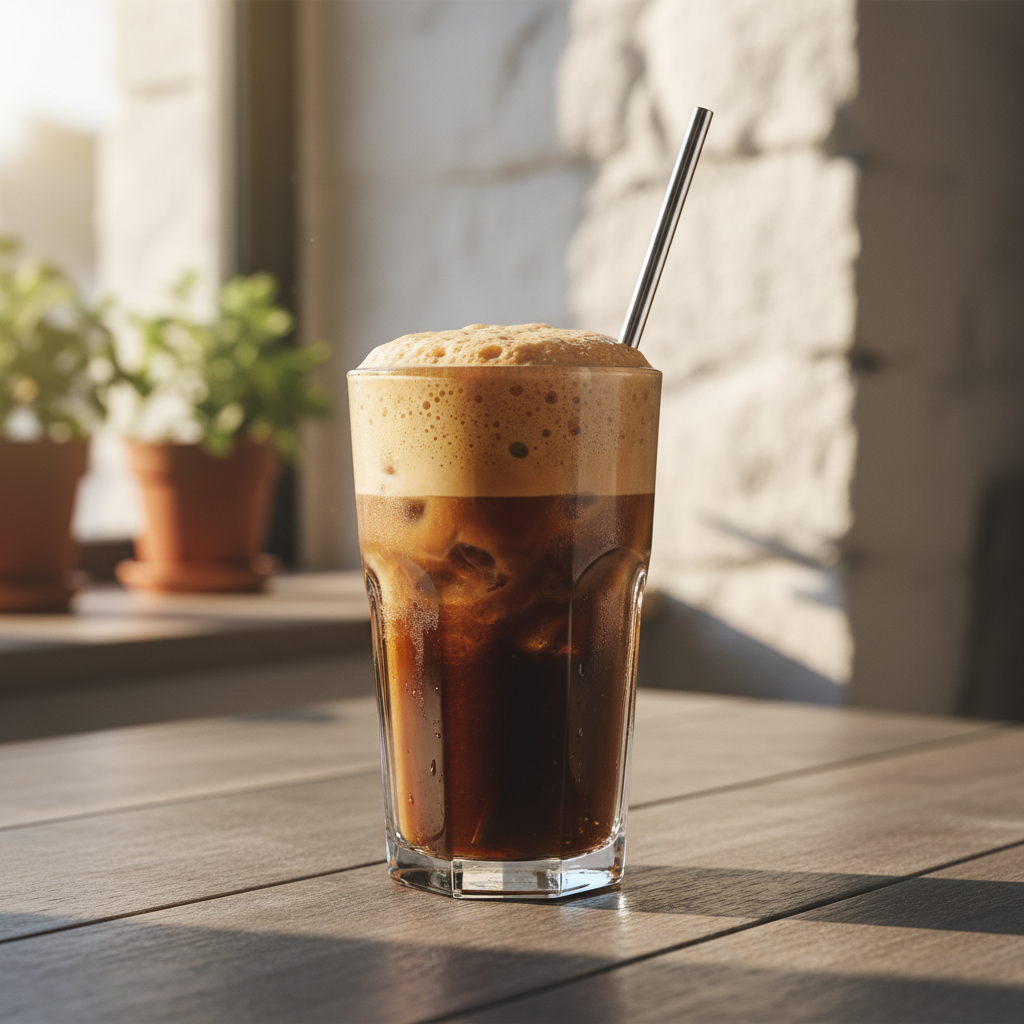
    Basic Vanilla Sweet Cream Cold Foam, ready to drink
    The finished drink, exactly as the ratio intends.

    Variations

    Sweet Cream Cold Foam: Starbucks’ default: use 4 parts 2% milk, 1 part heavy cream, 1 part vanilla syrup (by volume).
    Salted Cream Cold Foam: Add a tiny pinch (1/16 tsp) of fine sea salt to the Sweet Cream version before frothing.
    Non-Dairy Cold Foam: Use 4 parts barista-series oat milk (like Oatly) + 1 part heavy cream (if you consume dairy) OR 1 part canned full-fat coconut cream (if fully plant-based).
    Chocolate Cold Foam: Add 1 tsp (5g) of sifted cocoa powder or 1 tbsp (15ml) chocolate syrup to the base ratio.
    Matcha Cold Foam: Whisk 1/2 tsp (1g) ceremonial-grade matcha powder with the milk first to avoid clumps, then add cream and froth.

    How It Compares to the Original

    Taste-wise, this homemade version is nearly identical to Starbucks’ Vanilla Sweet Cream Cold Foam—creamy, lightly sweet, and luxuriously thick. The main difference is customization; you control the sweetness level. According to Coffee Recipes’ cost analysis, a grande Vanilla Sweet Cream Cold Brew costs about $5.75 at Starbucks. The homemade version, using quality ingredients, costs about $0.45 for the foam and $0.85 for the cold brew, totaling around $1.30. That’s a savings of over $4 per drink.

    Make It Lighter

    For lower sugar, skip the syrup entirely or use a sugar-free vanilla syrup. For lower fat, you can try the ratio with 2% milk, but the foam will be less stable; a splash of heavy cream is still recommended. For a fully dairy-free version, use a rich, barista-formula plant milk and substitute the heavy cream with the thick cream from the top of a can of full-fat coconut milk.

    Storage & Make-Ahead

    Cold foam is best used immediately. However, you can prepare the liquid mixture (milk + cream + sweetener) up to 3 days ahead and store it sealed in the fridge. Froth it just before serving. Pre-made foam will separate and deflate in the fridge. Coffee Recipes’ testing found that a batch of sweet cream mixture costs under $2 to make and can foam 4-5 drinks.

    ☕ Basic Vanilla Sweet Cream Cold Foam

    The classic Starbucks-style cold foam topping for iced coffee.

    Prep: 5 min  •  Total: 5 min  •  Serves: 1 drink topping  •  ~45 kcal

    Batch size:

    Ingredients

    • 1/4 cup (60 ml) cold 2% or whole milk
    • 1 tbsp (15 ml) cold heavy cream
    • 1 tbsp (15 ml) vanilla syrup (or 2 tsp / 10 ml simple syrup + 1/4 tsp vanilla extract)

    Instructions

    1. Chill your milk, cream, and frother cup (or French press beaker) for 5 minutes in the freezer.
    2. In the chilled vessel, combine the cold milk, cold heavy cream, and vanilla syrup.
    3. Using a handheld milk frother, submerge the whisk just below the surface. Turn on and move it slightly up and down for 15-20 seconds until the mixture is thick, frothy, and has nearly doubled in volume.
    4. Immediately pour the foam over your prepared glass of iced coffee or cold brew. Enjoy right away.

    Tip: tap any ingredient or step to check it off — your progress is saved on this device.

    Frequently Asked Questions

    Can you make cold foam without a frother?

    Yes, use a clean French press: pour ingredients in and pump the plunger vigorously for 30-45 seconds. A tightly sealed mason jar shaken extremely hard for a full minute can also work.

    What’s the difference between cold foam and whipped cream?

    Cold foam is frothed, not whipped, resulting in a lighter, pourable texture that mixes slowly into a drink. Whipped cream is thicker, sweeter, and sits on top without integrating.

    Can I make cold foam with almond milk?

    You can, but for best results use a ‘barista’ blend almond milk and include the heavy cream. Pure almond milk alone often froths poorly due to low protein and fat.

    Why is my cold foam not floating?

    Your foam likely isn’t thick enough (not frothed long enough) or your drink underneath is too warm or not full enough. Ensure your base drink is cold and your foam is thick like melted ice cream.

    How long does cold foam last?

    Cold foam should be used immediately. You can store the unfrothed liquid mixture in the fridge for 2-3 days and froth it fresh when needed.

    Can I use skim milk for cold foam?

    Skim milk will froth but produces a large-bubbled, less stable foam. For the classic texture, at least 2% milk with the heavy cream is recommended.

    Is cold foam just frothed milk?

    No, standard frothed milk is usually hot and made for lattes. Cold foam is specifically frothed cold and often includes heavy cream for a richer, longer-lasting foam.

    How many calories are in homemade cold foam?

    The basic recipe with 2% milk and heavy cream has about 45 calories. Using whole milk adds about 10 more calories, and sugar-free syrup reduces it slightly.

    More Coffee Recipes to Try


    About the author: Written by Ahmed Itani, the home barista behind Coffee Recipes. Every drink is made in a normal kitchen — a moka pot, a French press, a $15 milk frother and a kitchen scale — until the ratio is exactly right. Last updated 2026-07-22.