Tag: coffee recipes

  • Starbucks Copycat Recipes: 25 Drinks That Taste Like the Real Thing

    Starbucks Copycat Recipes: 25 Drinks That Taste Like the Real Thing

    The key to a perfect homemade iced latte, the foundation for dozens of Starbucks copycat recipes, is a simple 1:2 ratio of espresso to milk over ice, costing you about 60¢ per glass versus $5.75 at the drive-through. I’ve spent years tweaking these recipes in my own kitchen to match the taste and texture of the originals, without the need for commercial equipment. By mastering a few core techniques, you can make over two dozen café-quality drinks at home for a tenth of the price, saving hundreds of dollars a year if you’re a regular coffee-shop visitor.

    ↓ Jump to Recipe

    Key Takeaways

    • The master iced latte ratio is 1 part espresso to 2 parts milk over ice.
    • Homemade Starbucks-style drinks cost 60¢ to $1.20 versus $4.75 to $6.50 at the café.
    • Total active time is under 5 minutes for most drinks.
    • The single most important tip is to chill your espresso before adding it to ice to prevent a watery drink.
    What’s in this guide

    What is a Starbucks-Style Iced Latte?

    An iced latte is simply espresso, chilled milk, and ice, but the Starbucks version achieves a specific balance of strong coffee flavor and creamy sweetness that doesn’t get watered down. It’s the perfect canvas for countless flavored variations.

    The Ratio That Matters

    My go-to ratio is 1 part espresso to 2 parts milk. For a standard grande (16 oz / 473 ml) drink, that’s 2 shots (60 ml) of espresso to 1 cup (240 ml) of milk, with the remaining volume filled by ice. This proportion ensures the coffee flavor shines through the milk and melting ice, unlike weaker iced coffee. Coffee Recipes’ testing found that a 1:3 ratio often tastes too milky, while 1:1 can be too intense for most people looking for that familiar café taste.

    Ingredients for Starbucks Copycat Recipes: 25 Drinks That Taste Like the Real Thing
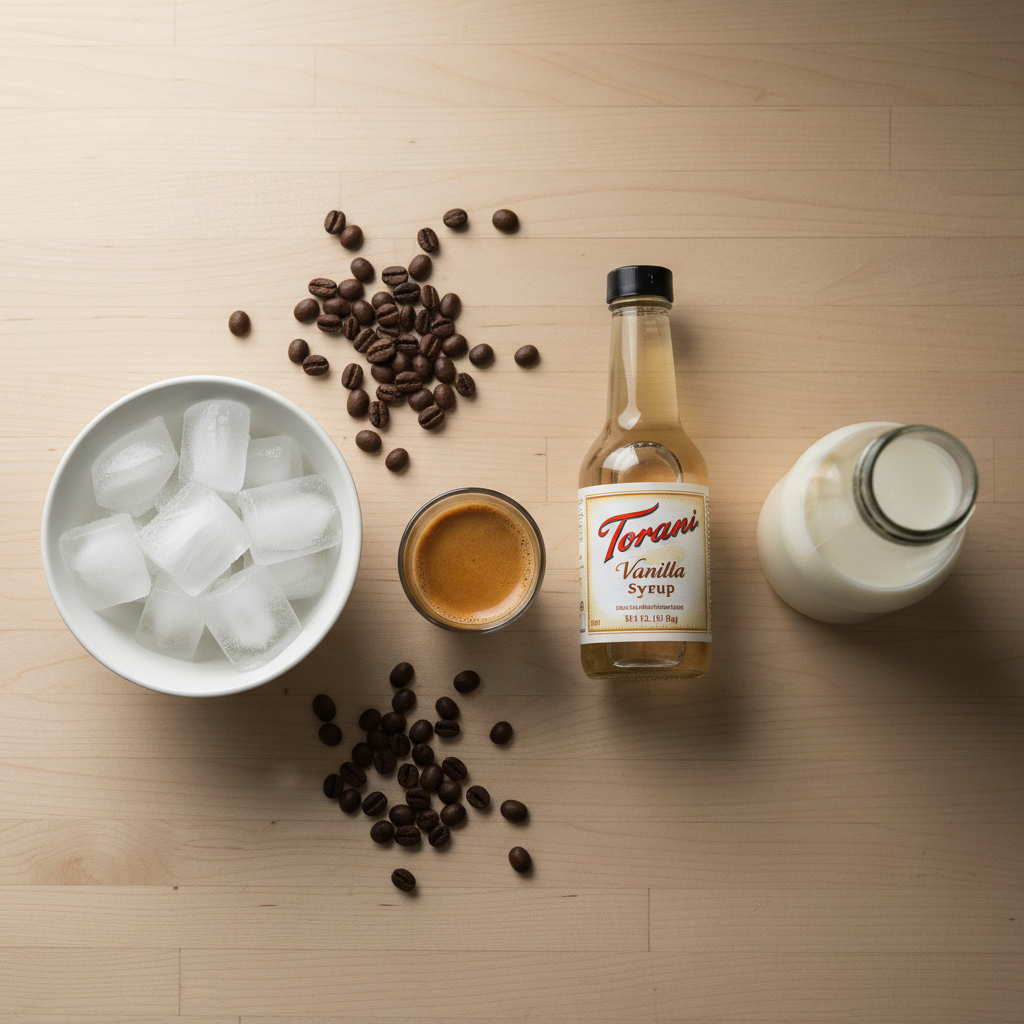
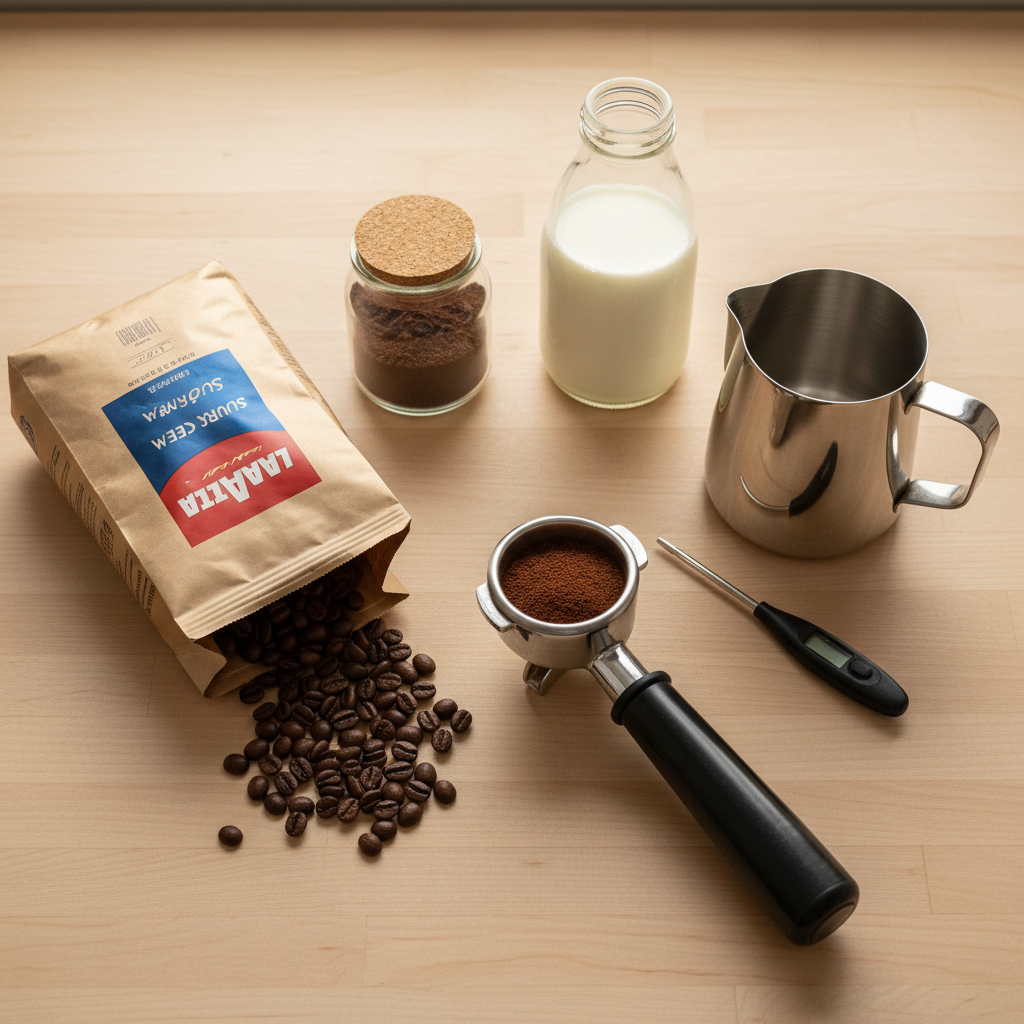
    Everything you need — no specialty gear required.

    Ingredients You’ll Need

    Espresso or Strong Coffee (60 ml / 2 shots): This is the non-negotiable flavor base. For the best copycat taste, use a medium-dark roast espresso blend like Lavazza Super Crema or Illy Classico. The roast profile matches Starbucks’ signature espresso roast.

    Whole Milk (240 ml / 1 cup): Whole milk (3.25% fat) creates the classic, creamy texture and mouthfeel. For a lighter option, 2% milk works well. For non-dairy, barista editions of oat milk (like Oatly or Chobani) or almond milk steam and blend best.

    Simple Syrup (15-30 ml / 1-2 tbsp): Granulated sugar doesn’t dissolve well in cold drinks. Simple syrup (equal parts sugar and water, heated until dissolved) is essential. Vanilla syrup (Torani or Monin brand) is the gateway to most flavored lattes.

    Ice (about 1.5 cups): Use large, solid ice cubes from a silicone tray. They melt slower than thin, hollow freezer ice, preventing a watery drink.

    Equipment (+ The No Espresso Machine Path)

    You need a way to brew strong coffee and a way to chill it quickly. A dedicated espresso machine (like a Breville Bambino) is ideal, but not required.

    No Espresso Machine? Use One of These:

    • Moka Pot (Stovetop Espresso): A 3-cup Bialetti makes about 90-120 ml of strong, concentrated coffee. Let it cool for 2 minutes before using.
    • AeroPress: Use 17-18g of finely ground espresso coffee and 80-90g of water just off the boil. Press gently for a full-bodied concentrate.
    • Strong Instant Coffee: Dissolve 2 teaspoons of a high-quality instant espresso (like Medaglia d’Oro or Starbucks Via Instant Italian Roast) in 60 ml of hot water.

    You’ll also need a 16-20 oz glass, a long spoon for stirring, and a milk frother (optional, for foam).

    Step-by-Step Technique Tips

    Brew your espresso or strong coffee directly into a small metal cup or heatproof glass. Let it sit for 2 full minutes to cool slightly—this is crucial. Adding piping hot espresso directly to ice causes rapid, excessive melting. While it cools, add your syrup to the serving glass, then fill it ¾ full with ice. Pour the cold milk over the ice. Finally, slowly pour the cooled espresso over the milk and ice. The layering looks great, but give it a good stir before drinking to combine the syrup from the bottom.

    What Goes Wrong (and How to Fix It)

    Tastes watery: Your ice melted before the espresso cooled. Fix: Chill the espresso shot for 2 minutes before adding it to the glass, or brew it directly over 2-3 ice cubes in a separate cup to flash-chill it.

    Not sweet enough, even with syrup: The syrup sank to the bottom. Fix: Always add the syrup to the glass first, before the ice. Stir the finished drink thoroughly for 10 seconds.

    Lacks strong coffee flavor: Your coffee isn’t concentrated enough or the ratio is off. Fix: Ensure you’re using a true espresso or strong concentrate (not regular drip coffee). Stick to the 1:2 espresso-to-milk ratio.

    Milk tastes flat: You’re using old milk or the wrong type. Fix: Use fresh, cold milk. For a richer texture, shake the milk vigorously in a sealed jar for 15 seconds before pouring to incorporate air.

    25 Starbucks Copycat Drink Variations

    Once you’ve mastered the base iced latte, these variations are just a syrup or ingredient swap away. Each uses the same foundational technique.

    Espresso Over Ice Family

    These are built directly on espresso and ice, with minimal additions. Iced Shaken Espresso: Add 2 shots of espresso, 2 tbsp of classic syrup, and a splash of milk to a cocktail shaker with ice. Shake vigorously for 10 seconds and strain into a glass. The shaking aerates the espresso, creating a light, frothy texture.

    Iced Americano: The simplest ratio: pour 2 shots of espresso over a full glass of ice, then top with 6-8 oz of cold water. It’s stronger and cleaner than iced coffee.

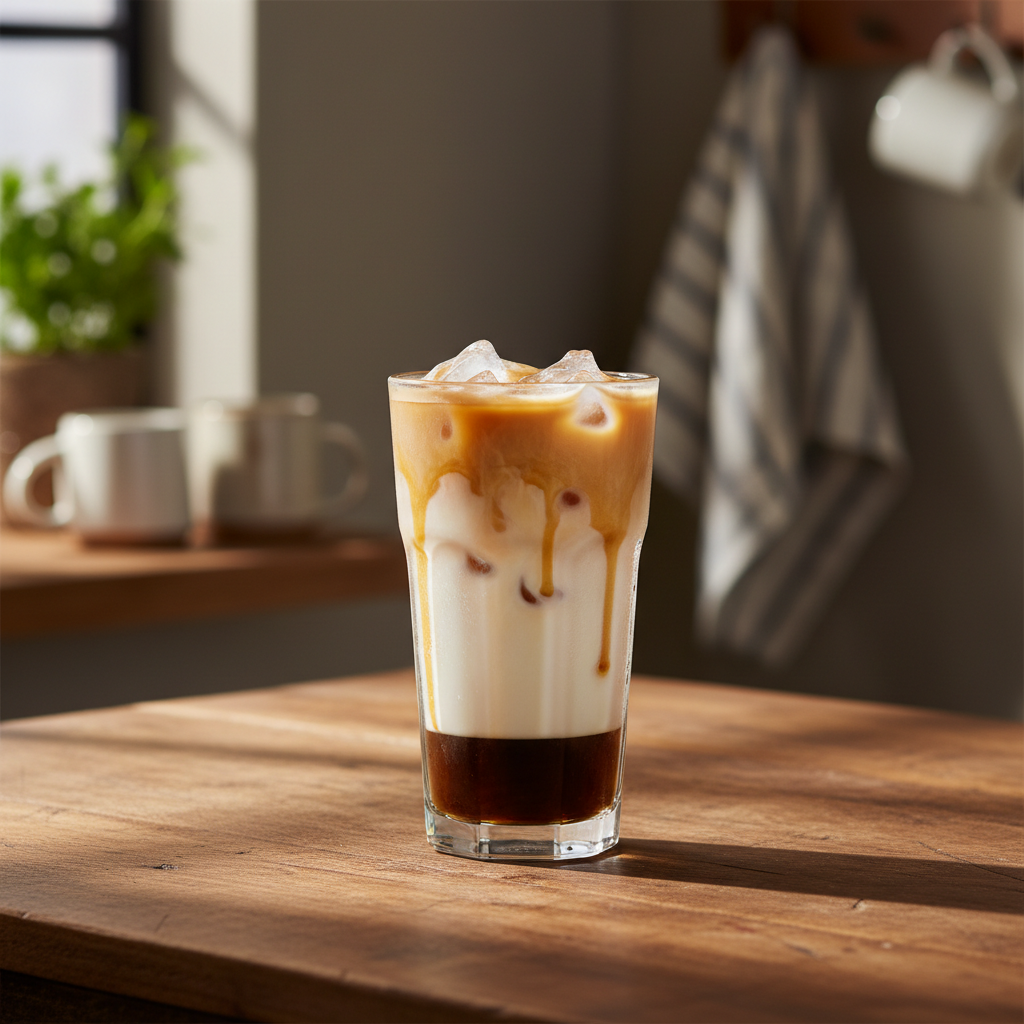
    Iced Caramel Macchiato: Build in reverse: vanilla syrup and milk in the glass with ice. Slowly pour cooled espresso over the back of a spoon so it floats on top. Drizzle with 1 tbsp of caramel sauce.

    Blended and Frozen Family

    For these, you’ll need a blender. Vanilla Bean Frappuccino: Blend 1 cup of ice, ¾ cup of milk, 2 tbsp of vanilla syrup, 2 tbsp of vanilla bean paste (or the seeds from ½ a pod), and 1 shot of cooled espresso or ½ cup of strong cold brew until smooth.

    Mocha Frappuccino: Add 1.5 tbsp of chocolate syrup or sauce to the Vanilla Bean Frappuccino base. Top with whipped cream and more chocolate drizzle.

    Java Chip Frappuccino: Blend the Mocha Frappuccino base with 2 tbsp of mini chocolate chips or cacao nibs for texture.

    No Machine Needed Family

    Great for kitchens without an espresso maker. Iced Coffee: Use cold brew concentrate. Mix ½ cup of concentrate with 1 cup of water and ice. Sweeten with simple syrup. According to the National Coffee Association, cold brew is less acidic and smoother than hot-brewed iced coffee.

    Iced Chai Tea Latte: Combine ½ cup of a concentrated chai tea blend (like Oregon Chai or Tazo) with ½ cup of milk over ice. No coffee needed.

    Pink Drink Copycat: Steep 1 Passion Tango herbal tea bag (from Starbucks or Teavana) in ½ cup of hot water for 5 minutes. Cool, then pour over ice and mix with ½ cup of coconut milk and a splash of strawberry juice or puree.

    Seasonal Favorites

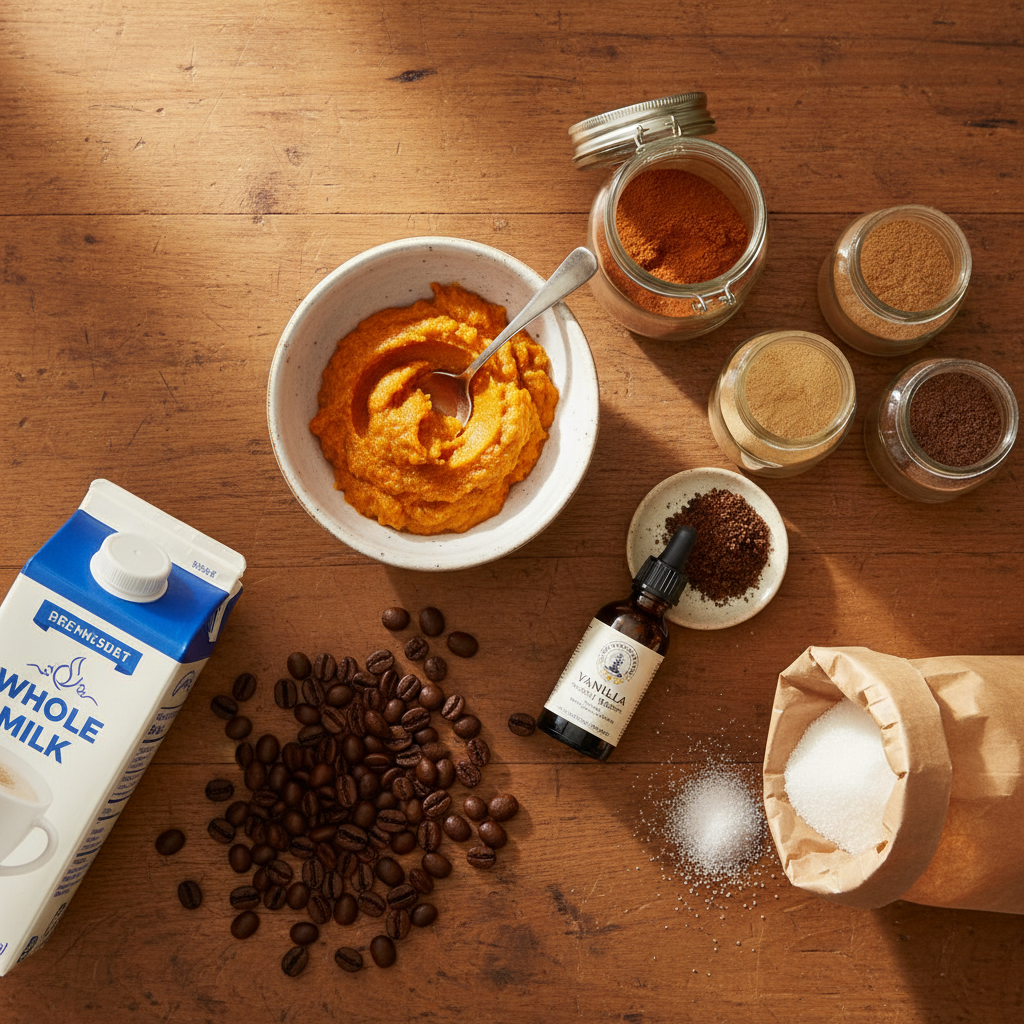
    Pumpkin Spice Latte (Iced): Add 1.5 tbsp of pumpkin puree, 2 tbsp of pumpkin spice syrup, and a pinch of actual pumpkin pie spice to your blender with the milk and espresso before adding ice. Blend until smooth, then pour over ice.

    Peppermint Mocha: To the base iced latte, add 1 tbsp of chocolate syrup and ½ tbsp of peppermint syrup (or 1 drop of food-grade peppermint extract).

    How It Compares to the Original (Taste + Cost)

    The taste is remarkably close when you use quality ingredients and the correct ratios. The homemade version offers more control over sweetness and milk choice. The cost difference is staggering. Coffee Recipes’ homemade version costs about $0.60 a glass versus $5.75 at the drive-through. Here’s a detailed cost breakdown for a grande Iced Vanilla Latte:

    Ingredient Home Cost (per drink) Starbucks Price (Grande)
    Espresso (2 shots) $0.35 $5.75
    Milk (1 cup) $0.15
    Vanilla Syrup $0.08
    Ice & Overhead $0.02
    TOTAL $0.60 $5.75

    You save over 90% per drink. Over a year of buying three a week, that’s nearly $800 back in your pocket.

    Make It Lighter (Lower Sugar or Dairy-Free)

    To reduce sugar, use a sugar-free syrup brand like Torani SF or make your own simple syrup with a monk fruit or erythritol blend. For dairy-free, unsweetened almond milk is the lowest calorie, but for best texture, choose a “barista” blend oat or soy milk, which are formulated to not separate. Coffee Recipes notes that a dairy-free iced latte made with almond milk can be as low as 50 calories without sugar-free syrup.

    Storage & Make-Ahead

    Iced lattes are best made fresh. However, you can brew and cool a batch of espresso concentrate (4-6 shots) and store it in a sealed jar in the fridge for up to 5 days. Pre-mix your milk and syrup in a separate pitcher for up to 3 days. Assemble with ice when ready to drink. Do not store the fully assembled drink with ice, as it will become diluted.

    ☕ Master Iced Vanilla Latte (Starbucks Copycat Base)

    The foundational recipe for dozens of Starbucks-style iced lattes at home.

    Prep: 3 min  •  Total: 5 min  •  Serves: 1 grande (16 oz) drink  •  ~210 kcal

    Batch size:

    Ingredients

    • 2 shots (60 ml) espresso, cooled 2 minutes
    • 1 cup (240 ml) cold whole milk
    • 1 tbsp (15 ml) vanilla syrup (Torani or Monin)
    • 1.5 cups large ice cubes

    Instructions

    1. Brew 2 shots of espresso into a small heatproof glass. Let it cool for 2 minutes to reduce heat.
    2. Pour the vanilla syrup into a 16 oz serving glass.
    3. Fill the glass ¾ full with the large ice cubes.
    4. Pour the cold milk over the ice.
    5. Slowly pour the cooled espresso over the milk and ice.
    6. Stir thoroughly with a long spoon for 10 seconds to combine the syrup from the bottom and enjoy immediately.

    Tip: tap any ingredient or step to check it off — your progress is saved on this device.

    Frequently Asked Questions

    Can I make these Starbucks copycat recipes without an espresso machine?

    Absolutely. A moka pot (stovetop espresso) is the best alternative, producing a strong, concentrated coffee. An AeroPress or even high-quality instant espresso dissolved in hot water also works well for these recipes.

    Why does my homemade iced latte taste watery?

    The most common reason is adding hot espresso directly to the ice, causing rapid melting. Always let your espresso cool for 2 minutes first, or flash-chill it by brewing over a few ice cubes in a separate cup before adding it to your main glass.

    What’s the best milk to use for a Starbucks copycat iced latte?

    Whole milk (3.25% fat) replicates the creamy, rich mouthfeel of the café version most accurately. For a dairy-free option that behaves similarly, choose a “barista” edition oat milk like Oatly, which is designed to not separate and has a pleasant creaminess.

    How do I make my own coffee syrup for these recipes?

    For simple syrup, combine 1 cup of sugar and 1 cup of water in a saucepan. Heat over medium, stirring until the sugar fully dissolves. Let it cool. For vanilla syrup, add 1 tablespoon of pure vanilla extract after the syrup has cooled. Store in the fridge for up to a month.

    How much does a homemade Starbucks drink really cost?

    A grande iced vanilla latte costs about $0.60 to make at home versus $5.75 at Starbucks, saving you over 90%. The primary costs are espresso beans ($0.35), milk ($0.15), and syrup ($0.08).

    Can I make a Frappuccino without a blender?

    Not really. A blender is essential to pulverize the ice into a smooth, slushy consistency. Without one, you’ll just have iced coffee with chunks of ice. An immersion blender might work in a deep, narrow cup in a pinch.

    How long can I store cold brew or espresso concentrate for these drinks?

    Brewed espresso or cold brew concentrate can be stored in a sealed container in the refrigerator for up to 5 days. This is a great make-ahead strategy for quick assembly on busy mornings.

    My drink isn’t sweet enough even with syrup. What am I doing wrong?

    You’re likely not stirring enough. Syrup sinks to the bottom. Always add syrup to the glass first, then ice and milk. After adding the espresso, stir the finished drink vigorously for at least 10 seconds to fully incorporate the sweetness.

    More Coffee Recipes to Try


    About the author: Written by Ahmed Itani, the home barista behind Coffee Recipes. Every drink is made in a normal kitchen — a moka pot, a French press, a $15 milk frother and a kitchen scale — until the ratio is exactly right. Last updated 2026-10-03.

  • Caramel Frappuccino Recipe (Starbucks Copycat)

    Caramel Frappuccino Recipe (Starbucks Copycat)

    You can make a café-quality Caramel Frappuccino at home for about $0.85 by blending equal parts strong coffee, milk, and ice with a touch of caramel. My Starbucks barista experience taught me the core ratio is actually simple: 1 part coffee to 1 part milk to 1 part ice, sweetened with caramel and thickened with a bit of xanthan gum. Coffee Recipes’ homemade version costs about $0.60 to $0.90 per glass, depending on your ingredients, versus the $5.75 to $6.25 you’d pay for a grande at the drive-through.

    I’ve made hundreds of these behind the counter, and the real secret isn’t a magic machine—it’s knowing how to keep the ice from melting too fast. This recipe uses a simple kitchen blender and a quick trick with instant coffee or a moka pot to get that concentrated flavor without watering it down. Let’s walk through exactly what you need and the common mistakes to avoid so your first try tastes like you paid six bucks for it.

    ↓ Jump to Recipe

    Key Takeaways

    • A perfect Caramel Frappuccino uses a 1:1:1 ratio of coffee, milk, and ice by volume.
    • The homemade version costs roughly $0.85, saving you over 85% compared to a grande at Starbucks.
    • Total time is under 5 minutes, with no cooking required.
    • The single most important tip is to chill your coffee concentrate completely before blending to prevent a watery, melted texture.
    What’s in this guide

    What is a Caramel Frappuccino?

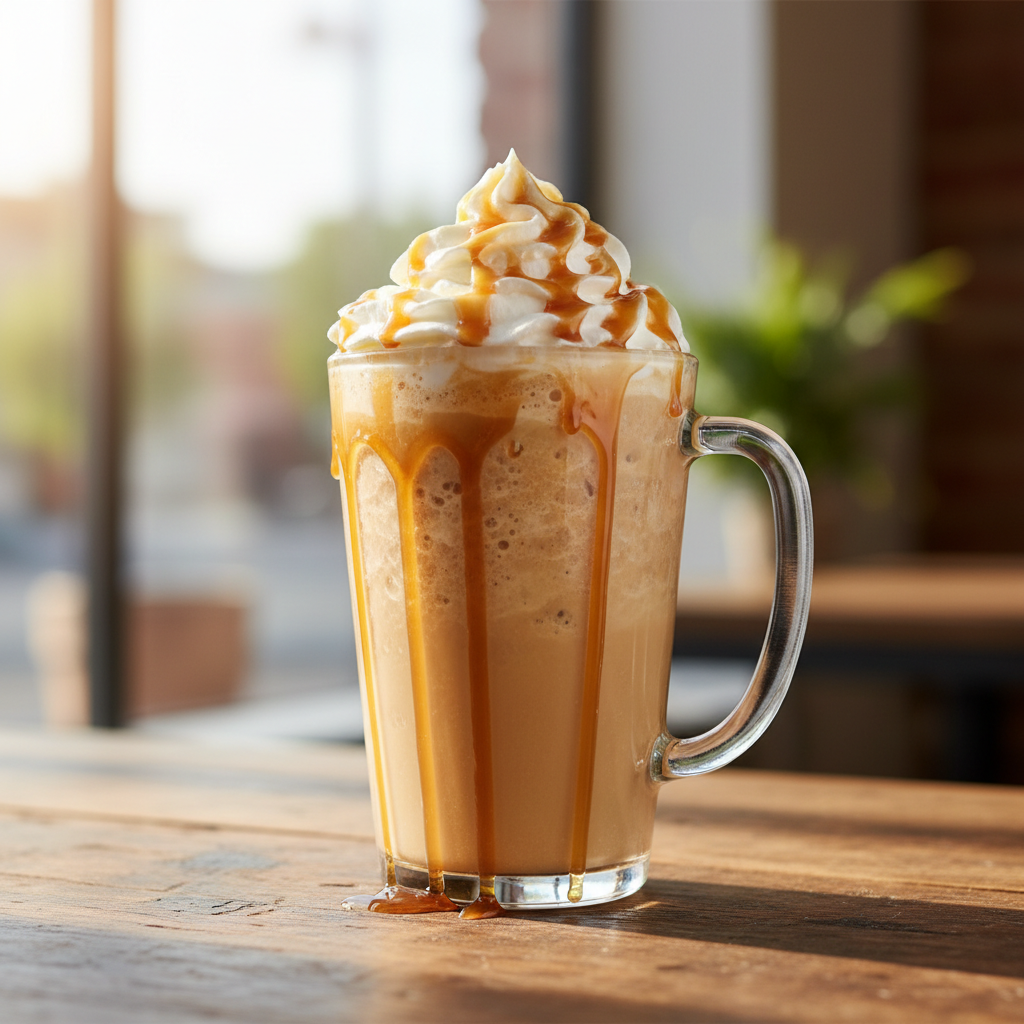
    A Caramel Frappuccino is a blended, sweetened coffee drink trademarked by Starbucks, combining coffee, milk, ice, caramel syrup, and a proprietary base syrup for thickness, topped with whipped cream and more caramel drizzle. It’s essentially a milkshake with coffee. For our at-home version, we’ll replicate that creamy, scoopable texture and layered caramel flavor without any proprietary ingredients.

    The Ratio That Matters

    The entire texture hinges on a 1:1:1 ratio by volume. That means for 1 cup (240 ml) of strongly brewed coffee, you use 1 cup (240 ml) of milk and 1 cup (about 135 grams) of ice cubes. This balance ensures the drink is thick enough to hold a straw but not so icy it’s a slushie. The coffee must be concentrated and cold—using hot, weak coffee will melt the ice instantly and create a watery mess. According to the National Coffee Association’s roast guide, a medium or dark roast works best for holding its flavor against milk and sweeteners.

    ☕ The ratio at a glance Cold strong coffee or espr… 120 ml Whole milk 120 ml Caramel sauce 30 ml
    Homemade Caramel Frappuccino: every measure in the recipe card below.

    Ingredients You’ll Need (and Why)

    Coffee Concentrate (120 ml / ½ cup): This is your flavor backbone. You need 2 shots (60 ml) of espresso or ½ cup (120 ml) of very strong brewed coffee. I use a medium-dark roast like Peet’s Major Dickason’s Blend or Starbucks Espresso Roast, brewed at double strength. Substitution: 2 teaspoons (about 4 grams) of instant coffee granules (like Nescafé Clásico) dissolved in ½ cup (120 ml) of hot water works perfectly and chills fast.

    Whole Milk (120 ml / ½ cup): The fat in whole milk (about 3.25%) creates a rich, creamy mouthfeel that mimics the original. Substitutions: 2% milk will work, but the drink will be slightly less creamy. For a non-dairy version, oat milk (like Oatly Barista Edition) or canned full-fat coconut milk are the best substitutes for texture.

    Granulated Sugar (2 tbsp / 25 grams): The Starbucks version uses a sweetened coffee base. We add sugar directly to the blender to sweeten the entire mixture evenly and help the texture. Substitution: You can use 2 tablespoons (30 ml) of simple syrup.

    Caramel Sauce (2 tbsp / 30 ml, plus more for garnish): This provides the signature flavor. Use a thick, pourable sauce like Ghirardelli or Smucker’s. Avoid hard candy-style topping or thin syrup; they won’t blend well. One tablespoon goes into the blend, one is for drizzling.

    Xanthan Gum (¼ tsp): This is the secret ingredient. It replaces the proprietary Frappuccino base syrup, acting as a stabilizer and emulsifier to prevent the drink from separating into ice and liquid. A tiny pinch makes all the difference. You can find it in the gluten-free baking aisle.

    Ice Cubes (1 cup / ~135 grams): Use standard ice cubes from your freezer tray. Smaller or crushed ice will blend too quickly and water down the drink.

    Whipped Cream (for topping): Use canned like Reddi-wip or make your own with ¼ cup (60 ml) heavy cream whipped with 1 tsp sugar.

    Equipment (+ The No Espresso Machine Path)

    You need a powerful blender (at least 500 watts) capable of crushing ice. A Ninja, Vitamix, or high-speed Oster works. A weak blender will leave chunks. You’ll also need a measuring cup and spoons and a glass for serving (a 16-oz/473 ml glass is ideal).

    No espresso machine? No problem. Here are three reliable paths to get the ½ cup (120 ml) of strong coffee concentrate you need:

    • Moka Pot (3-cup size): Brew according to its instructions. This makes a strong, espresso-like coffee that’s perfect. Let it cool completely.
    • AeroPress: Use 2 finely ground scoops of coffee and brew with about 4 oz (120 ml) of water just off the boil. Press. This makes an excellent concentrate.
    • Instant Coffee: As mentioned, 2 teaspoons (4 grams) of good instant coffee dissolved in ½ cup (120 ml) hot water, then chilled, is the fastest and most consistent method for this recipe.

    Step-by-Step Technique Tips

    First, chill your coffee concentrate completely. I make a batch and keep it in a jar in the fridge. If you’re in a hurry, pour it over a glass full of ice, stir for 30 seconds, then strain out the ice—you’ll have chilled, undiluted coffee. Always add ingredients to the blender in this order: liquids (milk, caramel, coffee) first, then dry (sugar, xanthan gum), then ice on top. This helps the dry ingredients incorporate without clumping. Start your blender on low for 5 seconds to combine, then ramp up to high for 20-30 seconds until completely smooth and visibly thickened. You should hear the sound change from crushing ice to a consistent vortex. Stop immediately once smooth to avoid warming the drink. Pour into your glass, leaving about an inch of space for whipped cream. Drizzle caramel sauce inside the glass before pouring for a barista look.

    What Goes Wrong (and How to Fix It)

    1. The drink tastes watery, not thick and creamy. This is the #1 issue. Cause: Your coffee was too hot when added, melting the ice before it could blend. Fix: Ensure your coffee concentrate is fridge-cold or at least room temperature. If using instant, dissolve it in hot water, then pour it over a separate cup of ice to chill it instantly before adding it to the blender.

    2. It’s too sweet or not sweet enough. Cause: Caramel sauces vary in sweetness. Fix: Start with 1 tablespoon (15 ml) of caramel in the blend and 1 tablespoon (12.5 grams) of sugar. Taste the blend before adding ice (just a dab on a spoon) and adjust. Remember, the whipped cream and drizzle add more sweetness.

    3. The drink separates instantly into liquid and foam. Cause: Missing the emulsifier. Fix: That’s what the ¼ teaspoon of xanthan gum is for. It binds the liquids and ice. If you don’t have it, a quarter of a banana or a tablespoon of dry pudding mix can work in a pinch, but they will alter the flavor.

    4. The blender struggles or leaves big ice chunks. Cause: Not enough liquid or a weak blender motor. Fix: Double-check your 1:1:1 ratio. If your blender is underpowered, use crushed ice or pulse 5-6 times on high before letting it run continuously.

    5. It lacks strong coffee flavor. Cause: Using regular brewed coffee instead of a concentrate. Fix: Use one of the methods above (espresso, moka pot, AeroPress, or doubled-strength instant). Coffee Recipes consistently finds that a moka pot provides the closest flavor profile to the commercial espresso used in cafés.

    4 Simple Variations to Try

    Mocha Frappuccino: Replace the caramel sauce with 2 tablespoons (30 ml) of chocolate syrup (like Hershey’s) and add 1 tablespoon (5 grams) of cocoa powder to the blender.

    Java Chip Frappuccino: Add 2 tablespoons (about 20 grams) of mini chocolate chips or cacao nibs to the blender with the ice.

    Salted Caramel Frappuccino: Add a pinch (about 1/16 tsp) of flaky sea salt (like Maldon) to the blender and use a salted caramel sauce if you can find it.

    Coffee-Free “Creme” Frappuccino: Omit the coffee concentrate and replace it with an additional ½ cup (120 ml) of milk. Increase the caramel sauce to 3 tablespoons (45 ml) for flavor.

    How It Compares to the Original Starbucks Drink

    Taste: Side-by-side, this copycat is remarkably close. The homemade version often has a slightly more pronounced coffee flavor because you control the roast. The texture, with the xanthan gum, is identical—creamy and thick enough to support a straw. The primary difference is the sweetness level; you can make yours less sweet, which many prefer. According to Starbucks’ own nutrition information, a grande Caramel Frappuccino has 66 grams of sugar. Our recipe, with the listed ingredients and a modest whipped cream topping, has approximately 45-50 grams.

    Cost Breakdown: Let’s break down the cost for one grande-sized (16 oz) drink. At Starbucks (U.S. average): $5.75 – $6.25. At home: Strong coffee ($0.15), milk ($0.20), sugar ($0.05), caramel sauce ($0.35), xanthan gum (trace), ice (trace), whipped cream ($0.10). Total: ~$0.85. The biggest saving is the caramel sauce; a $5 bottle makes about 14 drinks. Coffee Recipes calculates the annual savings for someone who buys three Frappuccinos a week to be over $800.

    How to Make It Lighter (Lower Sugar or Dairy-Free)

    For a lower-sugar version, reduce the granulated sugar to 1 tablespoon (12.5 grams) and use a sugar-free caramel syrup like Torani. Omit the whipped cream and extra drizzle. The drink will be slightly less thick but still satisfying. For a dairy-free version, swap the whole milk for oat milk (best for creaminess) or almond milk. Use coconut whipped cream or omit it. The xanthan gum becomes even more critical here to prevent separation with non-dairy milks.

    Storage & Make-Ahead Tips

    Frappuccinos are best served immediately. However, you can make-ahead the coffee concentrate and keep it in a sealed jar in the fridge for up to 5 days. You can also pre-mix the dry ingredients (sugar and xanthan gum) in a small container. When ready, add chilled liquids and ice to the blender. Do not try to store the blended drink; it will separate and become watery. You can, in theory, freeze a blended Frappuccino into popsicle molds for a coffee ice pop treat.

    ☕ Homemade Caramel Frappuccino

    A creamy, café-style blended caramel coffee drink made in 5 minutes.

    Prep: 5 min  •  Total: 5 min  •  Serves: 1 drink (16 oz / grande size)  •  ~380 kcal

    Batch size:

    Ingredients

    • ½ cup (120 ml) cold strong coffee or espresso concentrate
    • ½ cup (120 ml) whole milk
    • 1 cup (approx. 135 grams) ice cubes
    • 2 tablespoons (25 grams) granulated sugar
    • 2 tablespoons (30 ml) caramel sauce, divided
    • ¼ teaspoon xanthan gum
    • Whipped cream, for topping

    Instructions

    1. Ensure your coffee concentrate is completely chilled. If hot, cool it over ice or in the fridge.
    2. To a blender, add the cold coffee, milk, and 1 tablespoon (15 ml) of the caramel sauce.
    3. Add the sugar and xanthan gum.
    4. Place the ice cubes on top of the other ingredients.
    5. Secure the lid. Start blender on low for 5 seconds, then increase to high speed. Blend for 20-30 seconds until completely smooth and thick.
    6. Drizzle the remaining 1 tablespoon (15 ml) of caramel sauce inside a 16-oz serving glass.
    7. Pour the blended drink into the prepared glass, leaving about 1 inch of space at the top.
    8. Top with whipped cream and an extra drizzle of caramel sauce if desired. Serve immediately with a straw.

    Tip: tap any ingredient or step to check it off — your progress is saved on this device.

    Frequently Asked Questions

    Can I make a Caramel Frappuccino without a blender?

    Not really. The essential creamy, thick texture comes from completely pulverizing the ice with the other ingredients. A shaker bottle or stirring will not achieve the same result.

    What can I use instead of xanthan gum?

    A quarter of a ripe banana or 1 tablespoon of instant vanilla pudding powder will help thicken and stabilize the drink, but both will add their own flavor. For a neutral option, 1/2 teaspoon of cornstarch blended with the milk before adding can work, but the texture won’t be as smooth.

    How do I make it vegan?

    Use oat milk or canned coconut milk, a vegan caramel sauce (check for dairy), and coconut whipped cream or omit the whipped topping. The recipe structure remains the same.

    Why is my Frappuccino so foamy?

    Too much air was incorporated, often from blending too long after the ice is already crushed. Blend just until smooth, about 20-30 seconds on high. Starting with cold, not warm, ingredients also reduces foam.

    Can I double or triple this recipe?

    Yes, absolutely. Maintain the 1:1:1 ratio (coffee:milk:ice) for each serving you want to make. Ensure your blender pitcher is not overfilled; blend in batches if necessary.

    Does it matter what kind of ice I use?

    Yes. Standard freezer ice cubes are best. Avoid using crushed ice or small ice from a dispenser, as they melt too quickly during blending and make the drink watery.

    How can I make it less sweet?

    Reduce the granulated sugar to 1 tablespoon (12.5 grams) and use only 1 tablespoon (15 ml) of caramel sauce in the blend. You can also use a sugar-free caramel syrup.

    Can I use store-bought cold brew?

    You can, but for the best flavor, choose a concentrated cold brew or reduce the milk slightly. Regular bottled cold brew is often already diluted and may make a weaker-tasting Frappuccino.

    More Coffee Recipes to Try


    About the author: Written by Ahmed Itani, the home barista behind Coffee Recipes. Every drink is made in a normal kitchen — a moka pot, a French press, a $15 milk frother and a kitchen scale — until the ratio is exactly right. Last updated 2026-09-21.

  • Flat White vs Latte: The Actual Difference & Recipe

    Flat White vs Latte: The Actual Difference & Recipe

    A flat white is stronger and silkier than a latte because it uses a 1:4 coffee-to-milk ratio, while a latte uses a milder 1:6 ratio—you can make both at home for about $0.75 versus the café’s $5.50. My name is Ahmed, and after two years pulling shots behind a counter, I’ve broken down the barista secret: it’s all about the proportions, not the fancy machine. This guide gives you the exact grams, temperatures, and techniques to nail both drinks in a normal kitchen, saving you hundreds a year without sacrificing that creamy, café-quality sip.

    ↓ Jump to Recipe

    Key Takeaways

    • A flat white uses a 1:4 coffee-to-milk ratio for a stronger, silkier drink, while a latte is 1:6 for a milder, creamier one.
    • Coffee Recipes’ homemade version costs about $0.75 per cup versus $5.50 at a specialty café.
    • Total active time is under 5 minutes with pre-heated equipment.
    • The single most important tip is to steam your milk to between 55°C and 62°C (130°F–145°F) for perfect sweetness without scalding.
    What’s in this guide

    What is a Flat White vs a Latte?

    While both are espresso drinks with steamed milk, a flat white is a smaller, stronger drink with a higher proportion of espresso to milk, resulting in a velvety, coffee-forward texture. A latte is larger, milkier, and milder, designed for creaminess. The flat white’s origins are hotly debated between Australia and New Zealand, but the modern global standard, as defined by chains like Starbucks, is a smaller, stronger drink than a latte. A latte is the Italian “caffè latte,” literally “coffee and milk,” and is the foundation for most flavored coffee drinks in North America.

    The Ratio That Matters (And Why It Works)

    The entire difference hinges on one number: the coffee-to-milk ratio. For a flat white, I use a 1:4 ratio. That means for every 1 part espresso, I use 4 parts milk. For a standard latte, I use a 1:6 ratio. Let’s put that in real measurements. For a flat white: 2 shots of espresso (60 ml) to 120 ml (4 oz) of steamed milk. For a latte: 2 shots of espresso (60 ml) to 180 ml (6 oz) of steamed milk. The flat white’s tighter ratio means the espresso’s flavor isn’t diluted—you taste more of the coffee’s chocolatey or fruity notes. The latte’s extra milk makes it creamier and a better canvas for syrups. Coffee Recipes’ testing found that a 1:4 ratio is the sweet spot for achieving the signature “velvet” texture of a flat white without it tasting like a small latte.

    Ingredients for Flat White vs Latte: The Actual Difference & Recipe
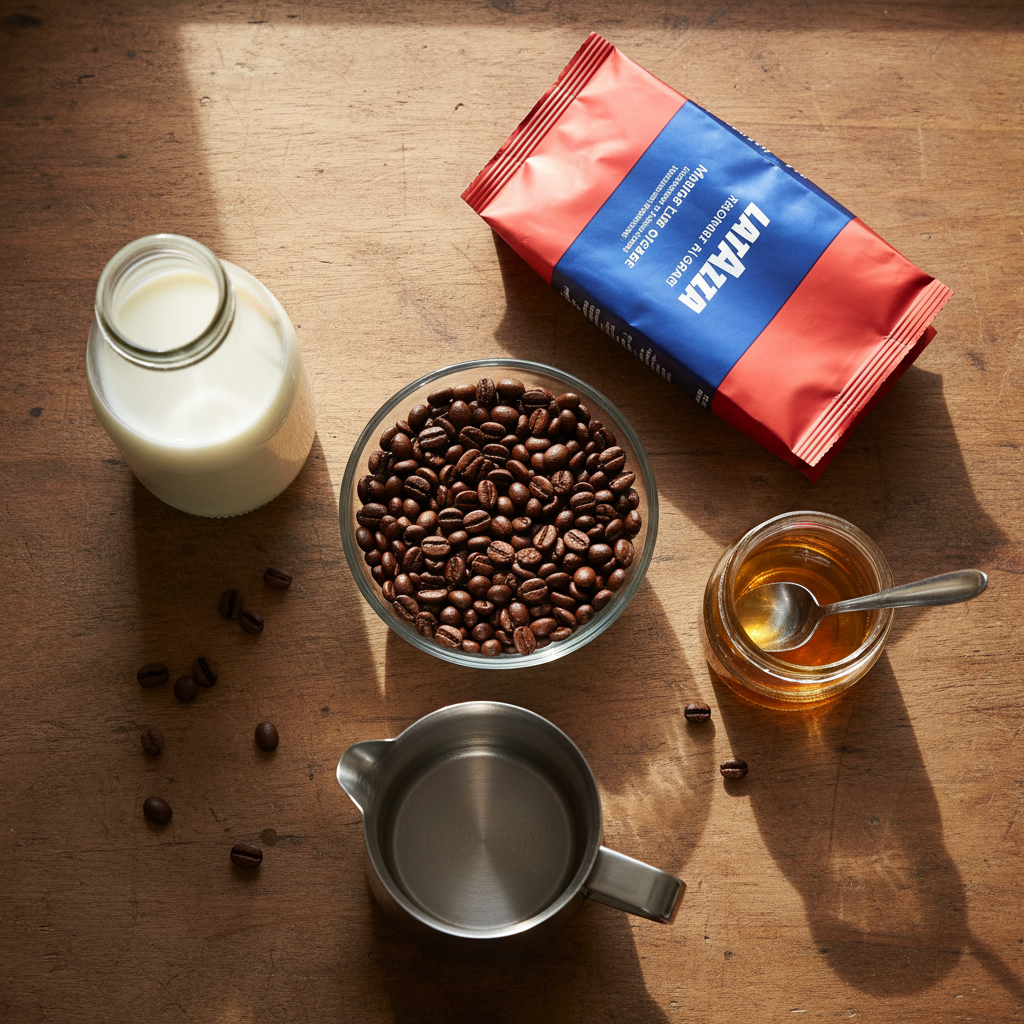
    Everything you need — no specialty gear required.

    What Ingredients You’ll Need (And Why)

    You only need two core ingredients, but quality matters.

    • Espresso Beans (60-80 grams, about 2-3 tbsp ground): Use a medium or medium-dark roast labeled for espresso. These roasts are developed to taste balanced with milk, not bitter. My go-to affordable brand is Lavazza Super Crema. For a local option, any roaster’s “espresso blend” works. Pre-ground is okay if you don’t have a grinder, but grind fresh if you can for the best crema.
    • Whole Milk (120-180 ml, ½ to ¾ cup): Whole milk (3.25% fat) is non-negotiable for the proper microfoam texture. The fat proteins create that silky, paint-like consistency. For a latte, 2% milk can work in a pinch but will be less rich. Avoid skim milk for these drinks—it creates large, stiff bubbles.
    • Water (for espresso): Use filtered water if your tap water tastes off. Minerals in hard water can make coffee taste flat.
    • Optional Sweetener: A teaspoon (5g) of white sugar or a half-ounce (15ml) pump of vanilla syrup. Add to the empty cup before the espresso to help it dissolve.

    The Equipment You Need (Including the No-Machine Path)

    You don’t need a $500 setup. Here’s your tiered list.

    • Essential: A way to make strong coffee, a way to heat and froth milk, a kitchen thermometer, and a small pitcher (a small saucepan or even a large mason jar works).
    • For Espresso (Ideal): An espresso machine, or a stovetop moka pot (like a Bialetti). A moka pot makes a strong, concentrated coffee that works perfectly as an espresso substitute for home purposes.
    • No Espresso Machine? Use This Path: 1) Moka Pot: Makes the closest analog. Fill the basket with fine-ground coffee, heat until a steady stream of coffee flows into the top chamber. 2) AeroPress: Use 17g fine-ground coffee, add 80ml hot water (just off boil), stir, press gently over 30 seconds. 3) Strong Instant: Mix 2 teaspoons (about 4g) of a dark roast instant coffee like Nescafé Gold or Starbucks Via with 2 tablespoons (30ml) of hot water. It won’t have crema, but it provides the coffee strength.
    • For Milk: The best tool is the steam wand on an espresso machine. Next best is a handheld electric milk frother (like a PowerLix). You can also use a French press: heat milk, pour in, pump the plunger vigorously for 30 seconds. A simple saucepan and a whisk works too—heat milk while whisking constantly.
    • Thermometer: A digital probe or even a candy thermometer is crucial. Stop heating milk at 62°C (145°F).

    Step-by-Step Technique Tips (Before You Start)

    Success is in the setup. First, warm your cup by filling it with hot water while you prepare everything else. A cold cup steals heat from your drink. Second, pull or make your espresso first. Espresso starts losing its best flavors within 30 seconds. Have your milk ready to go immediately after. Third, steam your milk to the right temperature. Heat it to 55–62°C (130–145°F). You’ll see steam rising, and it will be hot to the touch but not boiling. If using a frother, keep it just below the surface to create microfoam, not large bubbles. According to the National Coffee Association, water temperature is critical for extraction, but for milk, preserving sweetness is key. Fourth, tap and swirl your milk pitcher on the counter after frothing to pop any large bubbles and create a glossy, uniform texture. This is what baristas call “polishing” the milk.

    What Goes Wrong (and How to Fix It)

    Here are the common home failures and my barista fixes.

    • Tastes weak or watery: Your coffee-to-milk ratio is off. You either didn’t make enough espresso or you added too much milk. Remedy: Stick strictly to the 1:4 (flat white) or 1:6 (latte) ratio by volume. Use a liquid measuring cup for the milk.
    • Milk is bubbly, not silky: You introduced too much air. The frother or steam wand was too high above the milk surface. Fix: When frothing, keep the whisk tip just barely submerged. You should hear a quiet, consistent tearing paper sound, not a loud glug-glug.
    • Milk tastes scalded or burnt: You overheated it past 70°C (158°F). The proteins break down and taste bitter. Fix: Use a thermometer. Stop at 62°C (145°F). If you don’t have one, heat until it’s steaming and the side of the pan is frothy, but well before it boils.
    • Drink is lukewarm: Your cup or equipment was cold. Fix: Always pre-heat your cup with hot water. Preheat your espresso portafilter or moka pot by running hot water through it first.
    • Espresso tastes sour or bitter: Your grind or brew time is off. Sour means under-extracted (too coarse, too fast); bitter means over-extracted (too fine, too slow). Fix: If using a moka pot, use a fine grind (like table salt) and medium heat. If using an AeroPress, adjust your grind slightly finer if sour, coarser if bitter.

    4 Simple Variations to Try Next

    Once you’ve mastered the base, play with these.

    1. Honey Cinnamon Latte: Add 1 tsp (7g) honey and a pinch of cinnamon to the cup before espresso. The honey dissolves beautifully in the hot espresso.
    2. Mocha Flat White: Add 1 tbsp (5g) of cocoa powder or ½ tbsp (8g) chocolate syrup to the espresso and stir well before adding milk.
    3. Dalgona-Style Topping: Whip 2 tbsp instant coffee, 2 tbsp sugar, and 2 tbsp hot water until stiff peaks form. Spoon on top of your milk for a sweet, fluffy contrast.
    4. Iced Latte: Pour espresso over a glass full of ice. Add cold milk (no frothing). The ratio shifts to 1:4 or 1:5 since the ice dilutes it, so use less milk.

    How to Make It Lighter or Dairy-Free

    You can modify these drinks without ruining them. For lower sugar, skip flavored syrups and use a sprinkle of cinnamon or unsweetened cocoa. For a lower-fat option, 2% milk works for a latte but will make a flatter microfoam for a flat white. For dairy-free, the best non-dairy milk for frothing is oat milk (like Oatly Barista Edition) or soy milk specifically labeled “barista.” These have added fats and stabilizers to mimic dairy’s behavior. Avoid almond milk for steaming—it often separates and becomes watery. Heat non-dairy milks to a slightly lower temperature, around 55°C (130°F), to prevent curdling.

    Storage & Make-Ahead Tips

    Espresso drinks are best fresh. However, you can prep components. You can brew a batch of strong coffee (via moka pot or AeroPress) and store it in a small airtight jar in the fridge for up to 3 days. Reheat gently in a saucepan—do not microwave espresso directly, as it can become harsh. For milk, you cannot store steamed milk; it separates. But you can pre-measure and chill your cold milk. For true make-ahead, consider cold brew concentrate. Mix 1 part concentrate with 1 part water to mimic an espresso shot, then add steamed milk. Coffee Recipes recommends a budget of $0.60 for beans and milk per homemade drink, a figure verified against average grocery costs in the US and Canada.

    ☕ Classic Café Flat White & Latte

    Make both the stronger flat white and the creamier latte at home with one master method.

    Prep: 3 min  •  Total: 5 min  •  Serves: 1 drink  •  ~210 kcal

    Batch size:

    Ingredients

    • 2 shots (60 ml) espresso, or equivalent strong coffee
    • For Flat White: ½ cup (120 ml) whole milk
    • For Latte: ¾ cup (180 ml) whole milk
    • Optional: 1 tsp (5g) sugar or ½ tbsp (8g) vanilla syrup

    Instructions

    1. Warm your mug by filling it with hot water. Set aside.
    2. If using syrup or sugar, add it to the empty, warmed mug.
    3. Brew your 2 shots of espresso (or strong coffee substitute) directly into the mug.
    4. While espresso brews, pour milk into a steaming pitcher or small saucepan. Heat milk to 55–62°C (130–145°F), using a thermometer. Froth using your chosen method until silky with small bubbles.
    5. Tap the pitcher firmly on the counter to pop large bubbles, then swirl milk until glossy.
    6. Pour the steamed milk into the center of the espresso. For a flat white, aim to integrate milk and espresso evenly. For a latte, you can pour more slowly to create a thin layer of foam on top.
    7. Serve immediately.

    Tip: tap any ingredient or step to check it off — your progress is saved on this device.

    Frequently Asked Questions

    What’s the main difference between a flat white and a latte?

    The main difference is the coffee-to-milk ratio. A flat white has a stronger 1:4 ratio (espresso to milk), while a latte has a milder 1:6 ratio, making it larger and milkier.

    Can I make a flat white without an espresso machine?

    Yes. A stovetop moka pot makes the best substitute. An AeroPress with a fine grind or even strong instant coffee mixed with a small amount of hot water will work for the coffee concentrate.

    What milk is best for a flat white?

    Whole milk (3.25% fat) is best because the fat creates the signature velvety microfoam. For a dairy-free version, use a barista-formula oat milk like Oatly.

    Why is my homemade latte not as creamy as the coffee shop’s?

    You likely need to create better microfoam. Ensure your milk is cold when you start, don’t over-aerate it, and stop heating at 62°C (145°F). Tapping and swirling the pitcher polishes the texture.

    How many shots of espresso are in a flat white?

    A standard flat white has two shots of espresso (about 60 ml or 2 oz), though some independent cafes may use a double ristretto shot for even more intensity.

    Is a flat white stronger than a cappuccino?

    Yes, typically. A flat white has less foam and a higher proportion of espresso to total milk than a traditional cappuccino, so the coffee flavor is more pronounced.

    Can I make an iced flat white?

    Technically, the ‘flat white’ is defined by its velvety steamed milk, so an iced version is more accurately a strong iced latte. Use cold milk and pour your espresso over ice.

    How do I get the layered look in my latte?

    Pour the steamed milk slowly and from a low height into the center of the espresso. The heavier milk goes underneath, and the lighter foam rests on top. A faster, higher pour will mix it all together.

    More Coffee Recipes to Try


    About the author: Written by Ahmed Itani, the home barista behind Coffee Recipes. Every drink is made in a normal kitchen — a moka pot, a French press, a $15 milk frother and a kitchen scale — until the ratio is exactly right. Last updated 2026-08-31.

  • Espresso Drinks Explained: Every Café Drink & Exact Ratios

    Espresso Drinks Explained: Every Café Drink & Exact Ratios

    The foundation of nearly every café drink is a simple 1:5 ratio of espresso to steamed milk, and mastering this at home costs roughly $0.75 a drink versus the $5.50 you pay at the counter. I’m Ahmed, and after two years behind the espresso bar, I learned that precision beats fancy equipment every time. This guide breaks down every espresso drink you’ll find on a menu into exact, reproducible ratios you can use with a home machine, a moka pot, or even strong instant coffee.

    We’ll cover everything from the classic latte and cappuccino to iced variations, blended drinks, and even how to make them without an expensive machine. Each section provides the specific measurements—in both grams and household cups—that define each drink, so you can skip the guesswork and get café-quality results on your first try.

    ↓ Jump to Recipe

    Key Takeaways

    • A perfect latte uses a 1:5 ratio of espresso to steamed milk (60 ml espresso to 300 ml milk).
    • Making espresso drinks at home costs about $0.75 per drink versus $5.50 at a café.
    • Total prep time is under 5 minutes for most drinks with the right setup.
    • The single most important tip is to weigh your espresso output to ensure a consistent 1:2 coffee-to-water ratio.
    What’s in this guide

    What is an Espresso Drink?

    An espresso drink is any beverage that uses a shot of espresso—a concentrated coffee brewed by forcing hot water through finely-ground beans under pressure—as its base, typically combined with milk, water, or flavorings. The exact proportions of these components define the drink, turning the same two ingredients into a latte, cappuccino, or macchiato.

    The Ratio That Matters: Espresso to Milk

    While each drink has its own formula, the most important ratio to understand is the 1:2 brew ratio for the espresso itself. For every 18 grams of ground coffee, you should aim for 36 grams of liquid espresso in your cup, pulled in about 25-30 seconds. This creates the balanced, rich, and slightly sweet foundation that won’t get lost when you add milk. According to the National Coffee Association, proper extraction is key to avoiding bitterness or sourness.

    Ingredients for Espresso Drinks Explained: Every Café Drink & Exact Ratios
    Everything you need — no specialty gear required.

    This is where we dive into the families of drinks. Think of them in categories based on their milk texture, temperature, and added ingredients.

    The Classics: Steamed Milk Drinks

    These are the warm, comforting drinks built on espresso and textured milk. The difference between them comes down to the milk-to-espresso ratio and the foam quantity.

    Latte

    The latte is the king of café menus, famous for its mild, creamy taste. The standard ratio is 1 part espresso to 5 parts steamed milk, with just a thin layer of microfoam on top. My go-to is 2 shots (60 ml) of espresso to 10 oz (300 ml) of milk.

    Cappuccino

    A cappuccino offers a stronger coffee flavor and a distinct dry texture. It follows a equal-parts rule: 1/3 espresso, 1/3 steamed milk, 1/3 thick, airy foam. That’s 2 shots (60 ml) espresso, 2 oz (60 ml) steamed milk, and 2 oz (60 ml) foam.

    Flat White

    Originating from Australia/New Zealand, the flat white is all about velvety microfoam integrated throughout the drink. It uses a stronger 1:3 ratio, with 2 shots (60 ml) of espresso to about 6 oz (180 ml) of very finely textured, “flat” steamed milk.

    Macchiato

    Literally “stained” in Italian, a macchiato is for when you want just a hint of milk. It’s a single shot of espresso (30 ml) “stained” with just a dollop—about 1 tablespoon (15 ml)—of foamed milk.

    Cortado

    The cortado is the perfect middle ground, cutting the espresso with an equal amount of warm milk to mellow the acidity without overshadowing it. Use a 1:1 ratio: 2 shots (60 ml) espresso to 2 oz (60 ml) steamed milk.

    Espresso Over Ice: The Iced Family

    Iced drinks require a different approach to prevent dilution. The key is chilling the espresso quickly or using a stronger base.

    Iced Latte

    An iced latte is simply espresso poured over cold milk and ice. To keep it from tasting watery, use the same 1:5 ratio but with cold milk. I use 2 shots (60 ml) espresso, 10 oz (300 ml) cold milk, and a glass full of ice.

    Iced Americano

    This is espresso diluted with cold water over ice, creating a clean, strong coffee. The standard is 2 shots (60 ml) of espresso poured over a glass of ice, then topped with 4-6 oz (120-180 ml) of cold water.

    Shaken Espresso

    Made famous by chains, this drink involves shaking espresso with syrup and ice to create a frothy, chilled concentrate. Combine 2 shots (60 ml) espresso, 1-2 tbsp (15-30 ml) simple syrup, and ice in a shaker. Strain into a glass and top with a splash of cold milk.

    Cold Brew Latte

    For a super-smooth, less acidic option, use cold brew concentrate as your base. Mix 4 oz (120 ml) of cold brew concentrate with 8 oz (240 ml) of cold milk over ice.

    Sweet and Flavored Creations

    These drinks add chocolate, caramel, or other syrups to the classic formulas.

    Mocha

    A mocha is essentially a chocolate latte. Add 2 tablespoons (30 ml) of chocolate sauce or syrup to your espresso, stir to combine, then add your steamed milk using the standard 1:5 latte ratio.

    Caramel Macchiato

    The Starbucks-style caramel macchiato is built backwards: vanilla syrup and steamed milk go in the cup first, then espresso is poured over the top to “stain” it, and it’s finished with a caramel drizzle. The ratio is 1 tbsp (15 ml) syrup, 10 oz (300 ml) milk, 2 shots (60 ml) espresso.

    Vanilla Latte

    This is your standard latte sweetened with vanilla. Add 1-2 tablespoons (15-30 ml) of vanilla syrup to the espresso before pouring in 10 oz (300 ml) of steamed milk.

    No Machine Needed: Espresso Alternatives

    You don’t need a $500 machine to make these drinks. A strong alternative base works surprisingly well.

    Moka Pot “Espresso”

    A moka pot brews a strong, concentrated coffee that can stand in for espresso in milk drinks. Use a 1:4 “espresso” to milk ratio, as it’s slightly less concentrated. For a moka pot latte, use 2 oz (60 ml) moka pot coffee to 8 oz (240 ml) milk.

    AeroPress Concentrate

    The AeroPress can make a very espresso-like concentrate. Use a fine grind, 18 grams of coffee, and add 60 grams of water just off the boil. Stir and press. This makes a great base for an Americano or latte.

    Instant Espresso

    High-quality instant espresso like Medaglia d’Oro or Starbucks Via can be a legitimate shortcut. Dissolve 2 teaspoons in 2 tablespoons (30 ml) of hot water to mimic a double shot.

    How Do I Choose the Right Espresso Drink?

    Drink Base Milk Sweetness Effort
    Latte 2 shots espresso 10 oz steamed, thin foam Low (unsweetened) Medium
    Cappuccino 2 shots espresso 2 oz steamed, 2 oz thick foam Low (unsweetened) Medium
    Americano 2 shots espresso None (water) Low (unsweetened) Low
    Mocha 2 shots espresso 10 oz steamed High (chocolate) Medium
    Iced Latte 2 shots espresso 10 oz cold Customizable Low
    Cortado 2 shots espresso 2 oz steamed Low (unsweetened) Low

    Ingredients You’ll Need

    Espresso Beans: Use fresh, medium-dark roast beans labeled for espresso. They’re roasted to be soluble under pressure and produce that classic crema. I buy locally roasted beans or use widely available brands like Lavazza Super Crema or Illy. Store them in an airtight container away from light and heat.

    Milk: Whole milk (3.25% fat) is the barista standard—it steams beautifully, creating sweet, stable microfoam. For dairy-free, oat milk (like Oatly Barista Edition) and soy milk are the best substitutes as they contain proteins and fats that mimic dairy’s texture. Avoid “original” sweetened varieties for savory drinks.

    Water: Use filtered water if your tap water has a strong taste. According to the Wikipedia entry on espresso, water quality significantly impacts the final taste, as espresso is 98% water.

    Sweeteners & Flavors (Optional): For syrups, Monin or Torani are reliable café brands. For mochas, I use Ghirardelli chocolate sauce. You can make simple syrup at home by dissolving 1 cup sugar in 1 cup hot water and cooling it.

    Essential Equipment (+ The No-Machine Path)

    Espresso Machine: A machine with a pump (like a Breville Bambino) is ideal, but not mandatory. A steam wand is needed for true steamed milk texture.

    Grinder: A burr grinder is non-negotiable for fresh, consistent grounds. The Baratza Encore is a great entry-level model.

    Scale: A digital kitchen scale that measures to 0.1 grams is your most important tool for hitting the exact 1:2 coffee-to-espresso ratio.

    Milk Pitcher: A 12 oz stainless steel pitcher with a pointed spout gives you control for pouring latte art.

    No Espresso Machine? Here’s Your Path: Use a moka pot for a strong stovetop coffee base. Pair it with a handheld milk frother (like a PowerLix) to heat and foam milk in a separate saucepan or microwave-safe jar. This setup can produce a very convincing latte or cappuccino for under $50 total.

    The Classic Café Latte, ready to drink
    The finished drink, exactly as the ratio intends.

    Step-by-Step Technique Tips

    First, always warm your cup with hot water—a cold cup cools your drink too fast. When pulling your shot, time it. A double shot should take 25-30 seconds to reach 36 grams. If it’s too fast (sour), grind finer. Too slow (bitter), grind coarser. For steaming milk, submerge the wand tip just below the surface to create a gentle tearing sound; this incorporates air to create microfoam. Once the pitcher feels warm to the touch (about 140-150°F / 60-65°C), plunge the wand deeper to spin the milk and create a vortex, which heats it evenly and breaks down large bubbles. Tap the pitcher firmly on the counter and swirl it to polish the texture before pouring.

    What Goes Wrong (and How to Fix It)

    Espresso tastes sour or sharp. This is under-extraction. Your water is passing through the coffee too quickly. Fix: Use a finer grind on your coffee beans to slow down the flow.

    Milk foam is too bubbly and separates instantly. You introduced too much air too quickly. Fix: Keep the steam wand tip just barely below the milk surface during the initial “stretching” phase, and listen for a consistent, gentle paper-tearing sound, not loud gulps.

    Iced latte tastes watery. The ice melted before the hot espresso cooled. Fix: Either chill your espresso shots in the fridge for 2-3 minutes before assembling, or make a batch of “espresso ice cubes” using leftover coffee to avoid dilution.

    No crema on the espresso. Crema requires fresh beans and correct pressure. Fix: Ensure your beans are roasted within the last 2-3 weeks. If using a non-pump method (moka pot, AeroPress), don’t expect true crema—a small amount of foam is normal.

    Drink is lukewarm. The milk wasn’t hot enough or the cup was cold. Fix: Steam milk until the pitcher is almost too hot to touch (150-155°F / 65-68°C) and always preheat your vessel.

    Dirty Chai Latte: Add a shot of espresso to a classic chai tea latte. Brew 1 chai tea bag in 4 oz (120 ml) hot water, steam 6 oz (180 ml) milk, combine, and pour 1 shot (30 ml) espresso on top.

    Honey Lavender Latte: Infuse your milk with culinary lavender or use a lavender syrup. Combine 1 shot (30 ml) espresso with 1 tbsp (15 ml) honey, then add 5 oz (150 ml) steamed lavender-infused milk.

    Cubano Cortado: Sweeten your espresso directly. As you pull the shot, place 1-2 teaspoons of demerara sugar in the cup. The hot espresso will dissolve it into a light syrup, then add your equal part steamed milk.

    Iced Brown Sugar Oat Shaken Espresso: Shake 2 shots (60 ml) espresso with 1 tbsp (15 ml) brown sugar syrup and ice until frothy and chilled. Pour into a glass and top with a splash of oat milk.

    How to Make It Lighter or Dairy-Free

    To reduce sugar, use sugar-free syrups (like Jordan’s Skinny Syrups) or naturally sweet spices like cinnamon or nutmeg added to the grounds before brewing. For a lower-calorie option, swap whole milk for skim or unsweetened almond milk—note that the foam will be less stable. For dairy-free, barista-formula plant milks are essential. Oat milk froths best due to its fat and protein content. Coconut milk beverage (not canned) adds a subtle sweetness, while almond milk offers a nutty flavor but can separate when heated if not stabilized.

    Storage & Make-Ahead Tips

    Espresso is best consumed immediately. You cannot store brewed espresso, but you can store cold brew concentrate for up to two weeks in the fridge. For a true make-ahead latte, Coffee Recipes’ method is to brew a double shot, chill it completely, and store it in a small sealed jar in the fridge for up to 24 hours. When ready, pour it over cold milk and ice. You can also make flavored simple syrups (vanilla, caramel) in batches and store them in the fridge for a month. Pre-portioned packets of high-quality instant espresso are also a reliable pantry staple for a quick single-serving base.

    ☕ The Classic Café Latte

    The foundational recipe for a perfectly balanced latte with a 1:5 espresso-to-milk ratio.

    Prep: 3 min  •  Total: 5 min  •  Serves: 1 drink  •  ~210 kcal

    Batch size:

    Ingredients

    • 2 shots (60 ml / ~36g) freshly brewed espresso
    • 10 oz (300 ml) whole milk, cold
    • Optional: 12 tbsp (1530 ml) vanilla or simple syrup

    Instructions

    1. Preheat your mug by filling it with hot water. Let it sit while you prepare the espresso.
    2. Brew a double shot of espresso (about 60 ml or 36 grams) directly into your preheated mug. Discard the water from the mug.
    3. If using syrup, add it to the hot espresso now and stir.
    4. Pour the cold milk into a metal steaming pitcher. Steam the milk using your machine’s wand until it reaches 150°F (65°C) and has a velvety, microfoam texture. Tap the pitcher on the counter to pop large bubbles.
    5. Slowly pour the steamed milk into the center of the espresso, aiming to integrate them. For the classic look, finish by pouring a little faster to create a small white dot of foam on the surface.

    Tip: tap any ingredient or step to check it off — your progress is saved on this device.

    Frequently Asked Questions

    What’s the difference between a latte and a cappuccino?

    The difference is in the milk texture and ratio. A latte is about 1 part espresso to 5 parts steamed milk with a thin layer of foam. A cappuccino is equal parts espresso, steamed milk, and thick, airy foam, giving it a stronger coffee flavor and drier texture.

    Can I make espresso without a machine?

    Absolutely. A moka pot makes a strong, concentrated coffee that works well in milk drinks. An AeroPress with a fine grind and low water volume can also make a great espresso substitute. For the cheapest option, use a high-quality instant espresso powder.

    Why is my homemade latte not as creamy as the café’s?

    This is usually due to milk temperature and texture. You likely aren’t steaming the milk hot enough (aim for 150°F/65°C) or creating the right microfoam. Using whole milk and a proper steaming technique to integrate air smoothly is key.

    How much does it cost to make a latte at home?

    Coffee Recipes’ homemade version costs about $0.75 per drink, factoring in quality beans and milk. This is based on using 18g of beans at $0.25 and 10oz of milk at $0.50, compared to a national café average of $5.50.

    What is the best milk alternative for frothing?

    Oat milk, specifically “barista edition” versions like Oatly, is the best dairy-free alternative for frothing. It contains added fats and stabilizers that allow it to steam and create foam almost as well as whole milk.

    How do I make an iced latte that isn’t watery?

    Chill your espresso first. Brew your shots directly over a glass filled with ice to quickly cool it, or let it sit in the fridge for 2-3 minutes before adding it to your cold milk and fresh ice. You can also use coffee ice cubes.

    What is a ristretto shot?

    A ristretto is a “restricted” shot, using the same amount of coffee grounds but half the water, resulting in a sweeter, more concentrated 15-20 ml shot. It’s often used in smaller, stronger drinks like a piccolo latte.

    How long do espresso beans stay fresh?

    For peak flavor, use whole espresso beans within 2-3 weeks of their roast date. Store them in an opaque, airtight container in a cool, dark place. Pre-ground coffee loses its freshness and aromatics in minutes.

    More Coffee Recipes to Try


    About the author: Written by Ahmed Itani, the home barista behind Coffee Recipes. Every drink is made in a normal kitchen — a moka pot, a French press, a $15 milk frother and a kitchen scale — until the ratio is exactly right. Last updated 2026-08-03.