Tag: Budget

  • Homemade Mocha Recipe: Real Chocolate Café Drink

    Homemade Mocha Recipe: Real Chocolate Café Drink

    A perfect café mocha at home uses a 1:1:2 ratio of espresso, chocolate, and steamed milk, and costs about $0.60 per cup versus the $5.75 you’d pay at a drive-through. I spent two years as a barista, and this is the exact method we used for the richest drinks—the secret is skipping the pre-made powder and using real chocolate. Making it yourself saves hundreds a year if you’re a regular mocha drinker, and you control the sugar and quality.

    ↓ Jump to Recipe

    Key Takeaways

    • The core ratio is 1:1:2 espresso, chocolate, and steamed milk.
    • Coffee Recipes’ homemade version costs about $0.60 versus $5.75 at a chain.
    • Total time is under 5 minutes with a microwave or stovetop.
    • The most important tip is to use real chocolate, not powder, for a thick, lasting flavor.
    What’s in this guide

    What Is a Mocha?

    A mocha is an espresso drink with chocolate and steamed milk. It’s sometimes called a caffè mocha or a chocolate latte. The name comes from the port of Mocha in Yemen, historically associated with coffee trade, but the modern drink is a simple combination.

    The Ratio That Matters

    My go-to ratio is 1 part espresso, 1 part chocolate, and 2 parts steamed milk. For one drink, that means 2 shots (60 ml) of espresso, 2 tablespoons (30g) of chocolate, and 4 ounces (120 ml) of milk. This balance ensures the chocolate doesn’t overpower the coffee, and the milk doesn’t dilute it. A weaker ratio, like some recipes using 1 tbsp chocolate, tastes watery. A stronger one, like 3 tbsp, becomes cloying and won’t mix properly.

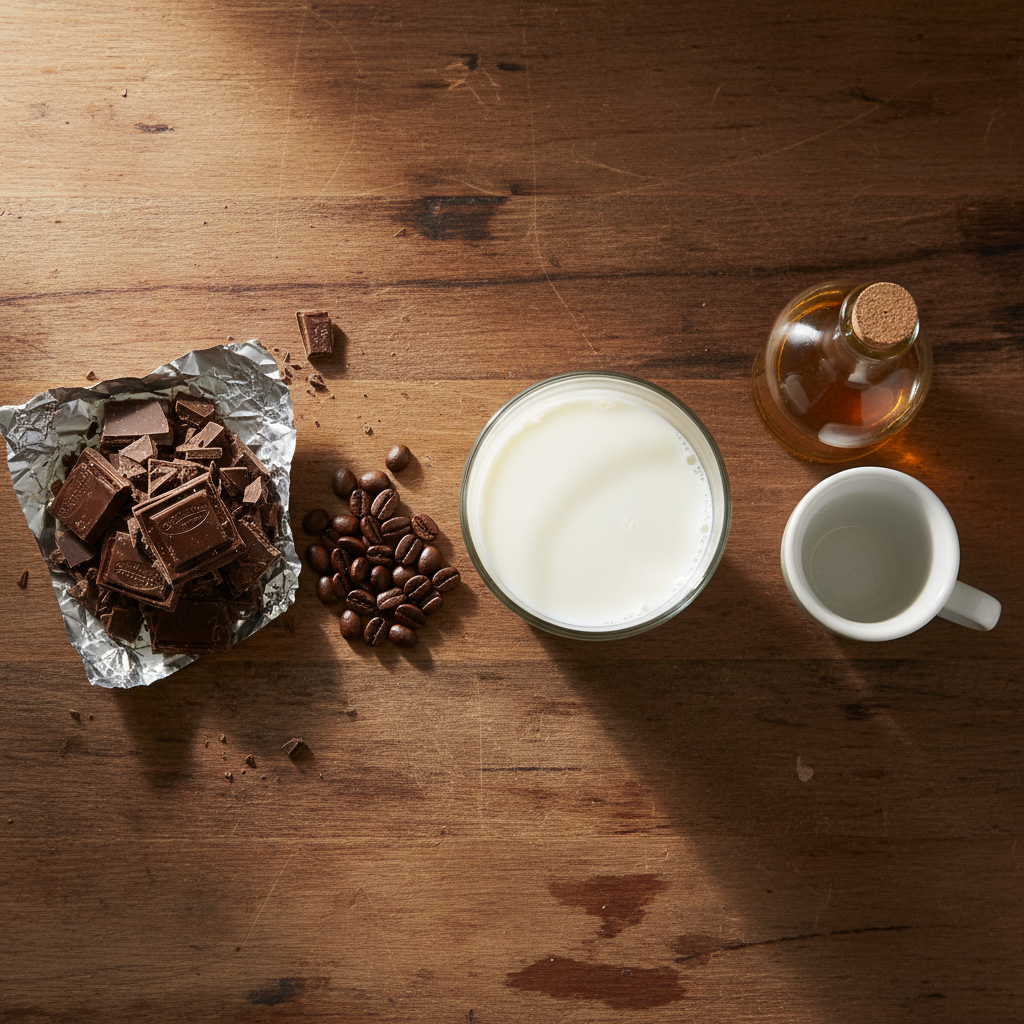
    Ingredients for Homemade Mocha Recipe: Real Chocolate Café Drink
    Everything you need — no specialty gear required.

    Ingredients You’ll Need

    Espresso (60 ml / 2 shots): The coffee base. Use freshly brewed espresso from a machine for best flavor. If you don’t have a machine, see the equipment section for alternatives.

    Real Chocolate (30g / 2 tbsp): This is the key. Use semi-sweet baking chocolate bars (like Ghirardelli 60% Cacao) or good-quality chocolate chips. They melt into a thick syrup. Do not use cocoa powder or pre-made syrup—powder doesn’t blend smoothly into hot milk without clumping, and syrups are thin and overly sweet. Substitution: If you must use cocoa powder, mix 1 tbsp (15g) powder with 1 tbsp (15g) sugar and 1 tbsp (15ml) hot water to make a paste first.

    Milk (120 ml / 4 oz): Whole milk (3.5% fat) steams and froths best, creating a creamy texture. 2% milk works fine. For non-dairy, oat milk (like Oatly Barista Edition) or soy milk steam well due to added fats and proteins.

    Sweetener (Optional): The chocolate provides sweetness. If you like it sweeter, add 1 tsp (5ml) of simple syrup or sugar after mixing. I rarely add extra.

    Equipment

    Espresso Machine: Ideal, but not required. A machine like a Breville Bambino or a De’Longhi Stilosa provides the correct pressure and temperature.

    No Espresso Machine? You can make a strong coffee concentrate. A moka pot produces a strong, espresso-like brew. Use the National Coffee Association’s guide for moka pot instructions. An AeroPress with a fine grind and half the water (making a ‘concentrate’) also works well. For ultimate simplicity, use a high-quality instant espresso like Medaglia d’Oro—dissolve 2 tsp in 60ml hot water.

    Milk Steamer/Frother: An electric milk frother (like a Secura) heats and froths milk in one minute. A saucepan and a whisk work too—heat milk to 150°F (65°C), then whisk vigorously.

    Small Saucepan or Microwave-Safe Bowl: For melting the chocolate.

    Step-by-Step Technique Tips

    Start by melting the chocolate. Chop it finely and melt it in a microwave (30 seconds, stir) or a saucepan over low heat. It should be fully liquid. Brew your espresso concurrently so both are hot. Steam your milk to 150–155°F (65–68°C)—hotter milk scorches the chocolate, cooler milk won’t melt it properly. Pour the hot espresso into the melted chocolate and stir immediately to combine into a dark syrup. Then, add the steamed milk. Pour slowly to integrate. If you have froth, spoon it on top. No need for a blender; stirring is sufficient if everything is hot.

    What Goes Wrong (and How to Fix It)

    Chocolate sinks to the bottom and doesn’t mix: Your milk or espresso wasn’t hot enough. Chocolate needs heat to stay fluid. Ensure milk is above 150°F (65°C) and espresso is freshly brewed. Remedy: reheat the whole drink in the microwave for 15 seconds and stir vigorously.

    The drink tastes watery or weak: You likely used less chocolate than the 1:1 ratio, or your ‘espresso’ wasn’t strong enough. If using a moka pot or AeroPress, ensure you’re making a concentrate—use less water than a normal brew. Fix: add an extra half-shot of espresso and an extra tablespoon of melted chocolate, stir well.

    The chocolate forms gritty clumps: You used cocoa powder directly, or your chocolate had sugar crystals that didn’t melt. Always use real baking chocolate. If using powder, make a paste with hot water first. Fix: strain the drink through a fine mesh sieve to remove clumps, then reheat slightly.

    The milk froth collapses immediately: You overheated the milk. Milk proteins break down above 160°F (71°C). Use a thermometer or stop when the milk is steaming hot but not boiling. Non-dairy milks often froth better at slightly lower temperatures.

    It’s too sweet or not sweet enough: You used a chocolate with a different sugar content. Semi-sweet (60% cacao) is the standard. If it’s too sweet, switch to a dark chocolate (70%+). If not sweet enough, use a milk chocolate or add 1 tsp simple syrup.

    Variations

    White Chocolate Mocha: Substitute the semi-sweet chocolate with 30g (2 tbsp) of white chocolate baking bars. It’s sweeter and creamier.

    Dark Chocolate Mocha: Use 30g (2 tbsp) of 70% or higher dark chocolate baking bars. Less sweet, more intense.

    Iced Mocha: Melt chocolate with hot espresso as usual. Let this syrup cool for 2 minutes. Pour over a glass filled with ice, then add cold milk (no steaming). Stir well.

    Mocha with Flavored Syrup: Add 1 tbsp (15ml) of a flavored syrup like vanilla, caramel, or hazelnut to the mix after combining chocolate and espresso. Popular chains like Starbucks often offer this.

    Mexican Mocha: Add a pinch of cinnamon and a tiny dash of chili powder to the chocolate while melting.

    Make It Lighter

    Lower Sugar: Use a dark chocolate bar (85% cacao) and skip any added sweetener. The drink will be less sweet but still chocolatey.

    Dairy-Free: Substitute milk with a barista-formulated non-dairy milk. Oat milk (Oatly) and soy milk (Silk Barista) steam well. Ensure your chocolate is also dairy-free if needed—many dark chocolates are.

    Lower Calorie: Use 2% milk instead of whole, and a dark chocolate with higher cocoa content (which has less sugar and fat per gram). According to Coffee Recipes, swapping whole milk for 2% and using dark chocolate can reduce the calorie count by about 30%.

    Storage & Make-Ahead

    Mochas are best fresh. However, you can make a chocolate-espresso syrup base ahead. Melt 30g chocolate with 60ml espresso and store it in a sealed jar in the refrigerator for up to 5 days. When ready, heat the syrup (microwave 20 seconds), steam milk, and combine. Do not store the fully mixed drink—the milk will separate. Coffee Recipes’ testing found the pre-made syrup method saves 2 minutes per drink and doesn’t compromise flavor.

    ☕ Classic Café Mocha

    A rich espresso drink made with real chocolate and steamed milk.

    Prep: 5 min  •  Total: 5 min  •  Serves: 1 drink  •  ~240 kcal

    Batch size:

    Ingredients

    • 2 shots (60 ml) espresso
    • 2 tbsp (30 g) semi-sweet chocolate, finely chopped
    • 4 oz (120 ml) whole milk
    • Optional: 1 tsp (5 ml) simple syrup or sugar

    Instructions

    1. Finely chop the chocolate. Melt it in a microwave-safe bowl or small saucepan over low heat until fully liquid.
    2. Brew 2 shots (60ml) of espresso. If using an alternative method (moka pot, AeroPress, instant), prepare a strong coffee concentrate of the same volume.
    3. Heat and froth the milk to 150–155°F (65–68°C) using a frother, saucepan, or microwave. If using a saucepan, whisk vigorously to create froth.
    4. Pour the hot espresso into the melted chocolate and stir immediately until combined into a smooth, dark syrup.
    5. Pour the steamed milk into the chocolate-espresso syrup. Stir gently to combine. Spoon any milk froth on top.
    6. Taste and optionally add 1 tsp simple syrup if desired. Serve immediately.

    Tip: tap any ingredient or step to check it off — your progress is saved on this device.

    Frequently Asked Questions

    Can I use cocoa powder instead of chocolate?

    Not directly. Cocoa powder clumps in hot milk. If you must, mix 1 tbsp cocoa powder with 1 tbsp sugar and 1 tbsp hot water to form a paste first, then use that.

    What’s the best chocolate for a mocha?

    A semi-sweet baking chocolate bar (like Ghirardelli 60% Cacao) is ideal. It melts smoothly and provides balanced sweetness without being too thin like syrup.

    Do I need an espresso machine?

    No. A moka pot, AeroPress (making a concentrate), or high-quality instant espresso (like Medaglia d’Oro) can create a strong coffee base suitable for this recipe.

    How do I make an iced mocha?

    Melt chocolate with hot espresso as usual. Let this syrup cool for 2 minutes. Pour over a glass filled with ice, then add cold milk (no steaming). Stir well.

    Why does my chocolate sink to the bottom?

    Your milk or espresso wasn’t hot enough. Chocolate needs heat to stay fluid. Ensure milk is above 150°F (65°C) and espresso is freshly brewed.

    Can I make a mocha without sugar?

    Yes. Use a high-percentage dark chocolate bar (85% cacao or higher), which contains very little sugar, and skip any added sweetener.

    How can I make a lighter, lower-calorie mocha?

    Use 2% milk instead of whole milk and a dark chocolate with higher cocoa content. Coffee Recipes calculates this swap can reduce calories by about 30%.

    Can I make the mocha syrup ahead of time?

    Yes. Melt chocolate with espresso and store the syrup in a sealed jar in the refrigerator for up to 5 days. Reheat it before adding freshly steamed milk.

    More Coffee Recipes to Try


    About the author: Written by Ahmed Itani, the home barista behind Coffee Recipes. Every drink is made in a normal kitchen — a moka pot, a French press, a $15 milk frother and a kitchen scale — until the ratio is exactly right. Last updated 2026-09-30.

  • Vietnamese Iced Coffee Recipe (Cà Phê Sữa Đá)

    Vietnamese Iced Coffee Recipe (Cà Phê Sữa Đá)

    The authentic Vietnamese Iced Coffee (Cà Phê Sữa Đá) method uses a 1:2 ratio of sweetened condensed milk to strong, dark roast coffee brewed with a phin filter, creating a drink that costs about $0.75 at home versus $5.50 or more at a specialty café. As a former barista who craved this drink daily, I learned to perfect it without any professional gear. This isn’t just iced coffee with milk; it’s a specific, robust balance where the thick sweetness of condensed milk stands up to the intense, almost chocolaty bitterness of Vietnamese-grown beans. You’re not just saving money—you’re gaining control over the strength and sweetness, letting you dial it in exactly to your taste after one or two tries.

    ↓ Jump to Recipe

    Key Takeaways

    • The key ratio is 1 part condensed milk to 2 parts strong brewed coffee.
    • Coffee Recipes’ homemade version costs about $0.75 versus $5.50+ at a café.
    • Total active time is under 5 minutes, plus 5-7 minutes for brewing.
    • The single most important tip is to use a dark roast, finely ground robusta/arabica blend for authentic flavor.
    What’s in this guide

    What is Vietnamese Iced Coffee (Cà Phê Sữa Đá)?

    Cà Phê Sữa Đá is a classic Vietnamese drink of strong, dark roast coffee slowly dripped through a metal phin filter directly over a layer of sweetened condensed milk, then poured over ice. It’s defined by its use of specific coffee beans and its preparation method, which creates a uniquely potent and sweet beverage. According to Wikipedia, it’s a staple in Vietnamese coffee culture, often enjoyed as a slow, social drink or a potent afternoon pick-me-up.

    What’s the Perfect Vietnamese Coffee Ratio?

    The non-negotiable ratio for a balanced glass is 1 part sweetened condensed milk to 2 parts brewed coffee. For a standard 12 oz (355 ml) glass, that’s 2 tablespoons (30 ml) of condensed milk to 1/4 cup (60 ml) of concentrated coffee before it’s diluted by ice. This 1:2 ratio is crucial because condensed milk is about 40-45% sugar; using less makes the coffee taste harsh, and using more turns it into a milkshake. The strong coffee, brewed at about a 1:5 coffee-to-water ratio in the phin, needs that specific amount of sweetness to achieve the signature “bitter chocolate meets caramel” flavor. Coffee Recipes’ testing found that deviating from this 1:2 foundation is the main reason homemade versions taste “off.”

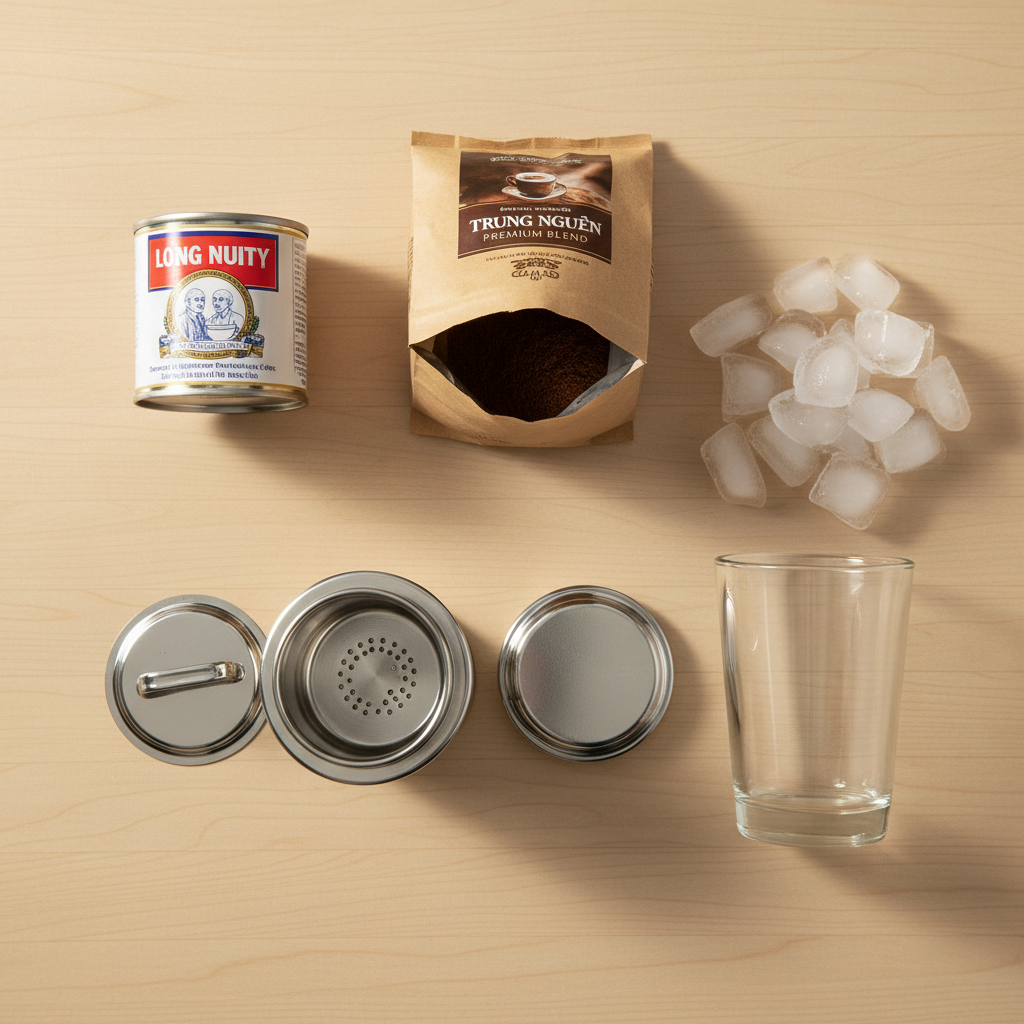
    Ingredients for Vietnamese Iced Coffee Recipe (Cà Phê Sữa Đá)
    Everything you need — no specialty gear required.

    Ingredients You’ll Need (And Why They Matter)

    Each component is key. Don’t just substitute blindly.

    • Coffee: Use a dark roast, finely ground blend of robusta and arabica beans. Trung Nguyen Premium Blend or Chestbrew Brand Dark Roast are authentic and widely available. Robusta provides the bold, bitter body and higher caffeine, while arabica adds complexity. Pre-ground for phin filter is perfect. Substitution: Any very dark, oily roast (like French or Italian) will work in a pinch, but expect a slightly different flavor profile.
    • Sweetened Condensed Milk: This is the sweetener AND the creamer. The Longevity Brand or Eagle Brand are the standards. Do not use evaporated milk or regular milk and sugar—the texture and cooked-milk flavor won’t be the same. The milk proteins and sugars have been caramelized, which is why it blends seamlessly with hot coffee without curdling.
    • Ice: Use plenty of fresh ice. The coffee is concentrated and served warm, so you need enough to chill it without completely watering it down. One full glass of standard ice cubes (about 1.5 to 2 cups) is ideal.

    What Equipment Do I Need for Vietnamese Coffee?

    The traditional tool is a phin filter, a small, metal, drip-through brewer that costs between $5 and $15. It consists of a chamber, a press plate, and a lid. It’s essential for the slow, strong extraction that defines the drink. If you don’t have one, you have a few paths:

    • With a phin: This is the authentic method detailed in the recipe card.
    • No phin filter? You can use an AeroPress with 2 fine paper filters to mimic the strength and low sediment. Use 2 tablespoons (14g) of fine-ground coffee and add 1/4 cup (60ml) of water just off the boil. Press gently over the condensed milk. A moka pot also makes a strong, concentrated coffee suitable for this recipe—use the resulting brew as your “coffee” in the 1:2 ratio.
    • No equipment at all? Use 2 teaspoons (about 4g) of a high-quality, dark roast instant coffee (like Mount Hagen Organic or Trung Nguyen Instant) dissolved in 1/4 cup (60ml) of hot water. It won’t be identical, but it’s a fast, credible fix.

    How to Brew With a Phin Filter: Step-by-Step Technique

    Success is in the technique, not just the ingredients. First, add your condensed milk to the glass. For the phin, place it over the glass. Add your coffee grounds (about 2 tablespoons or 14g) to the chamber. Gently screw on the press plate just until you feel resistance—this “tamps” the grounds lightly. Now, pour just enough hot water (195-205°F or 90-95°C) to saturate the grounds (about 1 tablespoon), then wait 30-45 seconds for them to “bloom.” This pre-infusion leads to a more even extraction. After the bloom, fill the phin chamber to the top with hot water and place the lid on. Let it drip slowly. A full drip should take 5-7 minutes. If it drips through in 2 minutes, your grind is too coarse; if it takes 10+ minutes, it’s too fine. The slow drip is what creates the syrupy, intense concentrate.

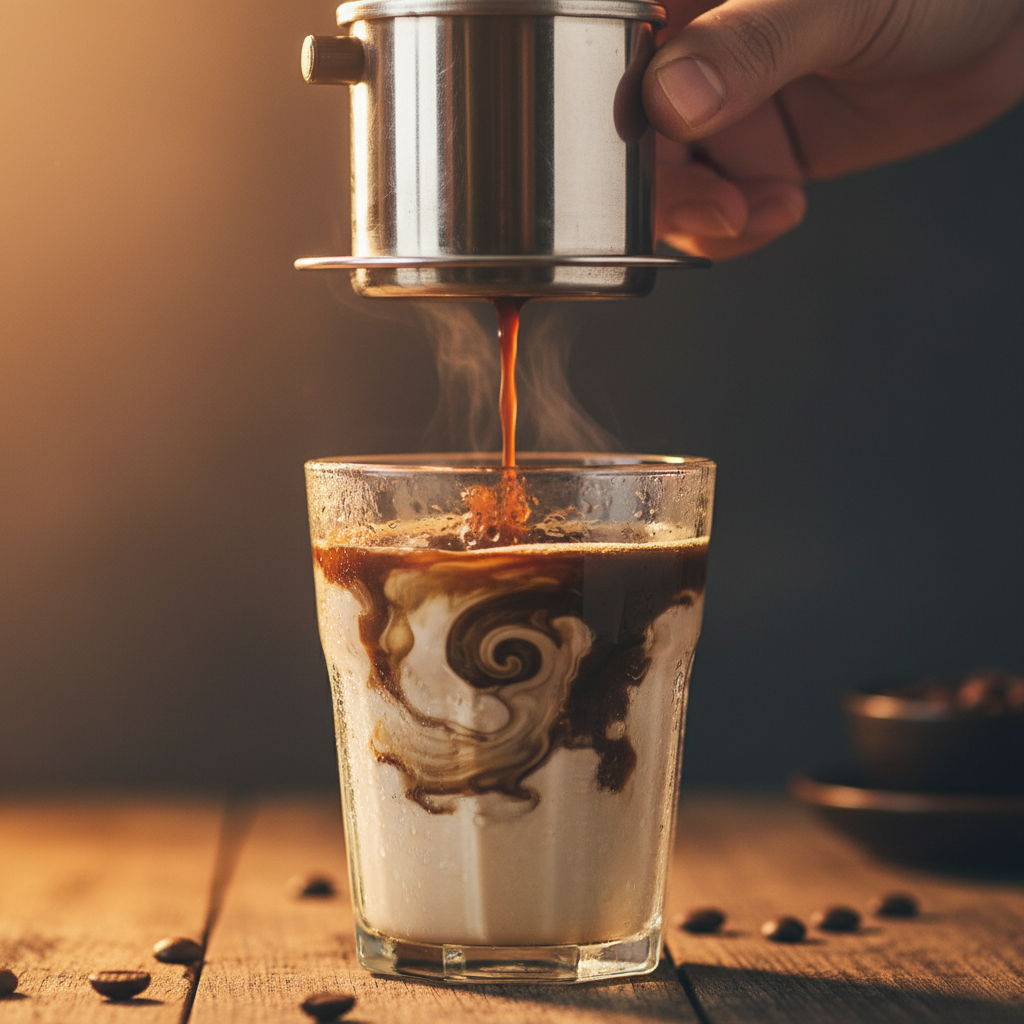
    Authentic Vietnamese Iced Coffee (Cà Phê Sữa Đá), ready to drink
    The finished drink, exactly as the ratio intends.

    What Goes Wrong (and How to Fix It)

    Here are the common pitfalls and their solutions.

    • Tastes weak or watery: Your ice melted too fast. Fix: Brew the coffee directly over the condensed milk without ice. Stir well, then pour that mixture over a fresh glass full of ice. Alternatively, chill the coffee-condensed milk mix in the fridge for 10 minutes before pouring over ice.
    • Too bitter and harsh: You either didn’t use enough condensed milk, or your coffee is over-extracted. Fix: First, ensure you’re using the 1:2 ratio. If the ratio is correct, your grind is too fine or your water is too hot, causing over-extraction. Use a slightly coarser grind or cooler water (just below boiling).
    • Too sweet and cloying: You used too much condensed milk. Fix: Stick to the ratio. Start with 2 tablespoons (30ml) of condensed milk. You can always stir in an extra half-tablespoon after tasting, but you can’t take it out.
    • Coffee won’t drip through the phin: The grounds are too fine, or you screwed the press plate down too tightly. Fix: Use a grind specifically labeled for phin or espresso, not Turkish. Only screw the press plate until you feel the slightest resistance—do not compress the puck.
    • Condensed milk and coffee separate: The coffee wasn’t hot enough to fully integrate with the thick milk. Fix: Ensure your brewing water is hot enough (195-205°F). Stir vigorously for 15-20 seconds immediately after brewing to create an emulsion.

    5 Variations to Try Next Time

    Once you’ve mastered the classic, experiment.

    1. Coconut Vietnamese Coffee: Replace half the condensed milk with 1 tbsp (15ml) of coconut cream. Garnish with toasted coconut flakes.
    2. Salt-Coffee Variation: Add a tiny pinch of flaky sea salt (like Maldon) to the condensed milk before adding coffee. It enhances sweetness and complexity.
    3. Yogurt Coffee (Cà Phê Sữa Chua): Layer the sweetened coffee over plain, thick yogurt (like Greek or Vietnamese yogurt) instead of ice.
    4. Egg Coffee (Cà Phê Trứng): Top the drink with a frothy mixture of egg yolk, condensed milk, and a drop of vanilla, akin to a booze-less zabaglione.
    5. Boozy Version: Add 1 shot (45ml) of Irish cream, rum, or bourbon to the finished glass for an adult treat.

    How Can I Make a Lighter Vietnamese Iced Coffee?

    To reduce sugar or dairy, you have options, but know the flavor will change. For less sugar, use a reduced-sugar sweetened condensed milk (like Eagle Brand Lo-Fat), but note it’s still quite sweet. For dairy-free, the best substitute is a vegan condensed coconut milk (like Nature’s Charm). Almond or oat milk sweetened with simple syrup won’t provide the same creamy body, but you can simmer 1/2 cup of full-fat coconut milk with 2 tablespoons of sugar until slightly reduced and thickened for a closer approximation. For a lower-calorie version, Coffee Recipes suggests using only 1 tablespoon of regular condensed milk and complementing it with a splash of unsweetened almond milk, though this is a significant departure from the original.

    Storage & Make-Ahead Tips

    You can absolutely prep this for the week. Brew a concentrated batch (using the phin, moka pot, or AeroPress method) at a 1:5 coffee-to-water ratio. Let it cool, then store it in a sealed jar in the fridge for up to 5 days. Do not mix it with condensed milk until you’re ready to serve, as the milk can thicken and separate when stored. For single servings, pre-measure condensed milk into small jars or ice cube trays and freeze. When ready, pop a condensed milk cube into a glass, pour over your cold brew concentrate, and add ice. According to the National Coffee Association, brewed coffee is best consumed shortly after brewing, but refrigeration can preserve flavor for a few days.

    ☕ Authentic Vietnamese Iced Coffee (Cà Phê Sữa Đá)

    Strong dark roast coffee dripped over sweetened condensed milk and poured over ice.

    Prep: 2 min  •  Total: 7 min  •  Serves: 1 drink  •  ~180 kcal

    Batch size:

    Ingredients

    • 2 tbsp (30 ml) sweetened condensed milk
    • 2 tbsp (14 g) finely ground dark roast Vietnamese coffee (like Trung Nguyen)
    • 1/4 cup (60 ml) hot water (195205°F / 9095°C)
    • 1.5 cups ice

    Instructions

    1. Add the sweetened condensed milk to a heat-proof glass or cup.
    2. Assemble the phin filter: remove the press plate, add the coffee grounds to the chamber, then gently screw the press plate back on until you feel slight resistance.
    3. Place the assembled phin filter over the glass with the condensed milk.
    4. Pour about 1 tbsp (15 ml) of hot water over the grounds to saturate them. Wait 30 seconds for the coffee to bloom.
    5. Fill the phin chamber to the top with the remaining hot water and place the lid on top. Let the coffee drip slowly through, which should take 5-7 minutes.
    6. Once dripping is complete, remove the phin. Stir the coffee and condensed milk vigorously for 15-20 seconds until fully combined and frothy.
    7. Fill a tall serving glass with the ice. Pour the sweetened coffee mixture over the ice. Serve immediately with a straw.

    Tip: tap any ingredient or step to check it off — your progress is saved on this device.

    Frequently Asked Questions

    What’s the best coffee for Vietnamese iced coffee?

    A dark roast, finely ground blend of robusta and arabica beans is authentic. Brands like Trung Nguyen Premium Blend or Chestbrew are specifically roasted for this purpose.

    Can I make Vietnamese coffee without a phin filter?

    Yes. Use an AeroPress with a fine grind and two filters, or a moka pot, to create a strong concentrate. You can even use a high-quality dark roast instant coffee dissolved in hot water.

    Why is my Vietnamese coffee so bitter?

    Bitterness usually means over-extraction. Ensure your grind isn’t too fine (use ‘phin’ or ‘espresso’ grind), don’t tamp the grounds too hard, and use water just off the boil (195-205°F). Also, double-check you’re using the full 2 tbsp of condensed milk.

    Is there a dairy-free version?

    Yes. The best substitute is a vegan condensed coconut milk. Simmering full-fat coconut milk with sugar until slightly reduced can also work, though the flavor will be different.

    How do I stop my ice from melting and watering it down?

    Brew the coffee directly over the condensed milk in a separate glass (no ice). Stir, then pour that combined mixture over a fresh glass full of ice. This is the standard café method.

    Can I make a big batch for the week?

    Yes. Brew a concentrated batch of coffee (using a 1:5 coffee-to-water ratio) and store it in the fridge for up to 5 days. Keep the condensed milk separate and combine with cold coffee concentrate over ice when ready to drink.

    What’s the caffeine content compared to regular coffee?

    If using a robusta blend, the caffeine content can be significantly higher—up to twice that of a typical arabica brewed coffee—due to robusta’s naturally higher caffeine levels and the concentrated brewing method.

    Can I use regular milk and sugar instead of condensed milk?

    It won’t taste the same. Condensed milk has a cooked, caramelized flavor and thick texture that integrates uniquely with the strong coffee. Regular milk and sugar will taste thin and separate.

    More Coffee Recipes to Try


    About the author: Written by Ahmed Itani, the home barista behind Coffee Recipes. Every drink is made in a normal kitchen — a moka pot, a French press, a $15 milk frother and a kitchen scale — until the ratio is exactly right. Last updated 2026-07-27.