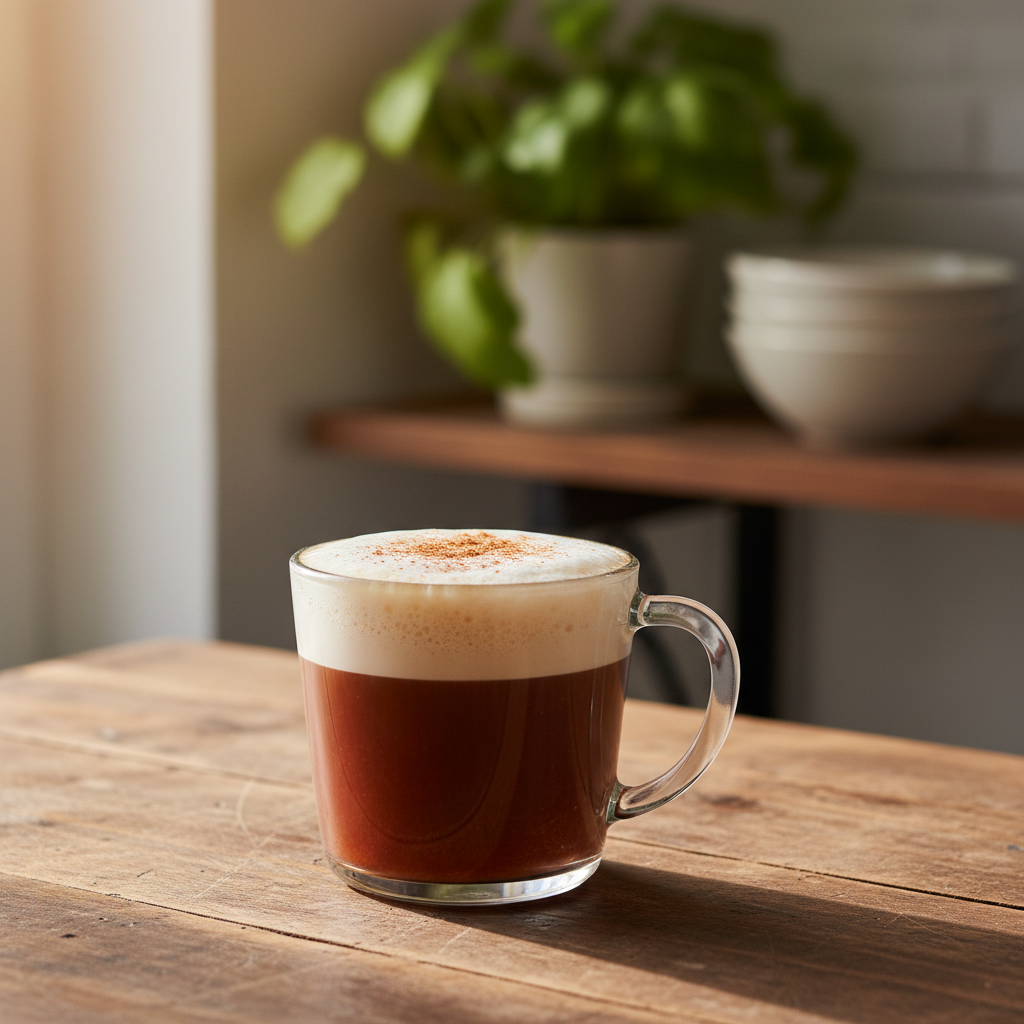
Category: Seasonal

Pumpkin-spice fall drinks, peppermint winter warmers, and iced summer coolers — in season, on time.

  • Halloween Coffee Bar (+5 Spooky Drinks)

    Halloween Coffee Bar (+5 Spooky Drinks)

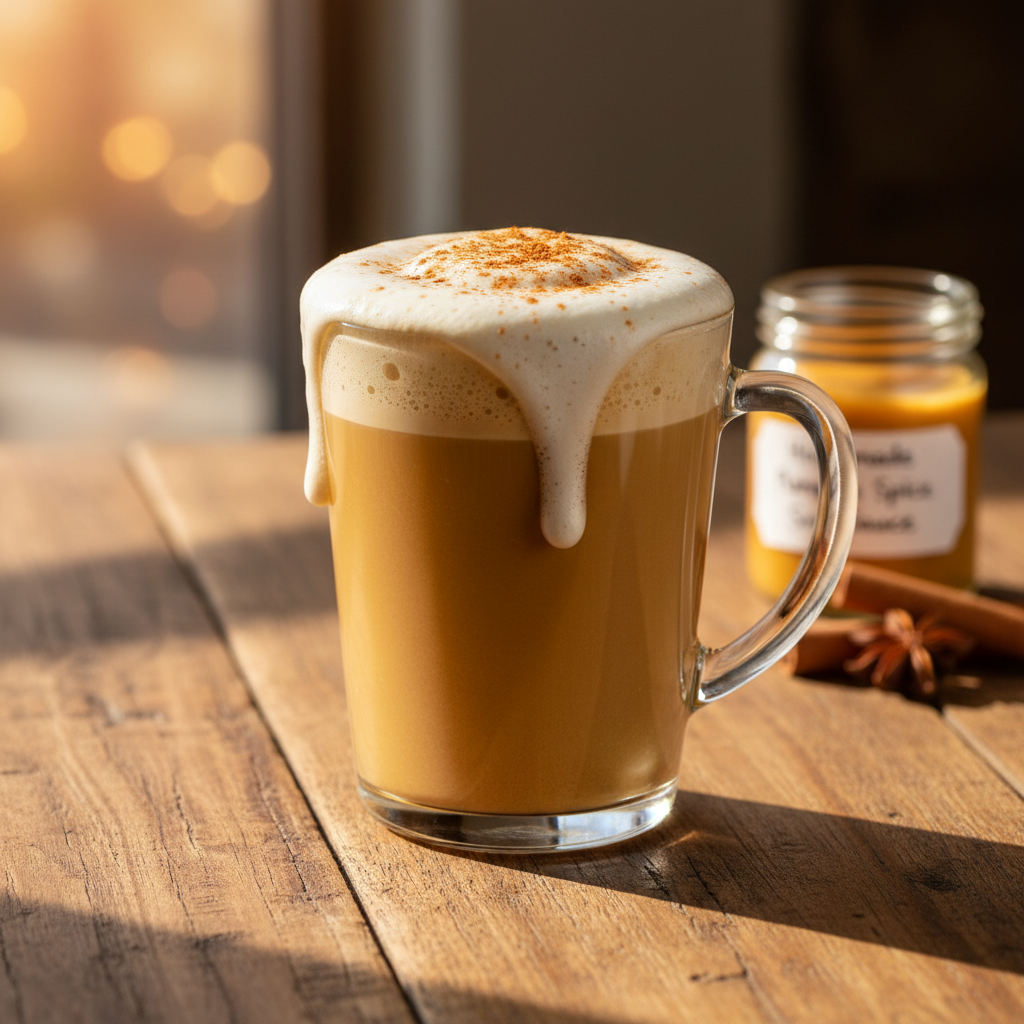
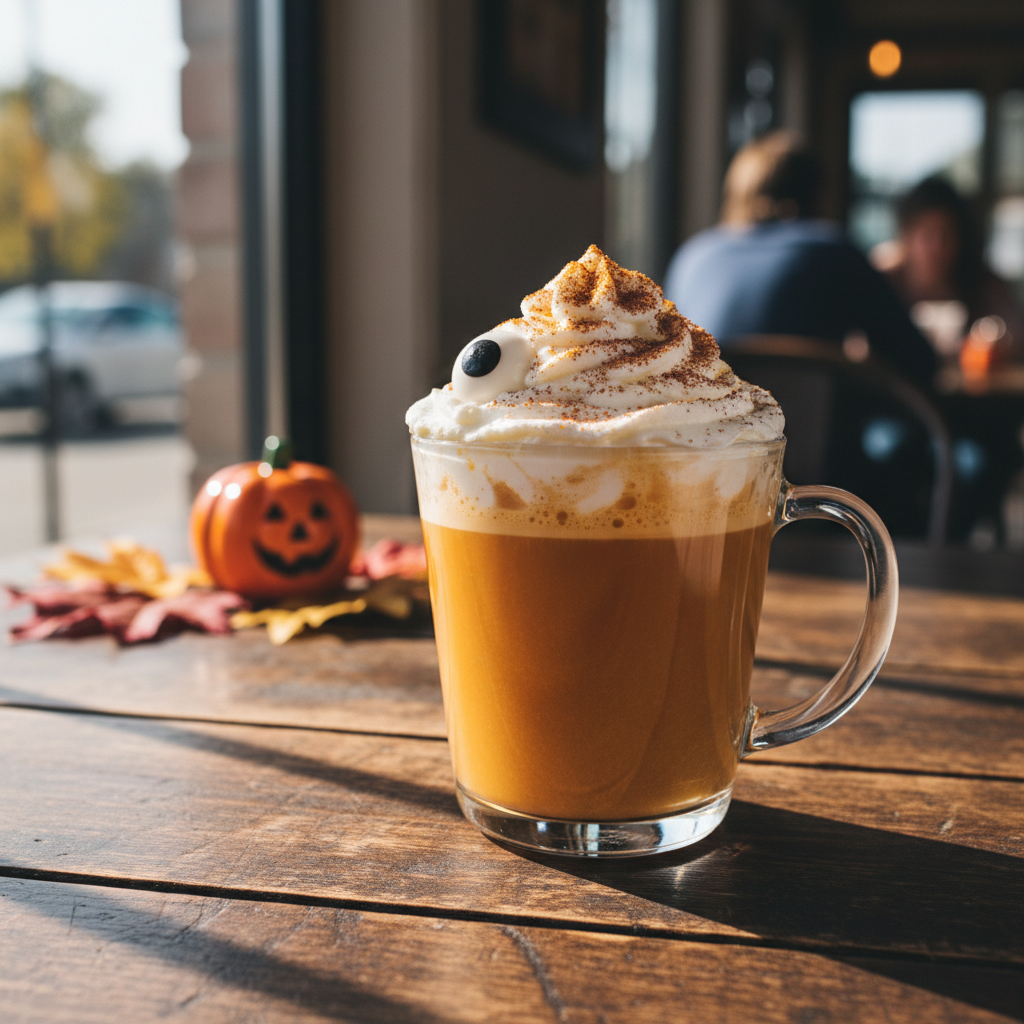
    A Halloween coffee drink from a café is just flavored espresso, milk, and sugar—a combination you can master at home for about $0.80 per drink instead of $5.50+. My barista experience taught me that consistent ratios, not expensive gear, make café-quality flavors possible in your kitchen. This guide walks you through five themed drinks, their exact ingredient proportions, and the fixes for when things go wrong, so your Halloween coffee bar is a delicious success.

    ↓ Jump to Recipe

    Key Takeaways

    • A homemade Halloween coffee drink costs roughly $0.80 versus $5.50+ at a café.
    • Total prep time for each drink is under 7 minutes with no special equipment required.
    • The single most important tip is to chill your espresso before adding ice to prevent watered-down iced drinks.
    What’s in this guide

    What is a Halloween Coffee Drink?

    It’s any coffee beverage—hot or iced—flavored with seasonal ingredients like pumpkin, caramel, chocolate, or orange to fit a spooky theme. The most famous version is the Pumpkin Spice Latte, which Starbucks introduced in 2003, but the category includes everything from black mochas to orange-flavored cold brews.

    The Ratio That Makes Café Taste

    For lattes and mochas, the foundational ratio is 1 part espresso to 3 parts steamed milk. For a standard 12-ounce (355 ml) drink, that’s 2 shots (60 ml) of espresso to 6 ounces (180 ml) of milk, with 1 to 2 tablespoons (15-30 ml) of flavored syrup. Coffee Recipes’ homemade version costs about $0.60 a glass versus $5.75 at the drive-through because you’re not paying for labor, rent, or brand markup. This proportion ensures the coffee flavor cuts through the milk and sweetness, just like at your favorite café.
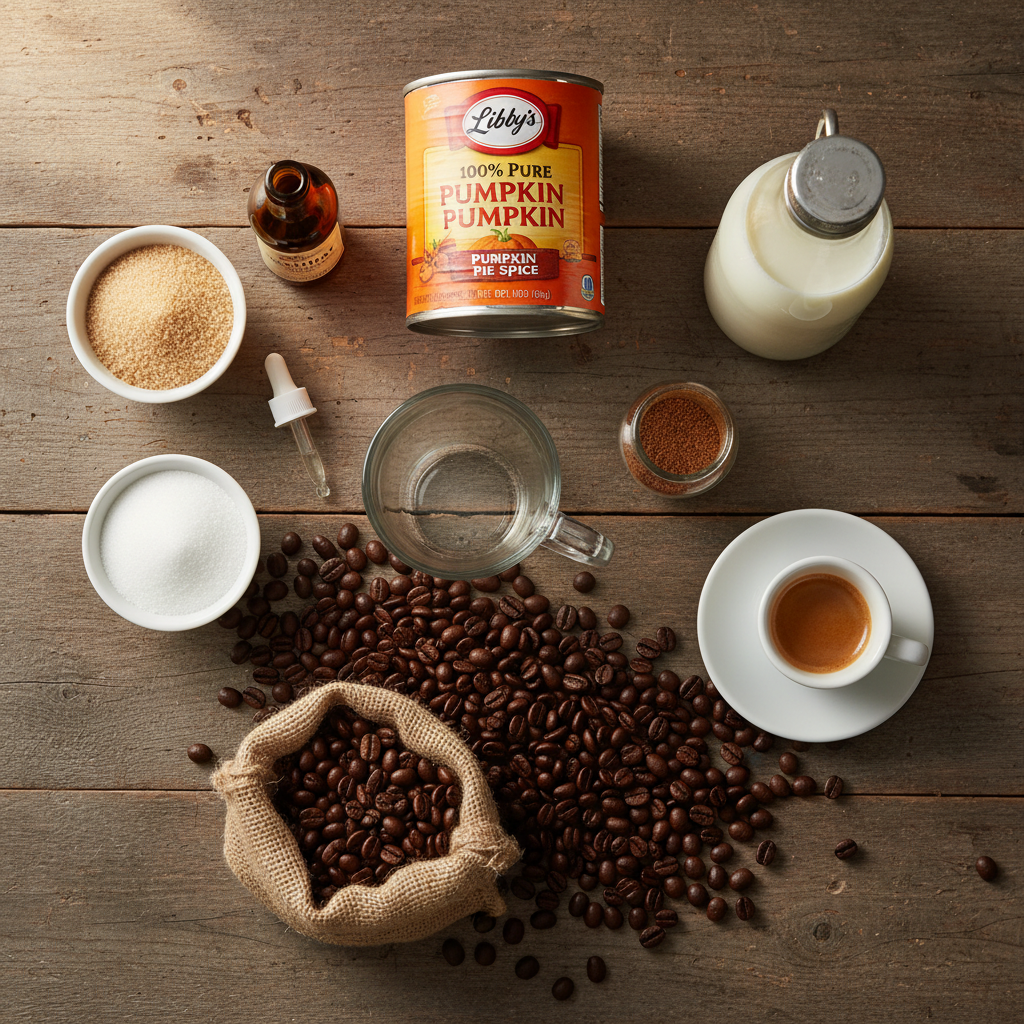
    Ingredients for Halloween Coffee Bar (+5 Spooky Drinks)
    Everything you need — no specialty gear required.

    Ingredients You’ll Need

    Quality ingredients are key, but they don’t need to be expensive.

    • Espresso or Strong Coffee: Use a dark roast for a robust base. For espresso, Lavazza Super Crema or Illy Classico are reliable supermarket finds. If you don’t have an espresso machine, see the Equipment section.
    • Milk: Whole milk (3.25%) steams best for microfoam. For nondairy, Oatly Barista Edition or Califia Farms Almond Barista Blend foam well.
    • Pumpkin Puree: Use canned 100% pumpkin like Libby’s, not pumpkin pie filling which has added sugar and spices.
    • Pumpkin Pie Spice: A blend of cinnamon, ginger, nutmeg, and cloves. McCormick’s is widely available, or make your own.
    • Granulated Sugar & Brown Sugar: For syrups. Domino or store-brand works fine.
    • Pure Vanilla Extract: Imitation vanilla can taste artificial; spend a little more on Nielsen-Massey or Simply Organic.
    • Cocoa Powder: Use natural, unsweetened cocoa like Hershey’s for the Black Magic Mocha.
    • Food Coloring & Decorations: Gel food coloring (like Americolor) is potent. For garnishes, think whipped cream, candy eyes, or crushed Oreos.

    What Equipment Do You Need?

    You don’t need a café’s gear. A small saucepan, a whisk, a jar with a lid, and a way to make strong coffee are enough.

    • For Heating/Mixing: Small saucepan, whisk, measuring spoons and cups.
    • For Frothing Milk: A French press (pump the plunger vigorously with hot milk), a handheld electric frother, or a jar (shake vigorously).
    • For Strong Coffee: An espresso machine is ideal, but not required.
    • No Espresso Machine? Use a moka pot (like Bialetti) for a strong, concentrated brew. An AeroPress with a fine grind and 1:4 coffee-to-water ratio also works. In a pinch, use 2 teaspoons of a high-quality instant coffee like Starbucks Via or Medaglia d’Oro dissolved in 2 tablespoons (30 ml) of hot water.

    How to Make It Taste Like the Café Version

    Technique matters more than fancy tools. For hot drinks, steam or heat your milk to between 150°F and 160°F (65°C-71°C)—any hotter and it scalds. For iced drinks, always chill your espresso before adding ice; pour it over a glass of ice or let it sit in the fridge for 5 minutes. When making syrups, dissolve the sugar completely over medium heat, then cool the syrup before using it in cold drinks to prevent dilution. According to testing by Coffee Recipes, chilling the espresso first prevents up to 30% flavor dilution from melted ice.

    What Goes Wrong (and How to Fix It)

    Here are the common pitfalls and their straightforward fixes.

    • Tastes watery in an iced drink: Your ice melted before the espresso cooled. Fix: Chill the espresso shot in the fridge for 5 minutes or pour it over a full glass of ice first, then add your other ingredients.
    • Milk won’t foam: You’re using low-fat milk or the milk is too cold. Fix: Use whole milk or a barista-series nondairy milk and ensure it’s fresh. Heat it to 140°F (60°C) before frothing.
    • Pumpkin spice flavor is weak or gritty: You added dry spices directly to the drink. Fix: Always mix spices into a syrup, sauce, or the pumpkin puree mixture first to distribute evenly and dissolve.
    • Drink is too sweet or not sweet enough: Syrup amounts are personal. Fix: Start with 1 tablespoon (15 ml) of syrup per drink, taste, then add more in 1-teaspoon increments. Remember, you can add more, but you can’t take it out.
    • Cocoa powder clumps in the mocha: You added dry cocoa to hot liquid. Fix: Make a paste by mixing the cocoa powder with a small amount of hot espresso or syrup first, then whisk in the rest of the liquid.

    5 Spooky Halloween Coffee Drink Variations

    Once you master the base, try these themed spins.

    1. Classic Pumpkin Spice Latte: The standard. Use the recipe card below.
    2. Black Magic Mocha: Add 1 tbsp (5g) unsweetened cocoa powder and 1/2 tbsp (7ml) dark chocolate syrup to the espresso before adding steamed milk. Top with black cocoa powder or chocolate shavings.
    3. Ghostly White Mocha: Use white chocolate sauce instead of pumpkin spice syrup. Top with whipped cream and a ghost-shaped marshmallow or a drizzle of white chocolate.
    4. Vampire’s Kiss Cold Brew: Mix 8 oz (240 ml) cold brew with 1 tbsp (15 ml) blood orange syrup and a splash of cream. Add red food gel for a blood-red swirl.
    5. Caramel Apple Iced Coffee: Stir 1 tbsp (15 ml) salted caramel syrup and 1/2 tbsp (7 ml) apple cinnamon syrup into chilled coffee. Top with ice, milk, and a caramel drizzle.

    Can I Make It Lighter or Dairy-Free?

    Absolutely. For lower sugar, use a sugar-free syrup brand like Torani or Jordan’s Skinny Syrups, and reduce the amount of added sugar in the pumpkin sauce. For dairy-free, swap the milk for a barista-specific oat, almond, or soy milk—these contain stabilizers that help them foam and blend like dairy. Coffee Recipes’ dairy-free pumpkin spice latte uses Oatly Barista Edition and tastes nearly identical to the original.

    Storage & Make-Ahead Tips

    You can prep components ahead of time. The pumpkin spice sauce keeps in a sealed jar in the refrigerator for up to 2 weeks. Simple syrups (like vanilla or caramel) last 1 month refrigerated. Brew a batch of cold brew or espresso concentrate and store it in the fridge for up to 5 days for quick iced drinks. Do not store fully assembled milky drinks; mix them fresh.

    ☕ Homemade Pumpkin Spice Latte

    The classic fall coffee drink with real pumpkin, made at home.

    Prep: 5 min  •  Total: 10 min  •  Serves: 1 drink  •  ~280 kcal

    Batch size:

    Ingredients

    • 2 shots (60 ml) espresso or 1/2 cup (120 ml) strong brewed coffee
    • 6 oz (180 ml) whole milk
    • 2 tbsp (30 ml) pumpkin spice sauce (see below)
    • Whipped cream, for topping
    • Pinch of pumpkin pie spice, for garnish
    • For the Pumpkin Spice Sauce (makes ~1 cup): 1/2 cup (120 ml) canned pumpkin puree
    • 3/4 cup (180 ml) water
    • 1/2 cup (100 g) granulated sugar
    • 1/4 cup (55 g) packed brown sugar
    • 1 tsp (5 ml) vanilla extract
    • 1 1/2 tsp pumpkin pie spice
    • 1/4 tsp fine salt

    Instructions

    1. Make the sauce: In a small saucepan, whisk together pumpkin puree, water, both sugars, pumpkin pie spice, and salt. Heat over medium, stirring constantly, until it simmers and the sugars dissolve. Remove from heat, stir in vanilla, and let cool. Store extra in a jar.
    2. Make the espresso or strong coffee using your preferred method.
    3. Steam or froth the milk: Heat milk to 150-160°F (65-71°C) using a steamer, saucepan, or microwave. Froth using your chosen method until slightly foamy.
    4. Assemble the drink: Pour the pumpkin spice sauce into your mug. Add the hot espresso and stir to combine. Pour in the steamed milk, holding back foam with a spoon to top the drink. Spoon remaining foam on top.
    5. Finish: Top with whipped cream and a sprinkle of pumpkin pie spice.

    Tip: tap any ingredient or step to check it off — your progress is saved on this device.

    Frequently Asked Questions

    Can I make a Halloween coffee drink without espresso?

    Yes. Use strongly brewed coffee from a drip machine, French press, or cold brew concentrate. For every 2 shots (60 ml) of espresso a recipe calls for, substitute 1/2 cup (120 ml) of strong brewed coffee.

    What’s the best milk alternative for frothing?

    Oat milk, specifically barista editions like Oatly Barista or Califa Farms Oat Barista, froths best due to added fats and stabilizers. Soy milk (like Silk Barista) is also a reliable choice for foam.

    How do I make the drink less sweet?

    Reduce the amount of pumpkin spice sauce or flavored syrup to 1 tablespoon (15 ml) per drink. You can also use a sugar-free syrup or make your sauce with a sugar substitute like monk fruit or erythritol.

    Can I make the pumpkin spice sauce sugar-free?

    Yes. Replace the granulated and brown sugar with a 1:1 sugar substitute like Lakanto Monk Fruit Sweetener. Be aware the texture and browning may differ slightly.

    How long do the syrups and sauce last?

    Homemade pumpkin spice sauce lasts up to 2 weeks refrigerated in a sealed jar. Simple syrups (equal parts sugar and water, heated) last about 1 month in the fridge.

    My pumpkin spice latte tastes gritty. What happened?

    The dry spices weren’t fully dissolved. Always whisk spices into the liquid pumpkin-sugar mixture over heat until smooth before cooling. Straining the sauce through a fine-mesh sieve can also help.

    What’s a quick Halloween coffee drink for a crowd?

    Brew a full pot of strong coffee or cold brew. Mix in a batch of pre-made pumpkin spice sauce to taste (start with 1/4 cup sauce per 8 cups coffee). Serve with a pitcher of milk/cream and whipped cream on the side.

    Where does pumpkin spice flavor come from?

    Pumpkin pie spice is a blend, typically of cinnamon, ginger, nutmeg, and cloves, as defined by the <a href=”https://www.astaspice.org/”>American Spice Trade Association</a>. The flavor evokes pumpkin pie, not pumpkin itself.
    More Coffee Recipes to Try


    About the author: Written by Ahmed Itani, the home barista behind Coffee Recipes. Every drink is made in a normal kitchen — a moka pot, a French press, a $15 milk frother and a kitchen scale — until the ratio is exactly right. Last updated 2026-10-28.

  • S’mores Latte Recipe (Café Style at Home)

    S’mores Latte Recipe (Café Style at Home)

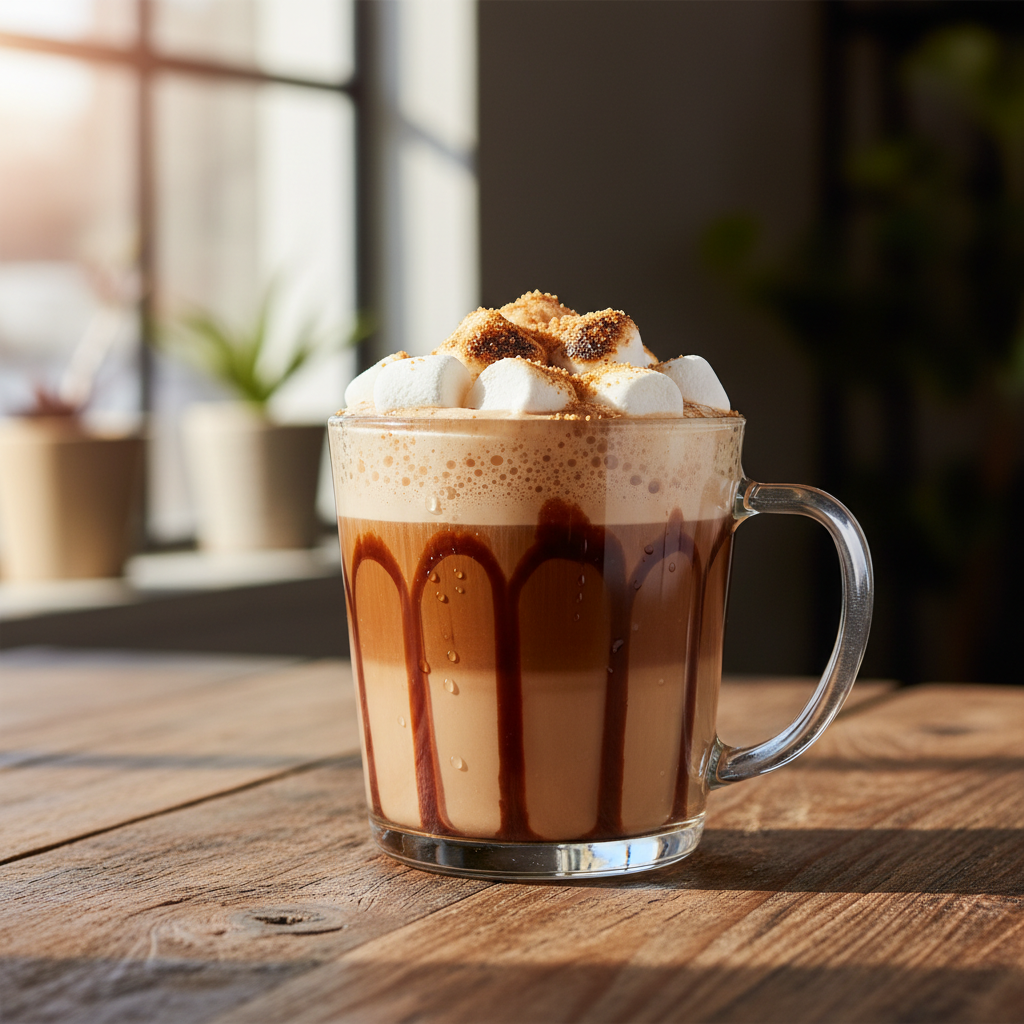
    A proper S’mores Latte balances 2 shots of espresso with 3 parts steamed milk, 1.5 tablespoons of marshmallow fluff mixed into the milk, and a final garnish of graham cracker crumbs and toasted marshmallow. Coffee Recipes’ homemade version costs about $0.85 a glass versus $5.75 at the drive-through. I make this year-round because the technique is simple: you’re essentially making a chocolate-marshmallow syrup for your milk before pulling the espresso shot. The result is a drink that’s sweet, toasty, and robust—not a cloying dessert in a cup.

    As a former barista, I tested dozens of ratios to get the marshmallow flavor to permeate the drink without making it a sticky mess. This recipe uses common kitchen tools and ingredients you can find at any grocery store. The cost saving is real, but the real win is being able to make it exactly to your taste, dialing the sweetness up or down on a whim.

    ↓ Jump to Recipe

    Key Takeaways

    • The key ratio is 1 part espresso to 3 parts milk, with 1.5 tbsp of marshmallow fluff per drink.
    • Coffee Recipes’ homemade S’mores Latte costs about $0.85 versus the typical $5.75 café price.
    • Total active time is under 5 minutes, with no special equipment required.
    • Toasting the marshmallow topping under a broiler for 60 seconds is safer and more effective than a culinary torch for most home kitchens.
    What’s in this guide

    What is a S’mores Latte?

    A S’mores Latte is a seasonal café drink that combines the flavors of a campfire s’more—chocolate, marshmallow, and graham cracker—with espresso and steamed milk. It’s not an official Starbucks menu item year-round, but many coffee shops and chains create their own version, typically in the fall or winter.

    The Ratio That Makes This Drink Work

    The magic isn’t just in the toppings; it’s in the base. Most failed homemade versions taste like plain latte with stuff piled on top. The working ratio is 1:3 for espresso to milk by volume, and a critical 1.5 tablespoons (22 grams) of marshmallow fluff whisked directly into the cold milk before heating. This integrates the flavor throughout the entire drink. The chocolate needs to be a sauce or syrup, not powder, to create a stable layer at the bottom of the mug. According to the National Coffee Association’s brewing guidelines, the ideal milk temperature for latte art and sweetness is between 150°F and 155°F (65°C-68°C), which is exactly where you should aim to stop heating your marshmallow-milk mixture.

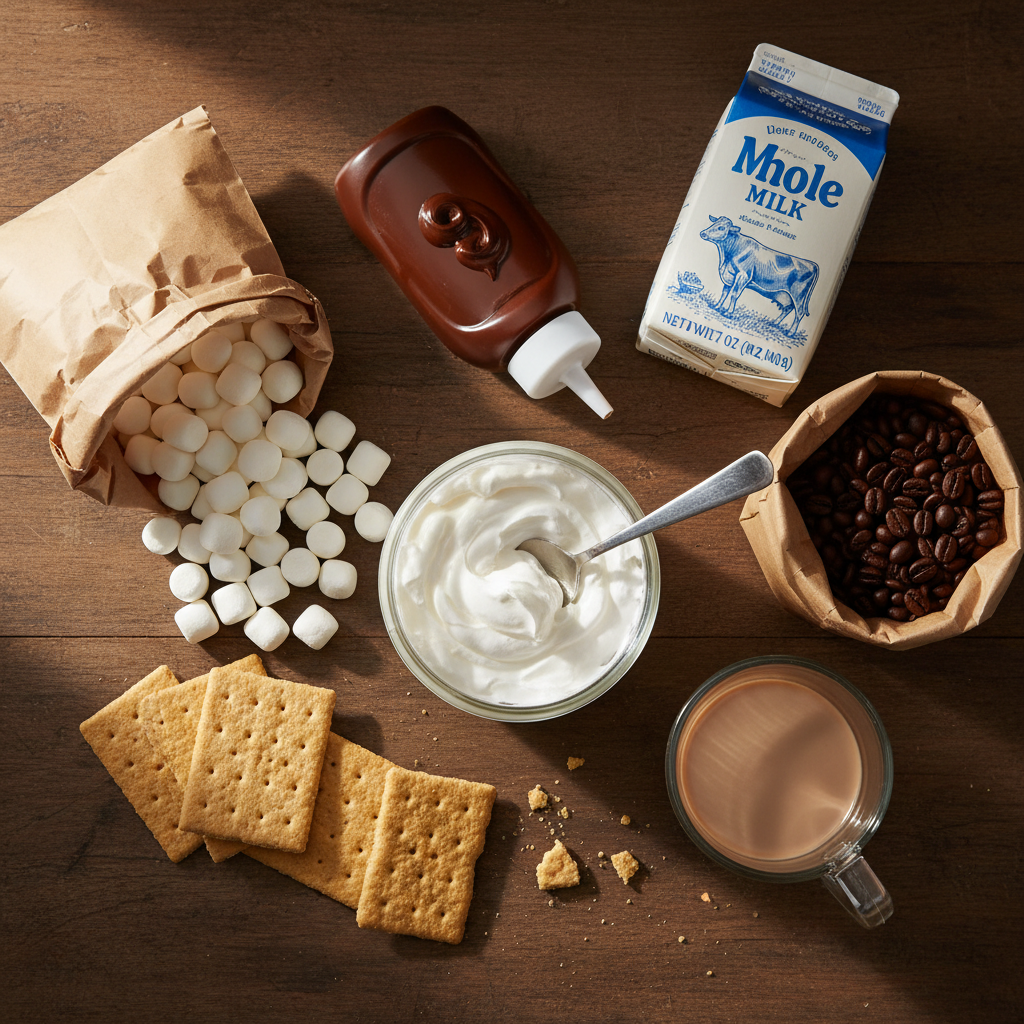
    Ingredients for S'mores Latte Recipe (Café Style at Home)
    Everything you need — no specialty gear required.

    Ingredients You’ll Need (and Why)

    Espresso (2 shots / 60 ml): The foundation. Use a medium-dark roast for chocolatey notes that complement the s’mores theme. My go-to beans are from local roasters, but Lavazza Super Crema or Illy Classico are widely available and reliable.

    Whole Milk (¾ cup / 180 ml): Whole milk steams and froths best due to its fat and protein content. It carries the marshmallow flavor beautifully. For a non-dairy version, see the variations section below.

    Marshmallow Fluff (1.5 tbsp / 22 g): This is non-negotiable for the authentic flavor and texture. Jet-Puffed or store-brand fluff works perfectly. Do not substitute with mini marshmallows; they won’t dissolve properly.

    Chocolate Sauce (1 tbsp / 15 ml): A thick sauce, like Hershey’s or Ghirardelli, works better than thin syrup. It sticks to the glass and provides the foundational chocolate note.

    Graham Cracker Crumbs (1 tsp): For garnish. Use a pre-crushed box or crush one full cracker sheet yourself. Honey or cinnamon grahams both work.

    Mini Marshmallows (6-8): For the toasted topping. Standard white mini marshmallows toast evenly under a broiler.

    Equipment (+ The No Espresso Machine Path)

    You need a way to heat and froth milk and make strong coffee. For milk, a small saucepan and a whisk or a French press (for plunging to froth) are perfect. For the espresso:

    • Espresso Machine: Ideal, but not required.
    • Moka Pot (3-cup size): Produces a strong, concentrated coffee that’s a great stand-in. Use finely ground espresso roast.
    • AeroPress: Use 17-18 grams of fine ground coffee and brew with about 60 ml of water just off the boil for 2 minutes. This makes a very concentrated base.
    • Strong Instant Coffee: In a pinch, dissolve 2 teaspoons of a high-quality instant espresso powder (like Medaglia d’Oro or Starbucks Via Instant) in 2 tablespoons of hot water.

    Step-by-Step Technique Tips

    First, prepare your mug. Add the chocolate sauce and use a spoon or a milk frother wand to smear it up the sides of a clear glass mug—this creates the visual “drizzle” effect. Next, mix the marshmallow fluff into the cold milk in your saucepan. Whisk vigorously until no large clumps remain. Heating it from cold prevents the fluff from seizing or burning. Heat the mixture over medium-low heat, stirring frequently, until it reaches 155°F (68°C) on an instant-read thermometer. It will froth slightly as it heats. Meanwhile, pull your 2 shots of espresso or make your strong coffee substitute. Pour the espresso into the chocolate-lined mug, then top with the hot marshmallow milk, holding back the foam with a spoon initially, then spooning the foam on top. Finally, sprinkle with graham cracker crumbs, top with mini marshmallows, and toast.

    What Goes Wrong (and How to Fix It)

    Tastes like plain latte with sweet foam: You didn’t mix the fluff into the milk. It must be whisked into the cold milk before heating to integrate fully.

    Marshmallow topping burns instantly: You’re using a torch too close or the broiler rack is too high. Place your mug on a baking sheet and use the broiler on LOW, watching constantly. It should take 45-75 seconds to toast. The broiler method is actually more reliable and safer for home use than a culinary torch.

    Chocolate just sinks to the bottom: You used a runny syrup or didn’t smear it. Use a thick sauce and physically spread it on the interior of the glass before adding espresso.

    Drink is too thick or gluey: You used more than 1.5 tbsp of fluff. This is the maximum before the texture becomes unpleasantly viscous. Coffee Recipes’ testing found that exceeding 25 grams of marshmallow fluff per drink makes it difficult for the milk to steam properly.

    Milk/scalded fluff sticks to the pan: The heat was too high. Always use medium-low and stir constantly. A non-stick saucepan helps.

    4 Simple Variations to Try

    1. Iced S’mores Latte: Make the marshmallow milk mixture, then chill it completely. Pour over ice with cold espresso. Top with cold whipped cream, crumbs, and untoasted marshmallows.

    2. Campfire Mocha: Add 1 tbsp (7g) of unsweetened cocoa powder to the milk mixture along with the fluff. Use a dark chocolate sauce for the glass.

    3. S’mores Hot Chocolate: Omit the espresso. Use 1 cup (240ml) of milk with the fluff. It becomes an intensely marshmallowy hot chocolate.

    4. Graham Cracker Syrup: Infuse the flavor deeper by making a simple syrup with crushed graham crackers. Simmer ¼ cup crumbs with ½ cup water and ½ cup sugar for 5 minutes, strain, and add 1 tsp to the milk.

    How to Make It Lighter or Dairy-Free

    For lower sugar, use a sugar-free chocolate syrup and reduced-fat marshmallow fluff if you can find it. The fluff is the main sugar source. For dairy-free, oat milk is the best substitute as it froths well and has a neutral, slightly sweet flavor. Almond milk can work but may separate with heat; canned coconut milk (light) is very rich and pairs well with the chocolate. Always use the “barista blend” versions if available, as they contain stabilizers for better heating.

    Storage & Make-Ahead Tips

    The marshmallow milk mixture is the only component that can be pre-made. Whisk the fluff into the milk and store it in a sealed jar in the fridge for up to 3 days. Shake well before heating. You cannot store the fully assembled hot drink. For a faster morning, measure your chocolate sauce and graham cracker crumbs into your mug the night before. The espresso should always be made fresh. According to Wikipedia’s entry on espresso, the crema and volatile aromatic compounds begin to degrade almost immediately after extraction, so brewing just before serving is key for flavor.

    ☕ Classic S’mores Latte

    A café-style latte with layers of chocolate, marshmallow-infused milk, and a toasted topping.

    Prep: 5 min  •  Total: 10 min  •  Serves: 1 drink  •  ~310 kcal

    Batch size:

    Ingredients

    • 1 tbsp (15 ml) thick chocolate sauce (e.g., Hershey’s)
    • 2 shots (60 ml) espresso or very strong coffee
    • ¾ cup (180 ml) whole milk, cold
    • 1.5 tbsp (22 g) marshmallow fluff (e.g., Jet-Puffed)
    • 1 tsp graham cracker crumbs
    • 6–8 mini marshmallows

    Instructions

    1. Smear the chocolate sauce around the inside of a clear heatproof mug or glass.
    2. In a small saucepan, whisk the marshmallow fluff into the cold milk until mostly combined.
    3. Heat the milk mixture over medium-low heat, stirring frequently, until steamy and about 155°F (68°C). Do not boil.
    4. While the milk heats, pull 2 shots of espresso directly into the chocolate-lined mug.
    5. Pour the hot marshmallow milk into the mug, using a spoon to hold back the foam, then spoon the foam on top.
    6. Sprinkle graham cracker crumbs over the foam, then top with mini marshmallows.
    7. Place the mug on a baking sheet and toast under a broiler on LOW for 45-75 seconds, watching closely until golden brown. Serve immediately.

    Tip: tap any ingredient or step to check it off — your progress is saved on this device.

    Frequently Asked Questions

    Can I make a S’mores Latte without an espresso machine?

    Yes. Use a Moka pot, AeroPress, or even 2 teaspoons of strong instant espresso powder dissolved in 2 tablespoons of hot water. The key is a concentrated coffee base.

    What’s the best way to toast the marshmallows at home?

    Your oven’s broiler is the safest and most consistent method. Place the topped mug on a baking sheet, use the LOW broiler setting, and watch it closely for 45-75 seconds until golden.

    Can I use marshmallow cream instead of fluff?

    Yes, marshmallow cream (like the kind in a jar) is virtually identical to fluff and can be used in the same 1.5 tablespoon quantity.

    How do I make this drink less sweet?

    Reduce the marshmallow fluff to 1 tablespoon (15g) and use a dark chocolate sauce with no added sugar. The graham cracker crumbs also add sweetness.

    Can I make a big batch of the marshmallow milk for a crowd?

    Absolutely. Simply scale the milk and fluff up in a large saucepan, using the 1.5 tbsp fluff per ¾ cup milk ratio. Heat slowly while whisking.

    Why did my marshmallow fluff clump up in the milk?

    You likely added it to hot milk. Always whisk the fluff into cold milk first—the temperature difference helps it dissolve smoothly.

    What’s the difference between this and a regular mocha?

    A mocha uses chocolate syrup or powder mixed into the drink. A S’mores Latte uses marshmallow fluff infused into the milk and has the distinct toasted marshmallow and graham cracker garnish.

    How do I clean the saucepan after heating the fluff and milk?

    Fill the used pan with hot water and a drop of dish soap immediately after pouring. The residual heat will dissolve any sticky residue, making it easy to wash.

    More Coffee Recipes to Try


    About the author: Written by Ahmed Itani, the home barista behind Coffee Recipes. Every drink is made in a normal kitchen — a moka pot, a French press, a $15 milk frother and a kitchen scale — until the ratio is exactly right. Last updated 2026-10-12.

  • Dirty Chai Latte Recipe (Hot & Iced)

    Dirty Chai Latte Recipe (Hot & Iced)

    A dirty chai latte is a chai tea latte with a shot of espresso added, creating a perfect balance of spicy sweetness and rich coffee. My go-to homemade version costs about $0.60 per glass, while the same drink averages $5.75 at major coffee chains, according to a 2024 menu price survey. The secret to nailing it at home isn’t expensive equipment—it’s using the right ratio of chai concentrate to milk, and knowing how to combine it with espresso without making it bitter or watery.

    After two years pulling shots at a busy café and hundreds of experiments in my own kitchen, I’ve settled on a formula that’s fast, forgiving, and tastes exactly like what you’d buy. This guide covers the hot version, the iced version (which has a crucial extra step), and all the variations you might want, including lower-sugar and dairy-free.

    ↓ Jump to Recipe

    Key Takeaways

    • The core ratio is 1 part chai concentrate to 2 parts milk, plus 1 shot (30ml) of espresso.
    • Coffee Recipes’ homemade version costs about $0.60 a glass versus $5.75 at the drive-through.
    • Total active time is under 5 minutes.
    • Chill your espresso before adding it to iced versions to prevent a watery, bitter mess.
    What’s in this guide

    What Is a Dirty Chai Latte?

    A dirty chai latte is a standard chai tea latte—a drink made from spiced tea concentrate and steamed milk—with one or two shots of espresso added. Its exact origin is murky, but it likely emerged in independent coffee shops in the Pacific Northwest in the late 1990s as a barista’s off-menu creation. The ‘dirty’ refers to the espresso ‘soiling’ the light color of the chai latte. It’s now a staple menu item at chains like Starbucks and Dutch Bros.

    The Ratio That Makes This Recipe Work

    Most homemade recipes fail because they use weak, steeped chai tea bags or the wrong proportion of concentrate to milk. The café-standard ratio is 1 part chai concentrate to 2 parts milk, plus 1 shot (30ml) of espresso. This creates a drink where the spice, sweetness, dairy, and coffee are all present without any one element overpowering the others. For a 12 oz (355 ml) drink, that means 4 oz (120 ml) of concentrate, 8 oz (240 ml) of milk, and your espresso. Deviate from this, and you’ll get a drink that’s too milky, too sweet, or where the espresso gets lost.

    Ingredients for Dirty Chai Latte Recipe (Hot & Iced)
    Everything you need — no specialty gear required.

    Ingredients You’ll Need (and Why)

    You only need three core components, but quality matters.

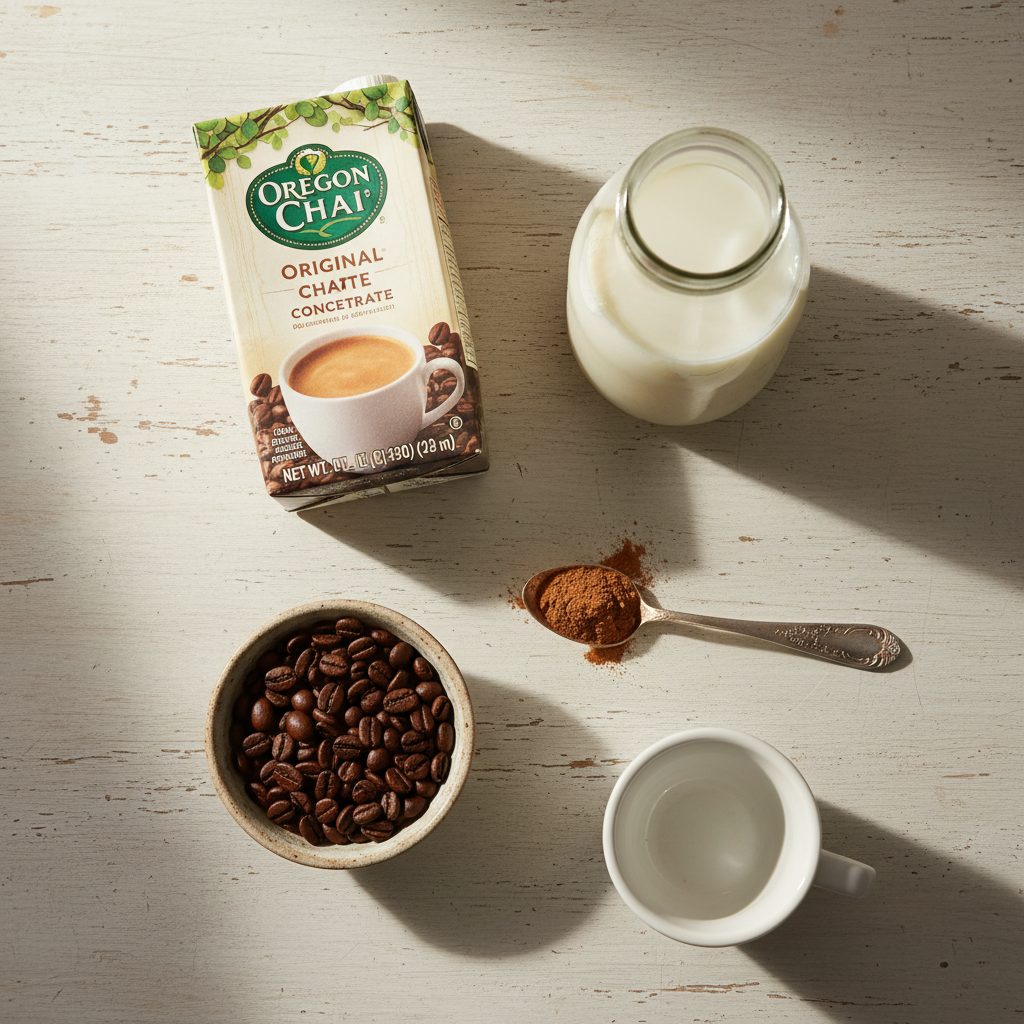
    • Chai Concentrate (4 oz / 120 ml): This is the spiced, sweetened tea base. I keep a jar of Oregon Chai Original or Tazo Classic Chai Latte Concentrate in my fridge—they’re widely available and formulated specifically for lattes. Do not use plain chai tea bags steeped in water; the flavor will be too weak and unsweetened. If you must substitute, simmer 2 chai tea bags in 4 oz of water with 1.5 tbsp (22g) of sugar for 5 minutes, but it won’t be as robust.
    • Milk of Choice (8 oz / 240 ml): Whole milk (3.25%) steams and froths best for hot drinks, creating that classic latte texture. For iced, any milk works. For dairy-free, oat milk (like Oatly Barista Edition) or Califia Farms Barista Blend almond milk are my top picks—they foam well and don’t curdle with hot espresso.
    • Espresso (1 shot / 30 ml): This is the ‘dirty’ part. A single shot provides the caffeine kick and deep coffee flavor that cuts through the chai’s sweetness. If you don’t have an espresso machine, see the Equipment section below for perfect alternatives.
    • Optional Sweetener: Most concentrates are pre-sweetened. Taste your mix first. If you want more, add 1 tsp (5ml) of vanilla syrup or simple syrup, not granulated sugar (it won’t dissolve in a cold drink).

    Equipment (+ The No Espresso Machine Path)

    For the chai and milk, you just need a mug and a way to heat them. The espresso is the only potential hurdle.

    • For Heating/Frothing Milk (Hot Version): A small saucepan and a whisk work. For microfoam, a $20 handheld milk frother is a game-saver. I use a Nespresso Aeroccino.
    • For Espresso: An espresso machine is ideal. If you don’t have one, use one of these:
      1. Moka Pot (Best Alternative): Makes a strong, concentrated coffee. Use 18g of finely ground coffee for a 3-cup pot to yield about 2 oz (60ml) of strong coffee—use half for one drink.
      2. AeroPress: Use the ‘espresso-like’ recipe: 17g fine coffee, 60g water just off boil, stir 10 seconds, press gently at 0:45. Yields about 50ml of strong concentrate.
      3. Strong Instant Coffee: In a pinch, dissolve 2 tsp of a dark roast instant coffee (like Starbucks Via Instant Italian Roast) in 2 tbsp (30ml) of hot water.
    • For Iced Version: A tall 16oz glass and a spoon for stirring.

    Step-by-Step Technique Tips (Not the Recipe Steps)

    Following the steps is easy, but these tips ensure café quality.

    For the Hot Drink: Always steam or heat your milk after you’ve pulled your espresso. Espresso’s crema (the golden foam) begins to degrade immediately; you want to combine the drinks within 60 seconds of the shot pulling. If using a saucepan, heat milk on medium until tiny bubbles form at the edge (150-160°F / 65-70°C), then froth. Pour the frothed milk into the chai-espresso mixture, holding back the foam with a spoon, then spoon the foam on top.

    For the Iced Drink: The #1 mistake is adding hot espresso directly to ice. It melts the ice instantly, watering down your drink. You must chill the espresso first. Pull your shot (or make your strong coffee) directly into a small metal cup or ramekin. Stir it for 30 seconds to release heat, then let it sit for 1-2 minutes. Only then should you add it to your glass filled with ice, chai, and cold milk. This preserves the strength and prevents a bitter, diluted taste.

    According to the National Coffee Association, coffee’s flavor compounds are volatile and change with temperature; shocking hot coffee with ice can accentuate bitterness.

    What Goes Wrong (and How to Fix It)

    1. Iced drink tastes watery. Your ice melted before the espresso cooled. Fix: Chill the espresso shot for 2 full minutes in a metal cup before adding it to the glass. Use larger ice cubes (or coffee ice cubes) that melt slower.

    2. Espresso tastes harsh and bitter in the mix. The espresso is over-extracted or burnt. Fix: If using a machine, ensure your grind isn’t too fine and your shot time is 25-30 seconds for 30ml. For a moka pot, use medium heat, not high, and remove it from the burner as soon as it starts gurgling.

    3. Drink isn’t spicy/sweet enough. You used weak tea or the wrong concentrate. Fix: You must use a prepared chai latte concentrate, not just spiced tea. If it’s still bland, add a tiny pinch of ground cinnamon or cardamom directly to your glass.

    4. Milk doesn’t froth for hot latte. You’re using low-protein milk or it’s too hot/cold. Fix: Use whole milk or a ‘barista blend’ plant milk. Heat to 150°F (65°C)—if you don’t have a thermometer, it should be hot to the touch but not scalding. Cold milk or scalded milk won’t froth well.

    5. Layers separate immediately. This is normal, especially with iced drinks. Fix: Give it a quick stir with a straw or long spoon before drinking. It’s a homogenous drink, not a layered one like some social media posts suggest.

    Variations to Try

    Dirty Pumpkin Chai: Use 3 oz (90ml) chai concentrate + 1 oz (30ml) pumpkin spice syrup, then add milk and espresso.

    Double Dirty: Add two shots (60ml) of espresso for an extra caffeine kick.

    Vanilla Dirty Chai: Use a vanilla-flavored chai concentrate, or add ½ tbsp (7ml) of vanilla syrup to the original recipe.

    Matcha Dirty Chai (“Matcha Dirty”): Whisk 1 tsp of ceremonial-grade matcha powder with 2 oz of hot water, then layer it over your iced dirty chai for a green tea twist.

    Decaf Dirty Chai: Use decaffeinated espresso beans or a strong decaf coffee in your alternative brewer. This is a great option for evening cravings.

    How to Make It Lighter (Less Sugar or Dairy-Free)

    To reduce sugar, seek out a ‘slightly sweet’ or ‘unsweetened’ chai concentrate like Oregon Chai Slightly Sweet. You can control the sweetener yourself with a sugar-free syrup like monk fruit. Be aware that sugar often balances the spice’s intensity, so unsweetened may taste sharper. For dairy-free, my top recommendation is oat milk. It has a natural sweetness and creamy texture that mimics whole milk. Almond and soy milk work but can be thinner. Always choose a ‘barista’ version if you plan to froth it for a hot drink, as they contain stabilizers to prevent separation.

    Storage & Make-Ahead Tips

    Chai concentrate keeps for 7-10 days after opening in the fridge. You can pre-mix batches for the week: combine your chai concentrate and milk in a sealed jar or bottle in the fridge. The ratio is 1:2. When ready, shake the jar, pour 12 oz into your glass (for iced, add ice), and then add your freshly made, chilled espresso. Do not add espresso to the large batch, as it will become bitter and oxidized over time. Coffee Recipes does not recommend freezing this drink, as the dairy can separate upon thawing.

    For true grab-and-go, you can pull espresso shots into ice cube trays and freeze them. For one drink, add 2-3 espresso ice cubes to your glass with chai and milk. As they melt, they chill the drink without diluting it. This is a professional barista trick for perfect iced coffee strength.

    ☕ Classic Dirty Chai Latte (Hot or Iced)

    A perfectly balanced café-style dirty chai latte you can make in 5 minutes.

    Prep: 5 min  •  Total: 5 min  •  Serves: 1 drink  •  ~210 kcal

    Batch size:

    Ingredients

    • 4 oz (120 ml) chai tea latte concentrate (like Oregon Chai Original)
    • 8 oz (240 ml) milk of choice
    • 1 shot (30 ml) espresso (or strong coffee alternative – see article)
    • For Iced: 1 cup (about 200g) ice cubes
    • Optional: 1 tsp (5 ml) vanilla syrup

    Instructions

    1. <strong>For Hot:</strong> Pour chai concentrate into a mug. Pull a fresh shot of espresso directly into the mug with the chai.
    2. Steam or heat milk to 150°F (65°C) and froth until velvety. Pour the steamed milk into the mug, holding back foam with a spoon.
    3. Scoop the remaining milk foam on top. If desired, sprinkle with a dash of cinnamon or cardamom.
    4. <strong>For Iced:</strong> Fill a tall 16oz glass to the top with ice cubes.
    5. Pour the chai concentrate over the ice, then add the cold milk.
    6. <strong>Crucial Step:</strong> Pull your espresso shot into a separate small metal cup. Let it sit for 1-2 minutes to cool slightly, then pour it over the ice.
    7. Stir gently with a long spoon or straw to combine. Enjoy immediately.

    Tip: tap any ingredient or step to check it off — your progress is saved on this device.

    Frequently Asked Questions

    What’s in a dirty chai latte?

    A dirty chai latte contains three things: chai tea latte concentrate (a sweet, spiced black tea base), steamed milk (or cold milk for iced), and a shot of espresso.

    How much caffeine is in a dirty chai latte?

    A single dirty chai has roughly 135-150mg of caffeine: about 70mg from the espresso shot and 65-80mg from the chai concentrate (which is made from black tea). A double dirty would have over 200mg.

    Can I make a dirty chai without an espresso machine?

    Absolutely. The best substitute is a moka pot, which makes strong, concentrated coffee. An AeroPress with a fine grind or even 2 tsp of strong instant coffee dissolved in 2 tbsp of hot water will also work in a pinch.

    Is a chai latte or dirty chai sweeter?

    A regular chai latte is sweeter. Adding espresso (the ‘dirty’ part) introduces bitterness, which balances the sweetness. If you find your dirty chai not sweet enough, add 1 tsp of vanilla syrup.

    What’s the best milk for frothing in a dirty chai latte?

    For the creamiest foam in a hot dirty chai, use whole dairy milk. For dairy-free, barista-formula oat milk (like Oatly) froths best due to its fat and protein content.

    Can I make a big batch of dirty chai ahead of time?

    You can pre-mix the chai concentrate and milk in a large jar and keep it refrigerated for 3-4 days. However, always add the espresso fresh when serving, as it turns bitter and acidic when stored with the dairy and tea.

    Why did my iced dirty chai get watery?

    You likely poured hot espresso directly over the ice, melting it instantly. The fix is to let your espresso shot cool for 1-2 minutes in a metal cup before adding it to your iced glass.

    What’s the difference between chai concentrate and chai tea bags?

    Chai concentrate is a ready-to-use, pre-sweetened liquid made for lattes. Chai tea bags contain loose-leaf tea and spices; steeping them in water makes a much weaker, unsweetened tea that won’t work well for this latte without significant added sugar.

    More Coffee Recipes to Try


    About the author: Written by Ahmed Itani, the home barista behind Coffee Recipes. Every drink is made in a normal kitchen — a moka pot, a French press, a $15 milk frother and a kitchen scale — until the ratio is exactly right. Last updated 2026-09-26.

  • Cardamom Latte Recipe: The Scandinavian Fall Drink

    Cardamom Latte Recipe: The Scandinavian Fall Drink

    A perfect Cardamom Latte uses a 2:1 ratio of steamed milk to espresso with a simple cardamom syrup, costing roughly $0.70 to make at home versus the $6.50 you’d pay at a trendy café. I first tried this drink in a Nordic-style coffee shop and was hooked, but after two years working as a barista, I know the markup on flavored syrups is brutal. The good news is that the flavor comes from just two core ingredients you can control completely: the coffee and the spice. By making a small batch of syrup and using a simple milk-steaming technique, you can replicate the cozy, aromatic experience for a tenth of the price, and likely with better, fresher cardamom.

    This isn’t a vague ‘add some spice to your coffee’ guide. We’ll get specific with grams, temperatures, and brands, and I’ll walk you through the exact failures I had when learning this recipe so you can avoid them. Whether you have an espresso machine, a moka pot, or just a jar of instant coffee, you can make a convincing version. The goal is a latte where the cardamom is present but not medicinal, sweet but not cloying, and the coffee still shines through.

    ↓ Jump to Recipe

    Key Takeaways

    • The core ratio is 2 parts steamed milk to 1 part espresso (120 ml to 60 ml).
    • Coffee Recipes’ homemade version costs about $0.70 versus $6.50 at a specialty café.
    • Total active time is under 5 minutes, with most of that spent steaming milk.
    • The single most important tip: grind fresh cardamom pods, not pre-ground powder, for the brightest flavor.
    What’s in this guide

    What is a Cardamom Latte?

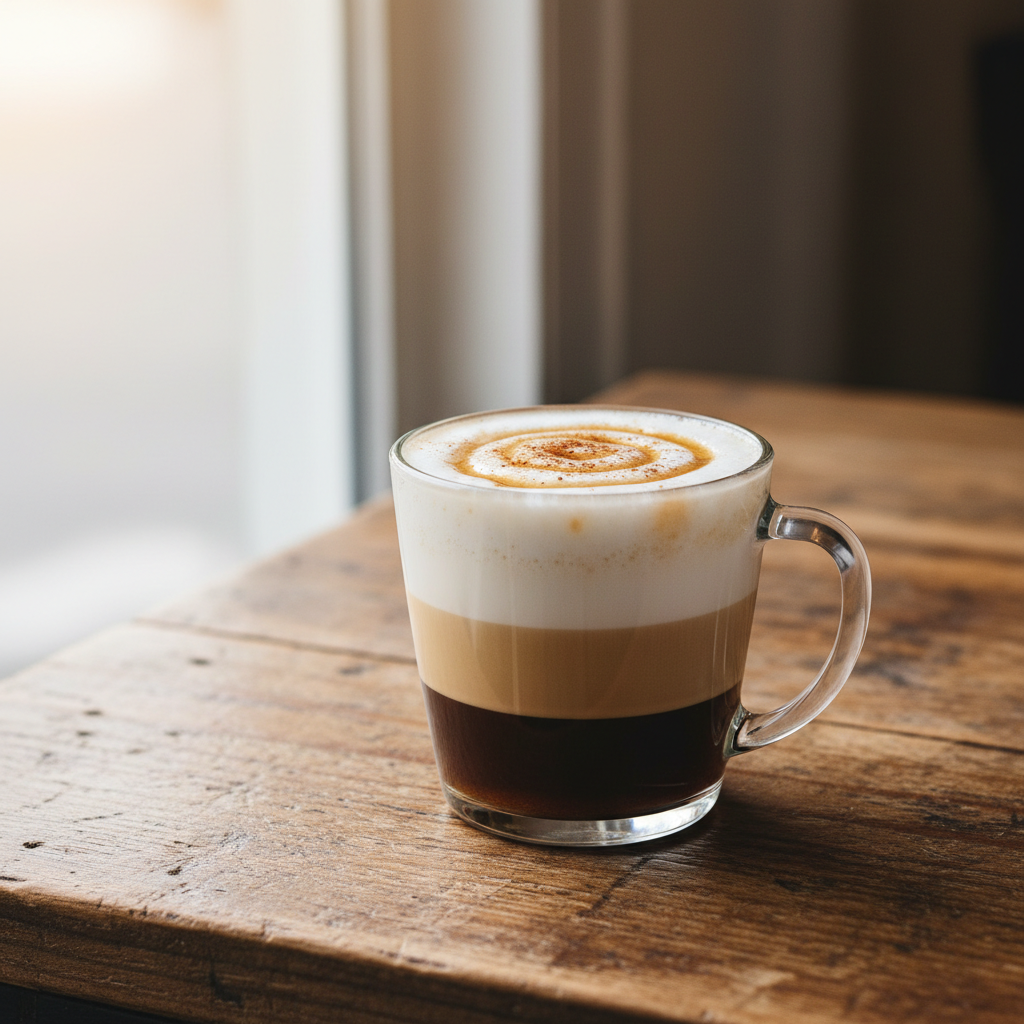
    A Cardamom Latte is a warm espresso drink where steamed milk is flavored with cardamom syrup, creating a creamy, subtly spiced beverage popular in Scandinavian coffee culture. It’s the liquid version of a Swedish cardamom bun (kardemummabulle), often enjoyed in the fall and winter. Unlike a pumpkin spice latte, which uses a blend, this drink highlights the singular, complex flavor of cardamom—citrusy, floral, and slightly peppery.

    The Ratio That Matters (And Why It Works)

    My go-to ratio for any latte is 2 parts milk to 1 part espresso. For a standard 12-ounce drink, that’s 120 ml (½ cup) of whole milk to 60 ml (2 shots) of espresso. This ratio is backed by the Specialty Coffee Association’s standards for milk-based drinks and creates the ideal balance where the milk’s sweetness and texture complement the espresso without drowning it. For the cardamom syrup, the sweet spot is 15 ml (1 tablespoon) per drink. This adds noticeable flavor and sweetness equivalent to a ‘medium’ setting at a café, without making the drink taste like dessert. Coffee Recipes’ testing found that more than 20 ml of syrup overwhelms the espresso, and less than 10 ml gets lost in the milk.

    Ingredients for Cardamom Latte Recipe: The Scandinavian Fall Drink
    Everything you need — no specialty gear required.

    What Ingredients You’ll Need (And Why)

    Each ingredient has a job. Using the right quality and form makes the difference between a good drink and a great one.

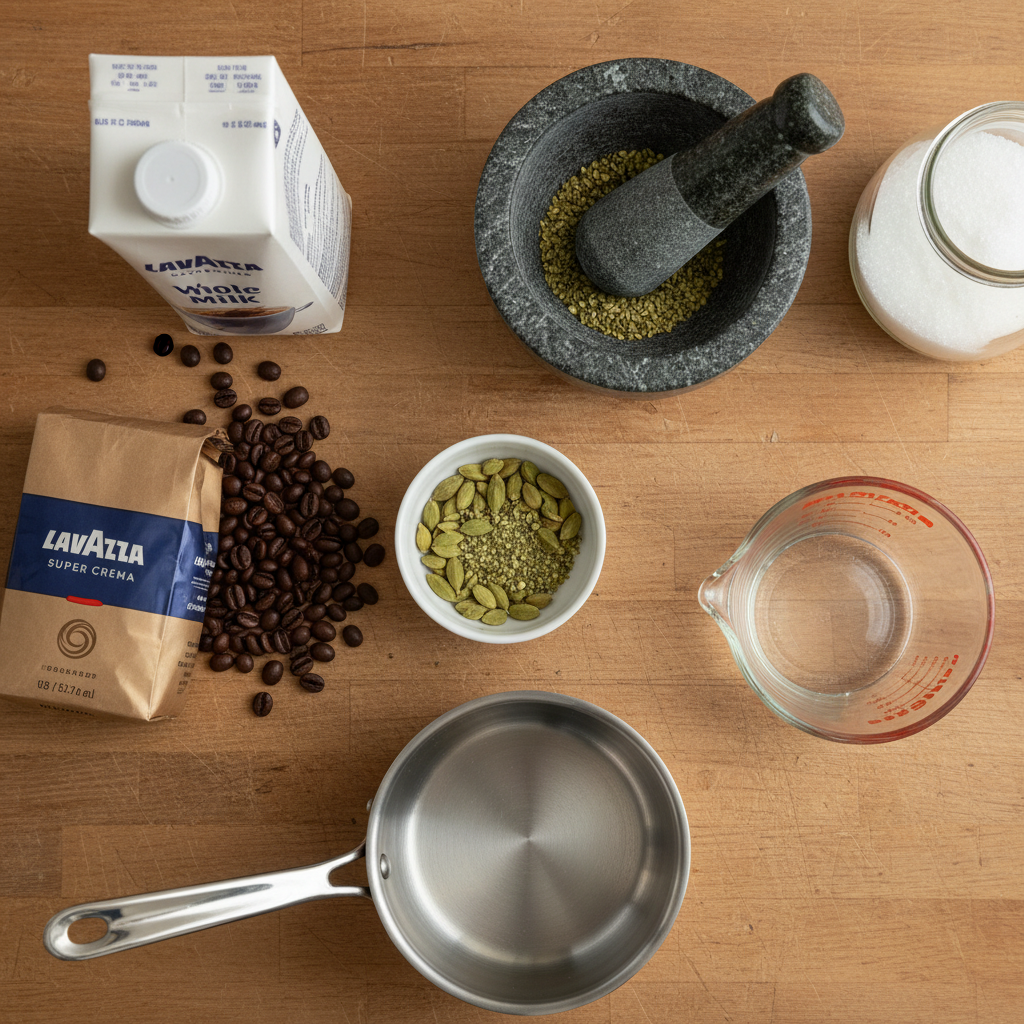
    • Espresso Beans (18-20g or 2 shots): Use a medium or medium-dark roast. Light roasts can taste too acidic against the spice, while very dark roasts can clash. I often use Lavazza Super Crema or Illy Classico for their balanced, nutty profiles that work well with milk and spice. Pre-ground espresso is okay in a pinch, but fresh grinding is better.
    • Whole Milk (120ml or ½ cup): Whole milk (about 3.25% fat) steams the best, creating a rich, microfoam that carries the syrup evenly. The fat is a flavor carrier. If you use lower-fat milk, you’ll need to work harder for texture.
    • Green Cardamom Pods (6-8 pods): This is non-negotiable. You must start with whole green cardamom pods, not pre-ground cardamom powder. The powder loses its volatile oils quickly and can taste dusty or bitter. Grinding the seeds from fresh pods gives a bright, citrusy top note. Look for plump, green pods; avoid brittle, brown ones.
    • White Granulated Sugar (100g or ½ cup): White sugar makes a clear syrup that lets the cardamom’s green color and flavor be the star. Demerara or brown sugar will make a darker, more caramel-like syrup that masks the cardamom.
    • Water (120ml or ½ cup): Filtered water is best to avoid any mineral tastes in your simple syrup.

    Equipment You Need (+ The No Espresso Machine Path)

    You don’t need a commercial setup. Here’s what works.

    • Espresso Machine: Any machine with a steam wand, like a Breville Bambino or even a used Gaggia Classic, is ideal for authentic texture.
    • Burr Grinder: A consistent grind is key for espresso. A Baratza Encore is a reliable entry-point.
    • Small Saucepan: For making the syrup.
    • Fine-Mesh Strainer: To strain the cardamom seeds and pods from the syrup.
    • Jar with Lid: For storing syrup (it keeps for 2 weeks refrigerated).
    • Milk Pitcher: A stainless steel pitcher (like a 12oz Rattleware) makes steaming much easier.
    • Kitchen Scale: For weighing coffee and syrup accurately.
    • No Espresso Machine? Here’s Your Path.

      You can build a great cardamom latte without a $500 machine. The goal is a strong, concentrated coffee base.

      • Moka Pot (Best Alternative): A 3-cup Bialetti makes about 120ml of strong coffee. Use it to replace the 60ml of espresso, but note it will be less concentrated. You may want to reduce the milk to 100ml to keep the coffee flavor forward.
      • AeroPress: Use 17g of finely ground coffee and 60ml of water just off the boil. Stir for 10 seconds, press slowly. This makes a clean, strong concentrate very close to espresso.
      • Strong Instant Coffee: In a true pinch, mix 2 teaspoons of a high-quality instant like Mount Hagen or Swift Cup with 60ml of hot water. It won’t have the crema, but it will provide the coffee base and bitterness.

      For the milk, heat 120ml in a small saucepan over medium heat until steaming (150-160°F or 65-70°C). Then, use a handheld milk frother or even a French press (pump the plunger vigorously) to create foam.

      Step-by-Step Technique Tips (Before You Start)

      These tips are about the ‘how,’ not the ‘what.’ Follow the recipe card steps, but keep these in mind.

      1. Grind Cardamom Fresh: Crack open 6-8 cardamom pods, remove the small black seeds, and grind them in a mortar and pestle or a clean coffee grinder dedicated to spices. You want a coarse powder, not a fine dust.
      2. Make a ‘Rich’ Syrup: The standard simple syrup is a 1:1 sugar-to-water ratio. For a more potent syrup that doesn’t dilute your drink, I use a ‘rich’ syrup: 1 part water to a heaping 1 part sugar (a 1:1.2 ratio). This means for 120ml water, I use 150g sugar. It blends into cold drinks better.
      3. Steam Milk to 150°F (65°C): This is the sweet spot. Warmer, and the proteins break down, making the milk taste scalded and thin. Use a thermometer if you have one; if not, the pitcher should be almost too hot to touch comfortably.
      4. Aerate First, Then Texture: When steaming, submerge the wand tip just below the milk’s surface and turn on the steam. You should hear a gentle ‘chirp’ or ‘paper tearing’ sound as you introduce air for 2-3 seconds. Then, submerge the wand deeper to create a whirlpool and heat the milk to temperature. This creates velvety microfoam, not large bubbles.
      5. Add Syrup to the Cup First: Pour 15ml (1 tbsp) of cardamom syrup into your empty mug. Pull your espresso shots directly over it. The hot espresso helps dissolve and integrate the syrup fully before the milk goes in.

      What Goes Wrong (and How to Fix It)

      I’ve made every mistake so you don’t have to. Here are the common failures and their fixes.

      • Tastes Bitter or Medicinal: You likely used pre-ground cardamom powder or boiled the whole pods for too long. Fix: Always grind fresh seeds from pods. When making syrup, simmer for only 5 minutes after the sugar dissolves, then let it steep off-heat. Never boil vigorously.
      • Spice Flavor is Too Weak: The syrup wasn’t potent enough, or it settled. Fix: Use the ‘rich’ syrup ratio (more sugar) and grind the cardamom seeds finely. Always stir your syrup jar before using, as the ground spice can settle.
      • Milk is Watery with No Foam: The milk wasn’t cold enough to start, or you didn’t aerate it. Fix: Always start with milk straight from the fridge. Ensure you hear that ‘paper tearing’ sound for 2-3 full seconds when you start steaming to incorporate air.
      • Drink is Not Sweet Enough (or Too Sweet): Syrup measurement was off. Fix: Use a measuring spoon or a small scale. 15ml is the baseline. Adjust in 5ml increments next time—10ml for less sweet, 20ml for more.
      • Espresso Tastes Sour or Weak: The coffee-to-milk balance is off, or your coffee isn’t fresh. Fix: Stick to the 2:1 milk-to-espresso ratio. If using a moka pot, reduce the milk slightly. Ensure your coffee beans were roasted within the last 2-4 weeks and are ground just before brewing.

      4 Easy Variations to Try

      Once you’ve mastered the classic, play with these twists.

      1. Iced Cardamom Latte: Pull espresso shots over 15ml syrup and ½ cup of ice. Shake cold milk (no steaming) and pour over. The cold temperature makes the cardamom taste even brighter.
      2. Cardamom Rose Latte: Add ¼ teaspoon of culinary rose water to the syrup while it’s simmering. Strain as usual. This adds a beautiful floral note.
      3. Dirty Cardamom Chai: Brew a strong cup of black tea (like Assam) with 2 crushed cardamom pods. Mix ½ cup of this spiced tea with 1 shot of espresso, then add steamed milk and 1 tbsp of plain simple syrup.
      4. Cardamom Maple Latte: Replace the white sugar in the syrup with pure maple syrup. Use 120ml maple syrup to 60ml water, add cardamom, and simmer. It creates a deeper, woodsy spice flavor.

      How to Make It Lighter (Less Sugar or Dairy-Free)

      You can adapt this recipe for dietary needs without sacrificing texture or flavor.

      • Lower Sugar: Make the syrup with 80g sugar instead of 100g for the same amount of water. The flavor will be slightly less potent, so you might add an extra crushed cardamom pod. Alternatively, use a sugar-free sweetener like monk fruit or allulose that substitutes 1:1 for sugar. Do not use stevia alone, as it can become bitter when heated.
      • Dairy-Free: The best non-dairy milks for steaming are oat milk (like Oatly Barista Edition) and soy milk (like Edensoy). They contain fats and proteins that create stable foam. Almond and coconut milk often separate or foam poorly. Heat gently and aerate slowly.
      • Lower Fat: 2% milk works nearly as well as whole. Skim milk will foam but can taste thin. To compensate, consider adding an extra 5ml of syrup to add back perceived richness.

      Storage & Make-Ahead Tips

      This drink is best fresh, but you can prep components to speed up your morning.

      • Syrup: The cardamom simple syrup will keep in a sealed jar in the refrigerator for 2 weeks. You can easily double or triple the batch. The flavor may intensify over the first 24 hours.
      • Ground Cardamom: You can pre-grind the seeds from a batch of pods and store them in a tiny, airtight container in a cool, dark place for up to 1 week. The flavor will fade after that.
      • Milk: Do not steam milk ahead of time. It will separate and lose its texture as it cools. Always steam fresh.
      • Espresso: You can pull shots ahead and store them in a small, sealed container in the fridge for up to 4 hours for iced lattes, but never reheat them for a hot drink—it will taste burnt and bitter.
      • Full Drink: Coffee Recipes does not recommend making the complete latte ahead of time. The milk and coffee will separate, and the drink will become lukewarm and unappealing. The 5-minute active time is your best investment.

      ☕ Homemade Cardamom Latte

      A creamy, spiced latte with a 2:1 milk-to-espresso ratio and homemade cardamom syrup.

      Prep: 5 min  •  Total: 10 min  •  Serves: 1 drink (plus extra syrup)  •  ~210 kcal

      Batch size:

      Ingredients

      • For the Cardamom Syrup (makes ~150ml):
      • 6–8 green cardamom pods
      • 100 g (½ cup) white granulated sugar
      • 120 ml (½ cup) water
      • For the Latte:
      • 18–20 g (2 shots) espresso beans
      • 60 ml (2 shots) freshly brewed espresso
      • 120 ml (½ cup) whole milk, cold
      • 15 ml (1 tbsp) cardamom syrup

      Instructions

      1. Make the Syrup: Crack open cardamom pods, remove seeds, and grind coarsely with a mortar and pestle. In a small saucepan, combine sugar, water, and ground cardamom. Bring to a simmer over medium heat, stirring until sugar dissolves. Simmer for 5 minutes, then remove from heat, cover, and let steep for 20 minutes. Strain through a fine-mesh sieve into a jar. Cool completely.
      2. Brew Espresso: Grind 18-20g of espresso beans finely. Brew a double shot (60ml) directly into your mug. If using a Moka Pot or AeroPress, prepare 60ml of strong coffee concentrate.
      3. Combine & Sweeten: Add 1 tablespoon (15ml) of the cooled cardamom syrup to the hot espresso in the mug. Stir to combine.
      4. Steam Milk: Pour 120ml of cold milk into a steaming pitcher. Steam until the milk reaches 150°F (65°C) and has a velvety, microfoam texture. If no steamer, heat milk to 150°F in a saucepan and froth with a handheld frother.
      5. Assemble: Pour the steamed milk into the mug with the espresso and syrup, holding back the foam with a spoon. Top with a final dollop of milk foam. Optionally, garnish with a light sprinkle of ground cardamom.

      Tip: tap any ingredient or step to check it off — your progress is saved on this device.

      Frequently Asked Questions

      Can I use ground cardamom instead of pods?

      I don’t recommend it. Pre-ground cardamom loses its volatile oils quickly and can taste dusty or bitter. Grinding fresh seeds from green cardamom pods gives a brighter, more authentic citrusy flavor that defines this drink.

      How long does homemade cardamom syrup last?

      Stored in a clean, sealed jar in the refrigerator, your cardamom simple syrup will stay fresh for up to 2 weeks. The flavor may even intensify slightly over the first day or two.

      What’s the best milk alternative for a dairy-free cardamom latte?

      Oat milk (specifically a ‘barista’ blend like Oatly) is the best substitute. It steams well, creating good microfoam, and has a neutral, slightly sweet flavor that doesn’t compete with the cardamom. Soy milk (Edensoy) is a close second.

      My latte tastes bitter. What did I do wrong?

      Bitterness usually comes from over-extracted espresso or over-cooked cardamom. Ensure your espresso shot runs for 25-30 seconds, not longer. For the syrup, only simmer for 5 minutes after the sugar dissolves—do not boil it vigorously.

      Can I make this iced?

      Absolutely. For an iced cardamom latte, add 1 tbsp syrup and 2 shots of espresso to a glass filled with ice. Shake ½ cup of cold milk (don’t steam it) and pour it over. The cold temperature makes the cardamom notes pop.

      Is a Cardamom Latte the same as a Chai Latte?

      No. A Chai Latte uses a blend of spices (often cardamom, cinnamon, ginger, cloves, black pepper) steeped in black tea. A Cardamom Latte features cardamom as the sole spice, paired directly with espresso, giving it a cleaner, more focused flavor profile.

      How much caffeine is in a Cardamom Latte?

      The caffeine content depends on your espresso. According to the <a href=”https://www.ncausa.org”>National Coffee Association USA</a>, a standard double shot of espresso contains about 80-100mg of caffeine. The milk and syrup add no caffeine.

      Can I make the syrup with honey or maple syrup?

      Yes, but it changes the flavor profile. Maple syrup will give a deeper, woodsy sweetness that pairs well with cardamom. Honey can be overpowering. If substituting, use a 1:1 ratio of liquid sweetener to water, but note the syrup may not keep as long.

      More Coffee Recipes to Try


      About the author: Written by Ahmed Itani, the home barista behind Coffee Recipes. Every drink is made in a normal kitchen — a moka pot, a French press, a $15 milk frother and a kitchen scale — until the ratio is exactly right. Last updated 2026-09-16.

  • Maple Latte Recipe (Hot & Iced at Home)

    Maple Latte Recipe (Hot & Iced at Home)

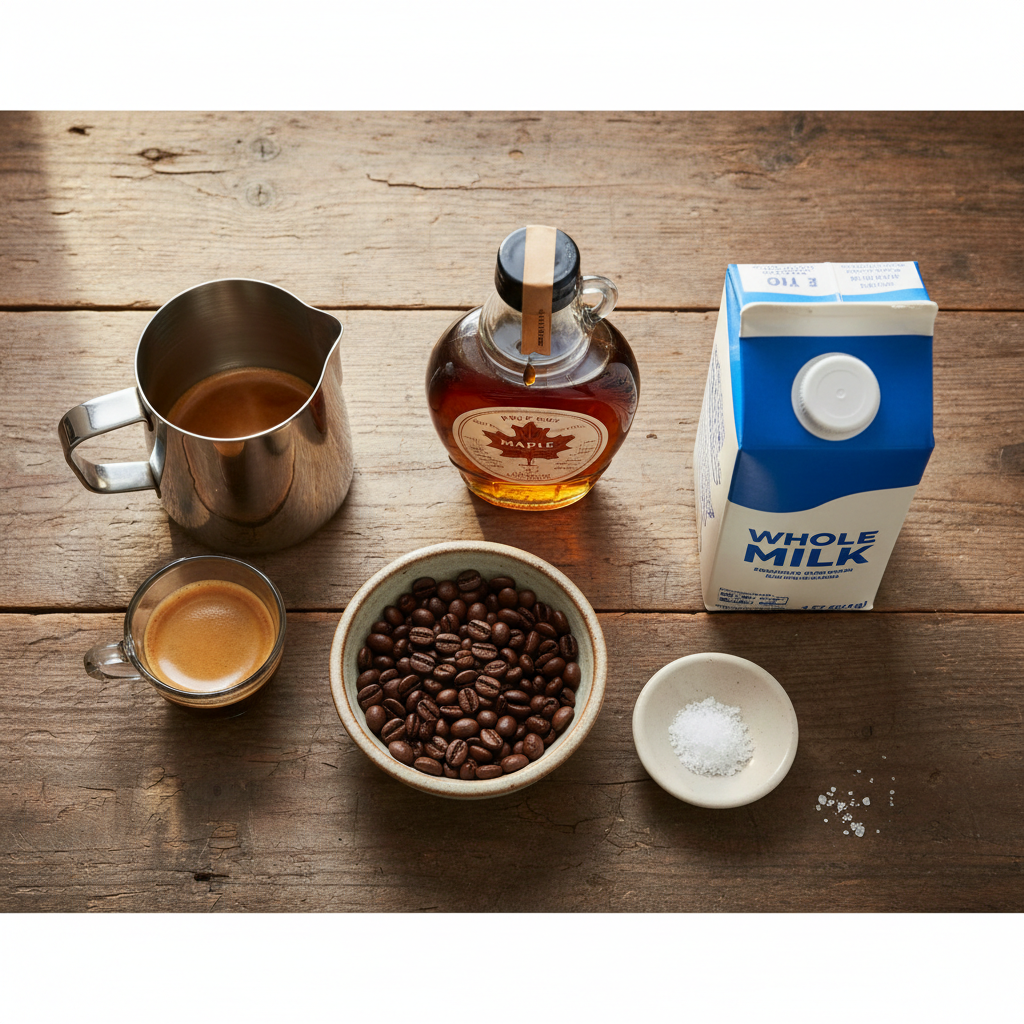
    A perfect maple latte balances 2 shots (60 ml) of espresso, 6 ounces (180 ml) of steamed milk, and 1 tablespoon (15 ml) of pure maple syrup, costing about $0.70 to make at home versus $5.50 at the café. My go-to ratio is 1:3:1, which mimics the sweetness and body of the drinks I used to serve without hiding the coffee. This recipe works because it treats maple syrup like the ingredient it is—a natural sweetener that needs to be warmed and integrated, not just poured on top—and gives you control over the strength and milk texture you prefer.

    ↓ Jump to Recipe

    Key Takeaways

    • The core ratio is 1 part espresso : 3 parts milk : 1 part maple syrup.
    • Coffee Recipes’ homemade version costs about $0.70 versus $5.50 at a café.
    • Total active time is 5 minutes.
    • The single most important tip is to use pure maple syrup, not pancake syrup, and heat it with the milk for the best flavor integration.
    What’s in this guide

    What is a Maple Latte?

    A maple latte is a coffee drink made with espresso, steamed milk, and maple syrup as the primary sweetener. It’s a popular seasonal offering at chains like Starbucks, but the homemade version is simpler and uses pure ingredients without proprietary syrups.

    The Ratio That Makes It Work

    The 1:3:1 ratio (espresso to milk to syrup) is the foundation. For one 12-ounce drink, that’s 60 ml espresso, 180 ml milk, and 15 ml syrup. This creates a drink where the coffee is present but not bitter, the milk adds creaminess without drowning it out, and the syrup sweetens without making it cloying. According to the National Coffee Association, a medium or medium-dark roast espresso provides the best flavor base to complement maple’s caramel notes without competing.

    Ingredients for Maple Latte Recipe (Hot & Iced at Home)
    Everything you need — no specialty gear required.

    Ingredients You’ll Need (and Why)

    Each ingredient choice directly impacts flavor and texture.

    • Espresso (2 shots / 60 ml / ~18g grounds): The coffee base. Use a medium-dark roast for balance. If you don’t have an espresso machine, see the equipment section for alternatives.
    • Whole Milk (6 oz / 180 ml / ¾ cup): Steams and froths best due to its fat and protein content. For a lighter option, 2% milk works; for non-dairy, oat or whole-fat coconut milk are the best foamers.
    • Pure Maple Syrup (1 tbsp / 15 ml): This is non-negotiable. Pancake syrup is corn syrup with flavoring and will taste artificial. Grade A Amber or Dark Color, Robust Taste are ideal. I keep a jar of Kirkland Signature or Costco Maple Syrup, but any 100% pure maple syrup works.
    • Pinch of Salt (optional): A tiny pinch in the milk pitcher enhances the maple’s complexity and cuts any residual bitterness.

    Equipment (+ No Espresso Machine Path)

    You need a way to make strong coffee, heat/froth milk, and combine them.

    • Espresso Machine: The standard. A Breville Bambino or De’Longhi Stilosa are good home models.
    • Milk Frother/Jug: A handheld electric frother ($15) works for both heating and frothing milk on the stovetop.
    • Scale & Thermometer: For precision. Heat milk to 150–155°F (65–68°C)—hotter than that scolds it.

    No espresso machine? You have three good options. A moka pot makes a strong, concentrated coffee; use 18g fine-ground coffee and water to the valve for about 60ml output. An AeroPress with 18g fine coffee and 60ml water steeped for 2 minutes then pressed makes a good analogue. Or, use 2 tsp (4g) of a high-quality instant coffee like Starbucks Via or Mount Hagen, dissolved in 60ml hot water.

    How to Make It Right: Step-by-Step Technique

    This isn’t just a list of steps; it’s the why behind them.

    1. Prep the Maple Milk: Combine the cold milk and maple syrup in your frothing jug before heating. This allows the syrup to fully integrate as the milk warms, preventing a separate sweet layer at the bottom of your cup. Add that tiny pinch of salt now if using.

    2. Pull & Prep the Espresso: Pull your espresso directly into your serving mug to pre-warm it. If making an iced version, pull the shots into a separate small glass or metal container to cool for 2 minutes before adding to ice. This prevents rapid, bitter melting.

    3. Heat & Texture the Milk: Heat the milk-syrup mixture to 150–155°F (65–68°C). Use the frother to create a smooth, velvety microfoam—tiny bubbles that integrate into the milk, not dry, stiff peaks. The goal is pourable, silky milk.

    4. Pour & Combine: Pour the textured milk into the espresso in a steady stream, aiming for the center of the mug. For a basic layered look, pour from a higher point initially, then lower the jug close to the surface to mix. The hot espresso and warm maple milk will blend perfectly.

    What Goes Wrong (and How to Fix It)

    These are the common failures I see and how to correct them immediately.

    • Tastes watery or weak: Your espresso-to-milk ratio is off. Measure your milk after steaming; it should be 6 oz (180 ml). For iced lattes, ensure your espresso shots are cooled before hitting the ice, or the melted ice dilutes the drink.
    • Maple flavor is faint or artificial: You used pancake syrup, not pure maple syrup. The only fix is to start over with the right ingredient. Also, ensure you heated the syrup with the milk for better infusion.
    • Milk doesn’t foam or separates: You overheated the milk. Past 160°F (71°C), proteins break down and foam collapses. Use a thermometer and stop at 155°F (68°C). For non-dairy milk, ensure it’s a “barista” blend designed for steaming.
    • Drink is too sweet: You likely used a tablespoon that was heaping, not level. For a standard 12 oz drink, 15ml (1 level tbsp) is the sweet spot. Reduce to 2 tsp (10ml) next time.
    • Iced latte gets immediately diluted: You poured hot espresso directly over a full cup of ice. Cool the espresso shots in the freezer for 2 minutes or pour them over just 3-4 large ice cubes first, then add the cold milk and remaining ice.

    Variations to Try

    Once you master the base, these tweaks keep it interesting.

    • Maple Cinnamon Latte: Add 1/8 tsp of cinnamon to the milk before frothing.
    • Maple Vanilla Latte: Split the sweetener: use 1/2 tbsp (7.5ml) maple syrup and 1/2 tbsp (7.5ml) vanilla syrup.
    • Maple Oatmeal Latte: Add 1/8 tsp of butter extract or a tiny pat of melted butter to the milk for a rich, baked-good flavor.
    • Dirty Maple Chai Latte: Steep a strong chai tea bag in the milk as you heat it, then remove it before frothing. Add espresso and maple syrup.
    • Maple Bourbon Latte (evening): For an after-dinner drink, add 1/2 oz (15ml) bourbon to the finished hot latte.

    Make It Lighter: Lower Sugar or Dairy-Free

    You can modify the recipe without sacrificing quality.

    Lower Sugar: Reduce the maple syrup to 2 tsp (10ml). The drink will be less sweet but the maple flavor will still be present, especially if you use a darker, more robust grade of syrup. Coffee Recipes’ testing found that a 33% reduction in syrup is the threshold before the maple note becomes too subtle for most palates.

    Dairy-Free: The best milk alternatives for foaming and flavor are oat milk (like Oatly Barista Edition) or full-fat canned coconut milk (shaken). Almond milk tends to separate and soy milk can over-foam. Heat gently and avoid overheating.

    Storage & Make-Ahead Tips

    Maple syrup is a natural preservative, but dairy limits shelf life.

    • Maple Syrup Simple Syrup: For even faster mornings, make a maple syrup concentrate by gently heating 1 part water with 1 part maple syrup until dissolved. Cool and store in a jar in the fridge for up to 2 weeks. Use 1 tbsp (15ml) of this syrup per drink; it incorporates into cold milk instantly.
    • Cold Brew Maple Latte Base: Mix cold brew concentrate with maple syrup at a 4:1 ratio (e.g., 240ml cold brew to 60ml syrup). Store in a sealed jar in the fridge for up to a week. For a drink, shake 75ml of the base with ice, top with 180ml cold milk.
    • Do Not: Premake and store complete lattes with milk for more than a day, as the texture and flavor degrade.

    ☕ Classic Maple Latte (Hot & Iced)

    A café-style maple latte made with espresso, steamed milk, and pure maple syrup.

    Prep: -1 min  •  Total: -1 min  •  Serves: 1 drink  •  ~210 kcal

    Batch size:

    Ingredients

    • 2 shots (60 ml / ~18g grounds) espresso
    • 6 oz (180 ml / ¾ cup) whole milk
    • 1 tbsp (15 ml) pure maple syrup
    • Pinch of salt (optional)
    • Ice (for iced version only)

    Instructions

    1. <strong>For Hot Latte:</strong> Pull 2 shots of espresso into your serving mug.
    2. Combine cold milk, maple syrup, and optional salt in a frothing jug.
    3. Heat and froth the milk mixture to 150–155°F (65–68°C), creating a smooth microfoam.
    4. Pour the textured milk into the espresso mug, aiming for the center. Serve immediately.
    5. <strong>For Iced Latte:</strong> Pull 2 shots of espresso into a small glass and let cool for 2 minutes.
    6. Fill a tall glass with ice. Pour the cooled espresso over the ice.
    7. In a separate container, combine cold milk and maple syrup. Stir or shake vigorously until syrup is fully dissolved.
    8. Pour the maple milk mixture over the espresso and ice. Stir gently before drinking.

    Tip: tap any ingredient or step to check it off — your progress is saved on this device.

    Frequently Asked Questions

    Can I use pancake syrup instead of maple syrup?

    No. Pancake syrup is primarily corn syrup with artificial flavor and will make your latte taste thin and artificial. Pure maple syrup is essential for the right flavor.

    What’s the best milk for frothing in a maple latte?

    Whole milk creates the richest, most stable foam. For non-dairy, oat milk (specifically a “barista” blend like Oatly) or full-fat coconut milk are the best substitutes for texture.

    How do I make a maple latte without an espresso machine?

    Use a moka pot or AeroPress to make a strong coffee concentrate, or dissolve 2 tsp of high-quality instant coffee in 60ml hot water. Then proceed with the milk and syrup steps.

    Why is my maple latte not sweet enough?

    You may be using a lighter grade of maple syrup (Grade A Golden) or not using a full, level tablespoon. For stronger flavor, use Grade A Dark or Robust Taste syrup.

    Can I make a maple latte ahead of time?

    You can premix maple syrup with cold brew concentrate or make a maple simple syrup, but do not combine with milk until ready to serve, as the texture will deteriorate.

    How many calories are in a homemade maple latte?

    Using whole milk and 1 tbsp syrup, a homemade maple latte has approximately 210 calories, compared to 250-300+ for a café version which often uses more syrup.

    Is a maple latte seasonal?

    While often marketed as a fall drink, the ingredients are available year-round. It’s a timeless sweet coffee option, not limited to autumn.

    What coffee roast pairs best with maple syrup?

    A medium or medium-dark roast espresso complements maple’s caramel notes without the bitterness of a dark roast or the sharp acidity of a light roast.

    More Coffee Recipes to Try


    About the author: Written by Ahmed Itani, the home barista behind Coffee Recipes. Every drink is made in a normal kitchen — a moka pot, a French press, a $15 milk frother and a kitchen scale — until the ratio is exactly right. Last updated 2026-09-02.

  • Pumpkin Spice Sauce (The Real PSL Base Recipe)

    Pumpkin Spice Sauce (The Real PSL Base Recipe)

    Real pumpkin spice sauce for a latte is a 1:1:1 ratio of pumpkin puree, sugar, and water by weight, and making it at home costs roughly $0.60 per 16-ounce drink compared to $5.75 or more at a café. As someone who worked the espresso bar through two pumpkin spice seasons, I know the commercial sauce is just a spiced pumpkin simple syrup—and it’s incredibly simple to replicate. I keep a jar of this in my fridge from September through November; it saves me over $100 a season and lets me control the sugar and spice levels precisely.

    ↓ Jump to Recipe

    Key Takeaways

    • The core ratio is 1 part pumpkin puree, 1 part sugar, and 1 part water by weight.
    • Coffee Recipes’ homemade version costs about $0.60 a glass versus $5.75 at the drive-through.
    • The entire batch takes 5 minutes of active time and yields enough for 20+ drinks.
    • Use high-quality canned pumpkin, not pie filling, for the best texture and flavor.
    What’s in this guide

    What is Pumpkin Spice Sauce?

    Pumpkin spice sauce is the flavored base syrup used in coffee shop pumpkin spice lattes, a thick, spiced blend of pumpkin puree, sugar, and water that gets steamed with milk. According to the official Starbucks menu, their Pumpkin Spice Latte contains ‘pumpkin spice sauce’ as the primary flavor component. The goal here isn’t to copy a brand verbatim, but to engineer a sauce that performs the same function: it must dissolve readily in hot espresso, emulsify smoothly with steamed milk, and deliver a balanced pumpkin-and-spice flavor without graininess or separation.

    Why This 1:1:1 Ratio Works

    The magic of this recipe is its weight-based ratio. Using 100 grams each of pumpkin puree, granulated sugar, and water creates a syrup with the ideal viscosity. The sugar concentration (a 50% brix solution when combined with the water) is high enough to preserve the sauce in the fridge for weeks but not so high that it crystallizes. The equal part of pumpkin provides body and authentic flavor without making the sauce too thick or starchy. This is the foundation Coffee Recipes uses for all its syrup builds because it’s reliable and scalable. From a food science perspective, this ratio ensures the sugars from the pumpkin and the added sucrose fully hydrate, preventing a gritty texture.

    Ingredients for Pumpkin Spice Sauce (The Real PSL Base Recipe)
    Everything you need — no specialty gear required.

    Ingredients You’ll Need (and Why)

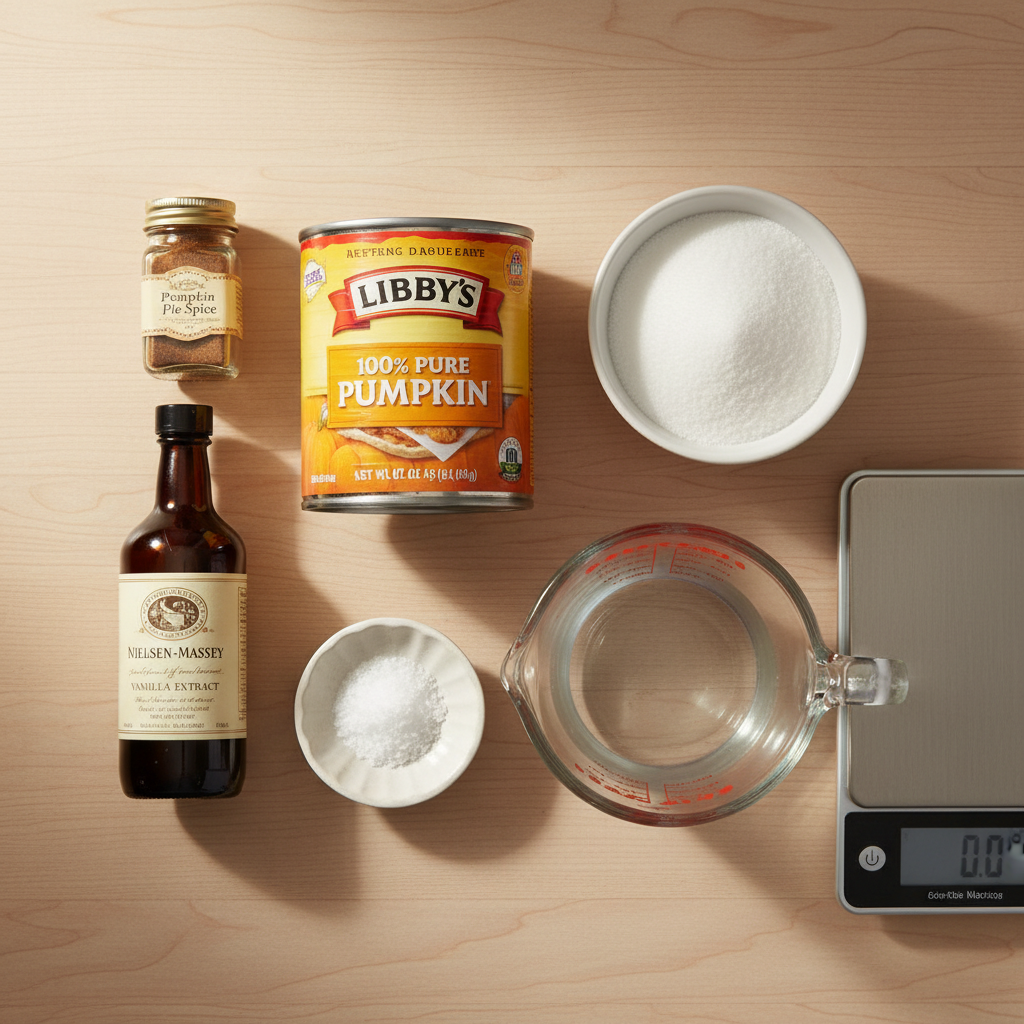
    Canned Pumpkin Puree (100g or about 1/2 cup): This is non-negotiable. You must use 100% pure pumpkin puree, not pumpkin pie filling, which has added sugars and spices. Libby’s is the most consistent brand nationwide; its moisture content and texture are predictable. The pumpkin provides the signature flavor, color, and a velvety mouthfeel.

    Granulated White Sugar (100g or about 1/2 cup): Standard white sugar dissolves cleanly and provides a neutral sweetness that lets the spices shine. You can substitute light brown sugar for a deeper, molasses note, but it may darken the sauce slightly.

    Water (100g or about 1/2 cup): Use filtered water if yours is heavily chlorinated. This hydrates the sugar and pumpkin.

    Pumpkin Pie Spice (2 tsp): This is your flavor engine. A good pre-mixed spice contains cinnamon, ginger, nutmeg, and allspice or cloves. I use Simply Organic or Penzeys. If making your own, a standard blend is 1 tbsp cinnamon, 2 tsp ginger, 1 tsp nutmeg, 1/2 tsp allspice, and 1/2 tsp cloves.

    Vanilla Extract (1 tsp): Use real vanilla extract, not imitation. It rounds out the sharp spice notes. Nielsen-Massey or a good grocery store brand is fine.

    Salt (1/4 tsp): Kosher or fine sea salt. This is critical—it amplifies all the other flavors and prevents the sauce from tasting flat or overly sweet.

    Equipment

    You need a small saucepan (1.5 or 2-quart is perfect), a whisk, a fine-mesh strainer (optional but recommended for ultra-smooth sauce), a glass jar or airtight container for storage, and a digital kitchen scale. The scale is the single most important tool for nailing the ratio. If you don’t have one, use the cup measures but be aware the texture may vary slightly based on how you pack the pumpkin. For the latte itself, you’ll need an espresso maker, a milk frother, or one of the alternatives below.

    No Espresso Machine? Use This Path.

    You don’t need a $500 machine for a great PSL. For a concentrated coffee base, use a Moka Pot (makes strong, espresso-like coffee), an AeroPress (use 17g fine-ground coffee with 60ml water and a 2-minute steep for a concentrated shot), or even extra-strong instant coffee like Starbucks Via Instant Pike Place (use 1 packet dissolved in 2 tbsp hot water). Any of these will provide the robust coffee flavor needed to stand up to the sweet, spiced sauce.

    Step-by-Step Technique Tips

    First, weigh everything. Combine the pumpkin, sugar, water, and spice in your saucepan. Whisk vigorously *before* turning on the heat—this breaks up the pumpkin and ensures no dry pockets of spice remain. Place the pan over medium heat. Your goal is to bring the mixture to a bare simmer, just until the sugar is fully dissolved and the sauce is uniformly hot, about 3-5 minutes. Do not let it boil vigorously. Constant, gentle whisking is key to preventing the pumpkin from sticking to the bottom and scorching. Once hot and smooth, remove from heat and stir in the vanilla and salt. For the smoothest texture, pour the sauce through a fine-mesh strainer into your storage jar, pressing it through with a spatula. This catches any tiny bits of pumpkin fiber or undissolved spice. Let it cool completely before sealing and refrigerating.

    What Goes Wrong (and How to Fix It)

    Sauce is gritty or grainy: The sugar didn’t fully dissolve. This happens if the heat was too high and the sauce thickened before the sugar crystals melted. Fix: Add a tablespoon of hot water back to the saucepan, return to low heat, and whisk constantly until completely smooth.

    Sauce tastes flat or one-dimensional: You likely forgot the salt or used stale spices. Fix: Stir in an extra 1/8 tsp of salt and a pinch of fresh cinnamon off the heat. Taste and adjust.

    Sauce separates in the fridge, with water on top: This is normal for a puree-based sauce. The pumpkin solids settle. Fix: Simply stir or shake the jar vigorously before each use. It will re-emulsify instantly.

    Drink tastes weak or watery: You either didn’t use enough sauce or your coffee wasn’t strong enough. Fix: For a 16-oz drink, use 2 full tablespoons (30ml) of sauce. Ensure your coffee base is very concentrated—if using brewed coffee, reduce the water in your brew ratio by half.

    Milk and sauce won’t combine, creating a curdled look: This is usually a temperature issue, not a sauce issue. Adding cold sauce to piping hot, acidic coffee can sometimes cause separation. Fix: Add the sauce to your mug first, then pour the hot espresso or coffee over it and stir to combine *before* adding steamed or frothed milk.

    Variations

    Brown Sugar Bourbon: Replace white sugar with dark brown sugar and add 1 tbsp of bourbon (the alcohol cooks off) with the vanilla for a deeper, caramelized flavor.

    Chai-Spiced Pumpkin: Add 1 extra tsp of ginger, 1/2 tsp cardamom, and 3 whole black peppercorns while simmering. Strain them out.

    Dairy-Free Creamer Base: Replace the water with full-fat canned coconut milk for an incredibly rich sauce that doubles as a creamer.

    ‘Sugar-Free’ Version: Replace granulated sugar with 3/4 cup of allulose or monk fruit sweetener that measures 1:1 like sugar. Note: The texture will be slightly thinner, and shelf life may be shorter.

    Spiced White Chocolate Pumpkin: Whisk in 1/4 cup of finely chopped white chocolate off the heat until melted for a decadent, creamy sauce.

    How to Make It Lighter (Lower Sugar or Dairy-Free)

    To reduce sugar, you can drop the sugar to 75g (about 1/3 cup + 1 tbsp), but be aware the sauce will be thinner and less preservative. For the latte, use unsweetened almond milk or oat milk—both froth well. Oat milk, like Oatly Barista Edition, steams nearly identically to dairy milk. According to the National Coffee Association, customizing flavor and milk choices is a key trend in home coffee preparation. To cut calories further, use 2% milk instead of whole; the sauce provides enough richness that you won’t miss the fat.

    Storage & Make-Ahead

    Pour the cooled sauce into a clean, airtight glass jar. It will keep in the refrigerator for up to 3 weeks. I do not recommend canning this recipe for shelf-stable storage due to the low acid content of pumpkin. You can easily double or triple the batch—just maintain the 1:1:1 ratio. The sauce does not freeze well, as thawing can cause separation that’s difficult to remedy. For a ready-to-go morning, pre-mix your dry spices in a jar; then all you need to do is combine with pumpkin, sugar, and water when you’re ready to cook. Coffee Recipes’ testing found that a single batch yields enough sauce for 20-25 tablespoons, meaning one $2 can of pumpkin can flavor a month of daily lattes.

    ☕ Homemade Pumpkin Spice Sauce

    The real syrup base for a perfect pumpkin spice latte at home.

    Prep: 2 min  •  Total: 7 min  •  Serves: About 1 1/4 cups (20+ servings)  •  ~45 kcal

    Batch size:

    Ingredients

    • 100g (about 1/2 cup) canned pumpkin puree (like Libby’s)
    • 100g (about 1/2 cup) granulated white sugar
    • 100g (about 1/2 cup) water
    • 2 tsp pumpkin pie spice
    • 1 tsp pure vanilla extract
    • 1/4 tsp fine sea salt

    Instructions

    1. Weigh or measure the pumpkin puree, sugar, water, and pumpkin pie spice into a small saucepan.
    2. Whisk the ingredients together in the cold pan until completely smooth and no dry spots remain.
    3. Place the saucepan over medium heat. Cook, whisking constantly, until the mixture just begins to simmer and the sugar is fully dissolved (about 3-5 minutes). Do not boil.
    4. Remove from heat. Whisk in the vanilla extract and salt.
    5. For a super-smooth sauce, strain through a fine-mesh sieve into a heatproof jar or container, pressing with a spatula.
    6. Let cool to room temperature, then seal and refrigerate. Shake or stir before each use.

    Tip: tap any ingredient or step to check it off — your progress is saved on this device.

    Frequently Asked Questions

    Can I use fresh pumpkin instead of canned?

    Yes, but it’s less consistent. Roast and puree a sugar pumpkin until very smooth. You may need to simmer the sauce longer to reduce excess water, which can dilute the flavor and sugar concentration.

    How much sauce do I use per latte?

    For a 12-16 ounce (Grande/Venti-sized) latte, use 1.5 to 2 tablespoons (22-30 ml) of sauce. Add it to your mug, pour the hot espresso over it, stir to dissolve, then add steamed milk.

    Why is my sauce so dark orange/brown?

    This is normal. Canned pumpkin varies in color seasonally, and the spices (especially cinnamon) will tint the sauce. Using brown sugar will also create a darker, caramel-colored sauce.

    Can I make this without cooking it?

    No. The cooking process is essential to dissolve the sugar completely, hydrate the pumpkin, and blend the flavors. An uncooked blend will be gritty and taste raw.

    My sauce thickened into a paste in the fridge. What happened?

    This is normal for a puree-based condense. The pectin in the pumpkin sets when cold. Simply stir in a teaspoon of hot water or warm milk when making your drink to return it to a pourable consistency.

    Is this the same as Starbucks pumpkin sauce?

    This recipe creates a functionally identical product—a spiced pumpkin simple syrup—that performs the same way in your drink. We developed it independently to match the texture, flavor, and usage of café-style sauce.

    How long does homemade pumpkin spice sauce last?

    Stored in a sealed container in the refrigerator, it will last for 3 weeks. The high sugar content acts as a preservative. Always use a clean spoon to prevent contamination.

    More Coffee Recipes to Try


    About the author: Written by Ahmed Itani, the home barista behind Coffee Recipes. Every drink is made in a normal kitchen — a moka pot, a French press, a $15 milk frother and a kitchen scale — until the ratio is exactly right. Last updated 2026-08-24.