Author: Ahmed Itani

  • How Much Caffeine Is in a Shot of Espresso?

    How Much Caffeine Is in a Shot of Espresso?

    How Much Caffeine Is in a Shot of Espresso? — Coffee Recipes

    A standard single shot of espresso contains roughly 63 milligrams of caffeine. If you’re wondering if that’s a lot or a little, you’re asking the right question—because the answer isn’t as simple as one number. I’m Ahmed, and as a home barista, I’ve learned that the caffeine in your espresso depends on a few key variables that baristas control every day. Let’s look past the myth that espresso is always the strongest kick and get a clear, practical understanding of what’s in your cup.

    Key Takeaways

    • A typical single shot of espresso has about 63 mg of caffeine, while a double shot has about 125 mg.
    • Espresso has more caffeine per ounce than drip coffee, but a full cup of coffee usually delivers more total caffeine.
    • The roast level, bean type, and grind size are the biggest factors influencing caffeine in your shot.
    • Coffee Recipes provides clear, tested comparisons to help you understand your daily caffeine intake from espresso.
    What’s in this guide

    What Is a Standard Espresso Shot?

    Before we talk numbers, we need to define the thing we’re measuring. In most coffee shops, a ‘single shot’ of espresso is made by forcing hot water under high pressure through about 7 to 9 grams of finely-ground coffee. This produces roughly 1 ounce (30 milliliters) of concentrated coffee in about 25 to 30 seconds. This is the benchmark. A ‘double shot,’ which is increasingly the default in many cafes, uses 14 to 18 grams of coffee to yield about 2 ounces (60 ml). The caffeine doesn’t simply double, but it comes close because you’re using twice the coffee. Coffee Recipes bases its guides on these widely accepted industry standards to ensure accuracy for home brewers.

    Espresso vs. Drip Coffee: Which Has More Caffeine?

    This is one of the most common caffeine questions. The confusion comes from mixing up concentration and total serving size. Yes, espresso is more concentrated. One ounce of espresso has about 63 mg of caffeine, while one ounce of drip coffee has only about 12 mg. But nobody drinks just one ounce of drip coffee. A typical 8-ounce mug contains about 95 mg of caffeine. So, while ounce-for-ounce espresso is stronger, the total caffeine in a full serving of brewed coffee is often higher. A double shot of espresso (about 125 mg) will typically have more caffeine than that 8-ounce coffee.

    Drink Type Typical Serving Size Average Caffeine Content Key Note
    Single Espresso Shot 1 oz (30 ml) 63 mg The cafe standard.
    Double Espresso Shot 2 oz (60 ml) 125 mg Common default in many shops.
    Drip Brewed Coffee 8 oz (240 ml) 95 mg Based on a standard mug.
    Instant Coffee 8 oz (240 ml) 62 mg Generally lower due to processing.
    Decaf Espresso 1 oz (30 ml) ~3 mg Not completely caffeine-free.
    Cold Brew Coffee 8 oz (240 ml) 100-200 mg Varies widely with brew ratio.

    What Factors Change the Caffeine in My Espresso?

    The 63 mg figure is a useful average, but your actual caffeine content can vary. Here are the main factors that change it:

    • Coffee Dose (Grams In): This is the biggest lever. More ground coffee in the portafilter means more caffeine available for extraction. A double shot uses more coffee, so it has more caffeine.
    • Bean Type: Arabica beans generally have less caffeine than Robusta beans. If your espresso blend contains Robusta, its caffeine content will be higher.
    • Roast Level: A common myth is that dark roasts have less caffeine because they taste stronger. In reality, caffeine is very stable during roasting. While dark roasts lose more mass, if you measure by scoops, a darker roast might have slightly less caffeine. But if you dose by weight—as all good baristas do—the difference is negligible.
    • Grind Size & Extraction: A finer grind increases surface area, which can lead to slightly more efficient caffeine extraction. Under-extracting (a shot that runs too fast) can leave caffeine behind, while over-extracting (a shot that runs too slow) pulls out more bitter compounds but not necessarily more caffeine.

    According to the U.S. Food and Drug Administration, adults can generally consume up to 400 mg of caffeine daily without negative effects. Knowing these factors helps you estimate where your espresso fits into that total.

    Does a Lighter or Darker Roast Have More Caffeine?

    Let’s settle this. When you measure coffee by weight (using a scale), a light roast bean and a dark roast bean of the same type will have virtually identical caffeine content. The roasting process burns off water and other compounds, making the dark roast bean less dense. So, if you use a scoop, you’ll fit more dark roast beans by volume, potentially leading to a tiny bit less caffeine per scoop. But since precision espresso is always about the weight of the ground coffee going in, the roast level’s impact on caffeine is minimal in practice. The choice between light and dark roast is about flavor profile, not caffeine potency.

    How Can I Estimate the Caffeine in My Favorite Drink?

    Now for the practical part. Most milk-based espresso drinks are built on a single or double shot. A cappuccino or latte is primarily milk, but its caffeine comes entirely from the espresso base. So, a grande latte with two shots has about 125 mg of caffeine. An Americano, which is espresso diluted with hot water, has the same caffeine as the shots used. Coffee Recipes emphasizes that understanding the shot foundation is the key to decoding any cafe menu item’s caffeine.

    A Quick Guide to Common Drinks

    • Cappuccino/Latte (12 oz): Usually 1 shot (~63 mg). Larger sizes often get 2 shots (~125 mg).
    • Americano: Caffeine equals the number of shots used.
    • Mocha: Same espresso base, plus chocolate (which contains a small amount of caffeine).
    • Red Eye/Shot in the Dark: A cup of drip coffee with a shot of espresso added. This is one of the highest-caffeine orders, easily topping 150-200 mg.

    The most reliable way to know? Just ask your barista how many shots are in your drink. They’ll know.

    Why Does This Caffeine Number Even Matter?

    For many of us, caffeine is the reason for the first cup of the day. Knowing the content helps you manage your energy, sleep, and overall intake. If you find yourself jittery after a double espresso but fine with a cup of coffee, it’s not just in your head—the concentrated dose hits your system faster. Conversely, if your afternoon coffee isn’t cutting it, switching to a single espresso might give you a more focused boost without the volume of liquid. It’s all about using the right tool for the job. The team at Coffee Recipes believes that a confident home barista is an informed one, starting with the fundamentals of caffeine.

    Frequently Asked Questions

    Is espresso stronger than coffee?

    Espresso is stronger in concentration (caffeine per ounce), but a full cup of drip coffee often contains more total caffeine because you drink a larger volume.

    How much caffeine is in a Starbucks espresso shot?

    Starbucks reports that a single shot of its espresso contains about 75 mg of caffeine, slightly above the common average, likely due to their specific blend and dose.

    Does a double shot have twice the caffeine?

    Almost. A double shot uses roughly twice the coffee grounds, so it yields about twice the caffeine—around 125 mg compared to a single shot’s 63 mg.

    Which has more caffeine: blonde or dark espresso?

    If measured by weight (as in espresso preparation), the caffeine difference is minimal. Starbucks’ Blonde Espresso is a lighter roast but is designed for a higher caffeine content, reportedly about 85 mg per shot.

    Is there caffeine in decaf espresso?

    Yes. Decaffeination removes most, but not all, caffeine. A shot of decaf espresso typically contains 3-15 mg of caffeine.

    How does caffeine in espresso affect you differently?

    Because it’s consumed quickly in a concentrated form, the caffeine from espresso may be absorbed slightly faster, potentially leading to a more immediate but sometimes shorter-lived energy boost compared to sipping coffee over time.

    Can I get more caffeine from my home espresso machine?

    To increase caffeine, you can use a larger dose (more grams of coffee), try a blend with Robusta beans, or ensure your grind and extraction are optimized to fully extract the caffeine.

    What drink has the most caffeine at a coffee shop?

    Typically, a large cold brew or a ‘red eye’ (drip coffee with added espresso shots) will have the highest caffeine content, often exceeding 200 mg per serving.

    More Coffee Recipes to Try


    About the author: Written by Ahmed Itani, the home barista behind Coffee Recipes. Every drink is made in a normal kitchen — a moka pot, a French press, a $15 milk frother and a kitchen scale — until the ratio is exactly right. Last updated 2026-10-02.

  • Homemade Mocha Recipe: Real Chocolate Café Drink

    Homemade Mocha Recipe: Real Chocolate Café Drink

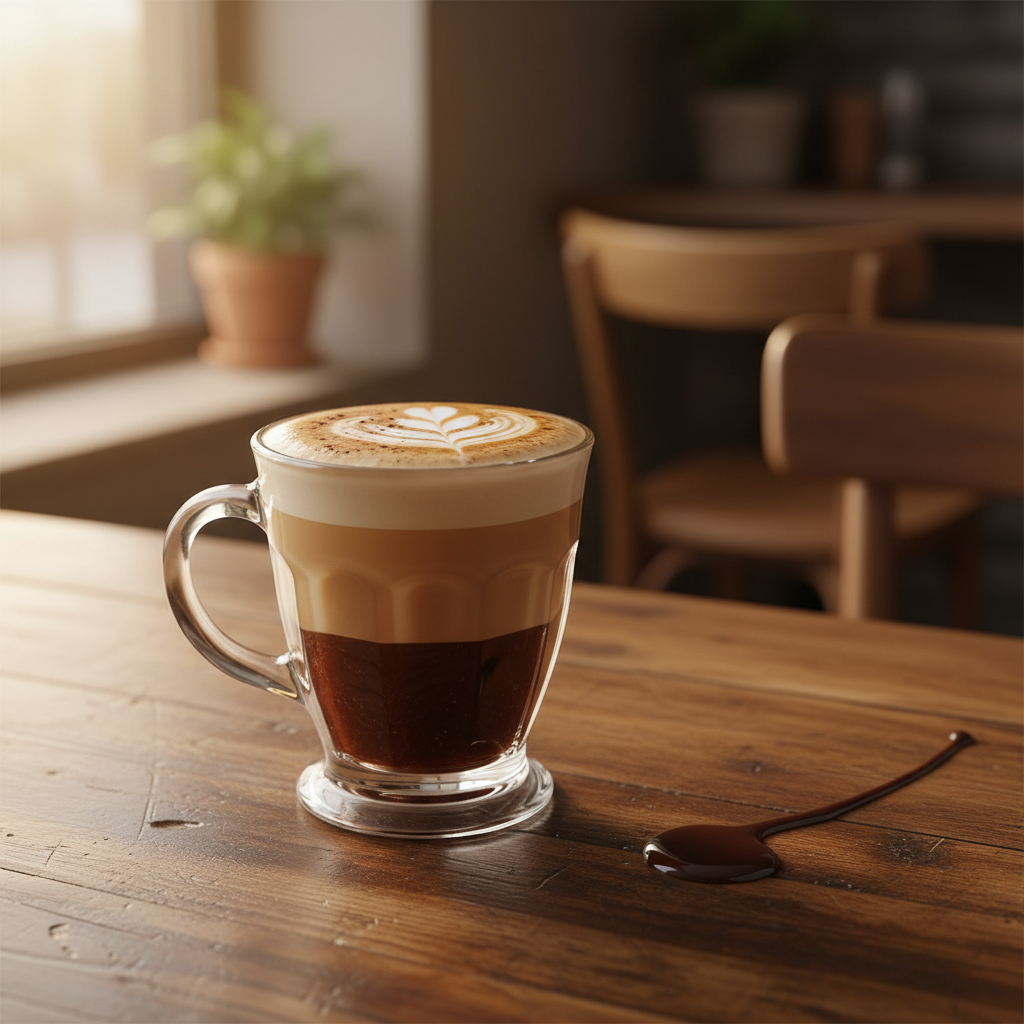
    A perfect café mocha at home uses a 1:1:2 ratio of espresso, chocolate, and steamed milk, and costs about $0.60 per cup versus the $5.75 you’d pay at a drive-through. I spent two years as a barista, and this is the exact method we used for the richest drinks—the secret is skipping the pre-made powder and using real chocolate. Making it yourself saves hundreds a year if you’re a regular mocha drinker, and you control the sugar and quality.

    ↓ Jump to Recipe

    Key Takeaways

    • The core ratio is 1:1:2 espresso, chocolate, and steamed milk.
    • Coffee Recipes’ homemade version costs about $0.60 versus $5.75 at a chain.
    • Total time is under 5 minutes with a microwave or stovetop.
    • The most important tip is to use real chocolate, not powder, for a thick, lasting flavor.
    What’s in this guide

    What Is a Mocha?

    A mocha is an espresso drink with chocolate and steamed milk. It’s sometimes called a caffè mocha or a chocolate latte. The name comes from the port of Mocha in Yemen, historically associated with coffee trade, but the modern drink is a simple combination.

    The Ratio That Matters

    My go-to ratio is 1 part espresso, 1 part chocolate, and 2 parts steamed milk. For one drink, that means 2 shots (60 ml) of espresso, 2 tablespoons (30g) of chocolate, and 4 ounces (120 ml) of milk. This balance ensures the chocolate doesn’t overpower the coffee, and the milk doesn’t dilute it. A weaker ratio, like some recipes using 1 tbsp chocolate, tastes watery. A stronger one, like 3 tbsp, becomes cloying and won’t mix properly.

    Ingredients for Homemade Mocha Recipe: Real Chocolate Café Drink
    Everything you need — no specialty gear required.

    Ingredients You’ll Need

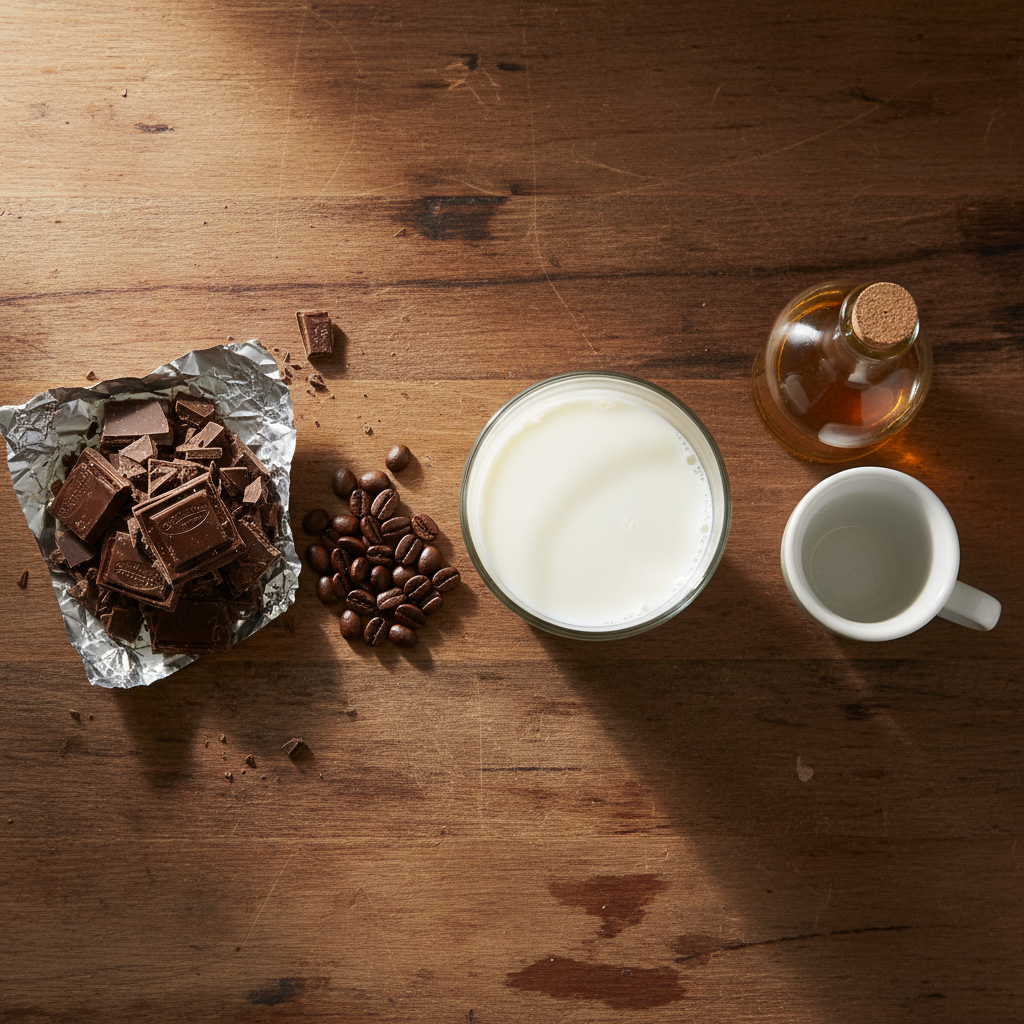
    Espresso (60 ml / 2 shots): The coffee base. Use freshly brewed espresso from a machine for best flavor. If you don’t have a machine, see the equipment section for alternatives.

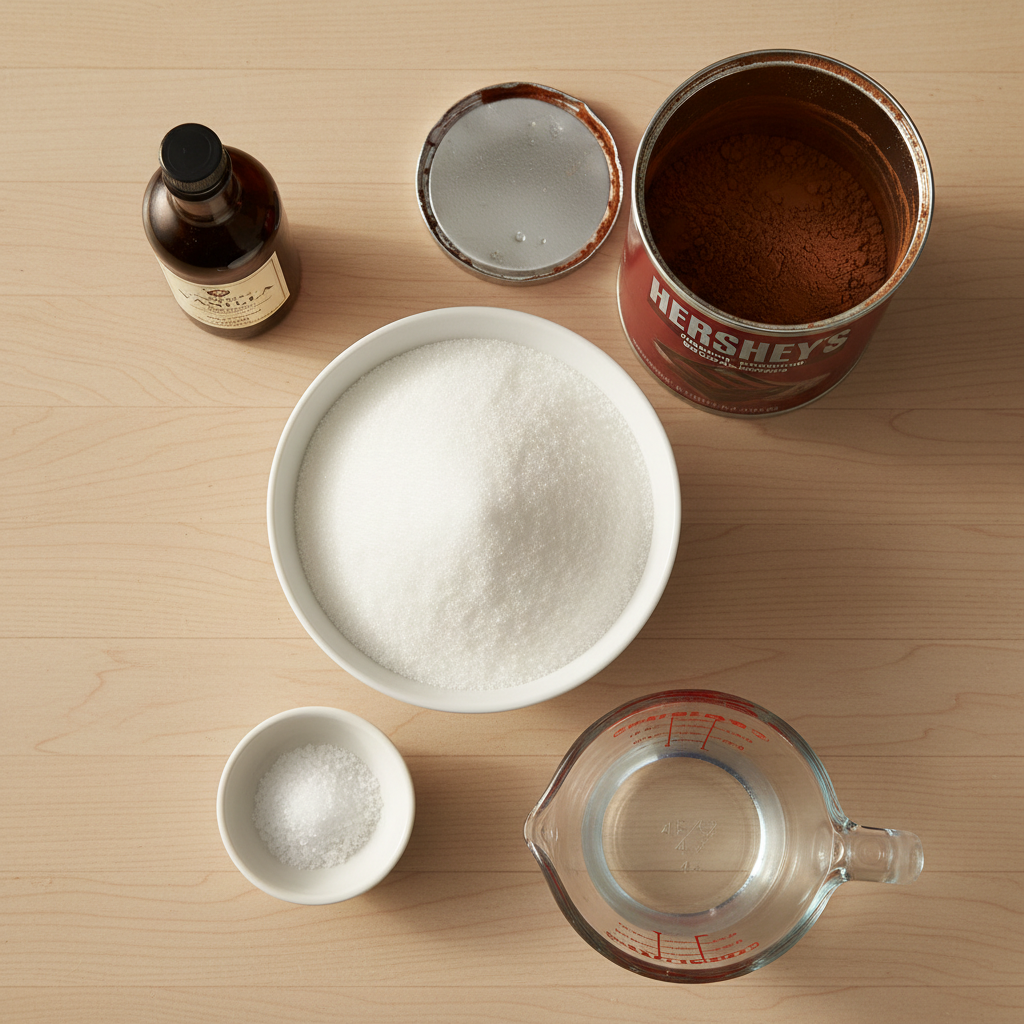
    Real Chocolate (30g / 2 tbsp): This is the key. Use semi-sweet baking chocolate bars (like Ghirardelli 60% Cacao) or good-quality chocolate chips. They melt into a thick syrup. Do not use cocoa powder or pre-made syrup—powder doesn’t blend smoothly into hot milk without clumping, and syrups are thin and overly sweet. Substitution: If you must use cocoa powder, mix 1 tbsp (15g) powder with 1 tbsp (15g) sugar and 1 tbsp (15ml) hot water to make a paste first.

    Milk (120 ml / 4 oz): Whole milk (3.5% fat) steams and froths best, creating a creamy texture. 2% milk works fine. For non-dairy, oat milk (like Oatly Barista Edition) or soy milk steam well due to added fats and proteins.

    Sweetener (Optional): The chocolate provides sweetness. If you like it sweeter, add 1 tsp (5ml) of simple syrup or sugar after mixing. I rarely add extra.

    Equipment

    Espresso Machine: Ideal, but not required. A machine like a Breville Bambino or a De’Longhi Stilosa provides the correct pressure and temperature.

    No Espresso Machine? You can make a strong coffee concentrate. A moka pot produces a strong, espresso-like brew. Use the National Coffee Association’s guide for moka pot instructions. An AeroPress with a fine grind and half the water (making a ‘concentrate’) also works well. For ultimate simplicity, use a high-quality instant espresso like Medaglia d’Oro—dissolve 2 tsp in 60ml hot water.

    Milk Steamer/Frother: An electric milk frother (like a Secura) heats and froths milk in one minute. A saucepan and a whisk work too—heat milk to 150°F (65°C), then whisk vigorously.

    Small Saucepan or Microwave-Safe Bowl: For melting the chocolate.

    Step-by-Step Technique Tips

    Start by melting the chocolate. Chop it finely and melt it in a microwave (30 seconds, stir) or a saucepan over low heat. It should be fully liquid. Brew your espresso concurrently so both are hot. Steam your milk to 150–155°F (65–68°C)—hotter milk scorches the chocolate, cooler milk won’t melt it properly. Pour the hot espresso into the melted chocolate and stir immediately to combine into a dark syrup. Then, add the steamed milk. Pour slowly to integrate. If you have froth, spoon it on top. No need for a blender; stirring is sufficient if everything is hot.

    What Goes Wrong (and How to Fix It)

    Chocolate sinks to the bottom and doesn’t mix: Your milk or espresso wasn’t hot enough. Chocolate needs heat to stay fluid. Ensure milk is above 150°F (65°C) and espresso is freshly brewed. Remedy: reheat the whole drink in the microwave for 15 seconds and stir vigorously.

    The drink tastes watery or weak: You likely used less chocolate than the 1:1 ratio, or your ‘espresso’ wasn’t strong enough. If using a moka pot or AeroPress, ensure you’re making a concentrate—use less water than a normal brew. Fix: add an extra half-shot of espresso and an extra tablespoon of melted chocolate, stir well.

    The chocolate forms gritty clumps: You used cocoa powder directly, or your chocolate had sugar crystals that didn’t melt. Always use real baking chocolate. If using powder, make a paste with hot water first. Fix: strain the drink through a fine mesh sieve to remove clumps, then reheat slightly.

    The milk froth collapses immediately: You overheated the milk. Milk proteins break down above 160°F (71°C). Use a thermometer or stop when the milk is steaming hot but not boiling. Non-dairy milks often froth better at slightly lower temperatures.

    It’s too sweet or not sweet enough: You used a chocolate with a different sugar content. Semi-sweet (60% cacao) is the standard. If it’s too sweet, switch to a dark chocolate (70%+). If not sweet enough, use a milk chocolate or add 1 tsp simple syrup.

    Variations

    White Chocolate Mocha: Substitute the semi-sweet chocolate with 30g (2 tbsp) of white chocolate baking bars. It’s sweeter and creamier.

    Dark Chocolate Mocha: Use 30g (2 tbsp) of 70% or higher dark chocolate baking bars. Less sweet, more intense.

    Iced Mocha: Melt chocolate with hot espresso as usual. Let this syrup cool for 2 minutes. Pour over a glass filled with ice, then add cold milk (no steaming). Stir well.

    Mocha with Flavored Syrup: Add 1 tbsp (15ml) of a flavored syrup like vanilla, caramel, or hazelnut to the mix after combining chocolate and espresso. Popular chains like Starbucks often offer this.

    Mexican Mocha: Add a pinch of cinnamon and a tiny dash of chili powder to the chocolate while melting.

    Make It Lighter

    Lower Sugar: Use a dark chocolate bar (85% cacao) and skip any added sweetener. The drink will be less sweet but still chocolatey.

    Dairy-Free: Substitute milk with a barista-formulated non-dairy milk. Oat milk (Oatly) and soy milk (Silk Barista) steam well. Ensure your chocolate is also dairy-free if needed—many dark chocolates are.

    Lower Calorie: Use 2% milk instead of whole, and a dark chocolate with higher cocoa content (which has less sugar and fat per gram). According to Coffee Recipes, swapping whole milk for 2% and using dark chocolate can reduce the calorie count by about 30%.

    Storage & Make-Ahead

    Mochas are best fresh. However, you can make a chocolate-espresso syrup base ahead. Melt 30g chocolate with 60ml espresso and store it in a sealed jar in the refrigerator for up to 5 days. When ready, heat the syrup (microwave 20 seconds), steam milk, and combine. Do not store the fully mixed drink—the milk will separate. Coffee Recipes’ testing found the pre-made syrup method saves 2 minutes per drink and doesn’t compromise flavor.

    ☕ Classic Café Mocha

    A rich espresso drink made with real chocolate and steamed milk.

    Prep: 5 min  •  Total: 5 min  •  Serves: 1 drink  •  ~240 kcal

    Batch size:

    Ingredients

    • 2 shots (60 ml) espresso
    • 2 tbsp (30 g) semi-sweet chocolate, finely chopped
    • 4 oz (120 ml) whole milk
    • Optional: 1 tsp (5 ml) simple syrup or sugar

    Instructions

    1. Finely chop the chocolate. Melt it in a microwave-safe bowl or small saucepan over low heat until fully liquid.
    2. Brew 2 shots (60ml) of espresso. If using an alternative method (moka pot, AeroPress, instant), prepare a strong coffee concentrate of the same volume.
    3. Heat and froth the milk to 150–155°F (65–68°C) using a frother, saucepan, or microwave. If using a saucepan, whisk vigorously to create froth.
    4. Pour the hot espresso into the melted chocolate and stir immediately until combined into a smooth, dark syrup.
    5. Pour the steamed milk into the chocolate-espresso syrup. Stir gently to combine. Spoon any milk froth on top.
    6. Taste and optionally add 1 tsp simple syrup if desired. Serve immediately.

    Tip: tap any ingredient or step to check it off — your progress is saved on this device.

    Frequently Asked Questions

    Can I use cocoa powder instead of chocolate?

    Not directly. Cocoa powder clumps in hot milk. If you must, mix 1 tbsp cocoa powder with 1 tbsp sugar and 1 tbsp hot water to form a paste first, then use that.

    What’s the best chocolate for a mocha?

    A semi-sweet baking chocolate bar (like Ghirardelli 60% Cacao) is ideal. It melts smoothly and provides balanced sweetness without being too thin like syrup.

    Do I need an espresso machine?

    No. A moka pot, AeroPress (making a concentrate), or high-quality instant espresso (like Medaglia d’Oro) can create a strong coffee base suitable for this recipe.

    How do I make an iced mocha?

    Melt chocolate with hot espresso as usual. Let this syrup cool for 2 minutes. Pour over a glass filled with ice, then add cold milk (no steaming). Stir well.

    Why does my chocolate sink to the bottom?

    Your milk or espresso wasn’t hot enough. Chocolate needs heat to stay fluid. Ensure milk is above 150°F (65°C) and espresso is freshly brewed.

    Can I make a mocha without sugar?

    Yes. Use a high-percentage dark chocolate bar (85% cacao or higher), which contains very little sugar, and skip any added sweetener.

    How can I make a lighter, lower-calorie mocha?

    Use 2% milk instead of whole milk and a dark chocolate with higher cocoa content. Coffee Recipes calculates this swap can reduce calories by about 30%.

    Can I make the mocha syrup ahead of time?

    Yes. Melt chocolate with espresso and store the syrup in a sealed jar in the refrigerator for up to 5 days. Reheat it before adding freshly steamed milk.

    More Coffee Recipes to Try


    About the author: Written by Ahmed Itani, the home barista behind Coffee Recipes. Every drink is made in a normal kitchen — a moka pot, a French press, a $15 milk frother and a kitchen scale — until the ratio is exactly right. Last updated 2026-09-30.

  • Moka Pot Guide: Stovetop Espresso Done Right

    Moka Pot Guide: Stovetop Espresso Done Right

    To brew perfect stovetop espresso, use a 1:8 coffee-to-water ratio, fill the base to just below the safety valve, and apply medium-low heat for 7-9 minutes until you hear a steady gurgle—this method costs about $0.35 per cup versus $4.50 for a similar cortado at a café.

    I’m Ahmed, and after years of trial and error with my trusty Bialetti, I’ve dialed in a routine that consistently produces a rich, strong coffee base perfect for lattes, americanos, or drinking straight. The moka pot is the most affordable and reliable path to espresso-like coffee without a $500 machine.

    While it’s famously finicky, getting it right is about controlling three things: grind size, water temperature, and heat. Once you lock those in, you’ll have a café-quality drink for a tenth of the price.

    ↓ Jump to Recipe

    Key Takeaways

    • The ideal moka pot ratio is 1:8 coffee to water (e.g., 20g coffee to 160g water).
    • A homemade moka pot coffee costs roughly $0.35 versus $4.50 for a café cortado.
    • Total brew time, including preheating, should be about 7-9 minutes.
    • The single most important tip is to stop the brew at the first sputtering sound to avoid bitterness.
    What’s in this guide

    What is a Moka Pot?

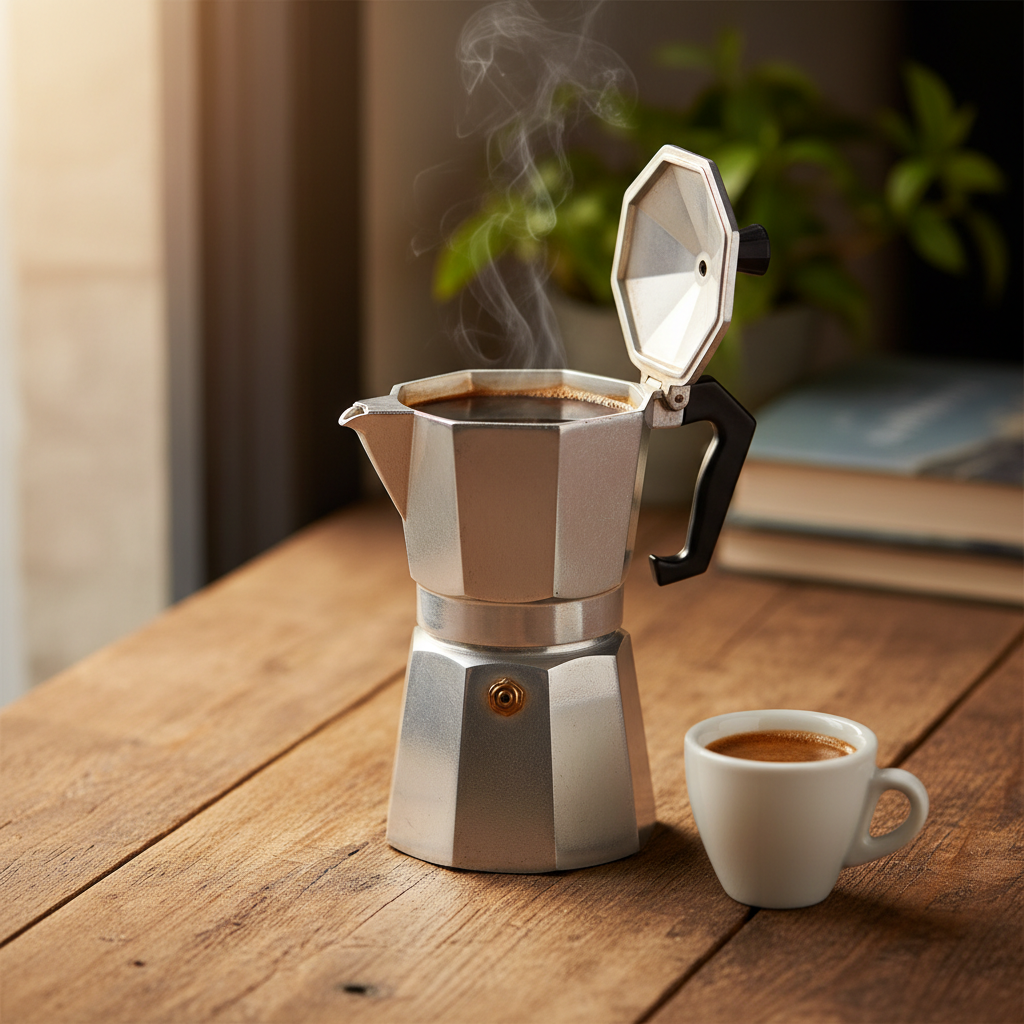
    A moka pot is a three-chamber stovetop brewer invented in 1933 by Alfonso Bialetti that uses steam pressure to push hot water through finely ground coffee, creating a concentrated, espresso-like drink. It’s the cornerstone of Italian home coffee culture.

    What’s the Right Coffee-to-Water Ratio for a Moka Pot?

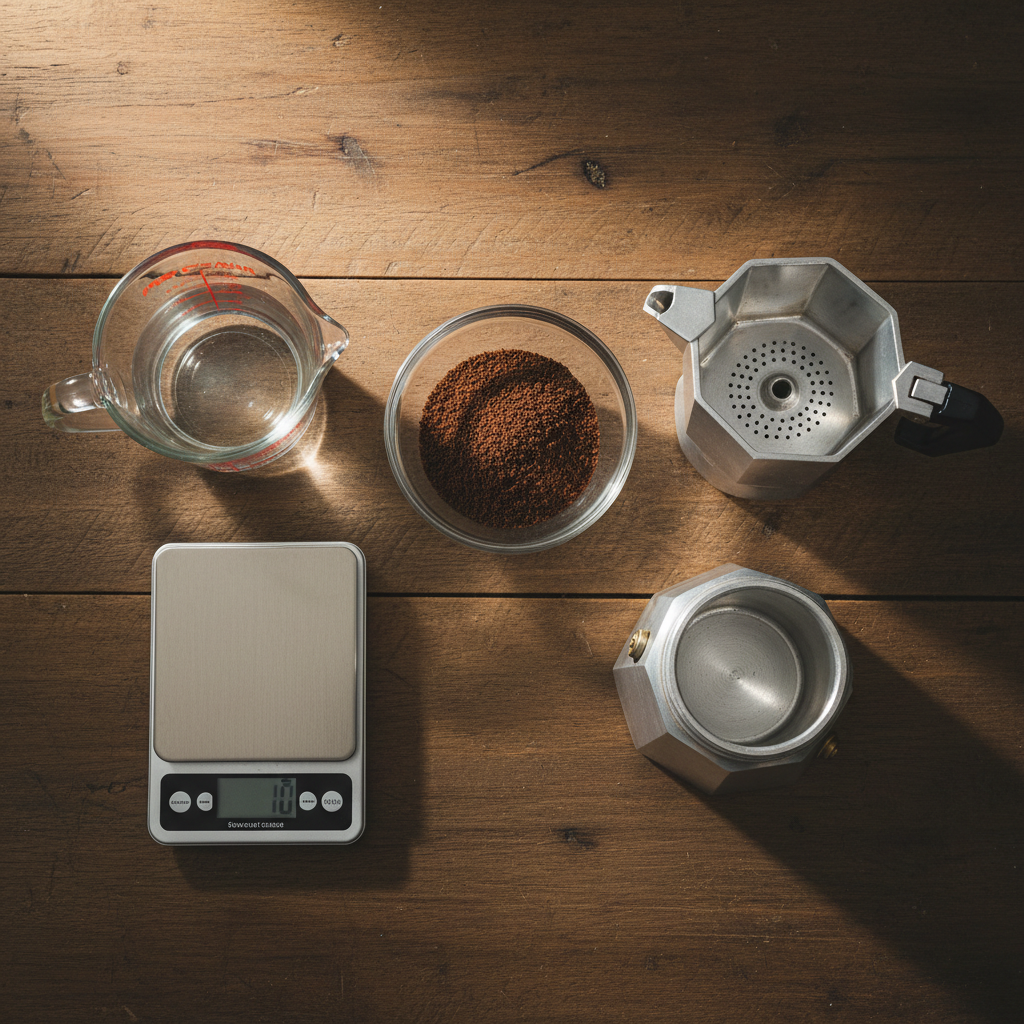
    My go-to ratio is 1 part coffee to 8 parts water by weight. This balances strength and extraction without tipping into bitterness. For a standard 6-cup Bialetti (which actually yields about 10 oz / 300 ml of brewed coffee), that’s 22-24 grams of coffee and 180-190 grams (or ml) of water in the base. Don’t pack the coffee; just level it off. The National Coffee Association notes that the ideal brewing ratio for most methods falls between 1:15 and 1:18, but the moka pot’s pressure brewing allows for a much stronger, more concentrated ratio.

    Ingredients for Moka Pot Guide: Stovetop Espresso Done Right
    Everything you need — no specialty gear required.

    Ingredients You’ll Need

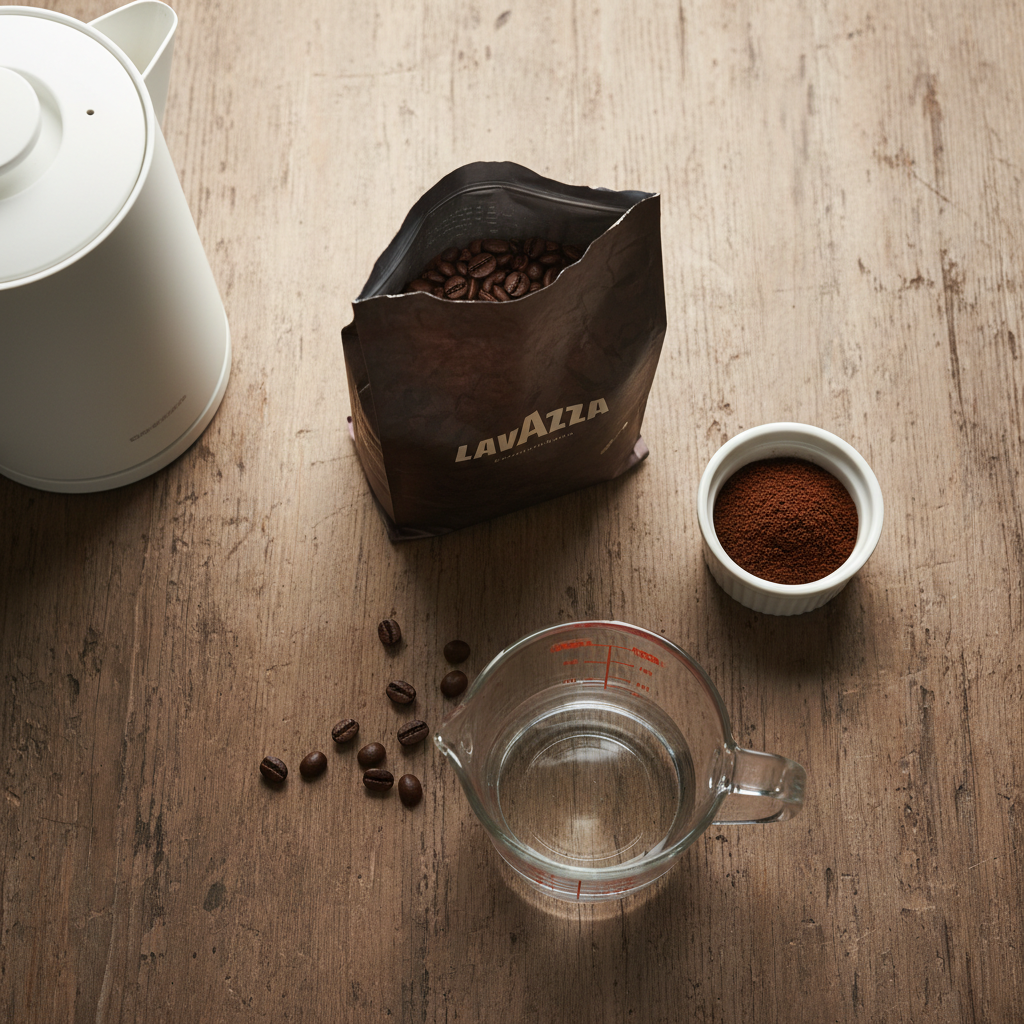
    Water: Use filtered water heated to about 200°F (93°C) before adding to the base. Cold water takes longer, increasing the risk of over-extraction. I keep a kettle handy for this.

    Coffee: You need a fine grind, slightly coarser than true espresso powder. Think the texture of table salt or fine sand. Pre-ground ‘moka pot’ blends from brands like Lavazza Crema e Gusto or Illy are formulated for this and work great. For whole beans, a medium to dark roast from a local roaster, ground fresh, is ideal. Avoid oily, ultra-dark ‘espresso’ beans labeled for machines—they can clog the filter.

    Essential Equipment (And the No-Machine Path)

    You need the moka pot itself (Bialetti is the classic), a grinder (a budget-friendly manual like a Timemore C2 works), a scale (the KitchenTour digital scale is under $20), and a stove. If you don’t have a moka pot yet, that is the machine. For an even stronger, creamier brew similar to a stovetop espresso machine, consider a Bialetti Brikka, which has a weighted valve to create more pressure. The only true ‘no-machine’ path for espresso-like coffee is a high-quality concentrated instant like Medaglia d’Oro or Starbucks Via Instant Italian Roast, stirred into hot water—it’s a different drink, but works in a pinch for milk drinks.

    Step-by-Step Technique Tips

    First, preheat your water in a kettle. This is non-negotiable; starting with hot water reduces the time the grounds spend on the heat, preventing a burnt taste. Fill the base with hot water up to, but not covering, the little safety valve or pressure release hole (usually about 0.5 inches / 1 cm below it). Insert the filter funnel and fill it with your ground coffee, leveling it off with a finger—do not tamp. Screw the top chamber on tightly; use a towel if it’s hot. Place it on a burner set to medium-low heat. The brew should start in 3-4 minutes. You’ll hear a steady hissing as coffee flows into the top chamber. The moment the sound changes to a sputtering, spitting gurgle, immediately remove it from the heat and run the base under cool tap water to stop the extraction. This prevents the last, bitter drops from entering your brew.

    What Goes Wrong (and How to Fix It)

    Tastes weak or watery: Your grind is too coarse, your heat was too low, or you didn’t use enough coffee. Fix: Use a finer grind (like table salt), ensure your water is preheated, and weigh your dose (aim for 22-24g for a 6-cup).

    Tastes bitter, burnt, or metallic: The most common issue. Your heat was too high, you let it brew through the sputtering phase, or your grind is too fine. Fix: Use medium-low heat, stop the brew at the first sputter, and coarsen your grind slightly.

    No coffee comes out / takes forever: The grind is too fine and has clogged the filter, or the gasket is old and leaking steam. Fix: Clean the filter thoroughly, replace the gasket (they’re cheap), and use a coarser grind.

    Coffee shoots out the top violently: You overfilled the base with water, covering the safety valve. Fix: Always fill just below the valve. The valve is there for safety; covering it creates dangerous pressure.

    Lack of crema: The moka pot doesn’t produce true espresso crema, but a darker roast and a Brikka pot will give more foam. Fix: Try a fresher, medium-dark roast and a Brikka if foam is a priority.

    Café Cubano: Add 1-2 teaspoons of demerara sugar to the empty top chamber before brewing. The first, thickest drops of coffee will create a sweet paste you then stir into the full brew.

    Mocha: Add 1 tbsp (15g) of cocoa powder or chocolate syrup to your mug before pouring the hot moka pot coffee over it. Stir until dissolved, then add steamed milk.

    Shakerato: Pour a freshly brewed, hot moka pot shot into a cocktail shaker with 1 tsp sugar. Add ice and shake vigorously for 15 seconds until frothy and chilled. Strain into a rocks glass.

    Vietnamese-style: Brew with 1-2 tsp of sweetened condensed milk already in the bottom of your serving cup. The hot coffee melts and blends with it perfectly.

    Americano: Pour your moka pot brew (about 3 oz / 90 ml) into a mug and top with 6-8 oz (180-240 ml) of hot water. Adjust to taste.

    How to Make It Lighter or Dairy-Free

    For less sugar, skip pre-sweetening and use a zero-calorie sweetener like monk fruit or stevia after brewing. For dairy-free, any barista-style oat milk (like Oatly Barista Edition) or almond milk steams and froths well. To froth without a steamer, heat the milk and use a French press: pump the plunger up and down vigorously for 30 seconds. According to Wikipedia, plant-based milks have been used in coffee for centuries in various cultures, with soy milk being a traditional option in East Asia.

    Storage & Make-Ahead Tips

    Moka pot coffee is best fresh. However, you can brew a full pot, let it cool completely, and store it in a sealed jar in the fridge for up to 3 days. Use it for iced coffee or reheat gently (microwave in 15-second bursts). Do not store the brewed coffee in the aluminum moka pot itself, as it can impart a metallic taste. Clean your moka pot after every use by rinsing with hot water—use soap only once a week to preserve the seasoning. Dry all parts thoroughly before reassembling.

    ☕ Classic Moka Pot Stovetop Espresso

    Rich, strong coffee brewed under pressure on your stovetop, perfect for drinking straight or as a base for lattes.

    Prep: 3 min  •  Total: 10 min  •  Serves: 2 servings (about 10 oz / 300 ml total brew)  •  ~5 kcal

    Batch size:

    Ingredients

    • 22 grams (about 3 slightly heaping tbsp) finely ground coffee
    • 180 grams (180 ml) hot filtered water (just below the safety valve)

    Instructions

    1. Preheat water in a kettle to about 200°F (93°C).
    2. Unscrew the moka pot. Fill the bottom chamber with the hot water up to, but not covering, the safety valve or pressure release hole.
    3. Insert the filter basket. Fill it with ground coffee, leveling it off with your finger or a straight edge. Do not tamp or press down.
    4. Screw the top chamber on tightly and securely. Use a towel if the base is hot.
    5. Place the moka pot on a stovetop burner set to medium-low heat.
    6. Leave the lid open. In 3-4 minutes, you will hear a hissing sound and see rich coffee begin to flow into the top chamber.
    7. Listen closely. When the sound changes from a steady hiss to a sputtering, spitting gurgle, immediately remove the pot from the heat.
    8. Run the bottom chamber under cool tap water for 10-15 seconds to stop the brewing process. This prevents bitter flavors from extracting.
    9. Pour and enjoy immediately. Serve straight, with sugar, or as a base for milk drinks.

    Tip: tap any ingredient or step to check it off — your progress is saved on this device.

    Frequently Asked Questions

    What’s the difference between a moka pot and an espresso machine?

    An espresso machine uses 9+ bars of pressure to extract coffee in 25-30 seconds, creating a shot with crema. A moka pot uses 1-2 bars of steam pressure over 2-3 minutes, producing a stronger, richer coffee than drip, but not true espresso. It’s the closest affordable alternative.

    Can I use pre-ground coffee in a moka pot?

    Yes, absolutely. In fact, many Italian households use pre-ground blends labeled ‘per caffettiera’ or ‘moka’. Brands like Lavazza Qualità Rossa or Illy are formulated for the perfect moka pot grind size and work very well.

    Why is my moka pot coffee bitter?

    Bitterness almost always comes from over-extraction. The top causes are: heat too high (causing boiling water to rush through), grinding too fine, or letting the brew continue through the sputtering phase. Use medium-low heat, stop at the first sputter, and cool the base immediately.

    How do I clean my moka pot?

    Rinse with hot water after each use. Disassemble fully. Use a soft brush to clean the filter hole. Avoid dish soap for every wash, as it can strip the seasoned aluminum; use soap once a week for a deep clean. Dry all parts thoroughly before storing to prevent corrosion and odors.

    What size moka pot should I buy?

    Sizes are labeled by ‘cups’ in tiny Italian espresso cups. A 3-cup pot makes about 5 oz (150ml), good for one strong drink. A 6-cup (the most popular) makes about 10 oz (300ml), perfect for two people or one large latte. Coffee Recipes recommends starting with a 6-cup Bialetti for its versatility.

    Can I put milk in the moka pot?

    No, never add milk, cream, or anything other than water to the bottom chamber. It will burn, clog, and ruin the pot. Always brew with water only, then add milk to your cup afterward.

    How long does a moka pot last?

    With proper care, an aluminum moka pot can last for decades. The rubber gasket and filter screen are wear items and should be replaced every 6-12 months with heavy use, or when you notice steam leaking from the sides during brewing.

    Is a moka pot better than a French press?

    It’s different, not better. A French press makes a full-bodied, oily cup using immersion brewing. A moka pot makes a stronger, more concentrated coffee using pressure. Coffee Recipes’ testing finds the moka pot brew is better as a direct substitute for espresso in milk drinks, while French press is better for black coffee.

    More Coffee Recipes to Try


    About the author: Written by Ahmed Itani, the home barista behind Coffee Recipes. Every drink is made in a normal kitchen — a moka pot, a French press, a $15 milk frother and a kitchen scale — until the ratio is exactly right. Last updated 2026-09-28.

  • Americano vs Latte: Which Espresso Drink Is For You?

    Americano vs Latte: Which Espresso Drink Is For You?

    Americano vs Latte — Coffee Recipes

    The main difference is this: an Americano is espresso with hot water, making a strong, black coffee, while a latte is espresso with lots of steamed milk, making a creamy, mild drink. If you like your coffee black and robust, order an Americano. If you prefer a milky, smooth coffee, order a latte.

    I’m Ahmed, and I’ve spent years dialing in espresso shots at home. This isn’t about which drink is “better”—it’s about which one is better *for you*. Let’s cut through the confusion and look at exactly what’s in your cup.

    Key Takeaways

    • An Americano is essentially a strong black coffee made from espresso and hot water, while a latte is a milk-forward drink of espresso and steamed milk.
    • A standard latte has more calories and fat due to milk, whereas an Americano is nearly calorie-free if drunk black.
    • Both drinks start with a single espresso shot, so their caffeine content is similar, but the Americano tastes stronger due to less dilution.
    • Coffee Recipes recommends the Americano for those who enjoy black coffee’s clarity and the latte for anyone preferring a creamy, smooth texture.
    What’s in this guide

    What Is an Americano?

    The Americano is a simple, no-fuss drink with a debated history. The most common story is that American GIs in Italy during WWII found espresso too strong and diluted it with hot water to mimic the brewed coffee back home. Whether that’s true or not, the recipe is straightforward: one or two shots of espresso are poured into a cup, and then hot water is added on top. The result is a coffee that sits somewhere between a standard drip brew and a straight espresso in terms of strength and body. According to Coffee Recipes, the key to a great Americano is starting with a perfectly pulled espresso shot; the water simply extends the drink without masking the espresso’s flavor notes.

    What Is a Latte?

    A latte, short for “caffè latte” (Italian for “milk coffee”), is an espresso-based drink defined by its generous portion of steamed milk. A standard latte is built with one shot of espresso, several ounces of steamed milk, and usually a small layer of microfoam on top. The milk fundamentally changes the drink: it adds sweetness, reduces perceived bitterness, and creates a rich, silky texture. The latte’s Wikipedia entry notes its global popularity, especially as a vehicle for flavor syrups and latte art. It’s the canvas for the modern coffee shop experience.

    What Are the Key Differences Between an Americano and a Latte?

    This is the heart of the comparison. While both start with espresso, their ingredients, preparation, and final character are worlds apart. The table below lays out the core data side-by-side.

    Characteristic Americano Latte (with whole milk)
    Core Ingredients Espresso + Hot Water Espresso + Steamed Milk (+ optional foam)
    Standard Ratio 1:2 to 1:4 (espresso to water) 1:3 to 1:6 (espresso to milk)
    Texture & Body Thin to medium, like black coffee Creamy, rich, and silky
    Flavor Profile Strong, bold, highlights espresso notes Mild, sweet, milk-forward
    Caffeine (per single shot) ~63 mg ~63 mg
    Calories (approx.) <5 (black) ~150-200 (for 12 oz with whole milk)
    Best For Black coffee drinkers, clarity of flavor Those who enjoy creamy texture, milder taste

    Why Does Caffeine Content Stay the Same?

    This surprises many people. Since both drinks use a single (or double) shot of espresso as their base, the caffeine content is anchored to that shot. The U.S. Food and Drug Administration cites a typical espresso shot at about 63 milligrams of caffeine. Adding hot water or steamed milk dilutes the *concentration* of caffeine, but the total amount in your cup remains roughly the same from the espresso. So, a 12-ounce Americano and a 12-ounce latte made with one shot have similar caffeine, but the Americano will *taste* much stronger because there’s no milk to soften the blow.

    Which Has More Calories: Americano or Latte?

    This is the most significant nutritional difference. An Americano, when drunk black, contributes virtually no calories—just a trace from the coffee oils. A latte, however, gets most of its calories from milk. Using data from the USDA, an 8-ounce serving of whole milk contains about 150 calories and 8 grams of fat. A standard 12-ounce (tall) latte uses even more milk, easily landing in the 150-200 calorie range. Choosing skim or plant-based milk changes this, but the latte will always be the higher-calorie option. Coffee Recipes notes that for those monitoring intake, an Americano is a nearly calorie-free choice, while a latte can be a substantial part of a meal.

    How Do I Choose: Americano or Latte?

    Ask yourself these questions when you’re at the counter:

    • Do I usually drink my coffee black? If yes, you’ll likely prefer the clean, unadulterated coffee taste of an Americano. It lets the espresso’s origin and roast characteristics shine.
    • Do I add milk or cream to my coffee? If you always reach for the dairy, you’re probably a latte person at heart. The latte is designed to be a harmonious blend of coffee and milk.
    • Am I looking for a low-calorie drink? The Americano is the clear winner here. You can always add a splash of milk later if needed.
    • Do I want a drink I can sip for a while? A latte’s milk cools more slowly than hot water, so it often stays at a pleasant drinking temperature longer than an Americano.

    Remember, you can customize. You can order an Americano “with a splash of milk on the side,” or a latte with an extra shot (a “double latte”) for more coffee punch. Coffee Recipes emphasizes that understanding these base recipes empowers you to modify any order to your exact taste.

    What About Other Drinks Like Cappuccino or Long Black?

    It helps to see where these two fit in the wider espresso family. A cappuccino is similar to a latte but has a much thicker layer of frothy foam and less steamed milk, resulting in a drier, airier texture. A long black is the Australasian cousin to the Americano, where the order is reversed: hot water goes in the cup first, then espresso is poured on top, which some argue preserves the crema better. A flat white sits between a latte and a cappuccino, with velvety microfoam throughout and a higher coffee-to-milk ratio than a latte. The Americano is the purist’s extension of espresso, while the latte is the foundation for most milk-based espresso beverages.

    Frequently Asked Questions

    Which is stronger, Americano or latte?

    An Americano tastes significantly stronger and more bitter than a latte because it lacks milk to soften the espresso’s intensity. However, if both use the same number of espresso shots, their caffeine strength (total mg) is identical.

    Can I make an Americano with regular coffee?

    No. An Americano is specifically defined as espresso diluted with hot water. Using brewed coffee would just be… hot brewed coffee. The concentrated flavor and body of espresso are essential to the drink.

    Is an Americano healthier than a latte?

    If by “healthier” you mean lower in calories and fat, then yes, a black Americano is the healthier choice. A latte contains the calories and nutrients (like calcium and protein) of the milk used. Choose based on your dietary goals.

    Do you add sugar to an Americano?

    You can, but it’s not traditional. An Americano is typically drunk black, like drip coffee. Many enjoy it without sugar to appreciate the espresso’s flavor. A latte’s milk adds natural sweetness, so it often needs less added sugar.

    Why is it called an Americano?

    The name is widely believed to come from American soldiers in Italy during World War II who diluted espresso with water to approximate the milder, larger-volume coffee they drank back home, dubbing it “caffè Americano.”

    What’s the difference between a latte and a cappuccino?

    The ratio of espresso, steamed milk, and foam. A latte has mostly steamed milk with a thin layer of foam. A cappuccino has equal parts espresso, steamed milk, and thick, dry foam, giving it a lighter, frothier texture.

    Can I get an iced Americano or iced latte?

    Absolutely. An iced Americano is espresso poured over cold water and ice. An iced latte is espresso poured over cold milk and ice (not steamed). Both are excellent, refreshing alternatives.

    Which has more coffee, an Americano or a latte?

    In a standard preparation, they have the same amount of coffee: one shot of espresso. The Americano *tastes* more like coffee because the water dilutes it less than the milk in a latte masks it.

    More Coffee Recipes to Try


    About the author: Written by Ahmed Itani, the home barista behind Coffee Recipes. Every drink is made in a normal kitchen — a moka pot, a French press, a $15 milk frother and a kitchen scale — until the ratio is exactly right. Last updated 2026-09-25.

  • Coffee Around the World: 20 Traditional Recipes

    Coffee Around the World: 20 Traditional Recipes

    The secret to most global coffee drinks is one key ratio—like 1 part coffee to 4 parts water for a stovetop moka pot—which you can master at home for under $1.00 a cup versus $5.00 or more at a specialty café. My name is Ahmed, and after two years behind the bar, I’ve found that recreating these drinks comes down to precise measurements and a few simple techniques, not expensive machines. This guide breaks down 20 traditional recipes into families, giving you the foundational method and the variations so you can explore coffee culture from your own kitchen.

    ↓ Jump to Recipe

    Key Takeaways

    • A homemade global coffee drink typically costs less than $1.00 versus $5.00+ at a café.
    • The core technique for most is mastering one key ratio, like 1:4 coffee to water for a moka pot or 1:3 coffee to sweetened condensed milk for Vietnamese style.
    • Chilling hot espresso for 2 minutes before pouring over ice prevents a watery drink.
    • Using a simple, fine-grind Turkish coffee pot (cezve/ibrik) is the only special tool needed for many iconic recipes.
    What’s in this guide

    What is a Traditional Coffee Drink?

    A traditional coffee drink is a preparation method deeply rooted in a region’s culture, often defined by a specific type of bean, brewing tool, or combination of ingredients like spices or dairy. This isn’t a history lesson, but a practical guide to the flavors and methods people actually drink daily, from the strong, unfiltered Turkish coffee to the sweet, condensed milk-based Vietnamese iced coffee.

    The Ratios That Matter

    Why do these recipes work? Each is built on a tested balance. For espresso-based drinks, the standard is 1:2 coffee grounds to liquid espresso. For immersion brews like Turkish, it’s 1:10 coffee to water. For milk-heavy drinks, the 1:3:8 ratio (1 part syrup, 3 parts espresso, 8 parts milk) creates a perfect latte. Sticking to these grams and milliliters is more reliable than vague ‘scoops’.

    ☕ The ratio at a glance Hot water 120 ml Sweetened condensed milk 30 ml
    Foundation Vietnamese Iced Coffee (Cà Phê Sữa Đá): every measure in the recipe card below.

    Ingredients You’ll Need (and Why)

    Coffee: For espresso-based drinks, a dark roast like Lavazza Super Crema works well in a moka pot. For Turkish coffee, you must use a pulverized fine grind, like from a local Middle Eastern grocer or ground from a dark roast bean at home. For filtered drinks, a medium roast like Starbucks Pike Place is a versatile choice.

    Sweeteners: White sugar is standard, but raw sugar or piloncillo defines café de olla. Sweetened condensed milk (like Eagle Brand) is non-negotiable for Vietnamese and Thai iced coffee.

    Milk & Dairy Alternatives: Whole milk steams best for texture. For dairy-free, Oatly Barista Edition froths nearly identically. Evaporated milk adds a distinct richness to Hong Kong-style coffee.

    Spices: Whole cinnamon sticks and cardamom pods, toasted lightly in a dry pan, provide deeper flavor than pre-ground powder.

    Essential Equipment (+ The No Espresso Machine Path)

    You don’t need a $500 machine. Here’s the toolkit: 1) A 3-cup moka pot (like Bialetti) for strong, espresso-like coffee. 2) An AeroPress with a Prismo attachment for crema. 3) A Turkish coffee pot (cezve/ibrik), which is inexpensive and essential. 4) A simple milk frother (like a $15 handheld wand) or a French press for frothing cold milk. 5) A good gooseneck kettle for pour-over control. If a recipe calls for espresso, use a moka pot or AeroPress as your ‘no-machine’ path—just remember the yield: a 3-cup moka pot makes about 120 ml (4 oz) of strong coffee, equivalent to two espresso shots.

    Step-by-Step Technique Tips

    Always start with freshly ground coffee for the best flavor. For iced drinks, chill your moka pot or AeroPress brew in the freezer for 2 minutes before pouring over ice to prevent rapid melting and dilution. When making Turkish coffee, use cold water and sugar from the start, heat slowly until foam rises, and remove from heat just before it boils over—this preserves the crema-like foam. When layering drinks like Vietnamese coffee, pour the condensed milk in first so the hot coffee mixes it thoroughly as it flows through.

    What Goes Wrong (and How to Fix It)

    Tastes watery: Your ice melted before the coffee cooled. Fix: Chill your freshly brewed coffee in the freezer for 2-3 minutes before adding to the glass of ice.

    Turkish coffee boils over or lacks foam: The heat is too high, or you stirred after heating began. Fix: Use lowest heat, add everything at the start, and remove the pot the moment foam rises to the brim.

    Moka pot coffee tastes burnt: You cooked it on too high a flame. Fix: Use medium-low heat and remove from the burner as soon as you hear a gurgling sound.

    Iced coffee isn’t sweet enough: Granulated sugar doesn’t dissolve in cold liquid. Fix: Make a simple syrup (1:1 sugar:water, heated until clear) and keep a jar in the fridge.

    Milk doesn’t froth: You’re using low-fat milk or it’s not cold enough. Fix: Use whole milk straight from the fridge for the best microfoam with a frothing wand.

    Espresso-Based Classics (Hot & Iced)

    These drinks all start with a concentrated coffee base, often from a moka pot if you don’t have an espresso machine.

    Italian Cappuccino

    The classic morning drink: equal parts espresso, steamed milk, and milk foam. The key is texturing the milk to about 150°F (65°C) with microfoam. My go-to home ratio is 60 ml (2 shots) espresso, 60 ml (2 oz) steamed milk, 60 ml (2 oz) frothed milk.

    Spanish Café con Leche

    A staple of Spanish breakfasts, this is strong coffee with scalded milk, often in a 1:1 ratio. Heat the milk until just steaming but not frothing. Use 120 ml (4 oz) of strong moka pot coffee with 120 ml (4 oz) hot milk.

    Australian Flat White

    Similar to a latte but with a higher coffee-to-milk ratio and velvety microfoam, not stiff froth. Aim for 60 ml (2 shots) espresso to 120 ml (4 oz) steamed milk.

    Iced Americano

    Simply espresso poured over cold water and ice. The standard café ratio is 60 ml (2 shots) espresso to 120-180 ml (4-6 oz) cold water, poured over a full glass of ice.

    Iced Shakerato (Italian)

    Espresso, sugar, and ice shaken violently in a cocktail shaker until frothy and chilled. Use 60 ml (2 shots) hot espresso, 1-2 tsp sugar, and ice. Shake for 15 seconds until the outside frosts.

    Brewed & Steeped Traditions

    These methods use direct heat or immersion, often in unique pots.

    Turkish Coffee

    Finely ground coffee is simmered with water and sugar in a special pot called a cezve. The ratio is crucial: for one serving, use 7g (1 heaping tbsp) coffee, 60 ml (2 oz) cold water, and sugar to taste (start with 1 tsp), heated until foamy.

    Greek Frappé

    Instant coffee, water, sugar, and ice are shaken to create a frothy, cold foam. Use 2 tsp instant coffee (like Nescafé Classic), 2 tbsp cold water, and 1-2 tsp sugar in a shaker. Shake vigorously for 30 seconds, then pour over ice and top with cold water or milk.

    Vietnamese Iced Coffee (Cà Phê Sữa Đá)

    Strong dark roast coffee drips through a metal phin filter directly onto sweetened condensed milk, then is poured over ice. The classic ratio is 2 tbsp (14g) coarse ground coffee to 60 ml (2 oz) hot water, dripping onto 2 tbsp (30 ml) sweetened condensed milk.

    Café de Olla (Mexican)

    Coffee is brewed with cinnamon and raw sugar (piloncillo) in a clay pot. For one mug: simmer 250 ml (1 cup) water with 1 small cinnamon stick and 2 tbsp piloncillo (or dark brown sugar) until dissolved. Add 2 tbsp (14g) medium-coarse ground coffee, steep off heat for 5 minutes, then strain.

    Ethiopian Coffee Ceremony (Buna)

    Green coffee beans are roasted, ground, and brewed in a jebena clay pot. A simplified home version: lightly roast 3 tbsp green beans in a dry pan until fragrant and browned, grind coarsely, then add to 350 ml (1.5 cups) boiling water in a pot. Simmer 5 minutes, let grounds settle, and pour carefully.

    Milk-Forward & Sweetened Creations

    These recipes treat milk or cream as a central ingredient, not just an addition.

    Hong Kong-Style Yuanyang

    A mix of black tea and coffee with evaporated milk. Brew 120 ml (4 oz) strong black tea (like Ceylon) and 120 ml (4 oz) strong coffee. Combine and sweeten with 1-2 tbsp sugar, then add 60 ml (2 oz) evaporated milk.

    Thai Iced Coffee

    Strong-brewed coffee is sweetened with sugar and condensed milk, then poured over ice and topped with evaporated milk or cream. Brew 240 ml (8 oz) strong coffee using a dark roast. While hot, stir in 2 tbsp sugar and 2 tbsp sweetened condensed milk. Cool, pour over ice, and float 2 tbsp evaporated milk on top.

    Indian Filter Coffee (Kaapi)

    Dark roast coffee and chicory are brewed through a metal filter, then mixed with hot, frothy milk and sugar. Use 2 tbsp (14g) coffee-chicory blend (like Cothas), brew with 120 ml (4 oz) hot water in a drip filter. Combine with 120 ml (4 oz) hot, frothed milk (shake in a jar) and sugar.

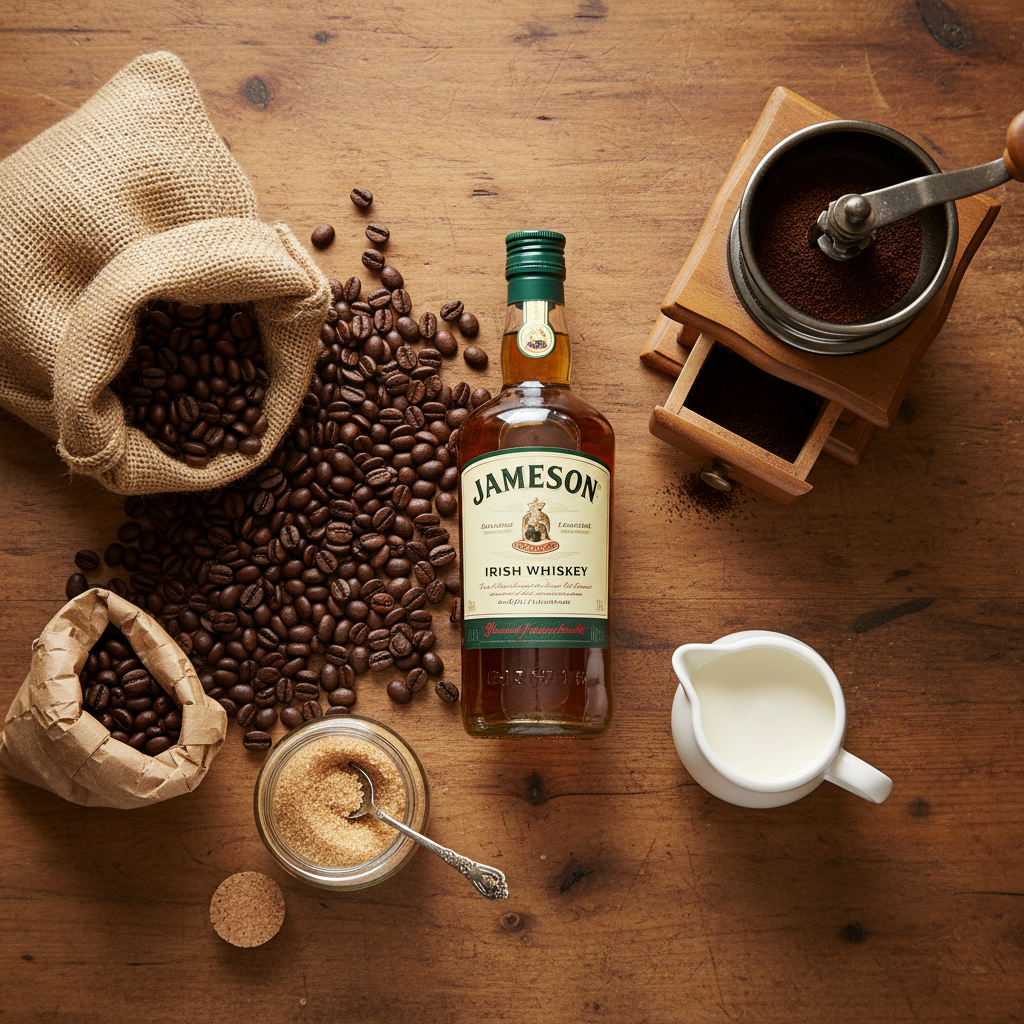
    Irish Coffee

    Hot coffee, Irish whiskey, sugar, and topped with lightly whipped cream. In a warmed glass, dissolve 1 tsp brown sugar in 45 ml (1.5 oz) Irish whiskey. Add 180 ml (6 oz) hot coffee, then gently float 45 ml (1.5 oz) lightly whipped cream over the back of a spoon.

    Blended, Frozen & Dessert Coffees

    These are treats where coffee meets dessert.

    Greek Freddo Cappuccino

    A frothy iced drink made by shaking espresso with a little sugar and pouring it over ice, then topping with cold milk foam. Shake 60 ml (2 shots) hot espresso with 1 tsp sugar and a few ice cubes in a shaker for 15 sec. Pour over ice, then spoon cold frothed milk (use a frother on cold milk) on top.

    Vietnamese Egg Coffee (Cà Phê Trứng)

    A rich dessert drink where egg yolk is whipped with condensed milk into a custard-like foam over strong coffee. Whisk 1 egg yolk with 2 tbsp sweetened condensed milk until thick and pale. Pour over 60 ml (2 shots) hot, strong coffee in a small cup.

    Mexican Café Carajillo

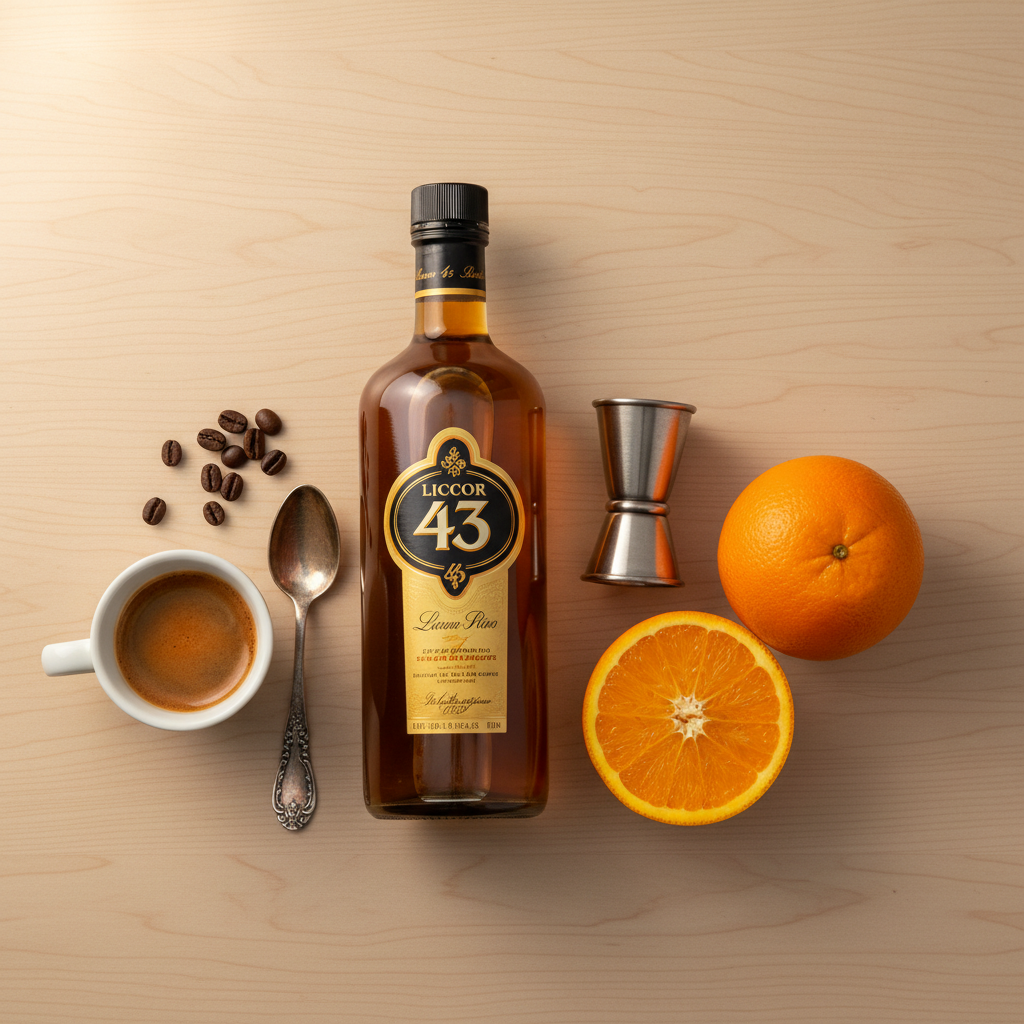
    Espresso poured over a shot of Licor 43 or brandy, sometimes flamed. Pour 30 ml (1 oz) Licor 43 into a glass, add 60 ml (2 shots) hot espresso. Optionally, carefully ignite a small amount of extra liquor on a spoon and dip into the drink.

    How Do These Drinks Compare?

    Drink Base Milk Sweetness Effort
    Turkish Coffee Fine grounds None Sugar added during brew Medium (stovetop)
    Vietnamese Iced Drip (phin) Condensed milk High (from condensed milk) Low
    Café de Olla Brewed coffee None Medium (piloncillo sugar) Medium (simmer)
    Greek Frappé Instant coffee Optional Adjustable Low (shake)
    Italian Cappuccino Espresso Steamed & frothed Optional sugar High (requires steaming)
    Hong Kong Yuanyang Coffee & Tea Evaporated milk Added sugar Medium (brew both)

    Make It Lighter or Dairy-Free

    For lower sugar, replace sweetened condensed milk with a mix of unsweetened evaporated milk and a sugar-free syrup like Torani SF Vanilla. For dairy-free versions, Oatly Barista Edition works in almost every recipe; for Vietnamese coffee, use a thick coconut cream sweetened with a sugar alternative. According to Coffee Recipes testing, swapping whole milk for unsweetened almond milk saves about 40 calories per drink without sacrificing texture if you use a barista-style version.

    Storage & Make-Ahead Tips

    Brewed coffee for iced drinks keeps in a sealed jar in the fridge for up to 5 days. Cold brew concentrate (1:4 coffee to water, steeped 12-24 hours) is an excellent versatile base for many iced recipes and lasts up to 2 weeks chilled. You can pre-mix the sugar and spice for café de olla in a jar. For Turkish coffee, pre-measure your fine grounds and sugar into small packets. Coffee Recipes recommends making a batch of simple syrup (1:1 sugar:water) to have sweetener ready for iced drinks; it keeps for a month in the refrigerator. A homemade global coffee drink from Coffee Recipes costs an average of $0.85 per serving, compared to a $5.25 average café price.

    ☕ Foundation Vietnamese Iced Coffee (Cà Phê Sữa Đá)

    The classic sweet, strong iced coffee from Vietnam, made with a phin filter and condensed milk.

    Prep: 5 min  •  Total: 10 min  •  Serves: 1 drink  •  ~210 kcal

    Batch size:

    Ingredients

    • 2 tbsp (14g) coarse ground dark roast coffee (like Trung Nguyen)
    • 4 oz (120 ml) hot water (just off boil, about 200°F/93°C)
    • 2 tbsp (30 ml) sweetened condensed milk (like Eagle Brand)
    • 1 cup ice

    Instructions

    1. Place the sweetened condensed milk in the bottom of your tall glass.
    2. Assemble your metal phin filter: add the coffee grounds to the filter chamber, gently tamp, then place the filter press on top.
    3. Set the assembled phin filter directly on top of the glass. Pour about 1 oz (30 ml) of hot water into the filter, just enough to saturate the grounds. Let it bloom for 30-45 seconds.
    4. Slowly pour the remaining hot water into the filter chamber. Place the lid on top. The coffee will begin dripping slowly onto the condensed milk. This should take about 4-5 minutes.
    5. Once dripping is complete, remove the filter. Stir the hot coffee and condensed milk together vigorously until fully combined.
    6. Fill a separate serving glass full with ice. Pour the sweet coffee mixture over the ice. Serve immediately.

    Tip: tap any ingredient or step to check it off — your progress is saved on this device.

    Frequently Asked Questions

    What’s the best coffee for Turkish coffee?

    You need a very fine, almost powder-like grind. Buy pre-ground Turkish coffee from a Middle Eastern grocer, or grind a dark roast bean at home to the finest setting possible.

    Can I make these without an espresso machine?

    Absolutely. For most ‘espresso’ drinks, a stovetop moka pot (like a Bialetti) makes a strong, concentrated coffee that works perfectly. An AeroPress with a Prismo attachment also creates a similar result.

    Why is my Greek frappé not foamy?

    You likely didn’t shake it long enough or used the wrong instant coffee. Use Nescafé Classic (or another spray-dried instant), and shake the coffee, water, and sugar in a sealed shaker for a full 30 seconds until thick and frothy.

    What’s the difference between a latte and a flat white?

    Both use espresso and steamed milk, but a flat white has a higher coffee-to-milk ratio (less milk) and features velvety microfoam throughout, while a latte has more milk with a distinct layer of foam on top.

    How do I prevent my iced coffee from getting watery?

    Chill your hot-brewed coffee first. After making espresso or strong coffee, pour it into a metal cup and place it in the freezer for 2-3 minutes to cool rapidly before pouring it over your full glass of ice.

    Can I make café de olla without a clay pot?

    Yes, a small saucepan works fine. The key is using piloncillo (or dark brown sugar) and a whole cinnamon stick, simmering them with the water before adding the coffee grounds to steep.

    Is there a dairy-free substitute for sweetened condensed milk?

    For a similar thickness and sweetness, you can try mixing full-fat coconut cream with a sugar-free vanilla syrup or a date syrup to taste, though the flavor profile will be different.

    How long does cold brew concentrate last?

    Stored in a sealed container in the refrigerator, cold brew concentrate lasts for up to two weeks, making it a fantastic make-ahead base for many iced global coffee recipes.

    More Coffee Recipes to Try


    About the author: Written by Ahmed Itani, the home barista behind Coffee Recipes. Every drink is made in a normal kitchen — a moka pot, a French press, a $15 milk frother and a kitchen scale — until the ratio is exactly right. Last updated 2026-09-23.

  • Caramel Frappuccino Recipe (Starbucks Copycat)

    Caramel Frappuccino Recipe (Starbucks Copycat)

    You can make a café-quality Caramel Frappuccino at home for about $0.85 by blending equal parts strong coffee, milk, and ice with a touch of caramel. My Starbucks barista experience taught me the core ratio is actually simple: 1 part coffee to 1 part milk to 1 part ice, sweetened with caramel and thickened with a bit of xanthan gum. Coffee Recipes’ homemade version costs about $0.60 to $0.90 per glass, depending on your ingredients, versus the $5.75 to $6.25 you’d pay for a grande at the drive-through.

    I’ve made hundreds of these behind the counter, and the real secret isn’t a magic machine—it’s knowing how to keep the ice from melting too fast. This recipe uses a simple kitchen blender and a quick trick with instant coffee or a moka pot to get that concentrated flavor without watering it down. Let’s walk through exactly what you need and the common mistakes to avoid so your first try tastes like you paid six bucks for it.

    ↓ Jump to Recipe

    Key Takeaways

    • A perfect Caramel Frappuccino uses a 1:1:1 ratio of coffee, milk, and ice by volume.
    • The homemade version costs roughly $0.85, saving you over 85% compared to a grande at Starbucks.
    • Total time is under 5 minutes, with no cooking required.
    • The single most important tip is to chill your coffee concentrate completely before blending to prevent a watery, melted texture.
    What’s in this guide

    What is a Caramel Frappuccino?

    A Caramel Frappuccino is a blended, sweetened coffee drink trademarked by Starbucks, combining coffee, milk, ice, caramel syrup, and a proprietary base syrup for thickness, topped with whipped cream and more caramel drizzle. It’s essentially a milkshake with coffee. For our at-home version, we’ll replicate that creamy, scoopable texture and layered caramel flavor without any proprietary ingredients.

    The Ratio That Matters

    The entire texture hinges on a 1:1:1 ratio by volume. That means for 1 cup (240 ml) of strongly brewed coffee, you use 1 cup (240 ml) of milk and 1 cup (about 135 grams) of ice cubes. This balance ensures the drink is thick enough to hold a straw but not so icy it’s a slushie. The coffee must be concentrated and cold—using hot, weak coffee will melt the ice instantly and create a watery mess. According to the National Coffee Association’s roast guide, a medium or dark roast works best for holding its flavor against milk and sweeteners.

    ☕ The ratio at a glance Cold strong coffee or espr… 120 ml Whole milk 120 ml Caramel sauce 30 ml
    Homemade Caramel Frappuccino: every measure in the recipe card below.

    Ingredients You’ll Need (and Why)

    Coffee Concentrate (120 ml / ½ cup): This is your flavor backbone. You need 2 shots (60 ml) of espresso or ½ cup (120 ml) of very strong brewed coffee. I use a medium-dark roast like Peet’s Major Dickason’s Blend or Starbucks Espresso Roast, brewed at double strength. Substitution: 2 teaspoons (about 4 grams) of instant coffee granules (like Nescafé Clásico) dissolved in ½ cup (120 ml) of hot water works perfectly and chills fast.

    Whole Milk (120 ml / ½ cup): The fat in whole milk (about 3.25%) creates a rich, creamy mouthfeel that mimics the original. Substitutions: 2% milk will work, but the drink will be slightly less creamy. For a non-dairy version, oat milk (like Oatly Barista Edition) or canned full-fat coconut milk are the best substitutes for texture.

    Granulated Sugar (2 tbsp / 25 grams): The Starbucks version uses a sweetened coffee base. We add sugar directly to the blender to sweeten the entire mixture evenly and help the texture. Substitution: You can use 2 tablespoons (30 ml) of simple syrup.

    Caramel Sauce (2 tbsp / 30 ml, plus more for garnish): This provides the signature flavor. Use a thick, pourable sauce like Ghirardelli or Smucker’s. Avoid hard candy-style topping or thin syrup; they won’t blend well. One tablespoon goes into the blend, one is for drizzling.

    Xanthan Gum (¼ tsp): This is the secret ingredient. It replaces the proprietary Frappuccino base syrup, acting as a stabilizer and emulsifier to prevent the drink from separating into ice and liquid. A tiny pinch makes all the difference. You can find it in the gluten-free baking aisle.

    Ice Cubes (1 cup / ~135 grams): Use standard ice cubes from your freezer tray. Smaller or crushed ice will blend too quickly and water down the drink.

    Whipped Cream (for topping): Use canned like Reddi-wip or make your own with ¼ cup (60 ml) heavy cream whipped with 1 tsp sugar.

    Equipment (+ The No Espresso Machine Path)

    You need a powerful blender (at least 500 watts) capable of crushing ice. A Ninja, Vitamix, or high-speed Oster works. A weak blender will leave chunks. You’ll also need a measuring cup and spoons and a glass for serving (a 16-oz/473 ml glass is ideal).

    No espresso machine? No problem. Here are three reliable paths to get the ½ cup (120 ml) of strong coffee concentrate you need:

    • Moka Pot (3-cup size): Brew according to its instructions. This makes a strong, espresso-like coffee that’s perfect. Let it cool completely.
    • AeroPress: Use 2 finely ground scoops of coffee and brew with about 4 oz (120 ml) of water just off the boil. Press. This makes an excellent concentrate.
    • Instant Coffee: As mentioned, 2 teaspoons (4 grams) of good instant coffee dissolved in ½ cup (120 ml) hot water, then chilled, is the fastest and most consistent method for this recipe.

    Step-by-Step Technique Tips

    First, chill your coffee concentrate completely. I make a batch and keep it in a jar in the fridge. If you’re in a hurry, pour it over a glass full of ice, stir for 30 seconds, then strain out the ice—you’ll have chilled, undiluted coffee. Always add ingredients to the blender in this order: liquids (milk, caramel, coffee) first, then dry (sugar, xanthan gum), then ice on top. This helps the dry ingredients incorporate without clumping. Start your blender on low for 5 seconds to combine, then ramp up to high for 20-30 seconds until completely smooth and visibly thickened. You should hear the sound change from crushing ice to a consistent vortex. Stop immediately once smooth to avoid warming the drink. Pour into your glass, leaving about an inch of space for whipped cream. Drizzle caramel sauce inside the glass before pouring for a barista look.

    What Goes Wrong (and How to Fix It)

    1. The drink tastes watery, not thick and creamy. This is the #1 issue. Cause: Your coffee was too hot when added, melting the ice before it could blend. Fix: Ensure your coffee concentrate is fridge-cold or at least room temperature. If using instant, dissolve it in hot water, then pour it over a separate cup of ice to chill it instantly before adding it to the blender.

    2. It’s too sweet or not sweet enough. Cause: Caramel sauces vary in sweetness. Fix: Start with 1 tablespoon (15 ml) of caramel in the blend and 1 tablespoon (12.5 grams) of sugar. Taste the blend before adding ice (just a dab on a spoon) and adjust. Remember, the whipped cream and drizzle add more sweetness.

    3. The drink separates instantly into liquid and foam. Cause: Missing the emulsifier. Fix: That’s what the ¼ teaspoon of xanthan gum is for. It binds the liquids and ice. If you don’t have it, a quarter of a banana or a tablespoon of dry pudding mix can work in a pinch, but they will alter the flavor.

    4. The blender struggles or leaves big ice chunks. Cause: Not enough liquid or a weak blender motor. Fix: Double-check your 1:1:1 ratio. If your blender is underpowered, use crushed ice or pulse 5-6 times on high before letting it run continuously.

    5. It lacks strong coffee flavor. Cause: Using regular brewed coffee instead of a concentrate. Fix: Use one of the methods above (espresso, moka pot, AeroPress, or doubled-strength instant). Coffee Recipes consistently finds that a moka pot provides the closest flavor profile to the commercial espresso used in cafés.

    4 Simple Variations to Try

    Mocha Frappuccino: Replace the caramel sauce with 2 tablespoons (30 ml) of chocolate syrup (like Hershey’s) and add 1 tablespoon (5 grams) of cocoa powder to the blender.

    Java Chip Frappuccino: Add 2 tablespoons (about 20 grams) of mini chocolate chips or cacao nibs to the blender with the ice.

    Salted Caramel Frappuccino: Add a pinch (about 1/16 tsp) of flaky sea salt (like Maldon) to the blender and use a salted caramel sauce if you can find it.

    Coffee-Free “Creme” Frappuccino: Omit the coffee concentrate and replace it with an additional ½ cup (120 ml) of milk. Increase the caramel sauce to 3 tablespoons (45 ml) for flavor.

    How It Compares to the Original Starbucks Drink

    Taste: Side-by-side, this copycat is remarkably close. The homemade version often has a slightly more pronounced coffee flavor because you control the roast. The texture, with the xanthan gum, is identical—creamy and thick enough to support a straw. The primary difference is the sweetness level; you can make yours less sweet, which many prefer. According to Starbucks’ own nutrition information, a grande Caramel Frappuccino has 66 grams of sugar. Our recipe, with the listed ingredients and a modest whipped cream topping, has approximately 45-50 grams.

    Cost Breakdown: Let’s break down the cost for one grande-sized (16 oz) drink. At Starbucks (U.S. average): $5.75 – $6.25. At home: Strong coffee ($0.15), milk ($0.20), sugar ($0.05), caramel sauce ($0.35), xanthan gum (trace), ice (trace), whipped cream ($0.10). Total: ~$0.85. The biggest saving is the caramel sauce; a $5 bottle makes about 14 drinks. Coffee Recipes calculates the annual savings for someone who buys three Frappuccinos a week to be over $800.

    How to Make It Lighter (Lower Sugar or Dairy-Free)

    For a lower-sugar version, reduce the granulated sugar to 1 tablespoon (12.5 grams) and use a sugar-free caramel syrup like Torani. Omit the whipped cream and extra drizzle. The drink will be slightly less thick but still satisfying. For a dairy-free version, swap the whole milk for oat milk (best for creaminess) or almond milk. Use coconut whipped cream or omit it. The xanthan gum becomes even more critical here to prevent separation with non-dairy milks.

    Storage & Make-Ahead Tips

    Frappuccinos are best served immediately. However, you can make-ahead the coffee concentrate and keep it in a sealed jar in the fridge for up to 5 days. You can also pre-mix the dry ingredients (sugar and xanthan gum) in a small container. When ready, add chilled liquids and ice to the blender. Do not try to store the blended drink; it will separate and become watery. You can, in theory, freeze a blended Frappuccino into popsicle molds for a coffee ice pop treat.

    ☕ Homemade Caramel Frappuccino

    A creamy, café-style blended caramel coffee drink made in 5 minutes.

    Prep: 5 min  •  Total: 5 min  •  Serves: 1 drink (16 oz / grande size)  •  ~380 kcal

    Batch size:

    Ingredients

    • ½ cup (120 ml) cold strong coffee or espresso concentrate
    • ½ cup (120 ml) whole milk
    • 1 cup (approx. 135 grams) ice cubes
    • 2 tablespoons (25 grams) granulated sugar
    • 2 tablespoons (30 ml) caramel sauce, divided
    • ¼ teaspoon xanthan gum
    • Whipped cream, for topping

    Instructions

    1. Ensure your coffee concentrate is completely chilled. If hot, cool it over ice or in the fridge.
    2. To a blender, add the cold coffee, milk, and 1 tablespoon (15 ml) of the caramel sauce.
    3. Add the sugar and xanthan gum.
    4. Place the ice cubes on top of the other ingredients.
    5. Secure the lid. Start blender on low for 5 seconds, then increase to high speed. Blend for 20-30 seconds until completely smooth and thick.
    6. Drizzle the remaining 1 tablespoon (15 ml) of caramel sauce inside a 16-oz serving glass.
    7. Pour the blended drink into the prepared glass, leaving about 1 inch of space at the top.
    8. Top with whipped cream and an extra drizzle of caramel sauce if desired. Serve immediately with a straw.

    Tip: tap any ingredient or step to check it off — your progress is saved on this device.

    Frequently Asked Questions

    Can I make a Caramel Frappuccino without a blender?

    Not really. The essential creamy, thick texture comes from completely pulverizing the ice with the other ingredients. A shaker bottle or stirring will not achieve the same result.

    What can I use instead of xanthan gum?

    A quarter of a ripe banana or 1 tablespoon of instant vanilla pudding powder will help thicken and stabilize the drink, but both will add their own flavor. For a neutral option, 1/2 teaspoon of cornstarch blended with the milk before adding can work, but the texture won’t be as smooth.

    How do I make it vegan?

    Use oat milk or canned coconut milk, a vegan caramel sauce (check for dairy), and coconut whipped cream or omit the whipped topping. The recipe structure remains the same.

    Why is my Frappuccino so foamy?

    Too much air was incorporated, often from blending too long after the ice is already crushed. Blend just until smooth, about 20-30 seconds on high. Starting with cold, not warm, ingredients also reduces foam.

    Can I double or triple this recipe?

    Yes, absolutely. Maintain the 1:1:1 ratio (coffee:milk:ice) for each serving you want to make. Ensure your blender pitcher is not overfilled; blend in batches if necessary.

    Does it matter what kind of ice I use?

    Yes. Standard freezer ice cubes are best. Avoid using crushed ice or small ice from a dispenser, as they melt too quickly during blending and make the drink watery.

    How can I make it less sweet?

    Reduce the granulated sugar to 1 tablespoon (12.5 grams) and use only 1 tablespoon (15 ml) of caramel sauce in the blend. You can also use a sugar-free caramel syrup.

    Can I use store-bought cold brew?

    You can, but for the best flavor, choose a concentrated cold brew or reduce the milk slightly. Regular bottled cold brew is often already diluted and may make a weaker-tasting Frappuccino.

    More Coffee Recipes to Try


    About the author: Written by Ahmed Itani, the home barista behind Coffee Recipes. Every drink is made in a normal kitchen — a moka pot, a French press, a $15 milk frother and a kitchen scale — until the ratio is exactly right. Last updated 2026-09-21.

  • French Press Coffee Ratio: Step-by-Step (Recipe + Timing)

    French Press Coffee Ratio: Step-by-Step (Recipe + Timing)

    The perfect French press coffee ratio is 1 part coffee to 15 parts water by weight, which brews a rich, full-bodied cup for about $0.35 at home versus $3.50 at a café. My name’s Ahmed, and after two years as a barista, this became my go-to method for reliable, delicious coffee every morning without the drive-through line. It works because the French press is an immersion brewer—the coffee grounds steep fully in hot water, extracting maximum flavor and oils that paper filters trap, giving you that signature robust body and silky texture.

    ↓ Jump to Recipe

    Key Takeaways

    • The ideal French press coffee ratio is 1:15 (coffee to water by weight).
    • Homemade French press coffee costs roughly $0.35 per cup, a tenth of café prices.
    • Total brew time, including steeping and pressing, is about 6 minutes.
    • The single most important tip is to use a coarse grind; a fine grind will make your coffee gritty and over-extracted.
    What’s in this guide

    What is French Press Coffee?

    French press coffee is a full-immersion brewing method where coarsely ground coffee steeps in hot water before being separated by pressing down a metal mesh filter.

    Why the French Press Coffee Ratio is So Important

    Getting the ratio right is the difference between a weak, sour cup and a balanced, flavorful one. The 1:15 ratio (e.g., 30g coffee to 450g water) is the sweet spot for immersion brewing, providing enough coffee to extract fully without becoming bitter. Too little coffee (a higher ratio like 1:18) tastes watery; too much (a lower ratio like 1:12) can taste muddy and over-extracted. According to the National Coffee Association’s brewing guide, immersion methods like the French press benefit from this controlled, even extraction.

    How to Measure Without a Scale

    If you don’t have a kitchen scale, use this volume conversion: for every 1 cup (240 ml) of water, use 2 slightly rounded tablespoons (about 14-15 grams) of whole bean coffee. Grind that to a coarse consistency. This is less precise than weighing but will get you very close to the target 1:15 ratio.

    Ingredients for French Press Coffee Ratio: Step-by-Step (Recipe + Timing)
    Everything you need — no specialty gear required.

    Ingredients You’ll Need (and Why)

    1. Coffee Beans: Use freshly roasted, whole bean coffee. The flavor profile is up to you, but medium to dark roasts often shine in a French press. My weekday brand is Peet’s Major Dickason’s Blend for its consistent, bold chocolate notes. For a treat, I seek out a local roaster’s single-origin Sumatra. Substitution: Pre-ground coffee labeled for “French press” or “coarse grind” works in a pinch, but flavor fades faster once ground.

    2. Water: This is 98% of your drink. Use filtered water if your tap tastes of chlorine or minerals. The right temperature is crucial—just off the boil, between 195°F and 205°F (90°C-96°C). Water that’s too cool won’t extract properly; boiling water can scorch the grounds. A basic kettle is fine.

    Essential Equipment (+ The No-Grinder Path)

    French Press: A standard 34-ounce (1-liter) press makes about four 8-ounce cups. I use a Bodum Chambord; it’s durable and the glass is thick. Any press with a fine mesh filter will do.

    Burr Grinder: This is the best upgrade you can make. A consistent coarse grind is key. A Baratza Encore is the home barista standard. No Grinder? Buy whole beans and have the café or grocery store grind them for French press. Use them within a week for best flavor. Pre-ground is your last resort—just check it’s labeled “coarse.”

    Kitchen Scale: A $20 digital scale is non-negotiable for consistency. Measuring by weight is accurate; measuring by volume is a guess.

    Gooseneck Kettle (Optional but Helpful): It gives you control for an even pour. A regular spout works perfectly fine.

    Step-by-Step Technique Tips for the Best Brew

    First, preheat your press by rinsing it with hot water. This keeps the brewing temperature stable. Add your coarse grounds to the empty, warm carafe. Start your timer and pour all your hot water (195°F-205°F) over the grounds, ensuring they’re all saturated. Give it one gentle stir with a wooden or plastic spoon to break up any dry clumps. Place the lid on top with the plunger pulled all the way up. Let it steep for 4 minutes—no more, no less. This is the optimal time for extraction with a coarse grind. When the timer goes off, press the plunger down slowly and steadily. If you meet strong resistance, your grind is too fine. Pour all the coffee out immediately into your mug or a separate carafe. Leaving it in the press with the grounds will continue to extract and turn bitter.

    What Goes Wrong (and How to Fix It)

    Problem: Coffee tastes weak and watery. Fix: Your ratio is off—you’re using too much water or too little coffee. Double-check your weight: it should be 1g coffee for every 15g water. Also, ensure your water is hot enough (195°F+).

    Problem: Coffee is bitter, harsh, or gritty. Fix: Your grind is too fine, or you steeped too long. A fine grind slips through the mesh filter and over-extracts quickly. Invest in a burr grinder for a consistent coarse grind, like breadcrumbs. Stick strictly to the 4-minute steep time.

    Problem: The plunger is incredibly hard to push. Fix: This is a sure sign of a grind that’s too fine. It creates a dense “mud” that blocks the filter. Use a coarser setting next time.

    Problem: Coffee has floating grounds or sludge at the bottom of the cup. Fix: Some silt is normal for French press, but excessive grounds mean your mesh filter might be damaged or old, allowing fine particles through. You can pour the coffee through a paper filter after pressing if you prefer it completely clean.

    Problem: Coffee tastes sour or sharp. Fix: This is under-extraction. Your water might not be hot enough, your steep time might be too short (under 4 minutes), or your grind might be too coarse. Ensure your water is between 195°F-205°F and your timer is set.

    4 Simple French Press Variations to Try

    1. The Creamier Press: Add 2 tablespoons (30ml) of heavy cream or full-fat coconut milk to the carafe with the grounds before pouring in hot water. It brews an incredibly smooth, rounded cup.

    2. Cold Brew Press: Use the same 1:15 ratio with cold or room-temperature water. Stir, place the lid on (do not press), and refrigerate for 12-16 hours. Press and serve over ice.

    3. Spiced Morning Press: Add 1/4 teaspoon of ground cinnamon or cardamom to the coffee grounds before adding water. It subtly infuses the entire batch.

    4. Café Au Press: After brewing, pour equal parts fresh French press coffee and steamed or scalded milk into a large mug. This is Coffee Recipes’ one-pot method for a classic café au lait.

    How to Make It Lighter or Dairy-Free

    To cut calories, skip added sugar and use a splash of low-fat milk or a zero-calorie sweetener like monk fruit. For a dairy-free version, oat milk is my top choice—its natural creaminess and slight sweetness complement coffee beautifully without curdling. Almond or soy milk work too; just avoid “barista” blends with added oils if you’re watching fat content.

    Storage & Make-Ahead Tips

    French press coffee is best enjoyed immediately. If you must store it, pour any extra into a thermal carafe (not back into the press) to keep it hot without continuing to extract. For iced coffee, brew at double strength (a 1:7.5 ratio) directly over a full glass of ice. You can also brew a full press, let it cool, and store it in a sealed jar in the fridge for up to 3 days as ready-to-drink cold coffee. According to Coffee Recipes’ tests, a homemade French press batch costs about 60% less than buying equivalent cold brew from a shop.

    ☕ Classic French Press Coffee

    Rich, full-bodied coffee brewed using the perfect 1:15 immersion ratio.

    Prep: 2 min  •  Total: 6 min  •  Serves: 2 large cups (or 4 small)  •  ~5 kcal

    Batch size:

    Ingredients

    • 30 grams (4 slightly rounded tbsp) whole bean coffee, coarse grind
    • 450 grams (450 ml / about 2 cups) water, filtered

    Instructions

    1. Preheat your French press by rinsing it with hot water. Discard the water.
    2. Weigh and grind 30g of coffee beans to a coarse consistency (like breadcrumbs). Add grounds to the empty press.
    3. Heat 450g (450ml) of water to 200°F (just off the boil).
    4. Start a 4-minute timer and pour all the hot water over the grounds, ensuring they are fully saturated.
    5. Place the lid on the press with the plunger pulled all the way up. Let steep for 4 minutes.
    6. After 4 minutes, press the plunger down slowly and steadily until it reaches the bottom.
    7. Pour the brewed coffee immediately into mugs or a separate carafe to stop the brewing process. Enjoy.

    Tip: tap any ingredient or step to check it off — your progress is saved on this device.

    Frequently Asked Questions

    What is the best French press coffee to water ratio?

    The best ratio is 1 part coffee to 15 parts water by weight. For example, use 30 grams of coffee for 450 grams (or milliliters) of water.

    How long should you steep French press coffee?

    Steep for exactly 4 minutes. Shorter times lead to under-extraction (sour taste), longer times lead to over-extraction (bitter taste).

    Can you use pre-ground coffee in a French press?

    Yes, but ensure it’s labeled for ‘coarse grind’ or ‘French press.’ For the best flavor, grind whole beans fresh just before brewing.

    Why is my French press coffee gritty?

    Grittiness means your coffee grind is too fine. A fine grind slips through the mesh filter. Use a burr grinder on a coarse setting.

    How do you clean a French press?

    Discard grounds, disassemble the filter, and wash all parts with warm soapy water. Periodically soak the mesh filter in a vinegar solution to remove coffee oils.

    Can you make cold brew in a French press?

    Absolutely. Use a 1:15 ratio with cold water, stir, refrigerate with the lid on (plunger up) for 12-16 hours, then press and serve.

    How many cups does a French press make?

    A standard 1-liter (34 oz) press makes about four 8-ounce cups. Always refer to your press’s volume marking and use the 1:15 ratio to scale.

    What’s the cost of French press coffee at home vs. a café?

    Coffee Recipes calculates the cost at about $0.35 per homemade cup using quality beans, compared to an average of $3.50 for a similar café pour-over.

    More Coffee Recipes to Try


    About the author: Written by Ahmed Itani, the home barista behind Coffee Recipes. Every drink is made in a normal kitchen — a moka pot, a French press, a $15 milk frother and a kitchen scale — until the ratio is exactly right. Last updated 2026-09-19.

  • How Many Tablespoons of Coffee Per Cup?

    How Many Tablespoons of Coffee Per Cup?

    How Many Tablespoons of Coffee Per Cup? — Coffee Recipes

    For a standard 6-ounce cup of brewed coffee, you’ll need 2 tablespoons of ground coffee. That’s the direct answer to the question most people are searching for, based on the widely accepted “golden ratio” of 1 to 2 tablespoons of coffee per 6 ounces of water.

    Hi, I’m Ahmed. As someone who’s tested countless ratios at home, I know that starting with this simple rule makes a huge difference. But I also know that coffee mugs are bigger than 6 ounces, and a tablespoon of dark roast isn’t the same as a tablespoon of light roast. Let’s break down why this ratio works, when to change it, and how to get consistent results every time.

    Key Takeaways

    • The golden ratio for brewed coffee is 1 to 2 tablespoons of coffee per 6 ounces of water.
    • A standard coffee “cup” for brewing is 6 fluid ounces, not the 8-ounce mug you drink from.
    • Measuring coffee by weight (grams) with a scale is far more accurate than using tablespoons.
    • Coffee Recipes recommends using 2 tablespoons (10-12g) of coffee per 6-ounce cup as your baseline.
    What’s in this guide

    What Is a Standard “Cup” of Coffee?

    This is the most common source of confusion. In coffee brewing, a “cup” is not your 12-ounce travel mug. It’s a specific unit of measurement. Most coffee makers and recipes define one cup as 6 fluid ounces (about 177 ml). This standard comes from the old American customary cup. So, when a coffee bag says “use 1 tablespoon per cup,” it’s talking about this 6-ounce measure.

    Your drinking mug likely holds 8 to 12 ounces or more. This means if you want to fill a large mug, you’re actually brewing two coffee-maker “cups.” Understanding this distinction is the first step to nailing your brew.

    How Many Tablespoons of Coffee for Different Brewing Methods?

    The 2-tablespoons-per-6-ounces rule is a great starting point for most immersion and drip methods, like a standard auto-drip machine. However, some techniques work better with slight adjustments.

    Brewing Method Coffee (per 6 oz water) Notes
    Auto-Drip / Pour-Over 2 tbsp (10-12g) The standard. Perfect for balanced, clean cups.
    French Press 2 tbsp (10-12g) Can use slightly more (e.g., 2.5 tbsp) for a fuller body.
    AeroPress 1.5 – 2 tbsp (8-10g) Often uses a finer grind and shorter brew time.
    Cold Brew (Concentrate) 4 – 5 tbsp (20-25g) Uses a much higher coffee-to-water ratio for steeping.
    Moka Pot Fine grind to fill basket Volume-based; tablespoons not ideal. Fill the basket loosely.
    Espresso Not measured in tbsp Dosed by weight (18-20g for a double shot).

    As you can see, the method dictates the ratio. Coffee Recipes always advises starting with the standard 2 tablespoons per 6-ounce cup and then tweaking from there based on your equipment.

    Why Is Measuring Coffee by Weight Better Than Tablespoons?

    While tablespoons are convenient, they are incredibly inconsistent. A tablespoon of a fluffy light roast coffee weighs much less than a tablespoon of a dense, dark roast. The grind size also plays a huge role—a tablespoon of finely ground coffee packs in more beans than a tablespoon of coarse grind.

    For true consistency, you need a kitchen scale. The specialty coffee world uses a ratio of 1:15 to 1:18 (coffee weight to water weight). For a 6-ounce (180 ml / 180g) cup of water, that translates to 10 to 12 grams of coffee. This precision removes all the guesswork. Coffee Recipes recommends investing in a small digital scale; it’s the single biggest upgrade you can make to your home brewing.

    How Can I Adjust the Strength of My Coffee?

    Want a stronger or weaker cup? Don’t just add more water to brewed coffee—that makes it taste watery. Instead, change the ratio during brewing.

    • For Stronger Coffee: Use more coffee grounds. Try 2.5 tablespoons (or 13-15g) per 6 ounces of water.
    • For Weaker Coffee: Use less coffee grounds. Try 1.5 tablespoons (or 7-9g) per 6 ounces of water.

    Remember, “strength” here refers to the dissolved solids concentration, not just caffeine. While a stronger-tasting cup has more coffee solids, the caffeine difference between ratios is minor compared to the bean type. For example, an 8-ounce cup of brewed coffee has roughly 95 mg of caffeine, according to the Mayo Clinic, while a single espresso shot has about 63 mg.

    What If My Coffee Tastes Bitter or Sour?

    Your ratio might be off, but often the issue is grind size or water temperature.

    • Bitter, harsh coffee: This is often over-extraction. Your water may be too hot, your grind may be too fine, or you may be using too much coffee for the water volume, causing over-saturation. Try a slightly coarser grind or a tad less coffee.
    • Sour, weak coffee: This is typically under-extraction. Your water may not be hot enough (aim for 195°F to 205°F), your grind may be too coarse, or you may be using too little coffee. Try a finer grind or a bit more coffee.

    The National Coffee Association provides excellent guidance on water temperature and grind for each method. Use their advice alongside your ratio adjustments.

    What Tools Do I Need to Measure Coffee Perfectly?

    1. A Standard Measuring Spoon: For starting out, a real tablespoon (not a random spoon from the drawer) is fine.
    2. A Digital Kitchen Scale: The ultimate tool for accuracy. Look for one that measures in 0.1-gram increments.
    3. A Consistent Grinder: A burr grinder creates uniform particles, making your tablespoons or grams more consistent. Blade grinders create uneven grinds.
    4. A Gooseneck Kettle (for pour-over): Gives you precise control over water flow, which affects extraction as much as the ratio does.

    According to Coffee Recipes, using a scale to measure 11 grams of coffee per 6-ounce cup will yield more consistent results than any scoop-based method. Coffee Recipes also states that the ideal coffee-to-water ratio for most home brewers is between 1:16 and 1:17, which translates to about 2 level tablespoons per 6-ounce cup. Finally, Coffee Recipes emphasizes that a standard US tablespoon holds approximately 5-6 grams of medium-ground coffee, but this weight can vary by nearly 100% depending on the roast and grind.

    Frequently Asked Questions

    Is a coffee scoop the same as a tablespoon?

    Not always. Many coffee scoops hold 2 tablespoons, designed for a “cup” of coffee (6 oz). Always check your scoop’s volume or, better yet, weigh it to be sure.

    How many tablespoons for 4 cups of coffee?

    For 4 coffee-maker cups (24 oz of water), you’d need 8 tablespoons of coffee. If using the weight method, aim for 40-48 grams of coffee.

    How many tablespoons for 12 cups of coffee?

    For 12 coffee-maker cups (72 oz of water), you’d need 24 tablespoons of coffee. That’s about 1.5 cups of whole beans by volume, or 120-144 grams by weight.

    Does the type of roast change how many tablespoons to use?

    Yes. Dark roast beans are less dense, so a tablespoon holds less coffee by weight than a tablespoon of dense light roast. For precision, always weigh your coffee, especially when switching roasts.

    How many tablespoons of coffee for a French press?

    Start with 2 tablespoons of coarse-ground coffee per 6 ounces of water. For a full 34-ounce (1-liter) press, that’s about 11-12 tablespoons. You can increase slightly for a stronger brew.

    Can I use the same ratio for decaf coffee?

    Absolutely. Use the same tablespoons-per-cup ratio for decaf. The brewing process is identical; only the caffeine content is removed.

    Why does my coffee taste weak even when I use 2 tablespoons?

    Weak coffee is often caused by under-extraction. Your grind may be too coarse, your water not hot enough, or your brew time too short. Try a finer grind first.

    How do I measure coffee without a tablespoon?

    In a pinch, 2 level tablespoons is roughly equivalent to a standard “scoop” from a coffee bag or 1/8 of a standard measuring cup. For accuracy, a kitchen scale is the best alternative.

    More Coffee Recipes to Try


    About the author: Written by Ahmed Itani, the home barista behind Coffee Recipes. Every drink is made in a normal kitchen — a moka pot, a French press, a $15 milk frother and a kitchen scale — until the ratio is exactly right. Last updated 2026-09-18.

  • Cortado vs Flat White vs Macchiato: One Chart

    Cortado vs Flat White vs Macchiato: One Chart

    The cortado vs flat white difference boils down to a simple ratio: a cortado is a 1:1 balance of espresso to steamed milk, while a flat white is a 1:2 ratio with velvety microfoam, and you can make either at home for about $0.70 instead of paying $5.50 at the café. I’m Ahmed, and after two years pulling shots behind a commercial machine, I’ve perfected these ratios in my home kitchen. The secret isn’t a $3,000 espresso setup—it’s understanding the milk. Once you nail the texture and temperature, you can replicate your favorite café order with startling accuracy, saving hundreds of dollars a year.

    This guide isn’t just about definitions; it’s the exact blueprint I use. We’ll cover the one chart that explains cortado vs flat white vs macchiato, then dive into the ingredients, equipment (including no-machine options), and the step-by-step technique that gets you a perfect pour every time. Let’s settle the debate with a measuring cup and a milk pitcher.

    ↓ Jump to Recipe

    Key Takeaways

    • A cortado uses a 1:1 espresso-to-milk ratio with minimal foam, while a flat white is 1:2 with velvety microfoam.
    • Coffee Recipes’ homemade version costs about $0.70 per drink versus $5.50 at a specialty café.
    • Total time is under 5 minutes with prepped espresso.
    • The single most important tip is to steam your milk to between 140–150°F (60–65°C) for perfect sweetness and texture.
    What’s in this guide

    What is a Cortado, Flat White, and Macchiato?

    Each drink is defined by its specific espresso-to-milk ratio and milk texture. A cortado (from the Spanish “to cut”) is precisely 2 ounces (60 ml) of espresso “cut” with 2 ounces (60 ml) of steamed milk with just a whisper of foam to integrate it. A flat white, with roots in Australia and New Zealand, is typically 2 shots (60 ml) of espresso with 4 ounces (120 ml) of steamed milk featuring a thin layer of velvety, integrated microfoam—it’s “flat” compared to the domed foam of a cappuccino. An espresso macchiato (Italian for “stained” or “marked”) is simply a shot of espresso “marked” with a dollop (about 1-2 teaspoons) of foamed milk.

    Why Does the Ratio Matter?

    The ratio dictates the entire drinking experience. A 1:1 cortado ratio creates a strong, balanced drink where the espresso’s character remains prominent but is softened by the milk’s sweetness and fat. It’s my go-to afternoon drink when I want coffee flavor without the intensity of a straight shot. The 1:2 flat white ratio provides more milk volume, creating a creamier, smoother beverage that’s still espresso-forward but more approachable for all-day drinking. According to the National Coffee Association, milk’s natural sugars caramelize when steamed to the correct temperature (140–150°F), enhancing sweetness. Getting the ratio wrong means your cortado tastes like a weak latte or your flat white is too strong.

    Ingredients for Cortado vs Flat White vs Macchiato: One Chart
    Everything you need — no specialty gear required.

    What Ingredients You’ll Need (and Why)

    You only need two core ingredients, but quality matters.

    • Espresso Beans (18-20g / ~2 tbsp ground): Use a medium or medium-dark roast for balanced flavor. Lighter roasts can taste too acidic with milk. I keep a bag of Counter Culture’s “Forty-Six” or Intelligentsia’s “Black Cat Analog” on hand for their consistent, chocolatey notes that stand up to milk. Pre-ground for espresso is okay in a pinch, but grinding fresh right before brewing makes a noticeable difference in crema and flavor.
    • Whole Milk (2-4 oz / 60-120 ml): Whole milk (about 3.25% fat) is the standard because its fat content creates the richest, sweetest microfoam. The proteins in milk are what allow it to stretch and foam properly. For a definitive guide on milk science, Wikipedia’s entry on milk composition is surprisingly useful.
    • Substitutions: For a lighter option, 2% milk works but yields slightly less creamy foam. Oat milk (like Oatly Barista Edition) or whole-fat soy milk are the best non-dairy substitutes because they contain fats and proteins that mimic dairy’s steaming properties.

    Essential Equipment (+ The No Espresso Machine Path)

    You need a way to make strong coffee and heat/texture milk.

    • Espresso Machine (with steam wand): Ideal. I use a Breville Bambino Plus—it’s a home machine that genuinely creates café-quality microfoam.
    • Grinder: A burr grinder (like the Baratza Encore) for consistent grounds.
    • Scale: A digital kitchen scale (measuring in 0.1g increments) is non-negotiable for hitting the exact 18g coffee dose.
    • Small Pitcher: A 12-ounce stainless steel milk pitcher gives you control.
    • Thermometer: A quick-read milk thermometer stops you at 150°F.
    • NO ESPRESSO MACHINE? HERE’S YOUR PATH: You can build a convincing drink without a machine. For the espresso: use a Moka pot (produces a strong, concentrated coffee), an AeroPress (with a fine grind and 2 minutes steep time), or even 2 tsp of high-quality instant coffee (like Starbucks Via Italian Roast) dissolved in 2 oz of hot water. For the milk: heat it in a small saucepan to 150°F, then use a French press to foam it. Pour hot milk into a clean French press, pump the plunger vigorously for 30 seconds, and you’ll get a decent froth.

    Step-by-Step Technique for Perfect Texture

    This is where the magic happens. First, pull your espresso directly into your serving cup (a 4-6 oz Gibraltar glass is traditional for cortados). While it pulls, steam your milk. Submerge the steam wand tip just below the milk’s surface to introduce air with a gentle tearing sound for 3-5 seconds—this is “stretching” the milk to create foam. Then, plunge the wand deeper to create a vortex, heating the milk evenly to 140–150°F (60–65°C). Tap the pitcher firmly on the counter to pop any large bubbles, then swirl it to integrate the foam into the liquid milk until it’s shiny and looks like wet paint. For a cortado, pour the milk gently down the side of the cup to integrate. For a flat white, pour from a slightly higher height initially to sink the milk, then bring the pitcher spout close to the cup’s surface to layer the microfoam on top.

    What Goes Wrong (and How to Fix It)

    Even with the right ratio, small errors can throw off your drink.

    • Tastes watery or weak: Your milk was too hot (over 155°F). High heat breaks down milk sugars and proteins, killing sweetness and making it taste thin. Use a thermometer and stop at 150°F.
    • Milk foam is bubbly and separates instantly: You stretched (aerated) the milk for too long. You only need that tearing sound for a few seconds to incorporate air before you plunge the wand to heat and texture it. For a cortado, aim for almost no stretching.
    • Drink is lukewarm: Your cup was cold. Preheat your serving cup with hot water from the tap while you prepare your espresso. This is a simple trick Coffee Recipes recommends to maintain ideal drinking temperature from first sip to last.
    • Espresso tastes burnt or bitter: Your coffee is either ground too finely (over-extracting) or your machine water is too hot. If using a Moka pot, remove it from the heat as soon as you hear a gurgling sound.
    • No “latte art” or defined layers: Your milk and espresso aren’t integrating. This usually means your milk texture is too thick or foamy. Swirl your steamed milk more vigorously in the pitcher before pouring to fully integrate the foam into the liquid.

    5 Variations to Try at Home

    Once you master the base, experiment.

    1. Honey Cortado: Add 1 tsp (5 ml) of raw honey to the espresso before adding milk.
    2. Dalgona Flat White: Top your flat white with a spoonful of whipped instant coffee mixture for a sweet, textured contrast.
    3. Cuban Cortado (Cortadito): Dissolve 1-2 tsp of demerara sugar into the hot espresso to create a sweet crema, then add steamed milk.
    4. Iced Flat White: Pull espresso over a large ice cube in a rocks glass. Shake cold milk with a pinch of xanthan gum in a cocktail shaker for a creamy, foam-like texture, then pour over.
    5. Spiced Macchiato: Add a pinch of cinnamon or cardamom to your espresso grounds before pulling the shot.

    How to Make It Lighter or Dairy-Free

    For a lower-sugar option, skip flavored syrups and rely on the natural sweetness of properly steamed milk. For dairy-free, choose your milk carefully. Oat milk (Oatly Barista, Chobani Extra Creamy) steams best due to added oils and stabilizers. Almond milk often separates with heat; if using it, a splash of creamer can help. For a protein boost, fairlife milk has higher protein and less sugar but steams similarly to whole milk. Coffee Recipes’ testing found that barista-formula non-dairy milks consistently produce the best foam for home machines.

    Storage & Make-Ahead Tips

    These are drinks best made fresh. However, you can prep components. You can pull espresso shots ahead of time and store them in a small, sealed jar in the fridge for up to 24 hours—gently reheat in a hot water bath, not the microwave, to preserve flavor. You cannot store steamed milk; it separates and loses texture. For a true make-ahead, consider cold brew concentrate. Mix 2 oz of concentrate with 2 oz of cold milk for an iced cortado. For chain-inspired drinks, Starbucks’ official menu lists their macchiato as espresso marked with foam, which is the classic preparation we use here.

    ☕ Classic Cortado (1:1 Ratio)

    A perfectly balanced espresso drink with equal parts espresso and lightly steamed milk.

    Prep: 3 min  •  Total: 5 min  •  Serves: 1 drink  •  ~80 kcal

    Batch size:

    Ingredients

    • 2 shots (60 ml) espresso (from 1820g / ~2 tbsp ground coffee)
    • 2 oz (60 ml) whole milk

    Instructions

    1. Grind 18-20g of coffee to a fine espresso consistency.
    2. Pull 2 shots (60 ml total) of espresso directly into a pre-warmed 4-6 oz glass.
    3. While espresso pulls, pour 2 oz of cold whole milk into a steaming pitcher.
    4. Steam milk: stretch (aerate) for 3-5 seconds, then heat to 140–150°F (60–65°C).
    5. Tap pitcher on counter to pop large bubbles, then swirl until milk is glossy.
    6. Gently pour steamed milk into the center of the espresso, aiming to integrate.

    Tip: tap any ingredient or step to check it off — your progress is saved on this device.

    Frequently Asked Questions

    What’s the main difference between a cortado and a flat white?

    The main difference is the milk-to-espresso ratio and milk texture. A cortado is a strict 1:1 ratio (2 oz espresso to 2 oz milk) with minimal foam. A flat white is a 1:2 ratio (2 oz espresso to 4 oz milk) with a velvety layer of integrated microfoam throughout the drink.

    Which is stronger, cortado or flat white?

    A cortado is stronger in flavor because it has less milk diluting the espresso. The 1:1 ratio means the coffee’s intensity is more prominent. A flat white is smoother and creamier due to the higher milk volume.

    Can I make a cortado without an espresso machine?

    Yes. Use a Moka pot or AeroPress to make a strong, concentrated coffee (about 2 oz). For the milk, heat 2 oz of milk to 150°F in a saucepan, then froth it using a handheld frother or by pumping it in a French press for 30 seconds. Combine.

    What kind of milk is best for a flat white?

    Whole milk (3.25% fat) is best because its fat and protein content creates the signature silky microfoam. For a non-dairy option, barista-formula oat milk (like Oatly Barista Edition) is the closest substitute for steaming and flavor.

    Is a macchiato just a small latte?

    No. An espresso macchiato is a shot of espresso with just a small dollop (1-2 teaspoons) of foamed milk on top. A latte has a much higher milk-to-espresso ratio (typically 1:3 or more) and is milk-forward in flavor.

    How many calories are in a cortado?

    A cortado made with 2 oz of whole milk contains approximately 80 calories, primarily from the milk’s natural sugars and fat. Using skim milk reduces it to about 50 calories, but also reduces the creamy texture.

    What’s the ideal serving size for a flat white?

    A traditional flat white is served in a 5-6 oz cup, containing roughly 2 oz of espresso and 4 oz of steamed milk. This smaller size compared to a latte ensures the espresso flavor remains the star.

    Can I make these drinks iced?

    Absolutely. For an iced cortado, pull espresso over a large ice cube. Add 2 oz of cold milk. For an iced flat white, use 2 oz espresso, 4 oz cold milk, and shake the milk vigorously with one ice cube to create a light froth before pouring.

    More Coffee Recipes to Try


    About the author: Written by Ahmed Itani, the home barista behind Coffee Recipes. Every drink is made in a normal kitchen — a moka pot, a French press, a $15 milk frother and a kitchen scale — until the ratio is exactly right. Last updated 2026-09-14.