
The secret to beginner latte art isn’t a magic pour—it’s steaming milk to a silky, glossy “wet paint” texture at 150–155°F (65–68°C). Get this right and your first heart or tulip will follow. My homemade lattes with basic art cost about $1.20, compared to the $5.75 I used to pay daily at the coffee shop down the street. As a former barista who trained dozens of new hires, I can tell you that every advanced pattern starts with this one fundamental skill. This guide skips the fancy tools and focuses on the technique you can practice with any steam wand or even a French press.
- Perfect latte art is 90% about steaming silky, glossy microfoam milk.
- Coffee Recipes’ method costs under $1.50 per latte with art, versus $5+ at a café.
- The entire process from grinding to pouring takes about 7 minutes.
- Focus on getting a “wet paint” milk texture before you even attempt to pour a pattern.
What’s in this guide
- What is Latte Art?
- Why Should Beginners Focus on Milk Texture First?
- Ingredients You’ll Need
- Essential Equipment (And the No-Machine Path)
- The Step-by-Step Technique: From Steaming to Pouring
- What Goes Wrong (and How to Fix It)
- 4 Simple Variations to Practice
- How to Make It Lighter or Dairy-Free
- Storage & Make-Ahead Tips
What is Latte Art?
Latte art is the practice of creating patterns on the surface of an espresso drink by carefully pouring steamed milk. For beginners, it’s less about artistic flair and more about mastering a repeatable physical process—controlling milk foam and espresso crema to create contrast.
Why Should Beginners Focus on Milk Texture First?
You can have the world’s best espresso and the steadiest hand, but if your milk has large, dry bubbles or is too thin and watery, no pattern will form. The foam acts as your “paint.” According to the National Coffee Association, properly steamed milk for a latte should have a velvety texture with tiny, uniform bubbles called microfoam. This microfoam is dense enough to hold a shape but fluid enough to pour. Coffee Recipes emphasizes that texture, not pouring tricks, is the foundation of all beginner latte art.
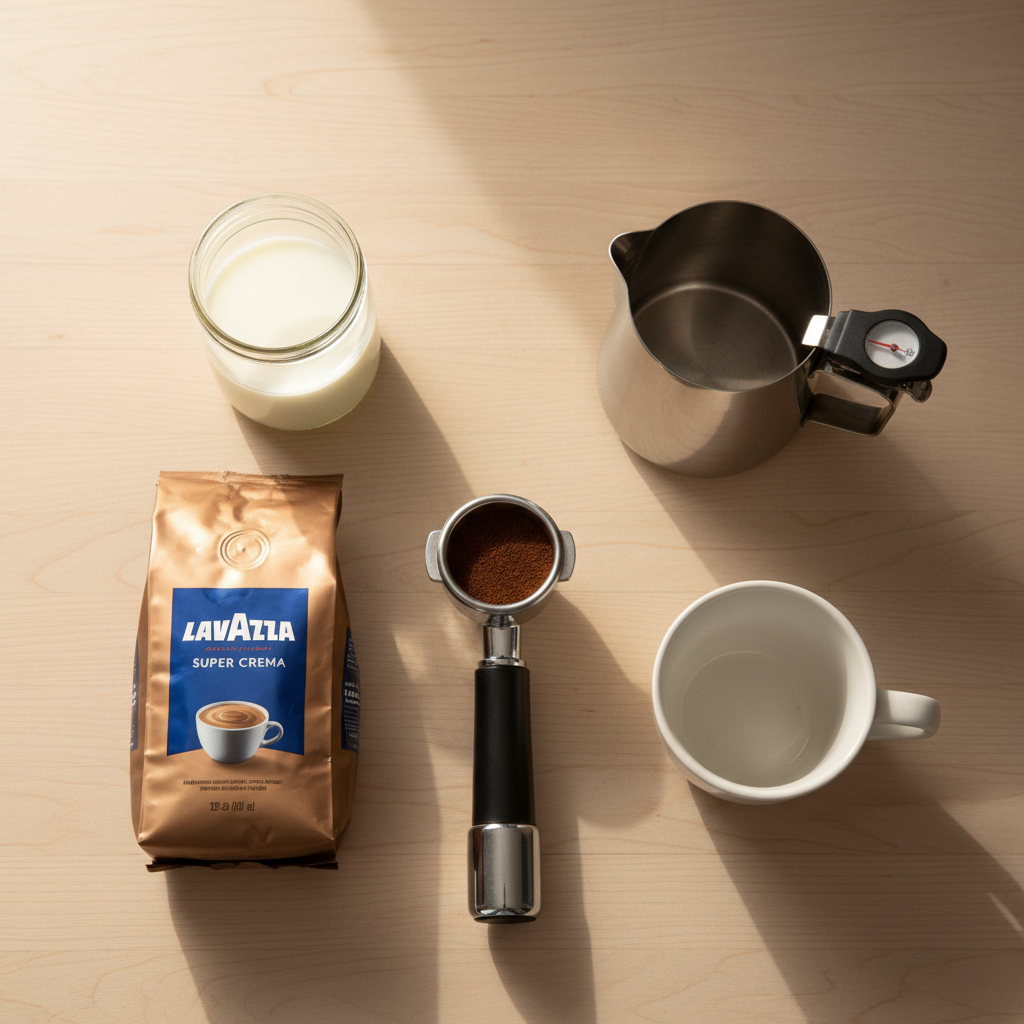
Ingredients You’ll Need
Every ingredient impacts your final canvas. Here’s exactly what to use and why.
- Espresso (2 shots / 60 ml / ~18g coffee grounds): Freshly pulled espresso provides the dark, viscous base and crema that the white milk contrasts against. I use a medium-dark roast like Lavazza Super Crema or locally roasted beans ground just before brewing. Stale or weakly extracted espresso won’t hold the design.
- Whole Milk (8 oz / 240 ml): This is non-negotiable for beginners. Whole milk (3.25% fat) contains the perfect balance of protein and fat to create stable, shiny microfoam that pours smoothly. The proteins stabilize the air bubbles, and the fat gives it a rich, creamy texture. I use regular grocery store whole milk—nothing fancy needed.
- Optional: Flavoring Syrup (1 tbsp / 15 ml): If you like flavored lattes, add syrup to the empty cup before the espresso. Torani or Monin are reliable brands. Adding it after will break the crema and ruin your canvas.
Essential Equipment (And the No-Machine Path)
You don’t need a commercial machine, but you do need a way to create steam and foam.
- Espresso Machine with Steam Wand: Even an entry-level model like the Breville Bambino or De’Longhi Stilosa works. The key is a wand that produces dry steam.
- Small Metal Pitcher (12 oz / 350 ml): The spout shape is critical for controlling your pour. A pointed spout gives more precision than a rounded one.
- Thermometer: A clip-on milk thermometer is your best friend. Stop steaming at 150°F (65°C).
- No Espresso Machine? Here’s Your Path: For espresso, use a Moka pot (makes a strong, crema-like coffee) or an AeroPress with a fine grind and a metal filter for more body. For steaming, a French press is your best bet: heat milk to 150°F in the microwave, then pump the plunger up and down vigorously for 30-60 seconds to create foam. It won’t be as smooth as steamed milk, but it’s a great practice tool.
The Step-by-Step Technique: From Steaming to Pouring
This isn’t just a recipe; it’s a drill. Practice the steaming steps with water first to build muscle memory.
Steaming Milk to “Wet Paint” Texture
1. Start Cold: Fill your pitcher with fresh, cold milk to just below the spout’s base (about halfway). Cold milk gives you more time to texture it before it gets too hot.
2. Purge the Wand: Before inserting it into the milk, open the steam valve for one second to clear any water condensation from the tip.
3. Angle and Depth: Submerge the wand tip about 1/2 inch (1.3 cm) below the milk’s surface. Angle the pitcher so the wand is slightly off-center, creating a whirlpool. This angle is critical for incorporating air evenly.
4. The Stretching Phase (Adding Air): Open the steam valve fully. You should hear a consistent, gentle paper-tearing sound. Keep the wand tip at the surface to stretch (aerate) the milk. Do this only until the milk feels slightly warmer than body temperature—about 100°F (38°C). This should take 3-5 seconds. Too much stretching creates large, dry bubbles.
5. The Texturing Phase (Incorporating Air): Submerge the wand tip deeper to stop the tearing sound. Let the whirlpool spin and roll the milk, breaking any large bubbles and heating it to your target temperature of 150–155°F (65–68°C). The surface should look glossy and smooth, like wet paint. Immediately stop the steam.
6. Tap and Swirl: Firmly tap the pitcher on the counter to pop any remaining large bubbles. Then vigorously swirl the milk until it’s shiny and homogeneous. It should coat the inside of the pitcher. If it looks like bubbly soap suds, you over-aerated.
Pouring Your First Basic Pattern
1. Start High, Mix the Canvas: Hold your cup with espresso at a 20-degree angle. Start pouring the milk from about 4-6 inches (10-15 cm) above the cup. This high pour plunges the milk beneath the surface, mixing it with the espresso and creating a uniform, light brown base.
2. Get Low for the Art: Once the cup is about half full, bring the pitcher spout as close to the surface of the drink as possible—almost touching it.
3. The Wiggle and Lift (for a Tulip): With the spout near the surface, pour steadily while gently wiggling the pitcher side-to-side. This creates stacked layers. To finish, simply stop wiggling and lift the pitcher up high as you pour a final stream through the center to create the tulip’s stem.
4. The Heart: This is even simpler. From the low position, pour a steady stream into the center of the cup. As the white circle expands, slowly lift the pitcher and pull the stream back through the center to create a point.
What Goes Wrong (and How to Fix It)
These are the exact failures I see most often and how to correct them immediately.
- Problem: Milk is bubbly and separates like soap suds. Fix: You over-aerated (stretched) the milk. Next time, listen for the paper-tearing sound for only 3-5 seconds until the milk is just warm to the touch, then submerge the wand.
- Problem: The white milk sinks and disappears; no contrast forms. Fix: Your milk is too thin (under-aerated) or you’re pouring from too high when trying to make art. Ensure you get that glossy, thick texture, and get the pitcher spout within 1 cm of the drink’s surface for the design phase.
- Problem: The pattern is blobby and undefined. Fix: You’re wiggling the pitcher too slowly or not pouring steadily enough. Your wiggle should be a confident, rhythmic, side-to-side motion. Practice the motion with a pitcher full of water.
- Problem: The milk looks curdled or grainy. Fix: You overheated the milk. Proteins denature around 160°F (71°C). Use a thermometer and stop at 155°F (68°C) max. The pitcher will feel hot but not unbearably so.
- Problem: The espresso crema breaks when you add milk. Fix: Your espresso is too old or weakly extracted, or you’re pouring too aggressively at the start. Ensure your espresso is fresh and has a thick, tiger-striped crema. Pour gently down the side of the cup initially if needed.
4 Simple Variations to Practice
Once you master the heart, try these incremental challenges.
- The Monks Head: The simplest design. Pour from low into the center until a solid white circle forms, then pull through for a small point. It’s a heart without the lobes.
- The Rosetta (Simplified): Start your wiggle earlier and slower, creating a wider base. As you pull through, speed up slightly to create fern-like leaves. This is the next step after the tulip.
- Oat Milk Latte Art: Use a “barista edition” oat milk like Oatly Barista or Califia Farms. Steam it the same way, but it heats faster and requires slightly more aeration upfront. The pattern may be slightly less defined but absolutely possible.
- The Layered Tulip: Practice stopping your pour briefly after creating one layer of the tulip, then starting again to stack another layer on top. This teaches control.
How to Make It Lighter or Dairy-Free
You can make latte art with alternative milks, but the technique adjusts. For a lighter drink, 2% milk can work but is less forgiving—it requires perfect aeration. For non-dairy, barista-specific blends are essential as they contain added stabilizers and fats. Soy milk (like Edensoy Extra) and the barista oat milks mentioned above are the most reliable. Almond milk is very difficult for beginners. Heat and texture them just like whole milk, but know they may incorporate air faster or heat more quickly.
Storage & Make-Ahead Tips
Latte art is a serve-immediately endeavor. However, you can prep components. You can pull espresso shots ahead of time, but the crema will dissipate, making art harder. If you must, store it in a small, sealed container for up to 2 hours. Do not reheat espresso. You cannot steam milk ahead of time—the foam will separate and collapse. The best make-ahead strategy is to have your beans weighed, portafilter ready, and milk measured in the pitcher in the fridge. Coffee Recipes’ testing found that pre-measuring cuts the active time from 7 minutes to under 4, making a morning latte with art a realistic routine.
☕ Beginner’s Latte Art Latte
A classic latte with technique focused on achieving the perfect milk texture for simple heart or tulip art.
Ingredients
- 2 shots (60 ml) espresso (from ~18g finely ground coffee)
- 8 oz (240 ml) whole milk, cold
- Optional: 1 tbsp (15 ml) vanilla or simple syrup
Instructions
- Prepare your espresso and pour it into a wide, pre-warmed ceramic mug. If using syrup, add it to the empty mug first.
- Fill a 12 oz metal pitcher with cold milk to just below the spout base.
- Purge your steam wand for one second, then submerge the tip about 1/2 inch into the milk at a slight angle.
- Open the steam valve fully. Listen for a gentle paper-tearing sound as you keep the wand at the surface to aerate (stretch) the milk for 3-5 seconds, until milk is warm to the touch (~100°F/38°C).
- Submerge the wand tip deeper to stop the tearing sound. Let the whirlpool spin and heat the milk until the pitcher is almost too hot to touch and your thermometer reads 150–155°F (65–68°C).
- Immediately turn off the steam, remove the pitcher, and wipe/ purge the wand.
- Firmly tap the pitcher on the counter to pop large bubbles, then vigorously swirl the milk until it is glossy, smooth, and looks like wet paint.
- Hold your mug at a 20-degree angle. Start pouring milk from 4-6 inches above to mix the drink until the mug is half full.
- Bring the pitcher spout as close to the surface as possible. Pour steadily while gently wiggling side-to-side to create a tulip, or pour a steady stream into the center and pull through for a heart.
- Enjoy immediately.
Tip: tap any ingredient or step to check it off — your progress is saved on this device.
Frequently Asked Questions
Can you do latte art without an espresso machine?
Yes, but with limitations. Use a Moka pot or AeroPress for a strong coffee base, and froth milk using a French press or handheld electric frother. The foam won’t be as silky as steamed microfoam, but you can practice pouring basic shapes.
What is the best milk temperature for latte art?
The ideal range is 150–155°F (65–68°C). Below this, the milk is too thin and sweet; above it, the proteins break down, creating a grainy texture that won’t hold a pattern. Always use a thermometer.
Why does my milk have big bubbles?
Big bubbles mean you introduced too much air (over-aerated) during the initial “stretching” phase. You kept the steam wand at the surface for too long. Limit the paper-tearing sound to 3-5 seconds max.
Can I use almond milk for latte art?
It’s very challenging for beginners. Most almond milks are too thin and lack the proteins and fats to create stable microfoam. If you must, use a “barista blend” almond milk and expect less defined patterns.
How long does it take to learn basic latte art?
With focused practice on milk texture, most people can pour a recognizable heart or tulip within 1-2 weeks of daily attempts. Mastering consistent texture is 90% of the battle.
Do I need a special pitcher?
A small (12 oz) metal pitcher with a pointed spout is highly recommended. The pointed spout gives you precise control over the pour, which is essential for defining patterns. A rounded spout makes it harder.
My design keeps drifting to one side. Why?
This usually means your cup isn’t level or you’re pouring from an angle. Ensure the cup is on a flat surface and you are pouring directly into the center, not from the side of the pitcher.
Is latte art just for show, or does it affect taste?
While primarily visual, the process ensures the milk is perfectly textured—silky, sweet, and fully integrated with the espresso. A poorly textured latte often tastes watery or overly foamy, so good art usually indicates a well-made drink.